Tag: holiday

  • Gingerbread Coffee Syrup

    Gingerbread Coffee Syrup

    Gingerbread Coffee Syrup

    Total Time 20 minutes
    Servings: 3 cups

    Ingredients
      

    • 2 cups water
    • 2 cups brown sugar
    • 2 cinnamon sticks
    • 8 allspice berries
    • 6 whole cloves
    • 1 1-inch piece fresh ginger sliced
    • 1 teaspoon molasses

    Method
     

    1. Place all ingredients in a medium saucepan over medium-low heat.
    2. Bring to a gentle simmer and cook for 15 minutes. Remove from heat and cool the syrup.
    3. Strain and store in an airtight container in the refrigerator for up to 2 weeks.

    Notes

    To Use: Add to brewed coffee or lattes as desired, start with a tablespoon of syrup per 10 ounces of coffee.

    Recipe Provided by INFRA

  • Frangipane Toast

    Frangipane Toast

    Frangipane Toast

    Total Time 40 minutes
    Servings: 10 slices

    Ingredients
      

    • 10 slices brioche bread
    • ½ cup unsalted butter melted
    • 6 tablespoons unsalted butter softened
    • ½ cup cane sugar
    • 1 large egg
    • 1 tablespoon almond extract
    • Pinch of salt
    • ½ cup almond flour
    • 2 tablespoons all-purpose flour
    • cup sliced almonds
    • 2 tablespoons powdered sugar for dusting

    Method
     

    1. Brush brioche slices with melted butter on both sides and place on two parchment lined baking sheets. Preheat oven to 350°F.
    2. Cream softened butter and cane sugar together until pale. Stir in egg, almond extract, and salt. Stir until combined.
    3. Add almond flour and all-purpose flour and fold in just until combined.
    4. Spread 2 tablespoons of almond mixture on each brioche slice and sprinkle on sliced almonds.
    5. Bake for 20-24 minutes or until the edges are golden in color. Remove from oven and dust with powdered sugar.

    Recipe Provided by INFRA

  • Charcuterie Board

    Charcuterie Board

    Charcuterie Board

    Total Time 25 minutes

    Ingredients
      

    Cheeses
    • Select a mixture of soft, semi-soft, firm and hard cheeses
    Cured Meats
    • Cured meats work great. Select salami, prosciutto, calabrese, etc.
    Crackers and Bread
    • Various crackers (plain, seeded, fruit studded)
    • Breads such as baguettes or sourdough
    Fruits and Nuts
    • Popular Fresh Fruit: red and green grapes, apples, figs
    • Popular Dried: apricots, figs
    Salty, Briny Elements
    • Olives, cornichons, pickles vegetables, caperberries
    Spreads
    • Complementary jams, preserves, or marmalade
    • Savory spreads and pates

    Method
     

    1. On a large platter, cutting board, or even directly on a butcher paper wrapped table, display the charcuterie board elements.Slice cheeses and meats if they don't come pre-sliced.
    2. Shingle them so guests can pick them up one at a time. Arrange all the meats and cheeses, keeping them separated by type.
    3. Then, mix the breads, crackers, and fruit into the remaining space. Feel free to put the salty, briny elements into small bowls to place around the board. Don't forget small tongs or knives and small plates to make it easy to serve. Enjoy!
  • 2023 Holiday Gift Guide

    2023 Holiday Gift Guide

    2023 Holiday Gift Guide

    At Basil Bandwagon, you can find holiday gifts and stocking stuffers around every corner. While you’re picking up your lunch or doing your grocery shopping with us, why not finish your last minute holiday gift shopping too?

    You can gift Sustainable

    The latest styles from Hydroflask, Clean Kanteen, Decomposition 100% recycled paper notebooks

    You can gift Local

    Noble Mushrooms grow your own mushroom kits, Hold Your Horses soaps, Bee flower Honey, Bubbly Goat soaps and lotions 

    You can gift Organic

    Yum Earth Candy Canes, Organic Fair Trade Chocolate

    You can gift Handmade

    Fair Trade

    Marquet Jewelry, Andes woolen hats, mittens and scarfs

    You can gift Self Care

    Perfect stocking stuffer Humble aluminum-free deodorant, Pranarom essential oils and diffusers

    You can gift Wellness

    Cookbooks, nutrition and wellness books, herbal teas and medicines, and Basil Bandwagon Gift Cards

    Shopping local at Basil Bandwagon and purchasing items we stock from local producers helps sustain family businesses and contributes to a strong and sustainable local economy. Buying fairly traded gifts helps sustain safe and healthy conditions and fair pay for artisans of handmade items around the world. No reason to keep it to just this holiday season – we have a year-round selection of gifts at all three locations, with new items arriving every day!

  • Rosemary & Sage Apple Cider Fizz

    Rosemary & Sage Apple Cider Fizz


    Rosemary & Sage Apple Cider Fizz

    The holiday season is upon us, and what better way to celebrate than with a creative and herb-forward cocktail that brings together the warm notes of apple cider with the aromatic essence of rosemary and sage?


    Rosemary & Sage Apple Cider Fizz

    This herb-forward creative cocktail combines the earthy flavors of rosemary and sage with the sweetness of apple cider and a touch of effervescence.
    Servings: 1

    Ingredients
      

    • 2 oz gin
    • 4 oz apple cider
    • 1 oz fresh lemon juice
    • 3 fresh sage leaves
    • 1 sprig of rosemary
    • sparkling water or club soda
    • ice cubes
    • apple slices and fresh rosemary sprigs for garnish

    Method
     

    1. Muddle Sage and Rosemary: In a shaker, muddle the fresh sage and rosemary leaves to release their flavor.
    2. Add Ingredients: Add gin, apple cider, and fresh lemon juice to the shaker.
    3. Shake Well: Add ice to the shaker, close the lid tightly, and shake the ingredients vigorously for about 15-20 seconds.
    4. Strain into Glass: Strain the mixture into a glass filled with ice.
    5. Top with Sparkling Water: Pour sparkling water or club soda over the mixture for a fizzy finish. Adjust the amount based on your preference.
    6. Garnish: Garnish with apple slices and a sprig of fresh rosemary.
    7. Stir Gently and Enjoy: Give the cocktail a gentle stir to mix in the sparkling water. Sip and savor!

  • Avoid seasonal stress-based eating

    Avoid seasonal stress-based eating

    Avoid seasonal stress-based eating

    Tips from a pro

    Everyone knows the holidays can be stressful. But it’s not just the effort to stay on budget or the dinnertime antics of your oddball uncle that make this time of year challenging. Healthy eating can take a nosedive at this time of year, too. End your year on a high with proactive measures to avoid getting caught in the food trap.

    Plan ahead

    Joan Ifland, PhD is the chief executive officer of Food Addiction Training, LLC, and is a leading innovator in the field of recovery from food addiction. She shares some insights about how to prepare for the holidays and its associated overindulging.

    At this time of year, the holiday gathering, with its lavish edible spread, is often the culprit. Simply saying you won’t indulge may not be enough to spare you from getting sucked into that vortex of stress and indulging, Ifland warns.

    “You get [to a party] and after an hour or two, you’re eating [unhealthy foods],” she says. “It’s because cravings and loss of control build up over time.”

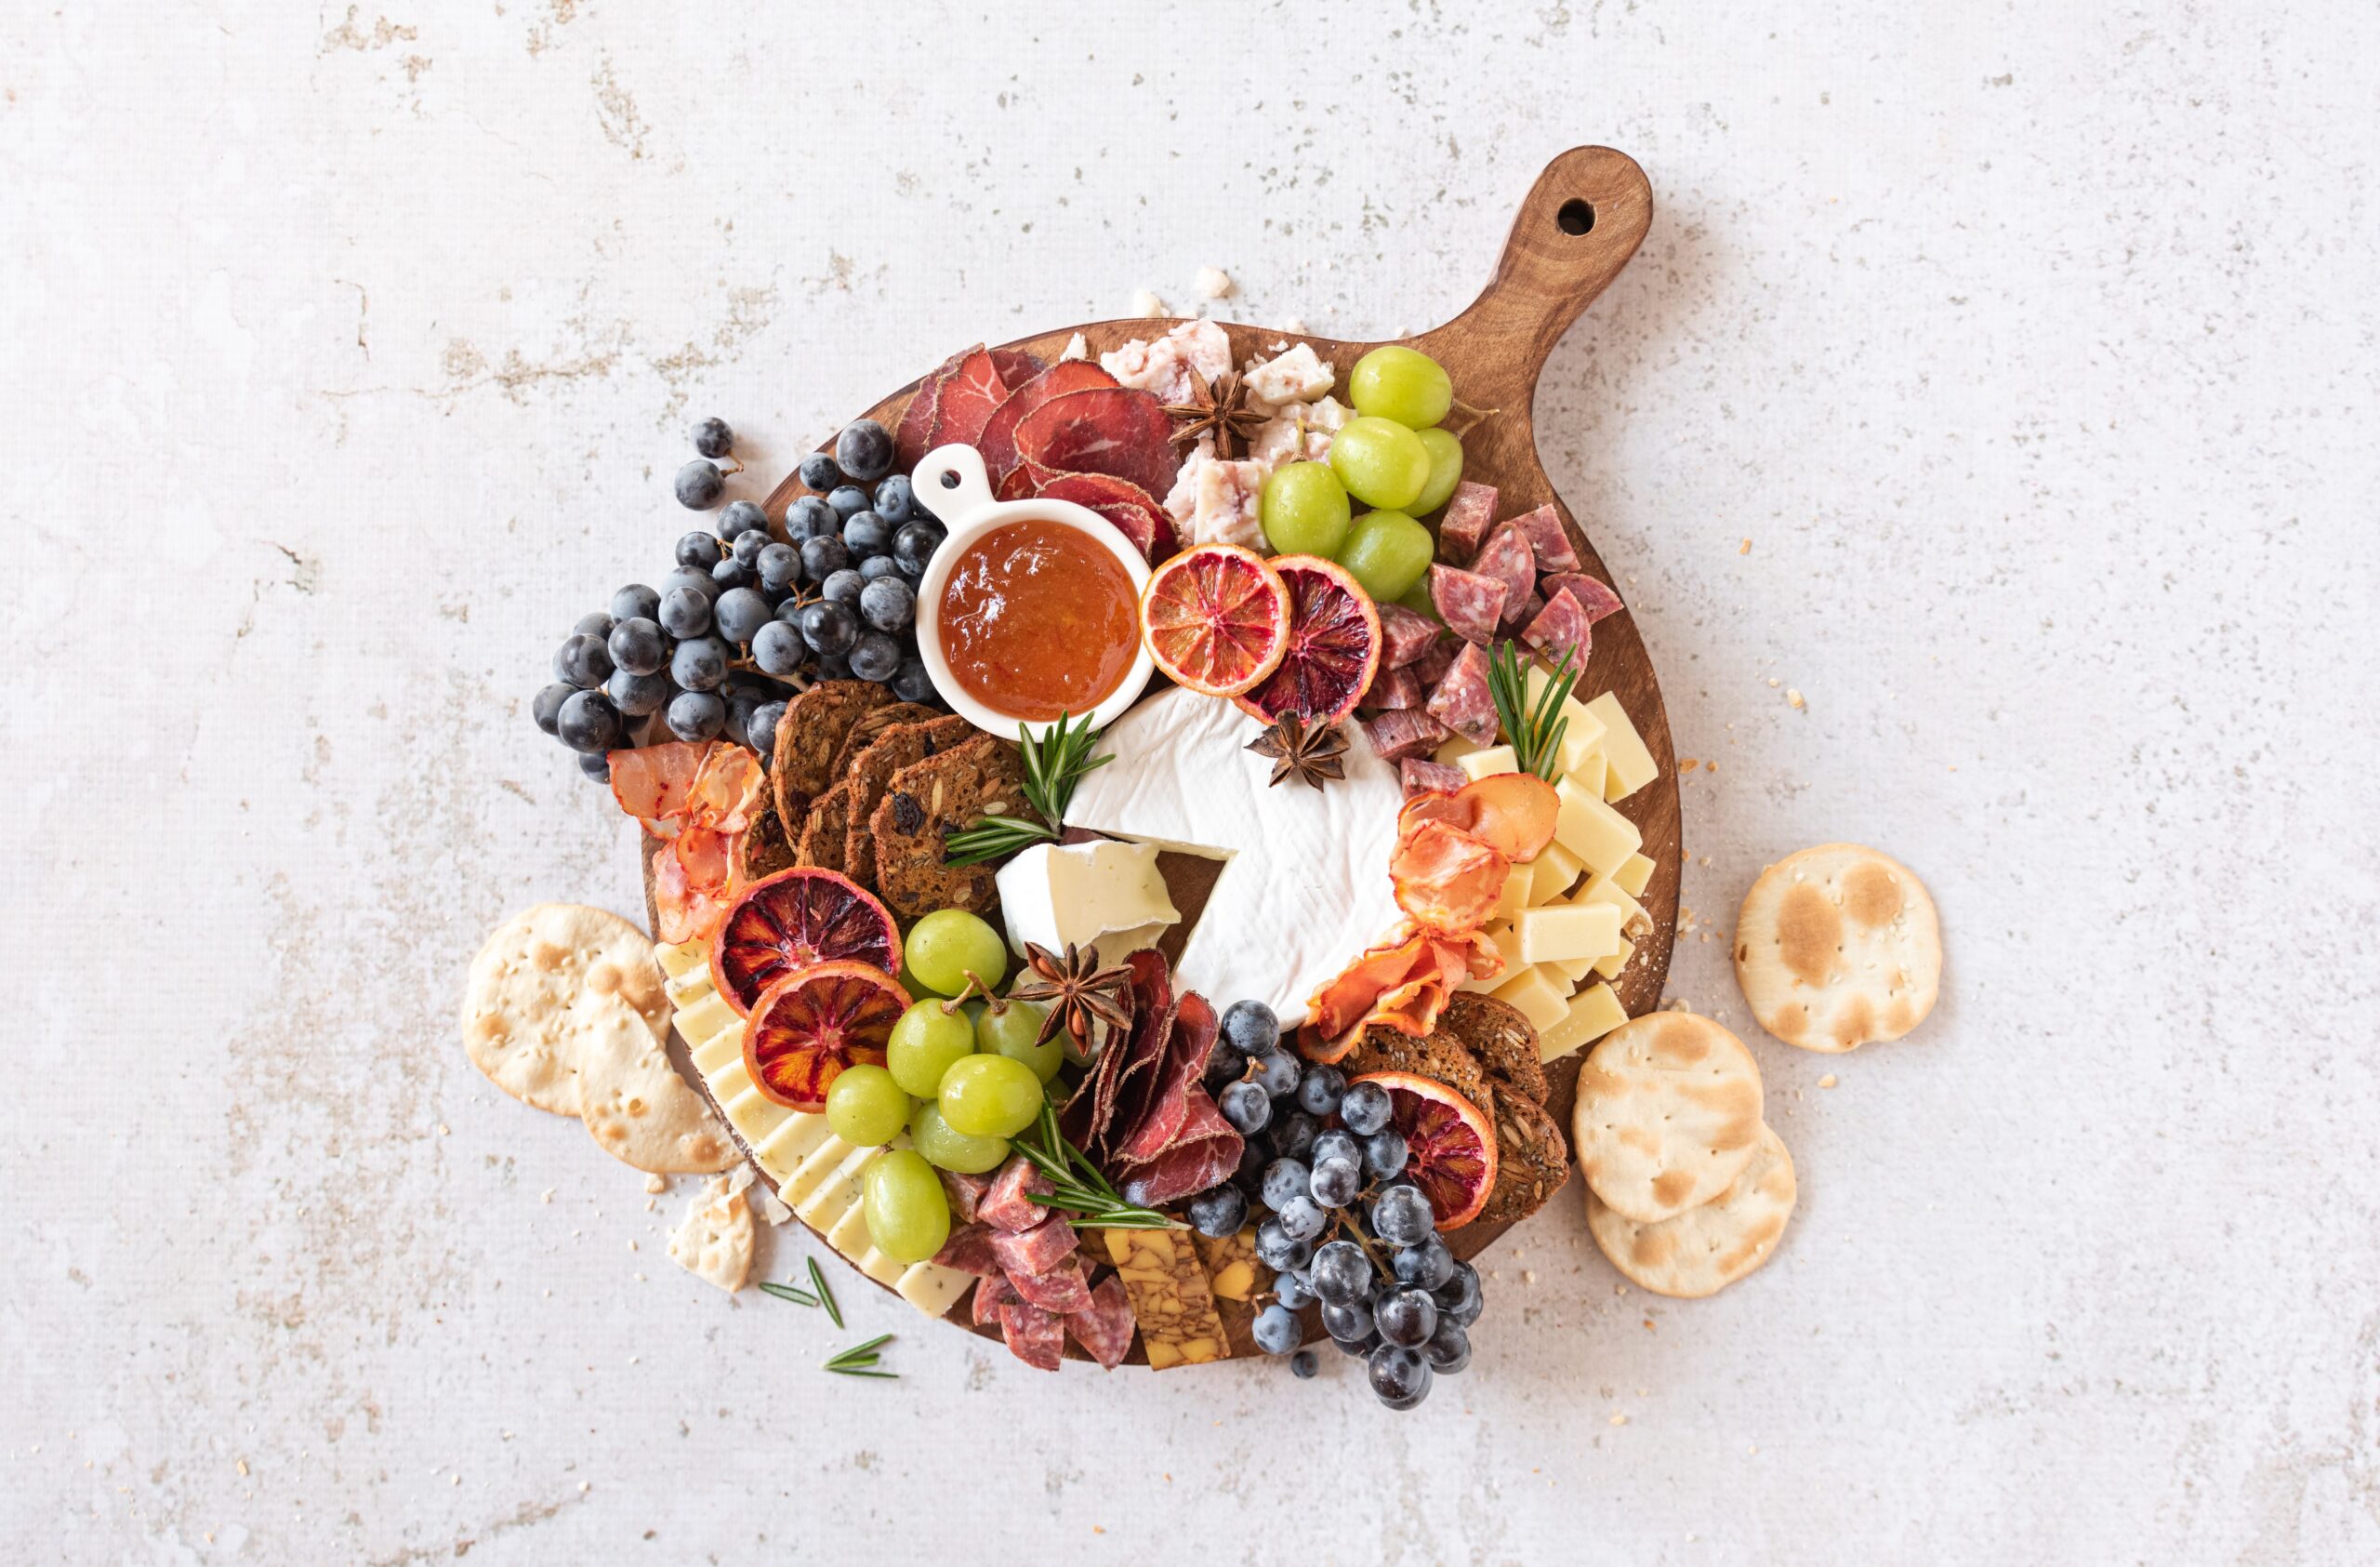
    Instead, take your own snacks—think crudités, healthy proteins, or other foods that are as close to their natural, unprocessed shape and form as possible—and keep it near you. If that’s not possible, avoid standing in a place with a clear view of the hors d’oeuvres table.

    Drink water

    Be sure to get a glass of water as soon as you arrive, and hang onto it. It keeps one hand busy, and reduces the chance of someone passing you a cocktail chock full of simple syrup and alcohol.

    Be easy on yourself

    Whatever happens, go easy on yourself, Ifland advises. Changing our behaviors to break the processed food addiction cycle can take years.

    “There are so many foods that have been deliberately processed to make them addictive. It can take a couple of years to get off all of them. When people know it’s a long, slow process, they give themselves permission to celebrate their wins.”

    What about alcohol?

    Getting into the holiday spirit, for many, often means getting into the spirits. But pouring yourself a tall cold one to make things merrier might actually make the season far less bright.

    Binge drinking increases around the holidays, which is often related to social or financial stress that comes with celebrating at this time of year. Stress and alcohol can create a toxic cocktail for our brains, no matter how much we might think we’re being released from our inhibitions when we imbibe.

    “Alcohol [can be] highly addictive,” says Ifland. And it can have potentially serious consequences that include impairing cognitive skills and our self-control. While that might feel fun in the moment, any feelings of comfort and joy experienced while tippling are fleeting, Ifland warned. If you are concerned about your relationship with alcohol, chat with your doctor.

    Article Provided by Alive Magazine

  • Elegant and plant-based

    Elegant and plant-based

    Elegant and plant-based

    Celebrate the season with this holiday meal

    This wow-worthy, plant-based holiday meal won’t disappointwhether you nix the meat entirely or incorporate some of these recipes into your celebratory meal. This gluten-free, vegan menu has “festive” written all over it.

    Stuffing with Thyme, Rosemary, and Dried Cranberries

    In this plant-based stuffing, fresh herbs and dried fruit replace the depth of flavor usually infused by chicken juices, so use fresh thyme and rosemary if possible to maximize the flavor return.
    Servings: 3

    Ingredients
      

    • 3 fresh thyme sprigs or ½ teaspoon dried
    • 1 fresh rosemary sprig or ½ teaspoon dried
    • 1 loaf gluten-free bread cubed, about 6 to 8 cups cubes
    • 1 cup chopped green onions
    • 3 tablespoons chopped dried cranberries
    • 2 cups low-sodium vegetable broth

    Method
     

    1. Preheat oven to 350°F.
    2. De-stem thyme and rosemary sprigs and coarsely chop. In large bowl, combine herbs with bread cubes, green onions, and dried cranberries. Add 1 ½ cups broth and toss to coat. Bread should be moistened and slightly softened. Add remaining broth if needed (some gluten-free breads are denser than others).
    3. Taste and add salt if desired. Grease or line 8 x 11 in baking or casserole dish with parchment paper. Transfer stuffing to dish and bake for 50 to 55 minutes.
    4. Enjoy!

    Green Beans with Dukkah

    Subbing Middle Eastern dukkah for classic toasted almonds with your green beans is like taking your first international trip (or the first in a long time …) and (re)discovering that there’s a world of flavor out there.
    Servings: 4

    Ingredients
      

    • ¼ cup hazelnuts
    • ½ teaspoon whole fennel seeds
    • 1 teaspoon whole cumin seeds
    • 1 teaspoon whole black or green peppercorns
    • 1 tablespoons whole coriander seeds
    • 2 teaspoons white or black sesame seeds
    • ¼ teaspoon salt
    • teaspoon ground cayenne pepper optional
    • 2 pounds green beans trimmed
    • 1 teaspoon hazelnut oil optional

    Method
     

    1. Preheat oven to 325°F. In nongreased baking dish, roast hazelnuts for 20 minutes.
    2. Heat medium skillet over medium-high. When hot, toast fennel seeds, cumin seeds, peppercorns, and coriander seeds for 45 seconds, stirring occasionally to prevent burning. Seeds should start to pop. Transfer to spice grinder, mortar and pestle, or directly to food processor or blender. In same skillet, toast sesame seeds, stirring every 10 seconds or so, until aromatic and, if using white sesame seeds, golden. Transfer immediately to medium bowl.
    3. Grind, or pulse all seeds except sesame seeds several times in blender or food processor, until lightly crushed and aromatic. Transfer to medium bowl with sesame seeds. Rub hazelnuts between kitchen towels to remove some of skins if needed, then coarsely chop in food processor (not in blender), or by hand. Add to bowl with crushed seeds. Stir in salt and optional cayenne.
    4. Steam green beans for 5 to 7 minutes, until tender-crisp. Serve topped with dukkah and a drizzle of hazelnut oil, if desired.
    5. Enjoy!

    Oyster Mushrooms with Garlic and Thyme on Caramelized Parsnip Puree

    This dish is a plant-based showstopper, with tender mushrooms in a sweet-and-sour glaze soaking into ultra-thick roasted parsnip puree.
    Servings: 4

    Ingredients
      

    Caramelized Parsnip Puree
    • 8 cups water
    • ½ teaspoon baking soda
    • 2 pounds parsnips peeled and chopped into 2 inch pieces
    • 2 garlic cloves peeled
    • 1 tablespoon olive oil
    • ¼ teaspoon cane sugar
    • ½ teaspoon salt
    • ¼ teaspoon pepper
    Mushrooms
    • ¾ cup balsamic vinegar or 6 tablespoons aged balsamic or balsamic glaze
    • 1 teaspoon olive oil
    • 14 ounces oyster mushrooms cleaned and, if necessary, trimmed so they grill flat
    • ¼ teaspoon salt
    • ¼ teaspoon pepper
    • ¼ cup finely chopped green onion
    • 2 thyme sprigs stripped from stem, or ½ teaspoon dried
    • 2 tablespoons toasted pistachios roughly chopped
    • ½ cup finely chopped chives, parsley, or green onion to garnish

    Method
     

    1. For parsnip puree, preheat oven to 400°F.
    2. In medium saucepan, bring water, baking soda, and parsnips to boil. Reduce heat and simmer, covered, for 5 minutes. Drain parsnips, but don’t rinse. Set aside until cool enough to handle, about 3 minutes.
    3. In large bowl, combine parsnips with remaining ingredients for puree. Spread on baking sheet and roast for 10 minutes. Turn and roast for 10 minutes more, or until tender and caramelized. Transfer to large bowl and mash with potato masher or immersion blender, or transfer to food processor and blend until smooth. Taste and adjust seasonings.
    4. For oyster mushrooms, in medium saucepan, boil balsamic vinegar until reduced by half, about 10 minutes. If using aged balsamic vinegar or glaze, skip this step.
    5. In large skillet, heat oil over medium-high. When hot, add mushrooms, salt, and pepper and cook for 1 minute. Flip mushrooms and add balsamic reduction, green onions, and thyme and stir to coat mushrooms. Lower heat to medium-low; cover and cook for 5 minutes, or until mushrooms are tender, adding 1 Tbsp water to prevent sticking, if necessary. Taste and adjust seasoning.
    6. To serve, spread parsnip puree on bottom of large platter. Place mushrooms on top. Top with toasted pistachios and garnish with chopped chives, parsley, or green onion.
    7. Enjoy!

    Article Provided by Alive Magazine

  • Vanilla Sandwich Cookies with Christine Waltermyer

    Vanilla Sandwich Cookies with Christine Waltermyer

    Vanilla Sandwich Cookies

    Thanks to Christine Waltermyer & The Natural Kitchen Cooking School!

    Christine Waltermyer is a local and renowned Wellness Chef, private chef to celebrities, published cookbook author and founder of the Natural Kitchen Cooking School, which offers an online Plant-Based Cooking Program. She also loves shopping at Basil Bandwagon! Visit naturalkitchenschool.com to subscribe to her email newsletter for new recipes, tips, and FREE access to the Power of Veggies mini-course!


    Do you know what sweet treat you’re making for your holiday cookie exchange? Thanks to Christine Waltermyer and The Natural Kitchen Cooking School, now you do – and everyone will love it! These Vanilla Sandwich Cookies not only taste great, but you can decorate them in your favorite sprinkles – especially Supernatural Kitchen’s Into The Woods festive, artificial dye-free sprinkles!

    Vanilla Sandwich Cookies

    Servings: 40 cookies

    Ingredients
      

    Vanilla Wafer Cookies
    • cup butter room temperature
    • cup granulated sugar
    • 1 ½ teaspoons vanilla extract
    • 1 teaspoon lemon juice
    • 1 egg
    • 1 ¾ cup all purpose flour
    • ½ cup cornstarch
    • teaspoon sea salt
    Vanilla Cream Filling
    • ½ cup butter room temperature
    • 1 ½ cups powdered sugar
    • 1 teaspoon vanilla extract
    Optional
    • Sprinkles of your choice

    Method
     

    Make the Vanilla Wafer Cookies
    1. In a large mixing bowl, place the softened butter and sugar. Use a hand mixer or stand mixer to cream together the butter and sugar for a few minutes until fluffy. Scrape down the sides as needed.
    2. Add the vanilla extract, lemon juice and egg. Mix well.
    3. Add the all purpose flour, cornstarch and sea salt. Continue mixing until a smooth dough forms.
    4. Form the dough into a flat disc. You may need to add a little extra flour to get the right consistency. Wrap it in parchment paper or plastic wrap. Chill the dough in the refrigerator for at least 30 minutes.
    5. Preheat the over to 350°F. Line several baking sheets with parchment paper.
    6. Remove the dough from the refrigerator. Unwrap it and place it between two fresh sheets of parchment paper. Use a rolling pin to carefully roll out the dough until it's just under ¼ inch think.
    7. Use a 2-inch round fluted edge cookie cutter to cut out cookies. If the dough gets too soft to work with, place it in the refrigerator to chill. Transfer the cookies to the prepared baking sheets.
    8. Bake for 10 to 12 minutes, until the edges of the cookies have set.
    9. Let the cookies cool on the baking sheet for 5 minutes before transferring to a cooling rack. Repeat with the remaining dough.
    Make the Vanilla Cream Filling
    1. In a mixing bowl, place the softened butter and powdered sugar. Use a hand mixer to whip until fluffy. This will take about 10 minutes. Add the vanilla extract and lemon juice and mix again briefly to incorporate. If the filling seems too soft, you can add a little more powdered sugar.
    2. Transfer the vanilla cream filling to a piping bag fitted with a large star or round piping tip.
    Assemble the Sandwich Cookies
    1. Add about 1 teaspoon of filling to the center of half of the cookies. Top the filled cookies with another vanilla wafer cookie. Use your fingertips to gently press the cookies together until the filling has spread to the edges.
    2. If using optional sprinkles, roll the edges of the cookies and the sprinkles until it covers all of the vanilla cream filling.
    3. Enjoy!

    Notes

    STORING THE COOKIES: Store the cookies in a covered container. They will keep at room temperature for up to 4 days and up to 1 week stored in the refrigerator.
    Unbaked cookie dough will keep in the refrigerator for up to 3 days.

    Thank you to Christine Waltermyer and the Natural Kitchen Cooking School for working with us to help promote healthy, nutritious meals and products that are affordable, full of nutrients, and simple to make at home!

  • Celebrate Oktoberfest!

    Celebrate Oktoberfest!

    Celebrate Oktoberfest!

    Delicious and healthy iconic German specialties

    Anchored in tradition but updated for health, these recipes for some of the greatest Oktoberfest foods will have you ready to celebrate!

    Plant-based Schnitzel with Noodles

    Schnitzel usually means tenderized meat coated in egg and bread crumbs and deep-fried. This version of schnitzel would have even Julie Andrews singing its praises, thanks to the tender tofu that skips the fryer.
    Servings: 4

    Ingredients
      

    • 12 to 15 ounces block firm or extra-firm tofu
    • ½ cup gluten-free flour blend
    • ¾ cup water or beer
    • 1 ½ cups bread crumbs
    • 1 teaspoon smoked paprika
    • ½ teaspoon garlic powder
    • ¾ teaspoon salt divided
    • 1 ½ tablespoon sunflower oil or canola oil divided
    • 8 ounces dried egg noodles or gluten-free pasta
    • ½ cup chopped parsley to garnish

    Method
     

    1. Slice tofu twice horizontally to create 3 pieces about 1/2 in thick, then cut each piece in half vertically to make 6 pieces. Different brands are different thicknesses, so slice it however is best to make pieces slightly smaller than a deck of cards.
    2. Line baking tray with clean kitchen towels and place tofu pieces on top in a single layer. Top with more towels, followed by another baking sheet. Weight the baking sheet (with books or cans of beans) and let moisture drain for 15 minutes.
    3. Preheat oven to 350 F.
    4. In shallow bowl, combine flour and water or beer. In second shallow bowl, combine bread crumbs, paprika, garlic powder, and 1/4 tsp salt.
    5. Sprinkle drained tofu with remaining 1/2 tsp salt, then dip each piece in flour mixture followed by spiced bread crumbs. Place on paper towel-lined plate and pat extra bread crumb mixture gently on top in any bare areas.
    6. In large skillet, heat 1 Tbsp oil over medium-high heat. When hot, add half the tofu and cook 2 minutes on each side, or until golden, pressing down with flat spatula on top to ensure crumbs brown evenly. Return tofu to paper towel-lined plate to drain excess oil.
    7. Remove any loose bread crumbs from skillet, then add remaining 1/2 Tbsp oil and cook remaining tofu.
    8. Meanwhile, cook pasta as per package instructions. Heat sauce, if using.
    9. Serve drained pasta topped with schnitzel and sauce of choice. Sprinkle with chopped parsley.
    10. Enjoy!

    Gluten-Free Pretzels

    Large pretzels are a staple of many Oktoberfest celebrations. The large pieces of golden, twisted pretzel dough come topped with coarse salt for a savory crunch with every bite.
    Servings: 10

    Ingredients
      

    • 2 cups sweetened or unsweetened nondairy milk divided
    • 1 tablespoon dry active yeast
    • ½ teaspoon cane sugar
    • ½ cup tapioca starch
    • ½ cup + 2 tablespoons cornstarch
    • 3 cups all-purpose gluten-free flour
    • 2 tablespoons psyllium husk powder
    • 1 ½ teaspoon salt
    • cup vegan butter or coconut oil melted
    • 5 cups water
    • ¼ cup baking soda
    • Coarse salt

    Method
     

    1. In small pot, heat 1/2 cup nondairy milk (or microwave) until warm to the touch but not scalding. In heat-proof bowl, add yeast and sugar, then pour milk overtop. Set aside for 15 minutes.
    2. In stand mixer or large bowl, whisk tapioca starch, cornstarch, flour, psyllium, and salt. Add melted butter or oil, remaining 1 1/2 cups nondairy milk, and yeast mixture. Use dough hook or hand mixer on low speed to beat until just combined.
    3. Shape dough into a ball. Transfer to lightly oiled bowl, cover with dish towel and set in a warm, draft-free place for 90 minutes.
    4. Preheat oven to 400 F.
    5. In medium pot, bring 5 cups water to a simmer with baking soda. Line 2 baking sheets with parchment paper. On cutting board or clean countertop, divide dough into 10 pieces and roll into 15 in strands. Push edges away from you into a “U” shape and twist the ends over each other twice (there are plenty of videos online for this if you need help). Then bring the ends down to the bottom of the “U.”
    6. Remove pot of water from heat. Using large, flat spatula, carefully pick up and slide a pretzel into water for 30 seconds. If water doesn’t cover the pretzel, rotate pot to submerge. Remove pretzel to parchment-lined baking sheet and repeat with remaining pretzels. You can do this all at once, but the pretzels are delicate.
    7. Sprinkle pretzels with coarse salt and bake for 15 to 20 minutes, until golden brown.
    8. Enjoy!

    Dunkel Beer-Marinated Rotisserie-Style Chicken

    This dark beer-marinated chicken uses the convection setting on your oven to create a crispy skinned bird. (If you don’t have a convection setting on your oven, you can simply bake the chicken for longer at the same temperatures as below, until a meat thermometer inserted in the thickest part of the thigh reads 165 F.)
    Servings: 5

    Ingredients
      

    • 1 lemon
    • 5 pounds whole chicken
    • 2 fresh thyme sprigs
    • 1 cup dark beer
    • 1 tablespoon olive oil
    • 1 teaspoon German mustard or any grainy or stone-ground mustard
    • 4 garlic cloves minced
    • 1 ½ teaspoon salt
    • 1 teaspoon pepper
    • 2 teaspoons dried basil

    Method
     

    1. Zest and juice lemon. Stuff chicken cavity with leftover lemon pith and fresh thyme sprigs. In medium bowl, combine lemon zest and juice with remaining ingredients and pour over chicken in large bowl, pot, or leak-proof, sealable bag. Gently separate chicken skin from breast and legs without tearing, and scoop some of the marinade juices inside. Refrigerate for at least 1 hour, up to 12 hours.
    2. Heat oven to 400 F on convection roast setting.
    3. Place chicken in roasting pan and pour remaining marinade overtop. It should be elevated above juices to allow chicken to crisp. A metal rack that fits inside the roasting pan can be used. Roast for 30 minutes. Lower heat to 375 F and roast for 50 minutes longer, basting chicken every 20 minutes, until internal temperature reads 165 F and juices run clear. Loosely tuck a large piece of parchment paper over chicken during the last 30 to 60 minutes if overly brown.
    4. Remove chicken from oven and let it rest for 10 minutes. Carve chicken and serve with sieved juices, or thicken juices with beer and cornstarch to make gravy.
    5. Enjoy!

    Recipes Provided by Alive Magazine

  • Dairy Free Carrot Cake

    Dairy Free Carrot Cake

    Dairy Free Carrot Cake

    Thanks to Christine Waltermyer, The Natural Kitchen Cooking School & MUSH Overnight Oats!

    Christine Waltermyer is a local and renowned Wellness Chef, private chef to celebrities, published cookbook author and founder of the Natural Kitchen Cooking School, which offers an online Plant-Based Cooking Program. She also loves shopping at Basil Bandwagon! Visit naturalkitchenschool.com to subscribe to her email newsletter for new recipes, tips, and FREE access to the Power of Veggies mini-course!


    What’s one of your favorite Easter desserts? One of ours is carrot cake! However, we like to make it with a fun, healthy twist – including MUSH Overnight Oats!

    Why add MUSH Overnight Oats? It gives a moist, flavorful texture to the cake while adding even more health benefits! All grains including oats contain phytic acid, which binds to nutrients and makes them harder to absorb. Soaking oats breaks down this acid and helps increase the absorption of nutrients, like zinc, iron, calcium and magnesium. Since carrots are loaded with vitamins and minerals, such as calcium, adding MUSH can even help absorb it!

    We’re not saying that you have to add them to your carrot cake – you can just eat these overnight oats straight out of the container with a spoon. Or add them to your morning smoothie. The possibilities are endless – go try all of their flavors!

    Keep scrolling to learn how to make this Dairy Free Carrot Cake with MUSH Overnight Oats thanks to Christine Waltermyer and the Natural Kitchen Cooking School. All ingredients can be found at your favorite local Basil Bandwagon Natural Market location.

    Dairy Free Carrot Cake

    Course Dessert
    Keyword cake, dairy free, dessert, easter

    Ingredients

    DRY

    • cups Bob's Red Mill Paleo Baking Flour
    • ½ teaspoon sea salt
    • 2 teaspoons cinnamon
    • ¼ teaspoon nutmeg
    • 1 teaspoon baking soda
    • ¼ cup maple sugar

    WET

    • 4 eggs
    • ¼ cup almond milk
    • 1 teaspoon vanilla extract
    • ¼ cup fresh orange juice
    • ½ cup maple syrup
    • cup melted coconut oil cooled
    • cup MUSH brand overnight oats or cooked oatmeal (or almond butter)
    • 3 cups coarsely grated carrots
    • ½ cup chopped walnuts

    CREAM CHEESE FROSTING

    • 1 stick dairy-free butter or butter of your choice
    • 8 oz. Kite Hill cream cheese or other cream cheese of your choice
    • 1 teaspoon vanilla extract
    • 2 cups powdered sugar
    • 1 cup monkfruit sweetener (or 1 more cup of powdered sugar)

    DECORATION

    • Shredded coconut
    • Edible flowers

    Instructions

    • Preheat the oven to 350 degrees F. In a large bowl, combine all of the dry ingredients.
    • In a separate bowl, combine all of the wet ingredients. Combine the wet and dry ingredients together. Fold in the MUSH overnight oats, carrots and walnuts.
    • Divide the batter between two lightly oiled 8-inch cake pans lined with parchment paper on the bottoms. Bake at 350 degrees F. for 35 minutes, or when the cakes spring back to the touch in the center. Check them after 30 minutes to avoid overbaking.
    • While the cakes are baking, prepare the frosting. Place all of the frosting ingredients in a food processor or stand mixer. Blend until smooth.
    • Remove finished cakes from the oven. Use a wet knife to loosen the sides of the cakes. Carefully flip the cakes onto cake cardboards or directly on cooling racks to cool. Once completely cool, frost the top of one cake. Place the other cake on top. Frost the top and sides of the cake.
    • Decorate with shredded coconut pressed into the sides of the cake and around the top in a circle. Add edible flowers for a pretty touch.
    • Enjoy!

    Thank you to Christine Waltermyer and the Natural Kitchen Cooking School for working with us to help promote healthy, nutritious meals and products that are affordable, full of nutrients, and simple to make at home!

    Resources:

    https://eatmush.com/pages/whats-mush