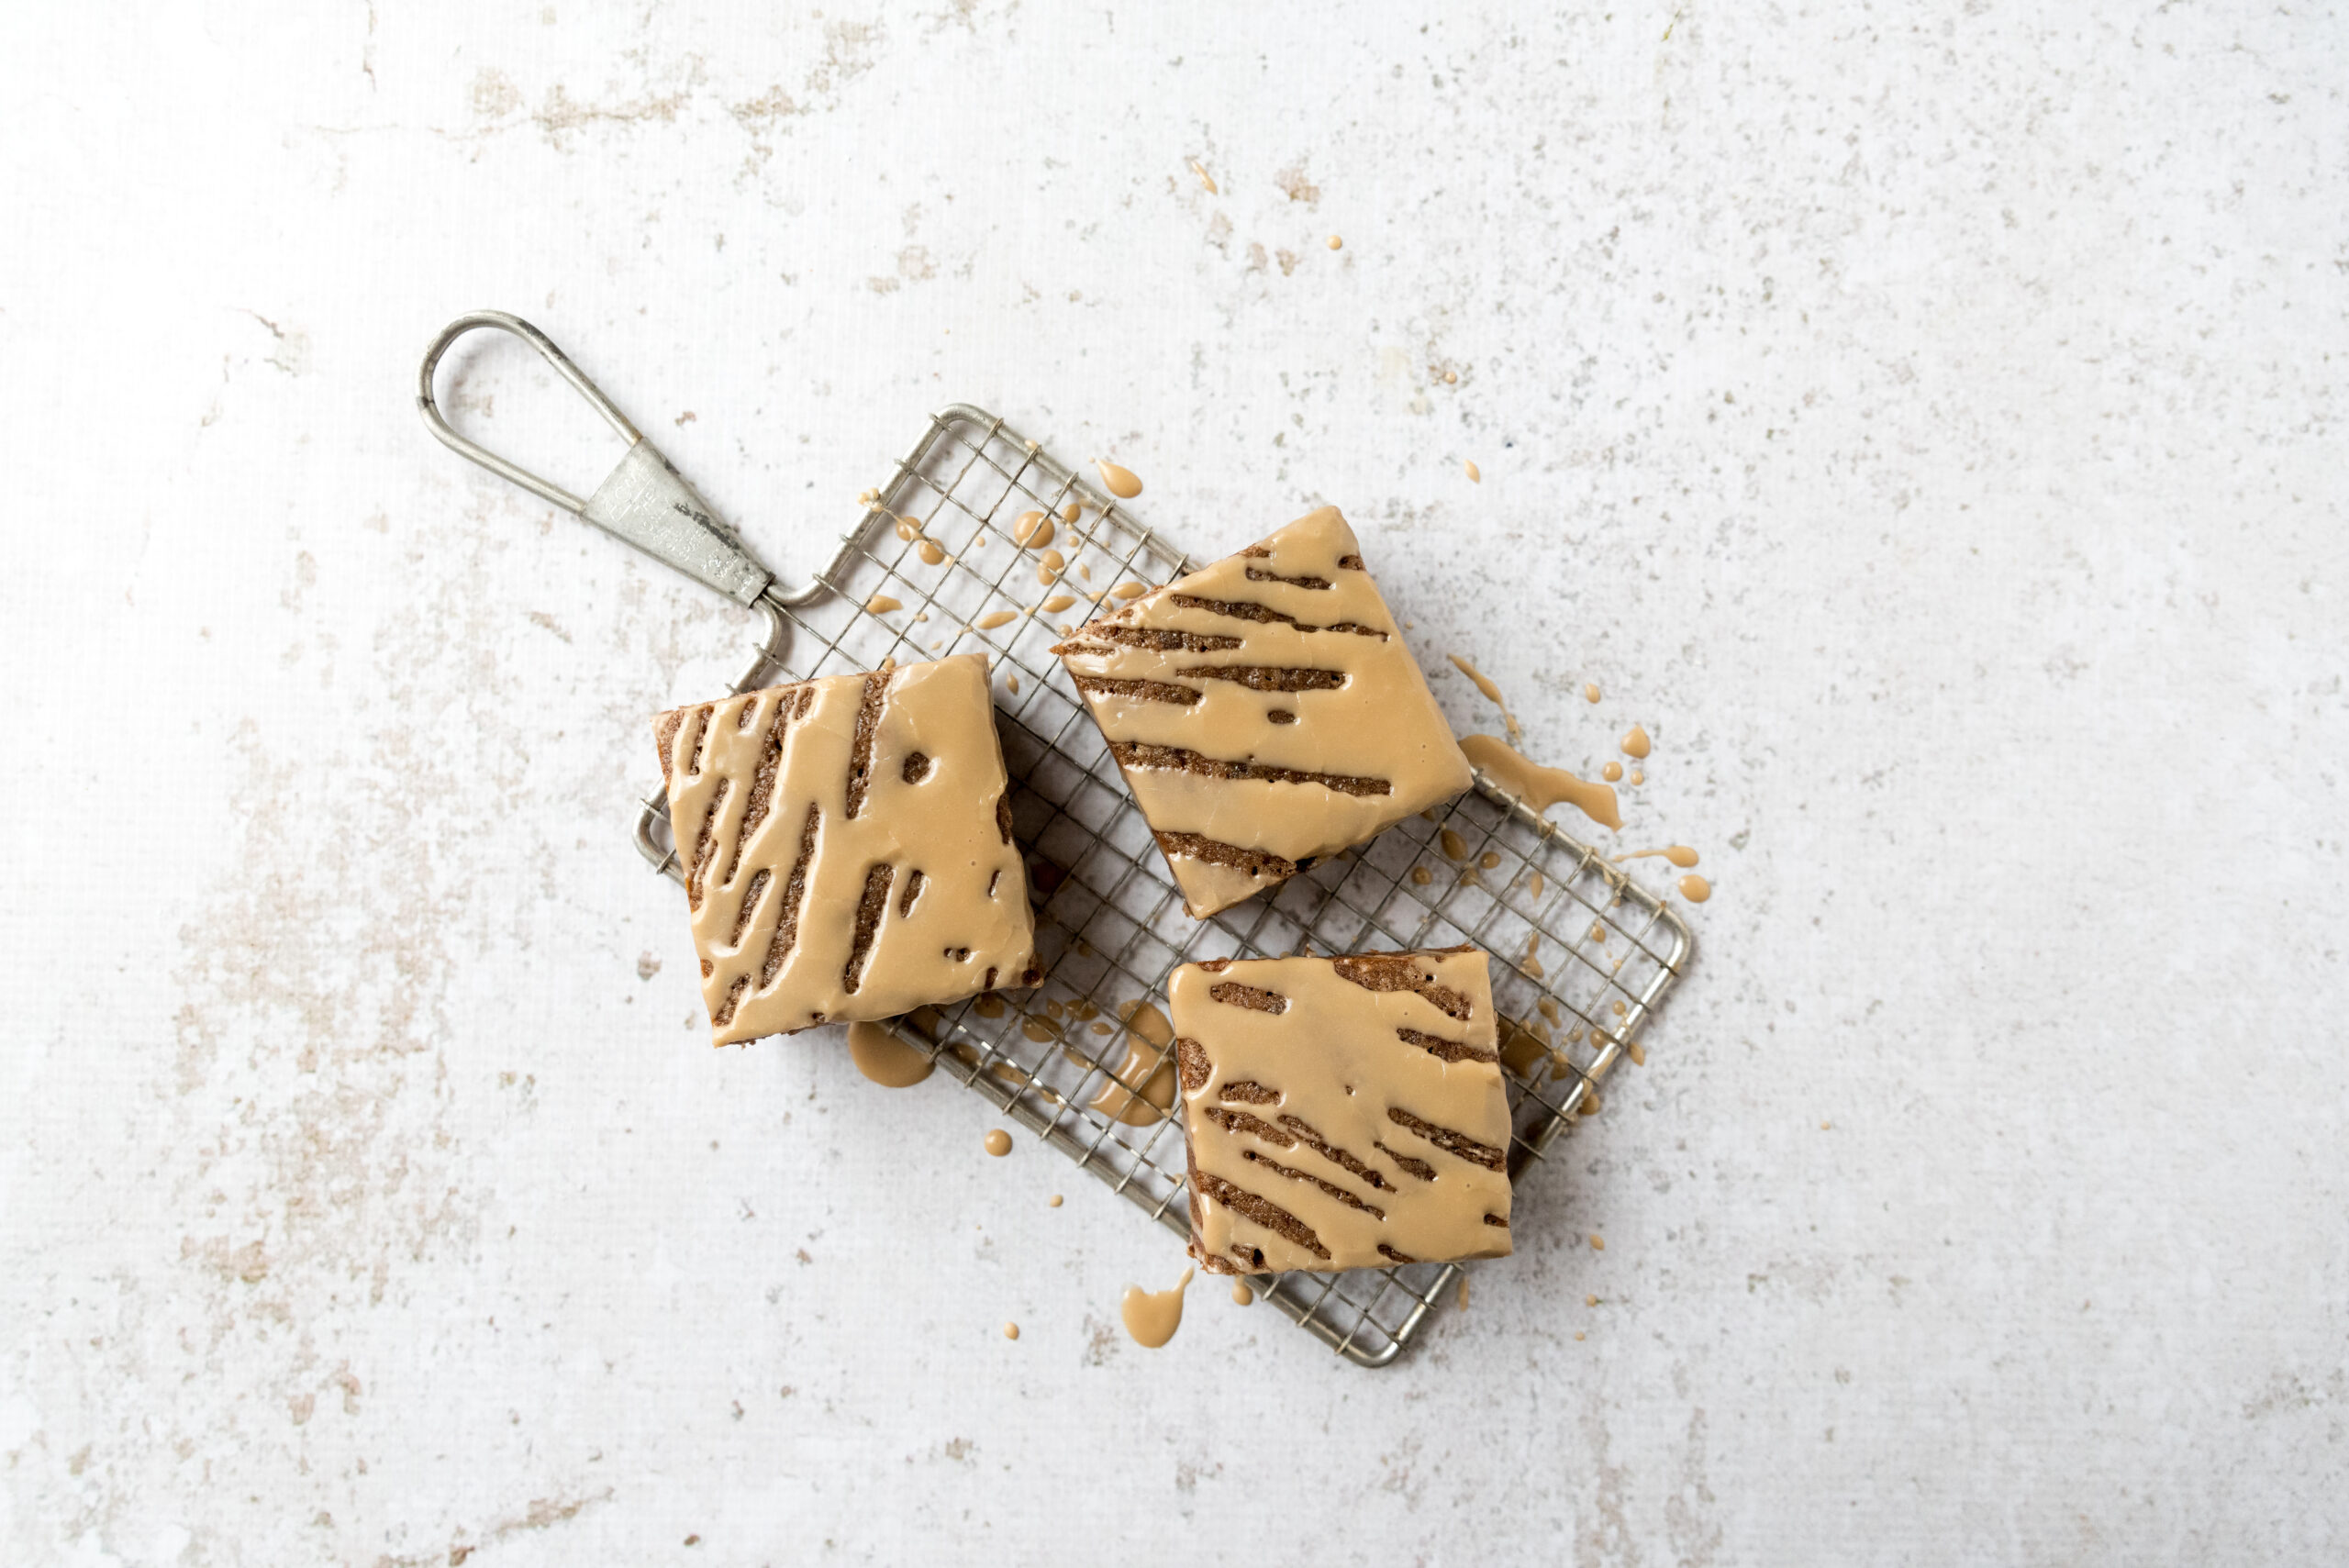
This brownie recipe is pulling double duty. Equally at home at a St. Patrick’s Day celebration as it is a girl’s night in, these brownies deserve a spot in your dessert rotation. Use your favorite chocolate stout in the batter and the glaze. The deep malty beer will enhance the chocolate of the brownies without overpowering them. A can of black beans helps fill out the batter with extra protein and fiber. Who says you can’t have your brownie and eat it too?
Double Chocolate Stout Brownies
Try a brownie recipe with TWO secret ingredients! Chocolate stout beer adds depth and complexity, while black beans add protein and fiber.
Preheat over to 350°F. Line an 8×8-inch baking pan with parchment paper.
Using a blender or food processor, blend beans and stout until smooth. In a mixing bowl, combine bean mixture, eggs, melted butter, vanilla, and salt. Stir until mixed.
In another mixing bowl whisk together flour, cane sugar, cocoa powder, and brown sugar.
Add dry into wet ingredients and mix together until just combined. Fold in chocolate chips.
Pour batter in prepared baking pan and bake for 48 minutes. Cool completely before glazing.
For glaze, stir together confectioner’s sugar, milk, and stout. Drizzle over cooled brownies and serve.
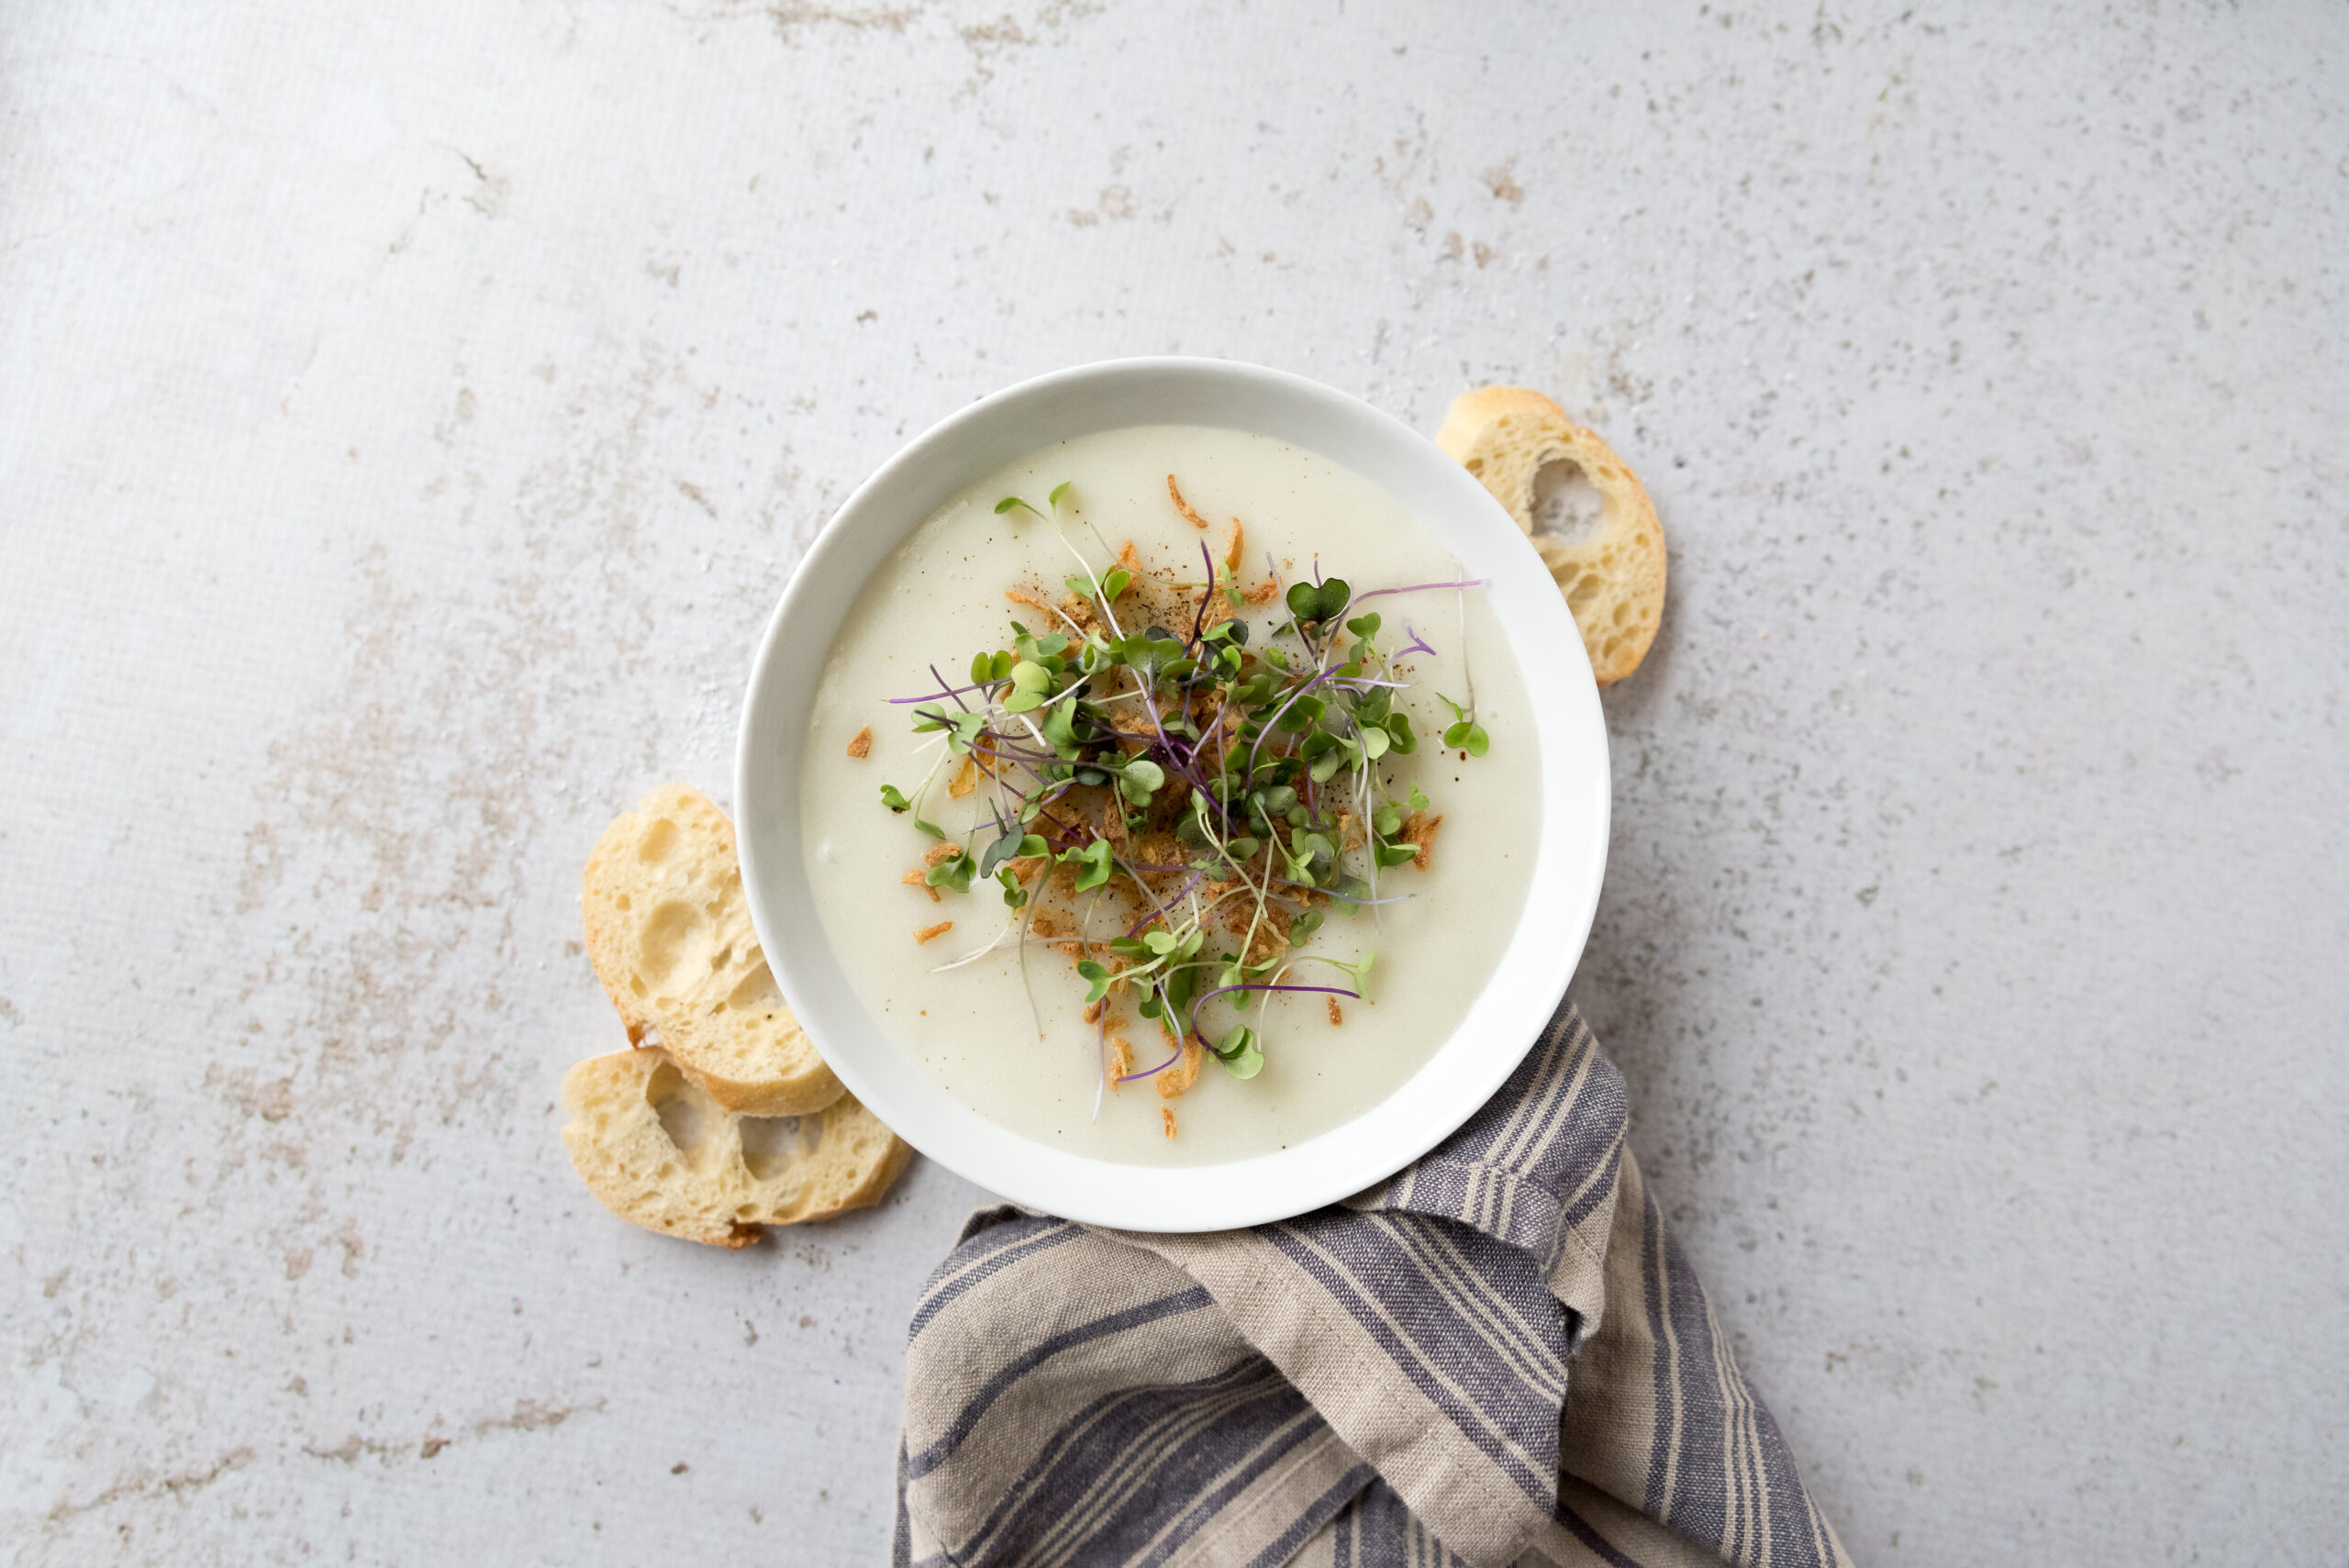
With just a few ingredients, you can make this luxurious, creamy soup. Perfect for days that don’t quite feel like spring, take storage potatoes, spring leeks, and the best vegetable stock you can find, whether it’s homemade or boxed. Adding a hefty pour of cream brings decadence that will satisfy you even if you’d rather soup season were behind you. An immersion blender makes quick work of creating the smooth texture, but don’t be afraid to leave the soup chunky or use a countertop blender if that’s what you’ve got. Crusty bread makes this soup a meal!
Potato Leek Soup
With just a few ingredients, you can make this luxurious, creamy soup. Perfect for days that don’t quite feel like spring.
Thanks to Christine Waltermyer & The Natural Kitchen Cooking School!
Christine Waltermyer is a local and renowned Wellness Chef, private chef to celebrities, published cookbook author and founder of the Natural Kitchen Cooking School, which offers an online Plant-Based Cooking Program. She also loves shopping at Basil Bandwagon! Visit naturalkitchenschool.com to subscribe to her email newsletter for new recipes, tips, and FREE access to the Power of Veggies mini-course!
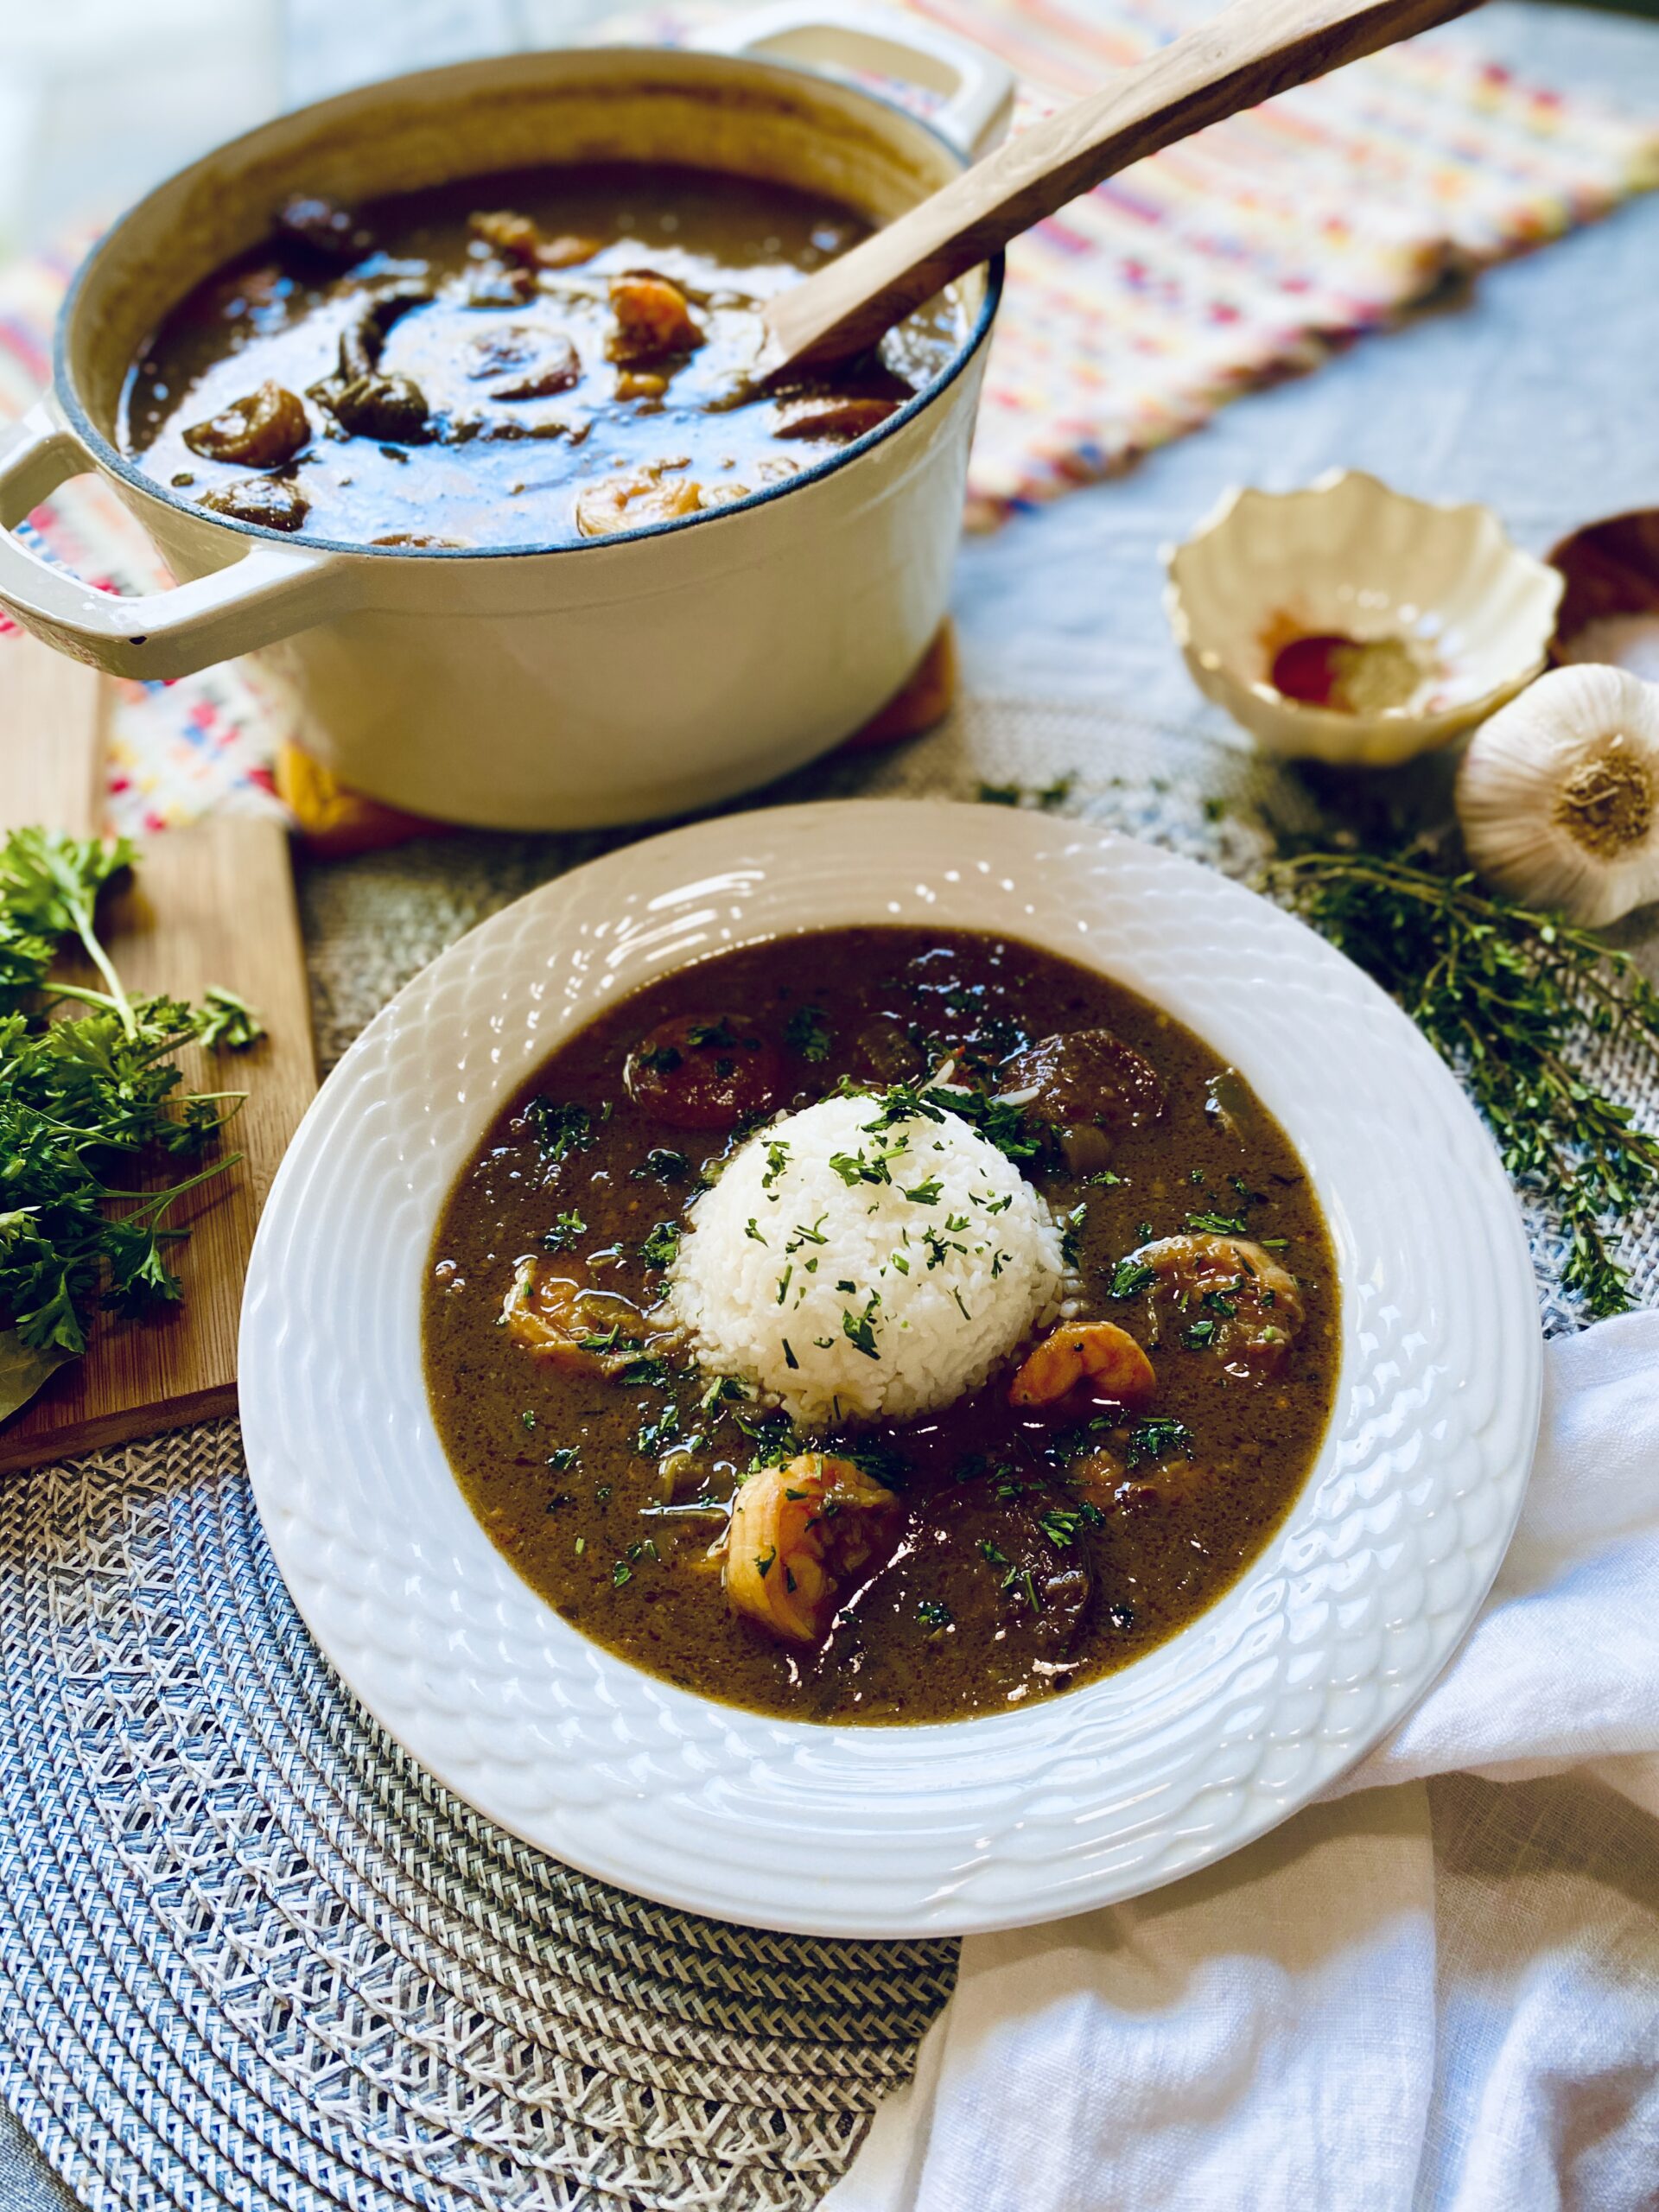
New Orleans Gumbo is an amazing fusion of cultures and flavors. While the roots of gumbo are African, the modern dish is a culmination of contributions from Native American, French, Spanish, and Caribbean cuisines. Enjoy!
½cupghee (clarified butter)divided (or tallow or bacon fat)
2cupsfrozen okrasliced and thawed
½cupall-purpose flour
1medium yellow onionchopped
1medium bell pepperseeded and chopped
2stalks celerychopped
2cloves garlicminced
2bay leaves
1poundsausagesliced
5sprigsfresh thyme
1tablespooncoconut aminos
Sea saltto taste
White or black pepperto taste
2poundsshrimppeeled, deveined, and rinsed
4cupscooked rice
1-2teaspoonsfilé powder
Fresh parsleyto garnish
Method
Make the seafood gumbo stock
In a large soup pot, place all of the seafood gumbo stock ingredients. Bring to a boil over medium high heat. Reduce the heat to medium-low and simmer for 30 minutes. Strain the stock through a large fine-mesh strainer. Set aside. If not using right away, the stock can be cooled and stored in a glass jar in the refrigerator for up to 3 days.
Make the mild Creole seasoning
In a small bowl, stir together all of the Mild Creole Seasoning ingredients until well combined.
Fry the okra
Heat 2 tablespoons of the ghee in a large skillet over medium heat. Add the okra and fry for a few minutes. Use a slotted spoon to transfer the okra to a paper towel-lined plate.
Make the roux
Whisk together the remaining ghee and the flour in a large soup pot over medium-low heat until for 25 minutes. Whisk constantly, until it turns a rich brown color. Watch closely, being careful not to burn the roux. Remove from the heat and continue whisking until it cools down.
Cook the gumbo
Place the soup pot containing the roux back on the stove. Add the onion, bell pepper, celery, and the mild creole seasoning. If you like more seasoning, feel free to increase the amount of spices used. Cook and stir for 5 minutes over medium heat, or until the onions have softened. Add the garlic and bay leaves.
Increase the heat to medium-high heat. While whisking or stirring constantly, add the seafood gumbo stock, a few cups at a time. Add the okra, sausage, thyme, and coconut aminos. Bring to a boil, then reduce the heat to low and simmer uncovered for 1 hour. Add more salt and pepper to taste. Stir in the shrimp. Cook for 10 more minutes. Stir in the filé powder.
Ladle 2 cups of the hot gumbo into each bowl. Add one cup of rice in the center of each bowl. Enjoy!
Notes
Note: Cool any remaining gumbo by placing the soup pot in an ice bath, then transfer to a covered container and refrigerate immediately to prevent spoilage.
Thank you to Christine Waltermyer and the Natural Kitchen Cooking School for working with us to help promote healthy, nutritious meals and products that are affordable, full of nutrients, and simple to make at home!
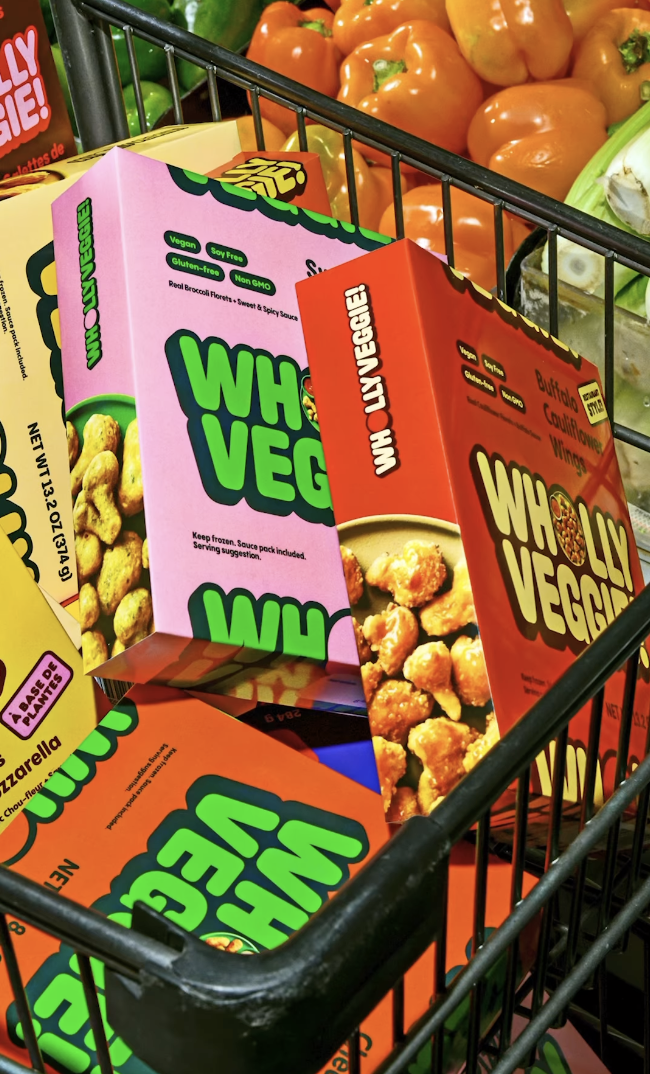
If you’re on the hunt for delicious, plant-based snacks that even a non-plant-based eater would enjoy, we got you! Wholly Veggie’s snacks are the perfect addition to your foodie collection – especially for your full spread for Sunday’s big game 🏈 Check out their gluten-free, vegan goodies below – including a Cheeze Stick Caprese Salad recipe, too!
Mozzarella Style Sticks
Perfectly good veggies were rescued to create our crispy crust. It’s called upcycling. Your mouth tastes cheesy, gooey goodness, your body gets veggies. Your brain explodes.
Buffalo Cauliflower Wings
Full cauliflower florets, lightly coated in a crunchy panko crust. Our gluten free, panko coating gives our cauliflower a unique, crunchy bite. Paired with our outrageously popular Buffalo Sauce, our Buffalo Cauliflower is perfect as an after work or after school snack. Just bake n’ snack.
Ranch Cauliflower Wings
Full cauliflower florets, lightly coated in a crunchy panko crust. Our gluten free, panko coating gives our cauliflower a unique, crunchy bite. Paired with a plant based ranch sauce. Perfect for taco night or Sunday game day. Just bake n’ snack.
Cheeze Stick Caprese
This Caprese Salad made from Wholly Veggie's plant-based cheeze sticks is festive, fresh, and perfect for any party or holiday meal! Not only does this showstopper look great, it's super simple to make.
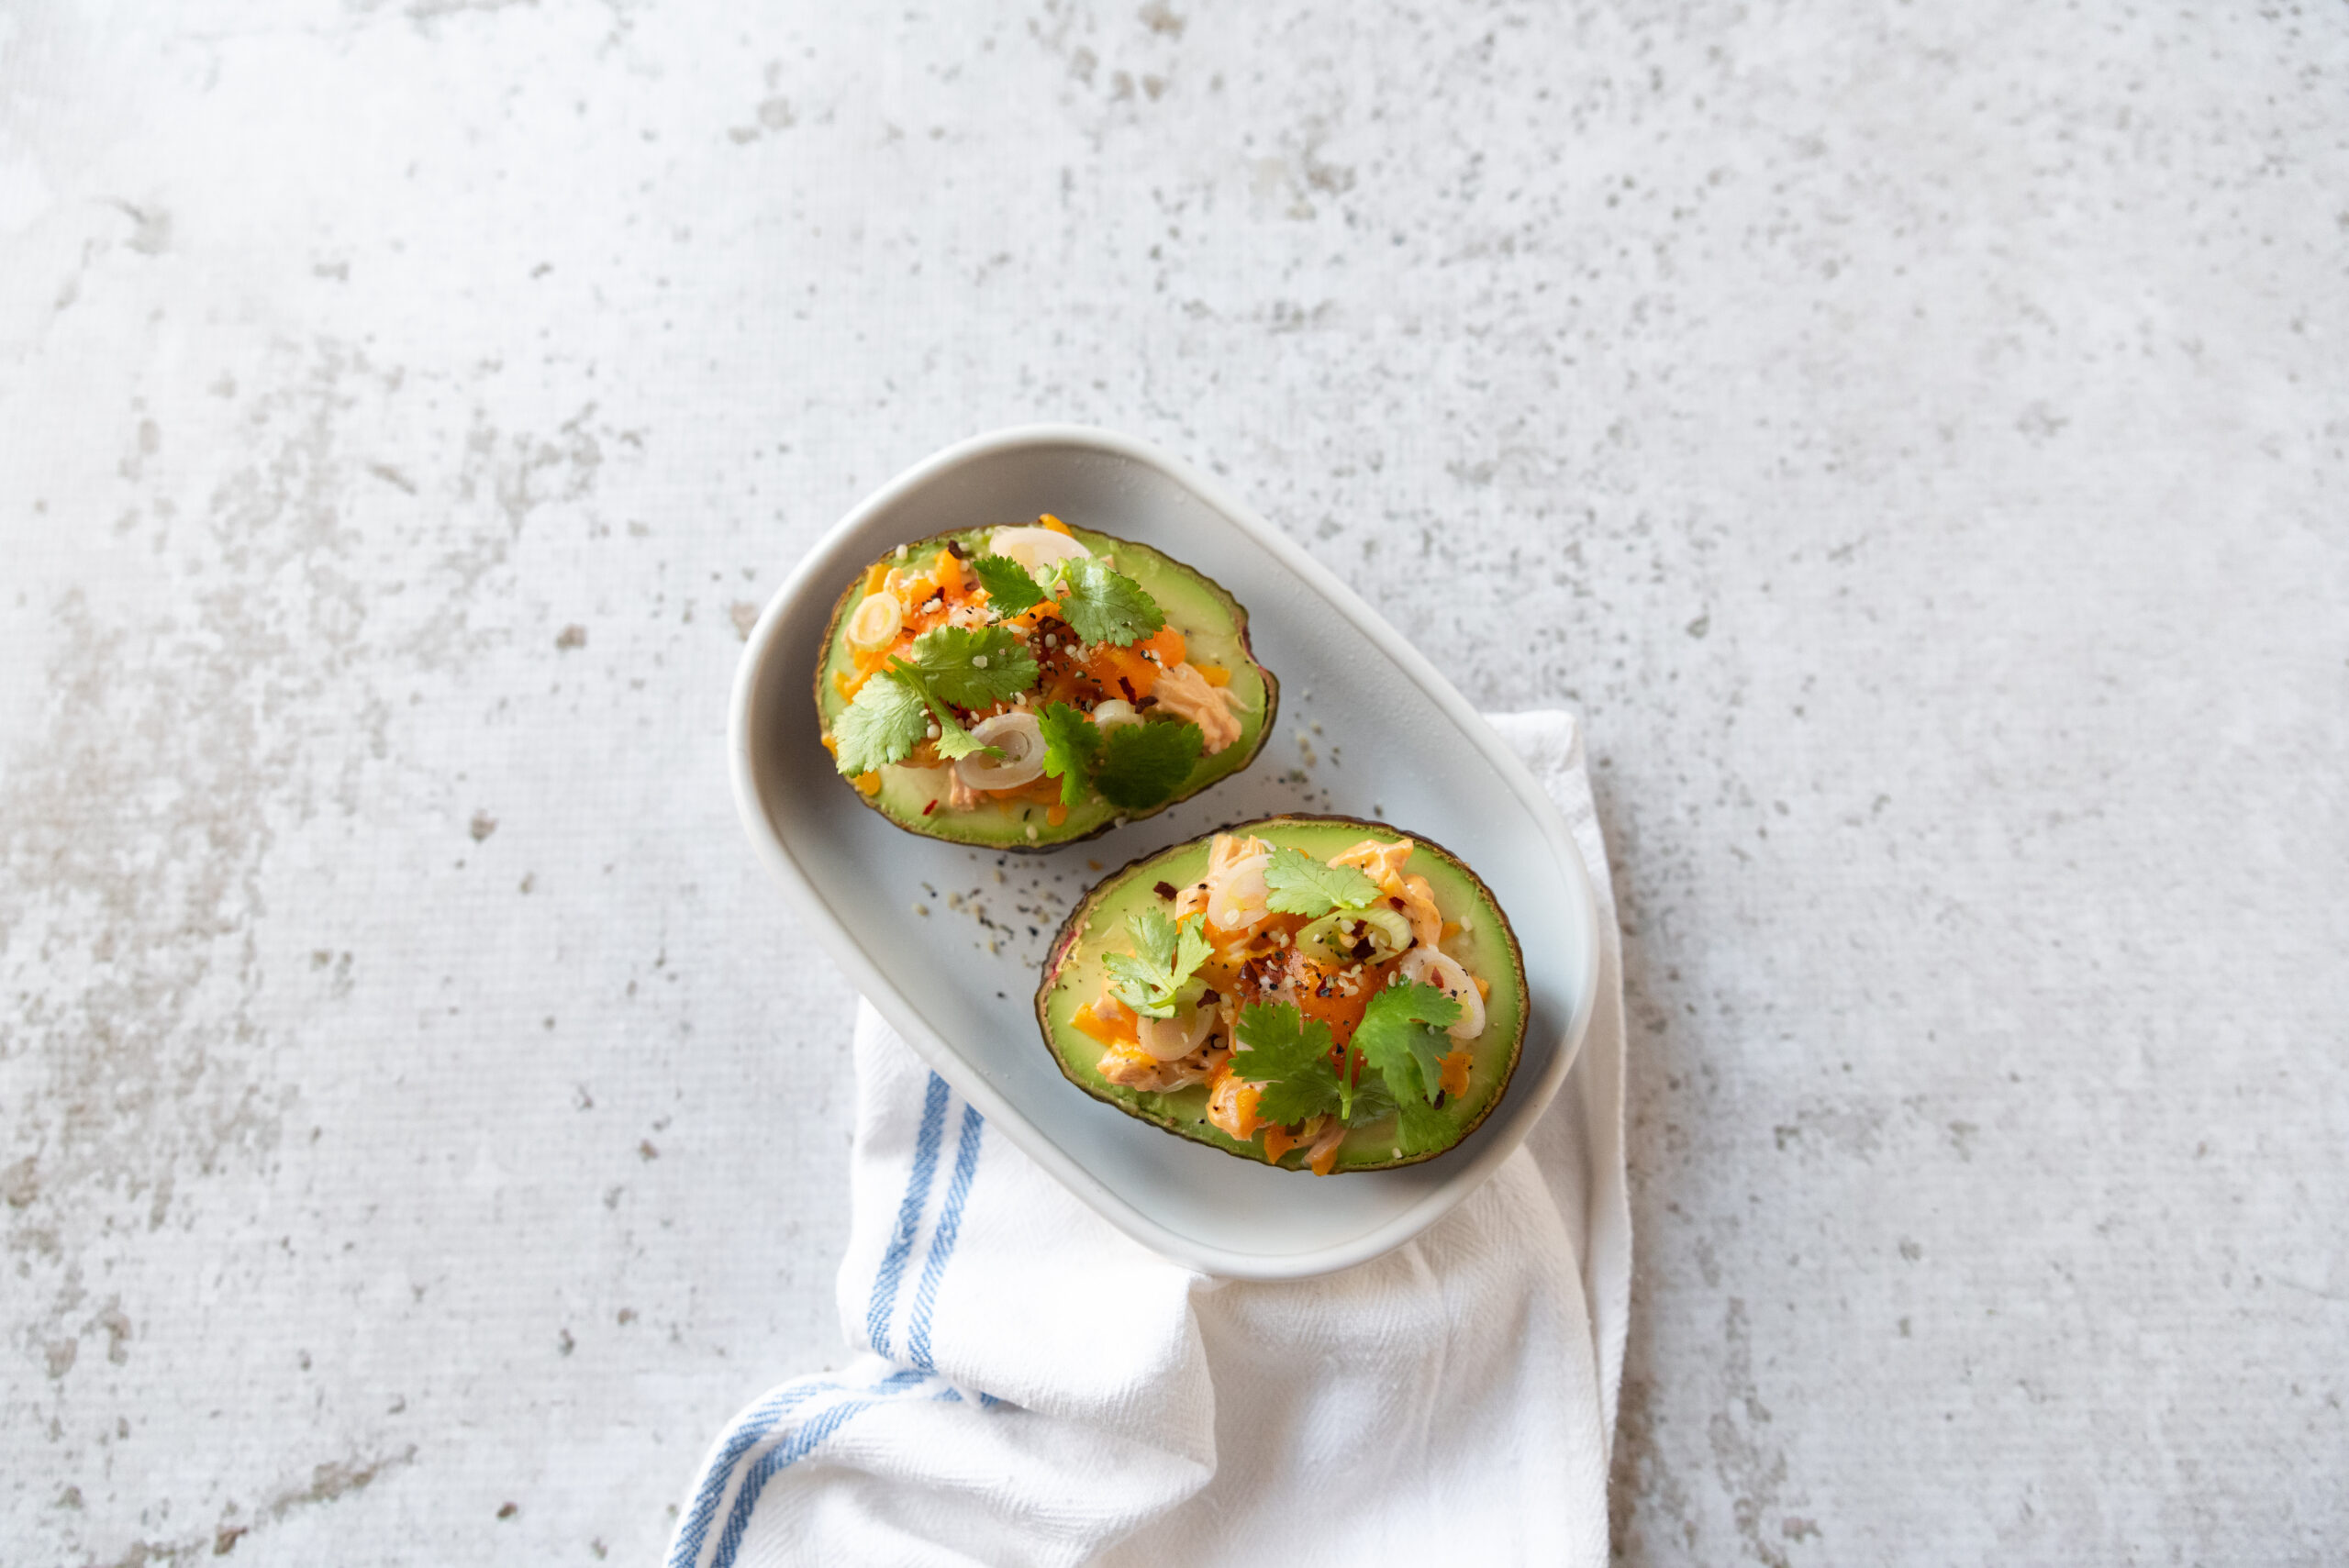
Whether you’re hosting for the big game or just want to feed a crowd easily, this Buffalo Chicken Stuffed Avocados recipe will make you the MVP! With healthy fats and protein, you’ll be satisfied long after the last whistle. Can’t find ready to eat buffalo chicken salad? You can always take your favorite chicken salad recipe and substitute some buffalo sauce for some of the mayonnaise. For an even easier hack, just stir in buffalo sauce to a prepared chicken salad. It is sure to be saucy and delicious!
Buffalo Chicken Stuffed Avocados
Ready for the big game? The first thing you may think of serving at half time is guacamole. Take it one step further with Buffalo Chicken Stuffed Avocados! It’s Keto. It’s easy. It’s delicious. Whether your team is winning or losing, this dish puts you on the winning team.
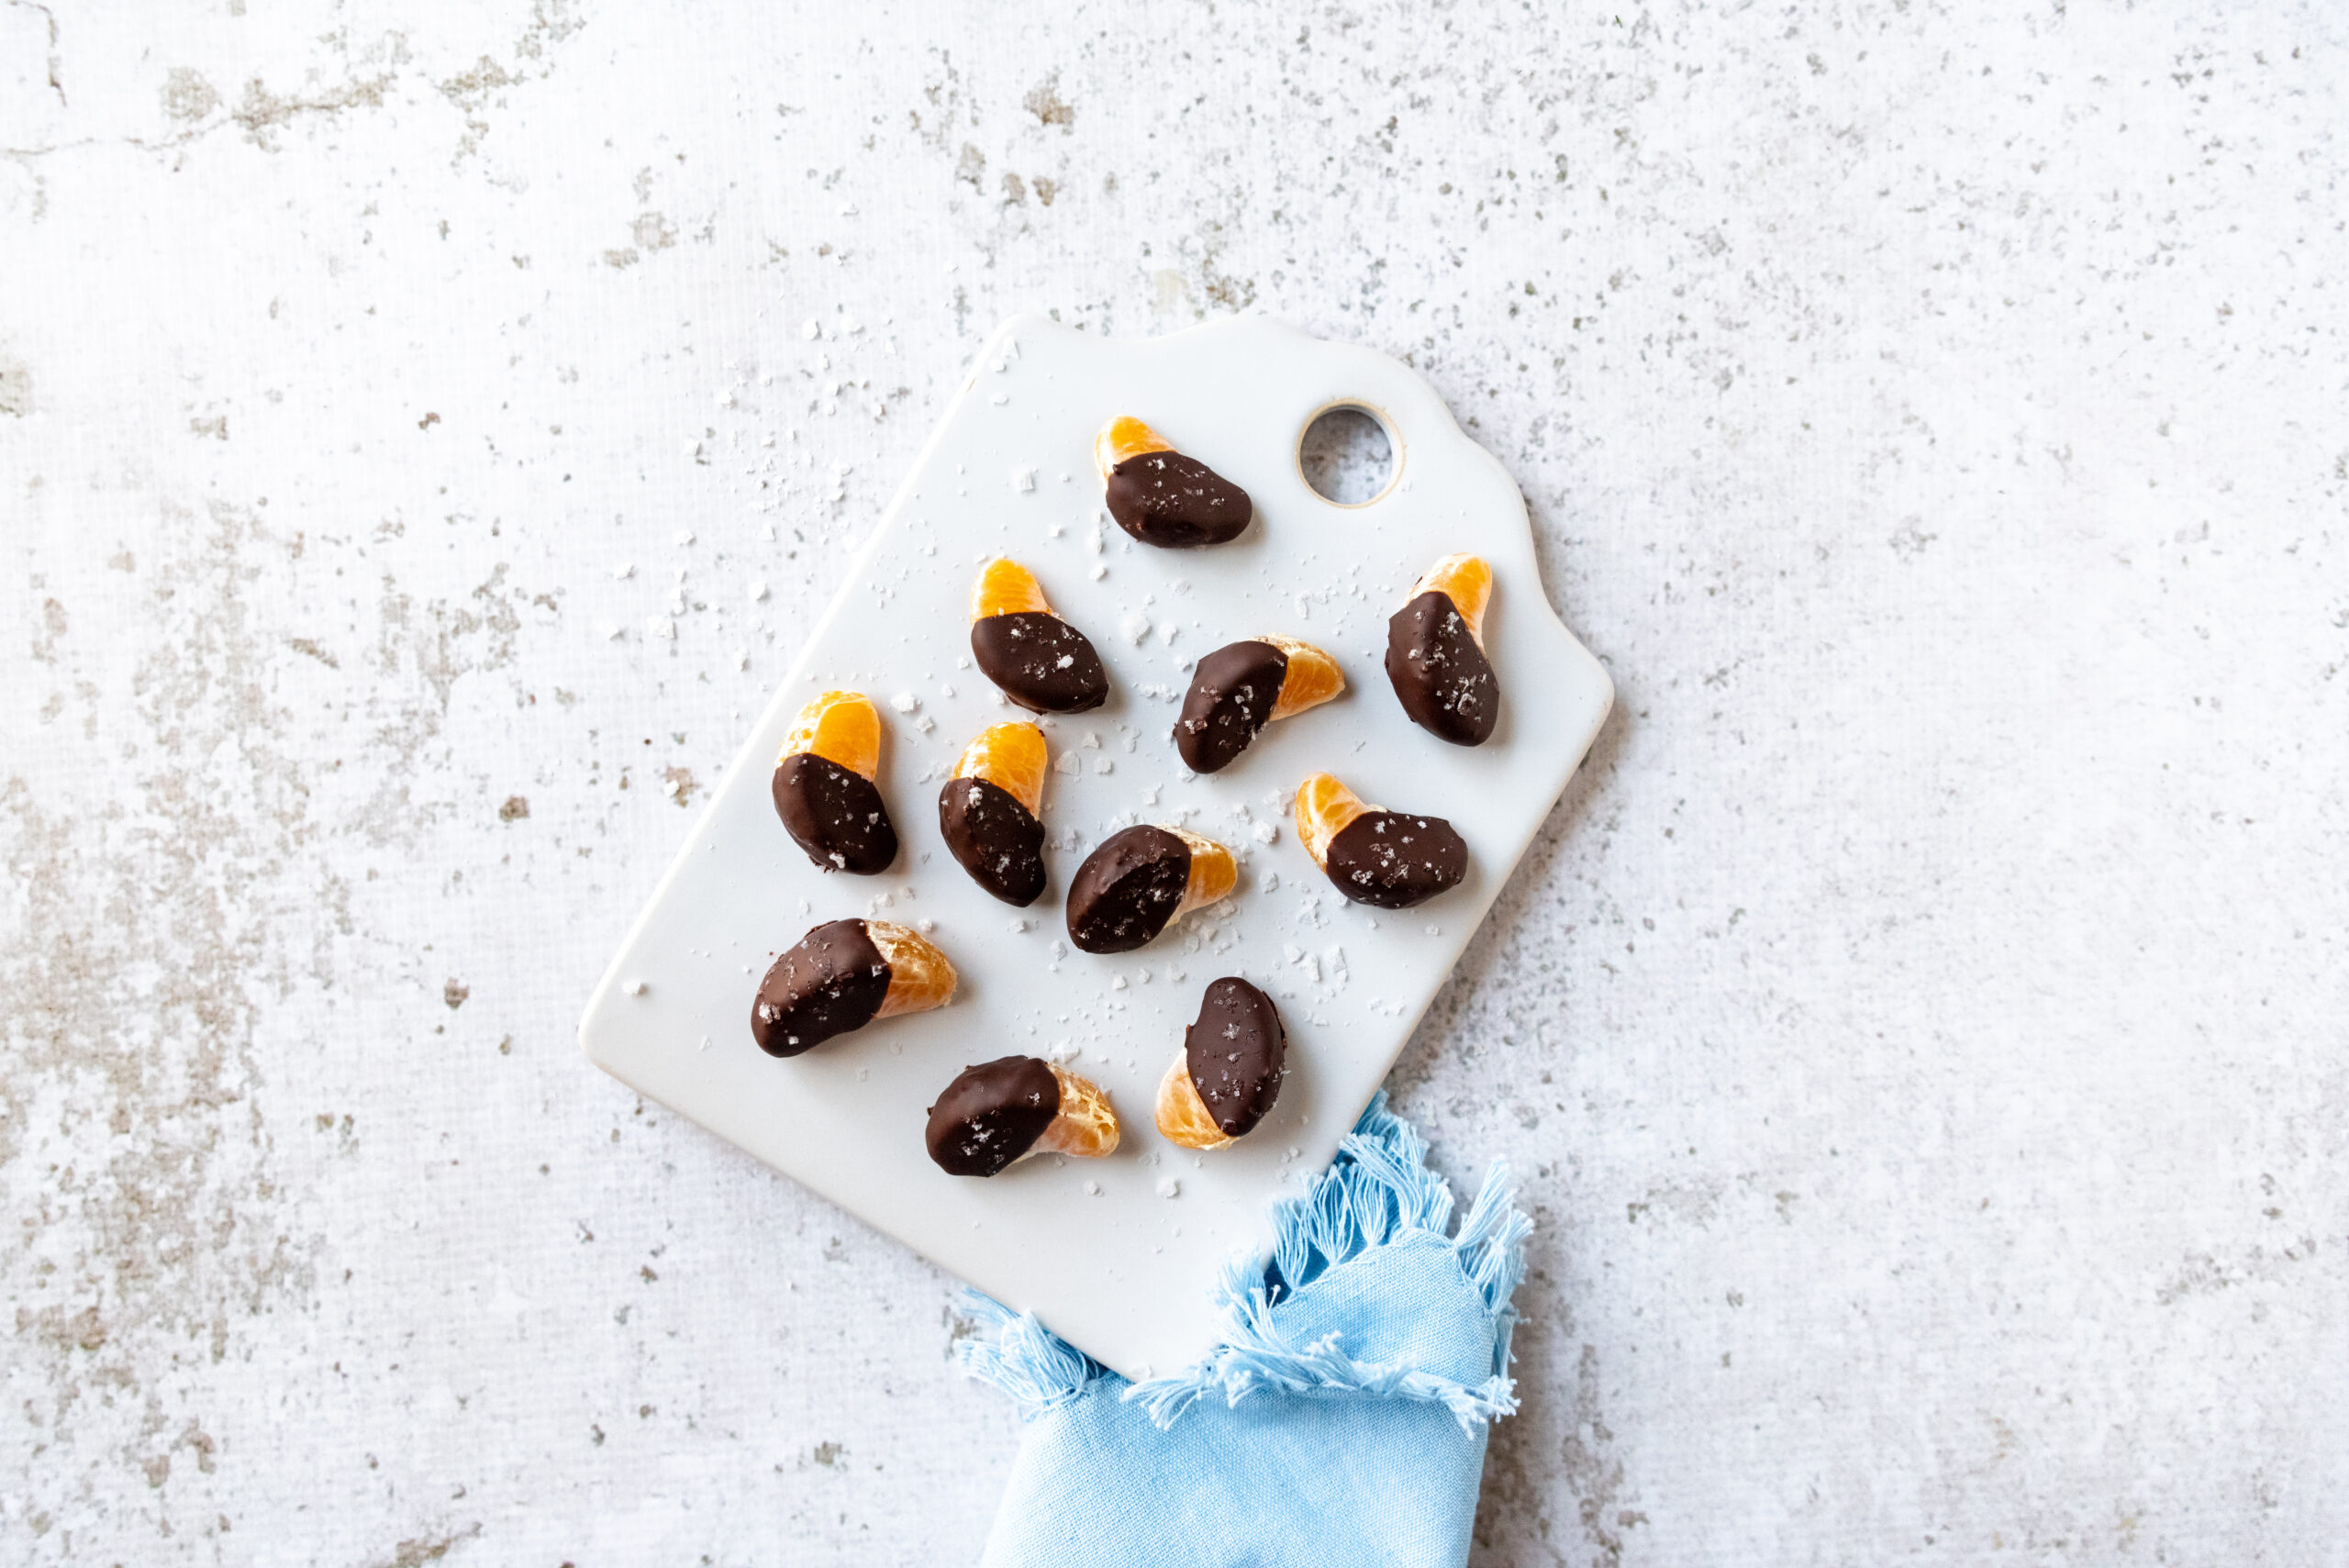
Chocolate covered strawberries look impressive, but the flavors of chocolate and orange are a classic combination that shouldn’t be forgotten this time of year. With peak season citrus and a dash of flaky sea salt, these chocolate sea salt mandarin oranges will be bursting with juicy flavor. They’re super easy to make, and you’ll get credit for a homemade Valentine’s gift. You can turn to this recipe year-round whenever you want to impress or have an abundance of citrus on hand.
Chocolate Sea Salt Mandarin Oranges
A Valentine’s mainstay is the chocolate covered strawberry, but we think seasonal citrus and just the right amount of flaky sea salt is an even better expression of your love.
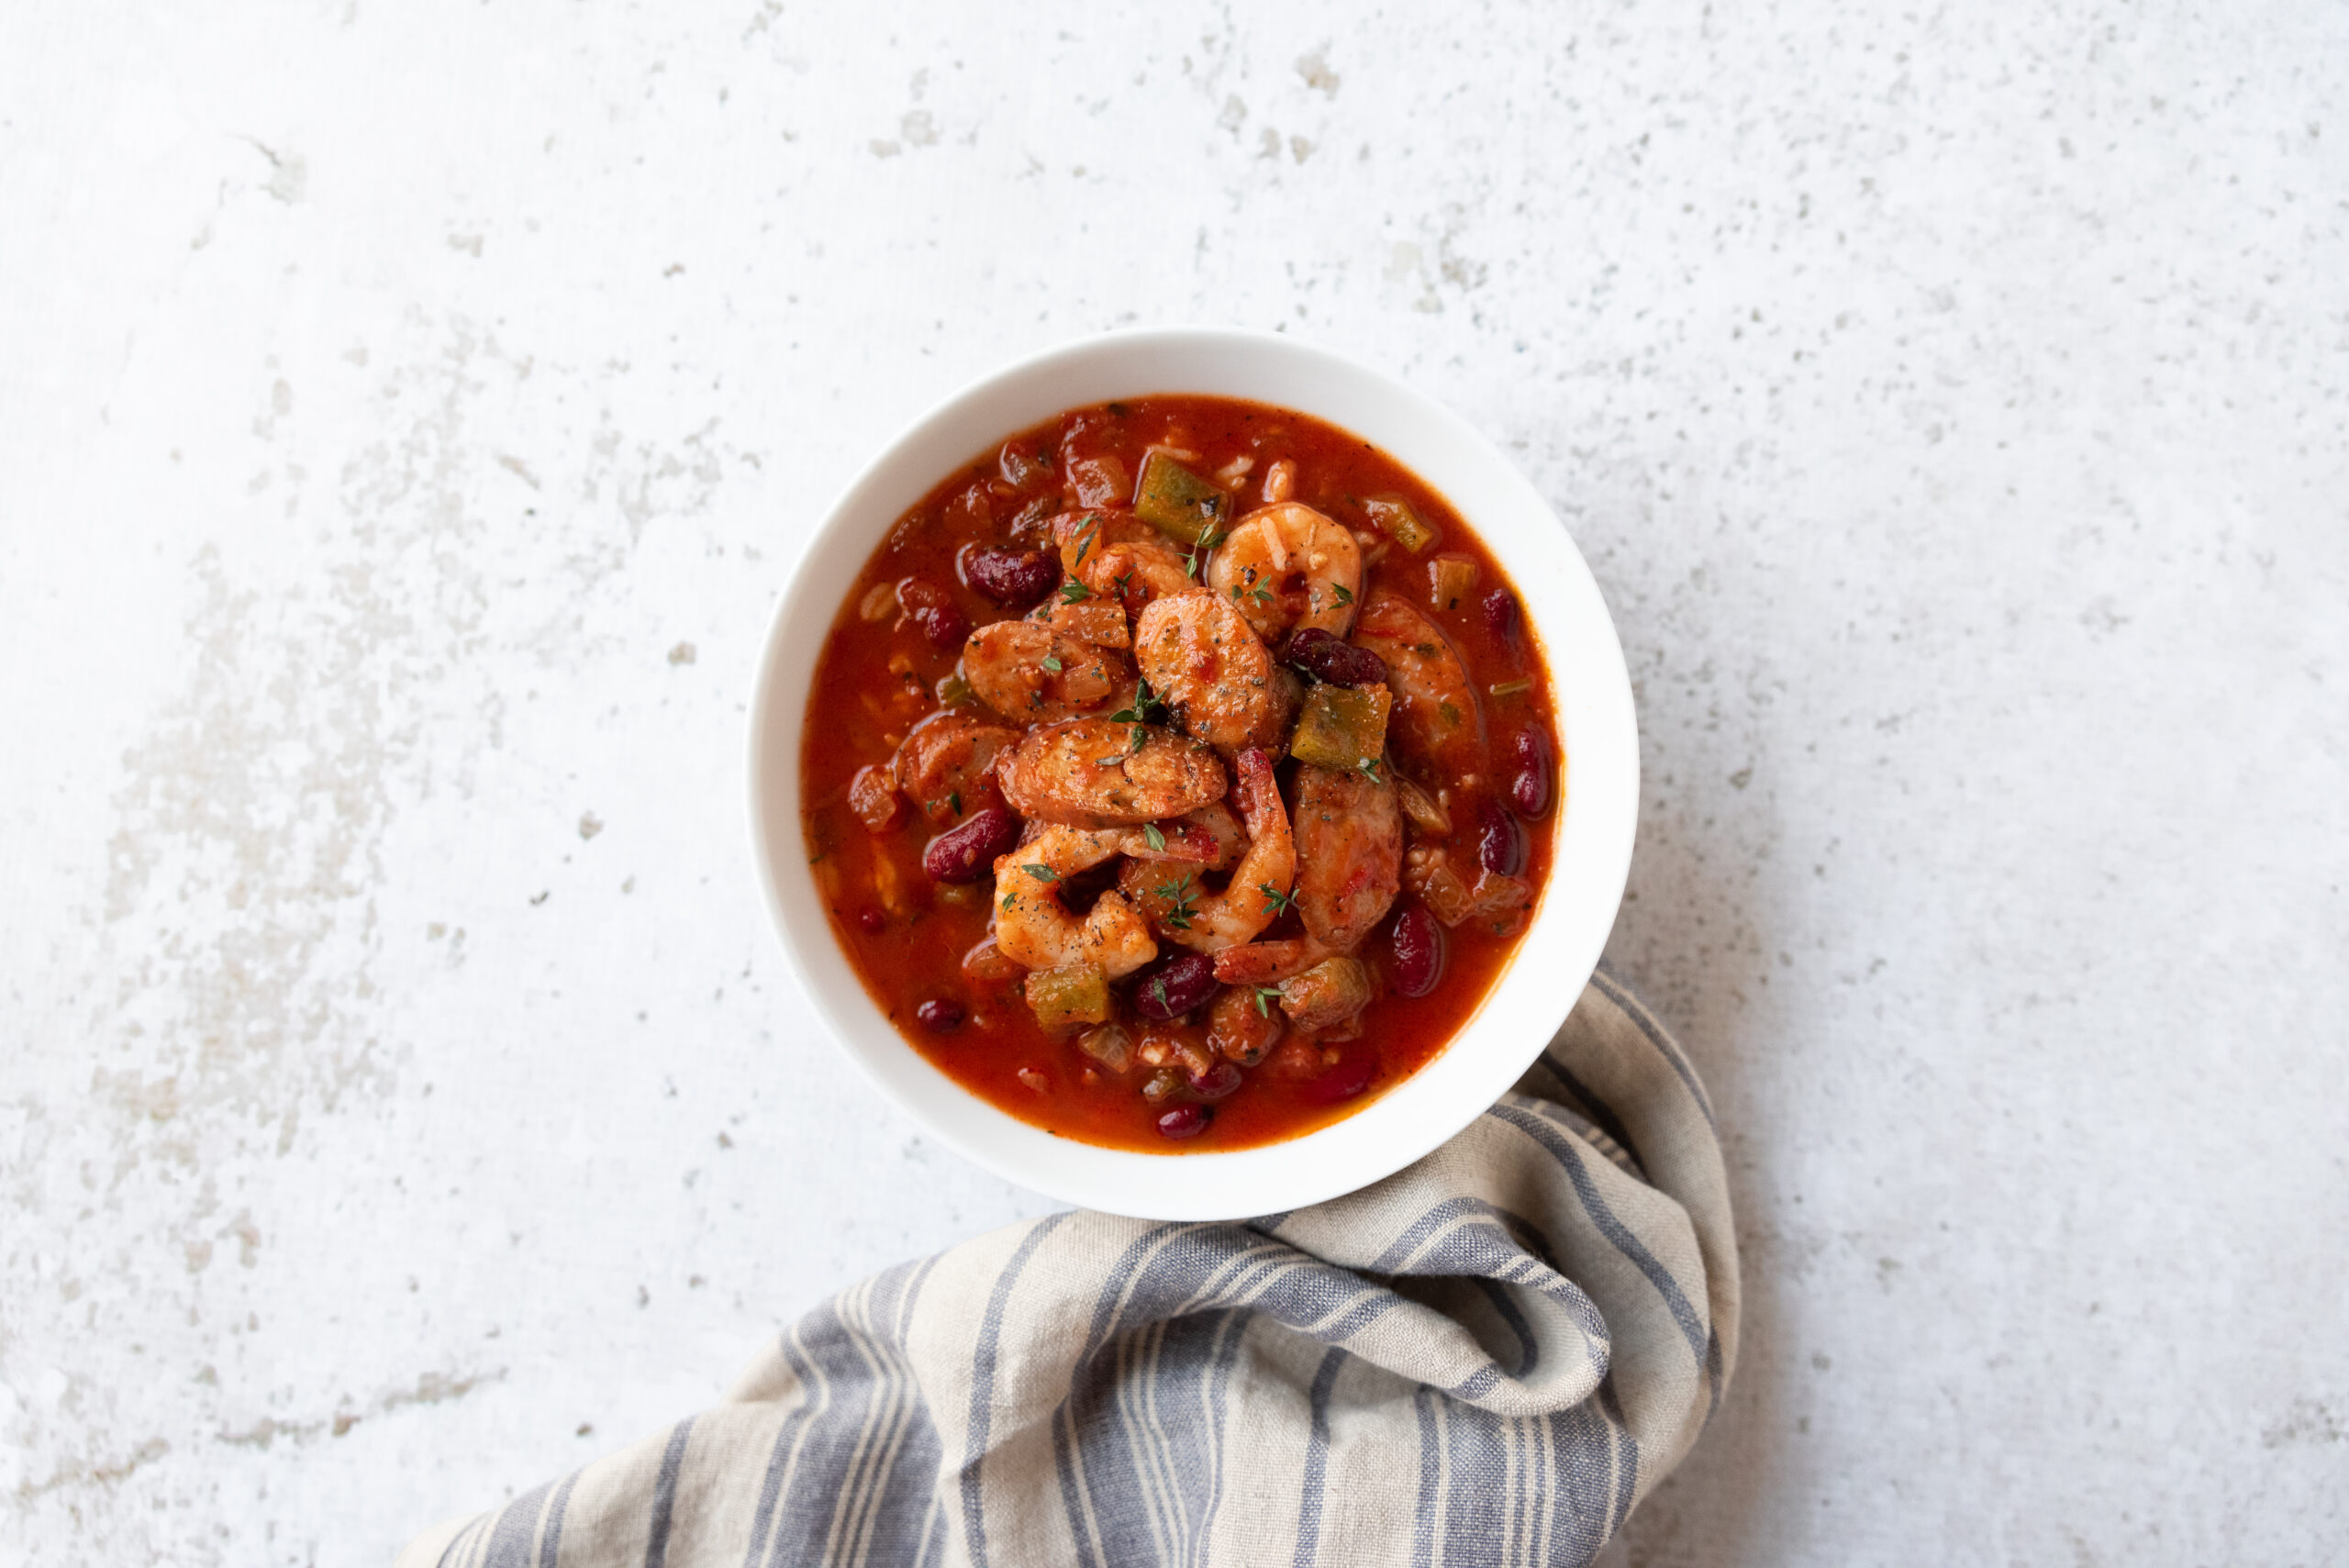
Getting ready for Mardi Gras? This Jambalaya Stew should be in your meal plan. A nod to the classic jambalaya, it’s filled with sausage, shrimp, veggies, and plenty of herbs and spices. You’ll build so much flavor in under an hour, this could be a weeknight meal, especially if you’ve got some leftover rice in the fridge. The holy trinity of creole cooking, onion, celery, and green bell pepper, form the base of the dish, with dried herbs, premixed spice blends, and a bit of harissa paste adding flavor and spice. Laissez les bons temps rouler!
Jambalaya Stew
Getting ready for Mardi Gras? This Jambalaya Stew should be in your meal plan. A nod to the classic jambalaya, it’s filled with sausage, shrimp, veggies, and plenty of herbs and spices.
In a large pot, heat oil over medium heat. Sauté sausage slices until browned. Remove from pan and set aside.
In the same pan, add onion and sauté until translucent. Stir in celery and green bell pepper, sauté for three minutes then add garlic and cook for another minute.
Stir in broth, tomatoes, harissa, Creole seasoning, paprika, thyme, and salt. Bring to a simmer and cook for 20 minutes. Add in peeled shrimp and cook until shrimp turns opaque, approximately three minutes.
Add in kidney beans, cooked rice, and sausage. Heat through and adjust seasonings to taste.
Red is a color commonly associated with passion and love, but red foods may have a direct effect on our heart health. The same pigments that give red foods their color, called anthocyanins, are also responsible for a host of health benefits, including reduction of inflammation in the body, and have been shown to help with heart health, playing a role in better cholesterol and triglyceride profiles.
Tuna-Stuffed Piquillo Peppers with Romesco-Style Sauce
When paired with a salad, this dish easily serves two as a main meal, but it will stretch to a few more as part of a tapas-style meal.
11-12piquillo or sweet red peppers (drained contents of 9 1/2 oz jar)
2tablespoonswhole hazelnuts
1tablespoonolive oil
1teaspoonsweet Spanish paprika
1garlic clovepeeled
½teaspoonsherry vinegar
2teaspoonhoneydivided
Method
Preheat oven to 350°F.
In small bowl, with fork, mix together tuna, parsley, lemon zest and juice, and black pepper. Set aside.
Remove whole peppers from jar and set aside 6 to be stuffed. In bowl of food processor, place remaining peppers with hazelnuts, olive oil, paprika, garlic, sherry vinegar, and 1 tsp honey, and pulse to blend into a sauce. The texture will not be completely smooth.
Add about 2 Tbsp of sauce to tuna mixture and stir through. Spoon remaining sauce into small baking dish to make a base for stuffed peppers.
Stuff tuna mixture into 6 piquillo peppers and place them on top of the sauce in baking dish. Drizzle with remaining 1 tsp honey and bake for 15 to 20 minutes.
Enjoy!
Red Berry Salad
Delicious, sweet berries and sharp red onion combine, with the help of some balsamic vinegar and a hint of basil, to make a classic salad.
In large skillet, toast pumpkin seeds over medium-high heat, stirring frequently, until golden brown. Pour onto plate to cool and set aside.
In bowl, place berries, basil, vinegar, and maple syrup, and stir gently to coat. Set aside and allow to marinate for about 30 minutes. After time has elapsed, into large bowl, strain any liquid and add one or two raspberries, reserving the remainder.
Mash the two raspberries in liquid in large bowl, add olive oil and salt, and whisk together. Add red onion and greens and toss to coat. Arrange on large platter, placing reserved marinated berries on top. Sprinkle with pumpkin seeds and serve.
Enjoy!
Spicy, Smoky Tomato-Braised Eggs
This simple yet luxurious dish is based on a dish from the south of Spain, similar to a North African shakshuka. It’s a satisfying meal, equally at home on the dinner table as on the breakfast bar.
Turn oven broiler to high. Rub red pepper with 1 tsp olive oil and place in baking pan. Place pan under broiler. While watching carefully, turn pepper occasionally as each side blackens under the heat, about 10 minutes. When all sides of red pepper have been fully blackened, remove from oven and place in paper bag to cool.
Add 1 Tbsp olive oil to 9 in cast iron skillet and saute onion on medium-low heat for about 5 minutes, until soft. Add garlic and red pepper flakes, and continue to cook for a further 5 minutes, until garlic is translucent. Add sweet smoked paprika and tomatoes to pan, stir thoroughly to incorporate, and allow to simmer on medium heat for 20 to 30 minutes.
Once pepper is cool, peel and discard skin and seeds. Place flesh in food processor or blender and puree. Add pepper puree to tomato sauce with salt, honey, and, if desired, hot smoked paprika. Allow sauce to simmer for 15 minutes more. Add in red chard and mix through.
Crack eggs into individual pinch bowls or glasses and set aside. Press the bowl of a soup ladle into sauce, and pour in an egg. Then tip contents slowly into tomato mixture. Repeat with remaining eggs, arranging them evenly over surface of skillet. For soft eggs, simmer for approximately 10 minutes, covering halfway through. Sprinkle with parsley and serve with a warm tortilla or a piece of crusty bread.
Thanks to Christine Waltermyer & The Natural Kitchen Cooking School!
Christine Waltermyer is a local and renowned Wellness Chef, private chef to celebrities, published cookbook author and founder of the Natural Kitchen Cooking School, which offers an online Plant-Based Cooking Program. She also loves shopping at Basil Bandwagon! Visit naturalkitchenschool.com to subscribe to her email newsletter for new recipes, tips, and FREE access to the Power of Veggies mini-course!
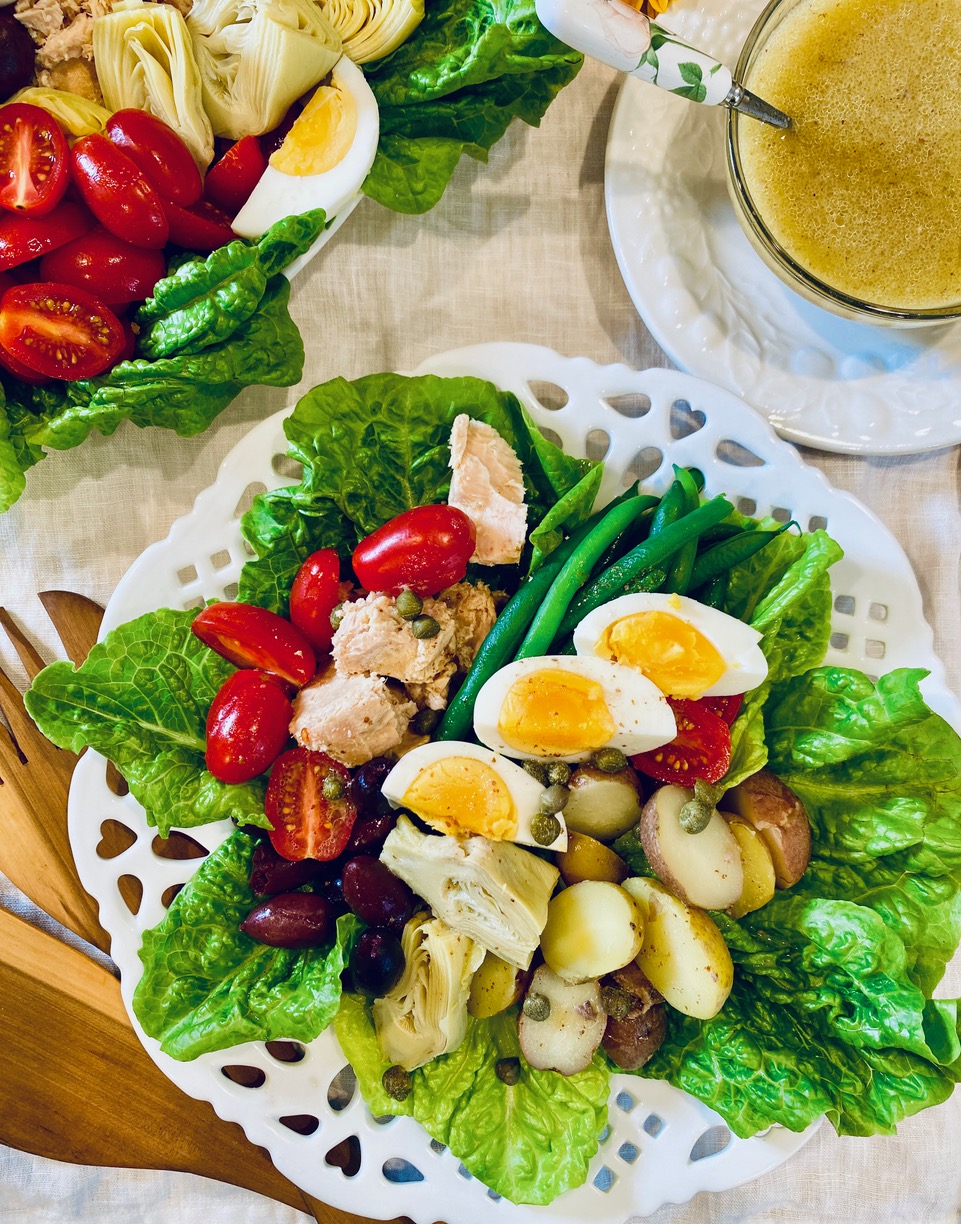
This classic French salad combines tuna, baby potatoes, crisp green beans, boiled eggs, cherry tomatoes, and a delicious lemon vinaigrette dressing to make a hearty salad that can be served as a meal.
Niçoise Salad
This classic French salad combines tuna, baby potatoes, crisp green beans, boiled eggs, cherry tomatoes, and a delicious lemon vinaigrette dressing to make a hearty salad that can be served as a meal.
Cook the potatoes. Place the potatoes in a medium saucepan. Add enough cold water to cover the potatoes. Add a teaspoon of the sea salt. Bring to a boil, then reduce the heat to simmer, uncovered, on medium heat for about 10 minutes, or until fork-tender. Drain and cool the potatoes. Slice them in half.
Cook the green beans. Fill another saucepan with water. Add sea salt to taste. Bring to a boil. Also, fill a bowl with some salted ice water. Add the green beans to the boiling water and cook for a few minutes, or until they are crisp-tender, but still bright green. Drain the green beans, then place them in the ice water for a few minutes. Drain and pat dry.
Cook the eggs. Place them in a saucepan. Cover with cold water by one inch. Bring to a boil over medium high heat. Cover and remove from the heat. Set a timer for 11 minutes. Drain the eggs and place them in an ice bath or run them under cold water to make them easier to peel. I like to peel them under cold running water as well. Slice the eggs in halves or quarters.
Make the lemon vinaigrette dressing. Whisk together in a bowl the lemon juice, anchovies, olive oil, brown or Dijon mustard and the white pepper. Taste and adjust the seasoning if needed. Add 3 to 4 tablespoons of this dressing to the cooked potatoes and toss.
Prep the tomatoes. Slice the tomatoes in half. Place them in a small bowl. Add a little sea salt and pepper to taste. Toss to combine.
Prep the lettuce. Wash and salad spin the lettuce. Separate the leaves. If using romaine lettuce like I did, you may wish to use only the more leafy tops.
Assemble the salad. Prepare either 4 to 6 individual plates, or 1 large serving platter. Arrange the lettuce, tuna, potatoes, green beans, eggs, artichoke hearts, capers, cherry tomatoes, and Kalamata olives. Serve drizzled with the vinaigrette dressing.
Enjoy!
Thank you to Christine Waltermyer and the Natural Kitchen Cooking School for working with us to help promote healthy, nutritious meals and products that are affordable, full of nutrients, and simple to make at home!
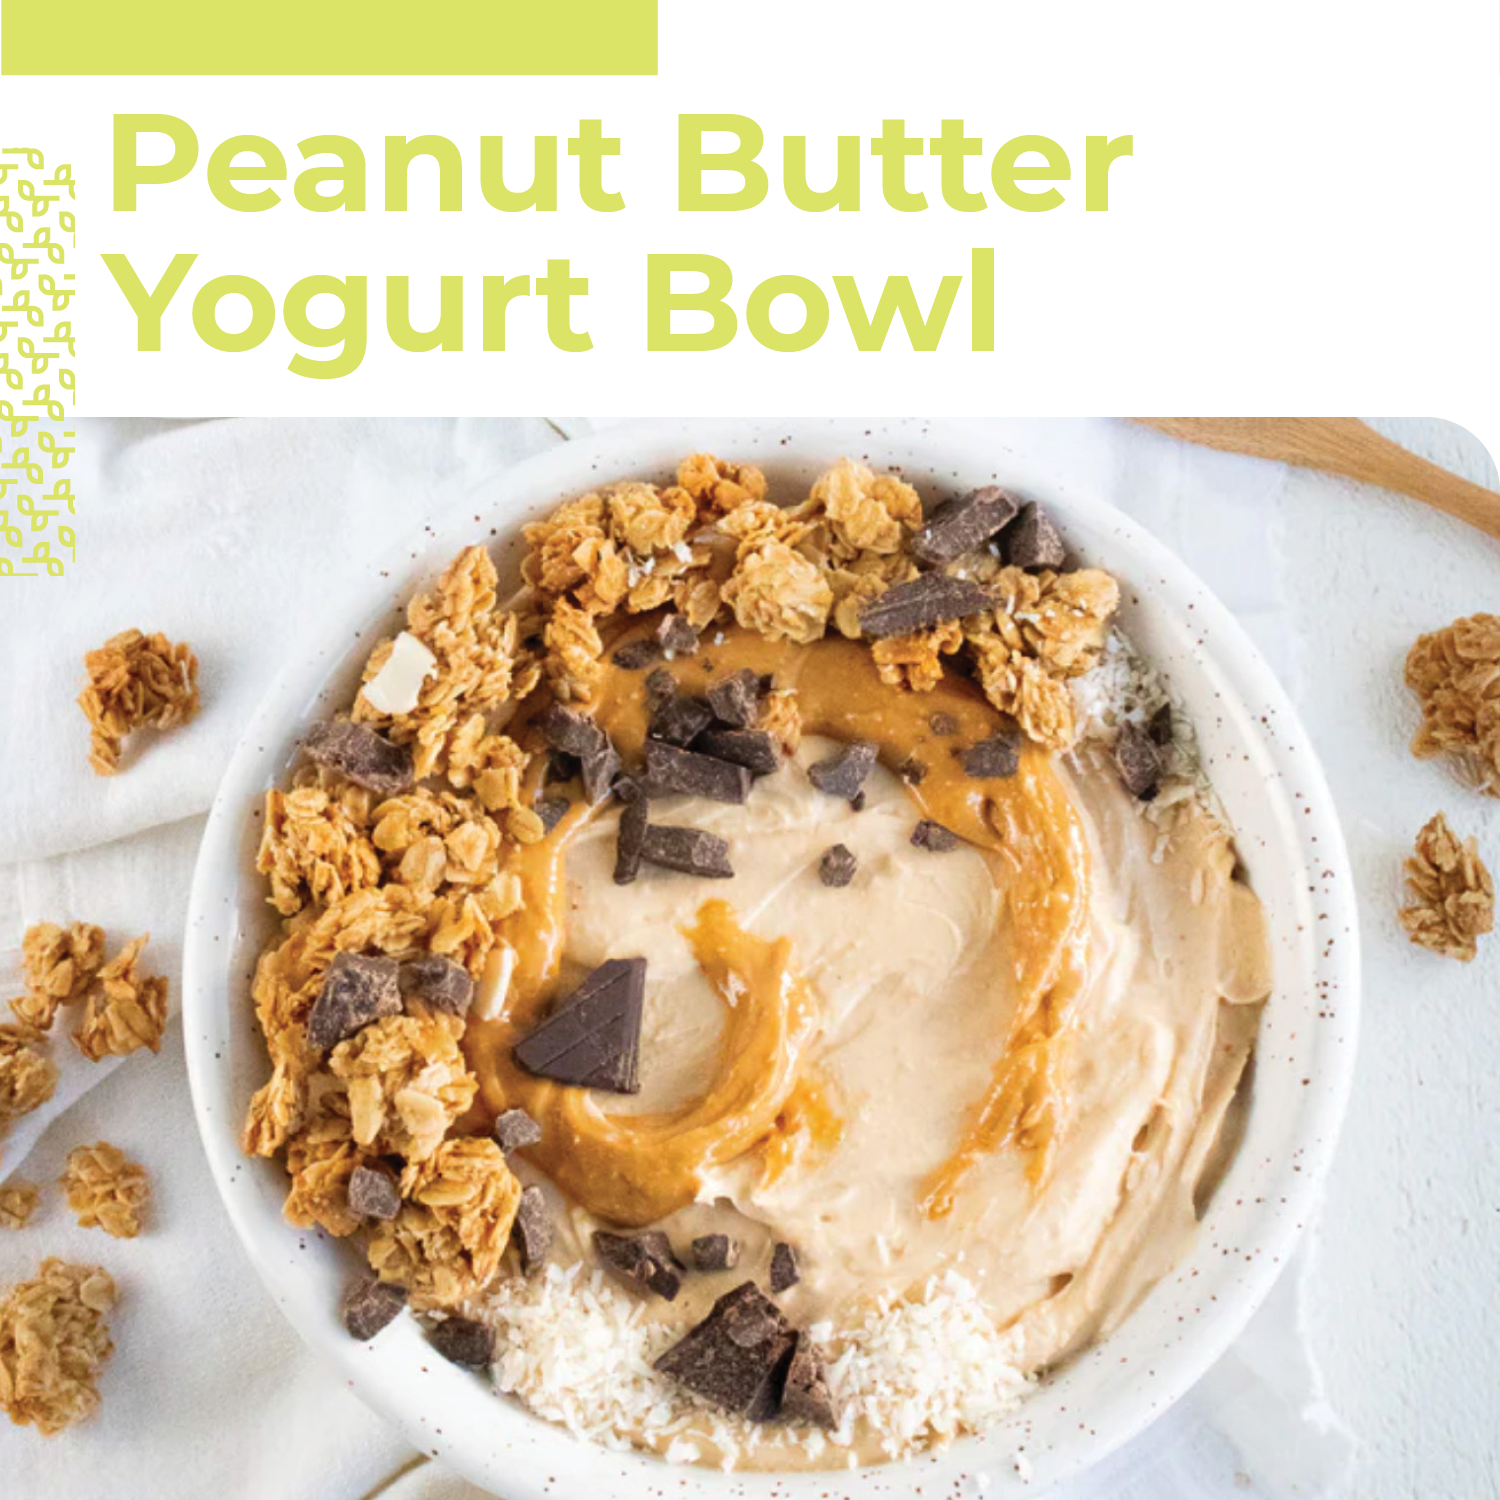
The basic recipe consists of peanut butter, yogurt, and maple syrup, but you can get creative with any of your favorite toppings. May we suggest pumpkin seeds, dark chocolate, and your favorite granola? Or consider coconut shreds, sliced banana, and mixed berries. This creamy peanut butter yogurt bowl is perfect for meal prepping during busy weeks. Simply keep the ingredients on hand to make when the craving strikes or you can scale the recipe up and store it in the fridge for up to five days.
Peanut Butter Yogurt Bowl
This salty and sweet peanut butter yogurt bowl satisfies every craving! Get ready for your new breakfast or go-to afternoon snack with the goodness of collagen and protein to support wellness and sustain energy.
In a bowl, whisk together the Greek yogurt, peanut butter, maple syrup and Vital Proteins Collagen Peptides. Combine until creamy, whipped, and smooth.
Divide into bowls and add the toppings of your choice. Enjoy!