Tag: recipe

  • Introducing: Hudson Valley Fisheries

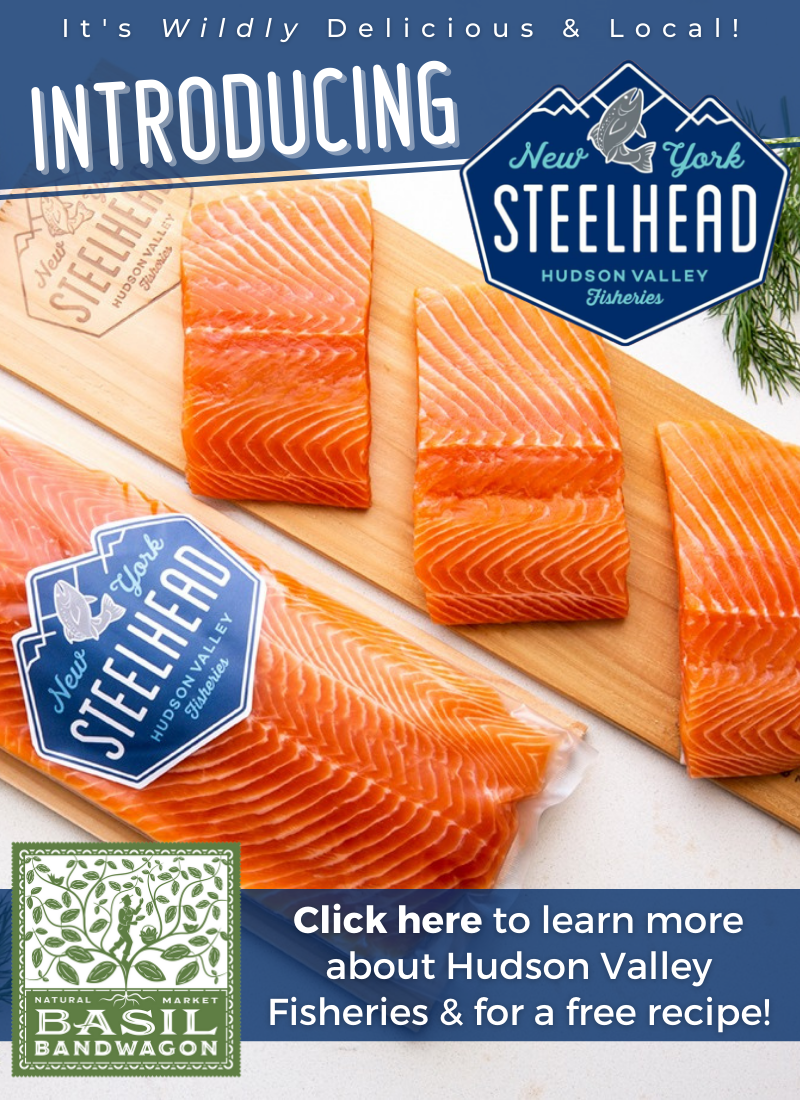
    Introducing: Hudson Valley Fisheries

    Healthy. Local. Sustainable.

    Hudson Valley Fisheries was inspired by their commitment to environmental stewardship. Their goal is to protect wild populations and the environment through a state-of-the-art land-based biosecure Recirculating Aquaculture System (RAS).

    As an aquaculture teaching facility, they are educating future fish farmers in best practices, collaborating with the Culinary Institute of America and numerous colleges and universities in the Hudson Valley region. Every aspect of their business model is designed to keep their carbon footprint small, including their central location, to offer impeccably fresh, local fish via delivery trucks, thus eliminating the environmental costs of trans-Atlantic and international seafood transportation.

    Fed a responsibly-sourced, GMO-free and balanced diet of natural antioxidants, proteins and lipids, New York Steelhead are completely traceable from egg to place.

    Flavor Profile

    • Clean flavor, subtle and herbaceous

    • Pairs well with many flavors and ingredients

    • Rich in omega 3 and fatty acids

    Texture Profile

    • Smooth and velvety

    • Meaty, lean with nice fat content

    • Medium moist flake that holds together with cooking

    • Pan roasting and grilling yield a wonderfully crisp skin

    What makes Hudson Valley Fisheries healthy?

    Unlike open-sea fish farms that regularly use harsh chemicals to control pathogens, parasites and sea lice, our land-based farm uses RAS technology which provides optimal conditions for our fish to grow without the need for antibiotics, vaccines or growth hormones. Our land-based facility offers round the clock dedicated animal care and the strictest biosecurity which guarantees our fish never disrupt native ecosystems or wild seafood populations.

    What makes Hudson Valley Fisheries sustainable?

    It all starts with RAS. Our bio-secure facility uses a Recirculating Aquaculture System which provides optimal conditions for our fish to grow without the use of antibiotics, vaccines, or hormones. Fish waste is recycled into nutrient-rich plant food and kept out of our rivers and oceans. With a land-based facility, our fish never disrupt native ecosystems or wild populations.

    Looking for a way to prepare your New York Steelhead?

    Check out this delicious recipe below!


    Crispy Steelhead Trout Tenders

    with Herbed Yogurt Dipping Sauce

    Ingredients:

    New York Steelhead fillets
    (6 oz. New York Steelhead, filet), skinned and cut into 5 x 2 inch pieces

    2 eggs

    1 teaspoon dijon mustard

    1 cup panko breadcrumbs

    1 teaspoon lemon zest

    1/8 teaspoon salt

    1/8 teaspoon pepper

    1 lemon, squeezed

    For Sauce:

    1/2 cup whole greek yogurt

    1/4 teaspoon onion powder

    1/8 teaspoon garlic powder

    1/2 teaspoon chopped chives

    1/4 teaspoon chopped parsley

    1/8 teaspoon salt

    1/8 teaspoon pepper

    Method

    Fish Directions:
    Combine breadcrumbs, salt, pepper and lemon zest, in a plate. In a separate plate, combine eggs and mustard. Dip each tender in the egg mixture and then into the breadcrumb mixture. Set coated tenders aside on a plate. Spray tenders with olive oil cooking spray and place on a parchment lined baking sheet. Bake for 12 minutes at 375F flipping once.


    Sauce Directions:
    Mix well and allow to sit in the fridge for 1 hour for a stronger ranch flavor. Enjoy with tenders!

    References:

    https://www.hudsonvalleyfisheries.com/

    https://www.hudsonvalleyfisheries.com/blogs/steelheadcooking/crispy-steelhead-tenders-with-herbed-yogurt-dipping-sauce

    https://www.instagram.com/hudsonvalleyfisheries/

  • Introducing Sunscoop – From the Earth, But Out of This World.

    Introducing Sunscoop – From the Earth, But Out of This World.

    “We are powered by the sun to make the most delicious plant-based ice cream from organic coconut cream, superfoods, and no refined sugar.”

    They’re taking over the freezer aisle with a plant-based ice cream that is absolutely delicious, allergen-friendly, and makes you feel good. Their flavors are reimagined classics with a superfood twist. They’ve sourced the highest quality ingredients and let their tastes and nutrients shine.

    From the Founder Carli Blum

    Eat, Pray, Sneeze. Story of my life. Being born with food allergies is not easy. I love food, I celebrate with food, and I am endlessly inspired by it. Food for me is both my hardest challenge and biggest blessing. Being allergic to dairy, gluten, nuts, soy, eggs, and sensitive to refined sugar, I’ve struggled with inflammation and fatigue my whole life.

    In the journey of discovering what foods triggered me I also found the foods that healed. Being a lover of ice cream, I was never able to find a brand that was allergen-friendly and tasted good. One day I asked myself, why can’t dairy-free ice cream taste insanely delicious, have clean ingredients, and make your body feel good? From that point on I knew I wanted to bring Sunscoop to the world. 

    I hope you and your body feel the love and intention in every bite. Most importantly I hope you can truly enjoy the indulgence and feel great afterwards.  


    Love & Light,
    Carli

    They Are Proudly

    ☑️ Dairy-Free

    ☑️ Plant-Based

    ☑️ Vegan

    ☑️ Refined Sugar-Free

    ☑️ Gluten-Free

    ☑️ Nut-Free

    ☑️ Soy-Free

    ☑️ Allergen Friendly

    Pure Sun in A Mug Cake

    Gluten-Free & Vegan ~ Serves 1

    This is the perfect recipe for when you don’t feel like making a whole cake, cleaning a mound of dishes, or worrying about eating an entire batch of sweets. Not only is it OUT OF THIS WORLD but it’s packed with superfoods!

    Ingredients

    1/4 cup gluten free flour

    2 tablespoons coconut sugar

    1/4 teaspoon cinnamon

    1/4 teaspoon baking soda

    1 tablespoon plant-based milk

    1 tablespoon melted coconut oil

    1 scoop of your favorite Sunscoop flavor!

    Method

    1. Whisk all ingredients in a small bowl

    2. Coat a mug with a thin layer of coconut oil.

    3. Pour batter into mug.

    4. Microwave for 2 minutes.

    5. Add scoop of Sunscoop.

    6. Enjoy!

    References:

    https://sunscoop.com/

    https://www.instagram.com/p/CHOCYHmJ9BO/?hl=en

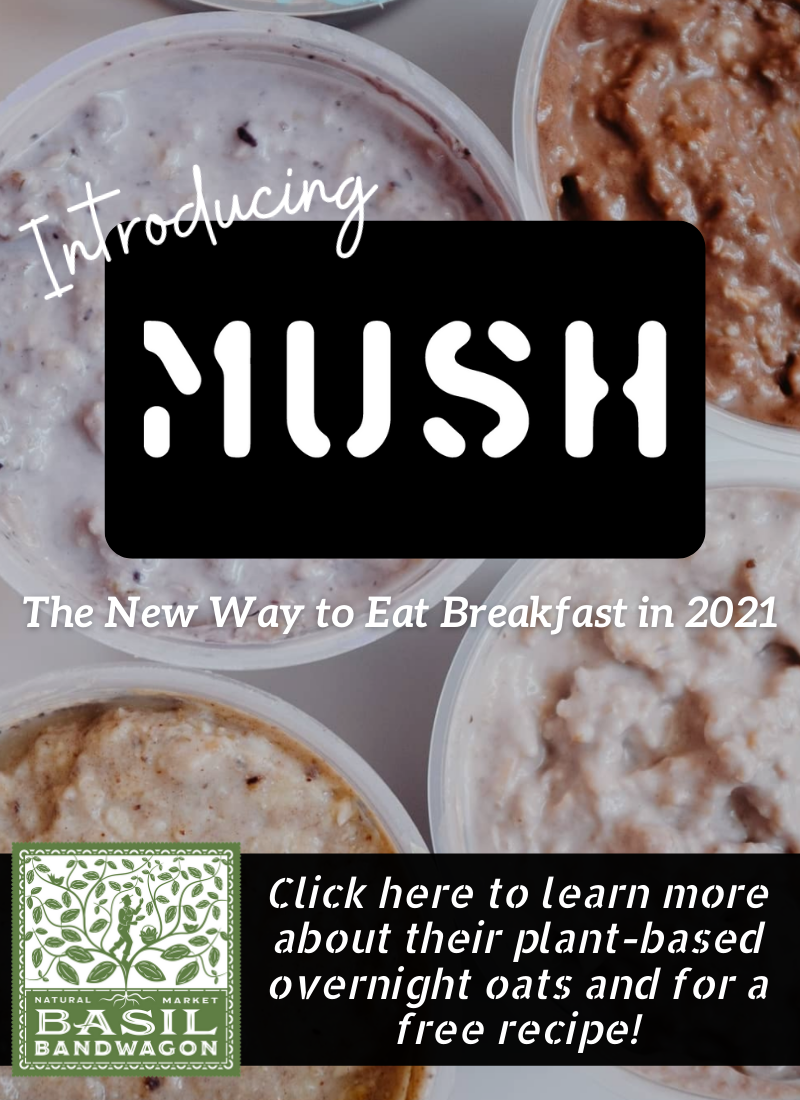
  • Introducing MUSH – The New Way to Eat Breakfast in 2021

    Introducing MUSH – The New Way to Eat Breakfast in 2021

    Cold. Creamy. Like Pudding.

    Just what you were looking for – an easy, healthy breakfast that’s perfect on-the-go. They make healthy food convenient and delicious so that you can incorporate more of it into your life. Because after all, you are what you eat.

    Why Overnight Oats?

    All grains including oats contain phytic acid, which binds to nutrients and makes them harder to absorb. Soaking oats breaks down the acid and helps increase the absorption of nutrients, like zinc and iron.

    Soaking the oats also facilitates the break down of the natural starches, a type of complex carbohydrate, found in oats. This helps to improve digestion, aid in weight loss, and increase feelings of fullness.

    Better absorption. Better digestion. BETTER YOU.

    “Mushy. In all the right ways.”

    Made with simple, whole food ingredients, each Mush Overnight Oats product contains 8 or less real ingredients. Available in these amazing flavors year-round: Apple Pie, Coffee + Coconut Cream, Dark Chocolate, Strawberry, Vanilla Bean, & Wild Blueberry. If you love these, keep your eye out for their fun seasonal flavors available for limited times!

    Did we mention how healthy their overnight oats actually are?

    No heat pasteurization. No preservatives. No fillers. No artificial flavors or colors. Gluten free. Dairy free. Non-GMO. Protein rich. High in fiber. Plant-based.

    Save $1 on 5oz. MUSH Overnight Oats during the month of January – try them all!

    Overnight Oats Smoothie

    Vegan ~ Serves 1

    Making healthy on-the-go breakfast smoothies is now even easier! Mix up your morning smoothie everyday of the week without the worry of buying so many ingredients.

    Ingredients

    1 5oz Mush tub – any flavor you like!

    1/2 cup of plant-based milk – almond milk, oat milk, hemp milk, etc.

    A handful of fresh fruit – will vary depending on the flavor of Mush you’d like to pair with

    Optional Toppings: fresh fruit, honey, maple syrup, chia seeds, etc. – the possibilities are endless!

    Method

    Combine all ingredients in a blender and blend until you’ve reached your favorite smoothie consistency. Pour into glass, add toppings if you prefer and enjoy!

    References:

    https://eatmush.com/

    https://www.instagram.com/p/CGu-Qw1D6Hg/

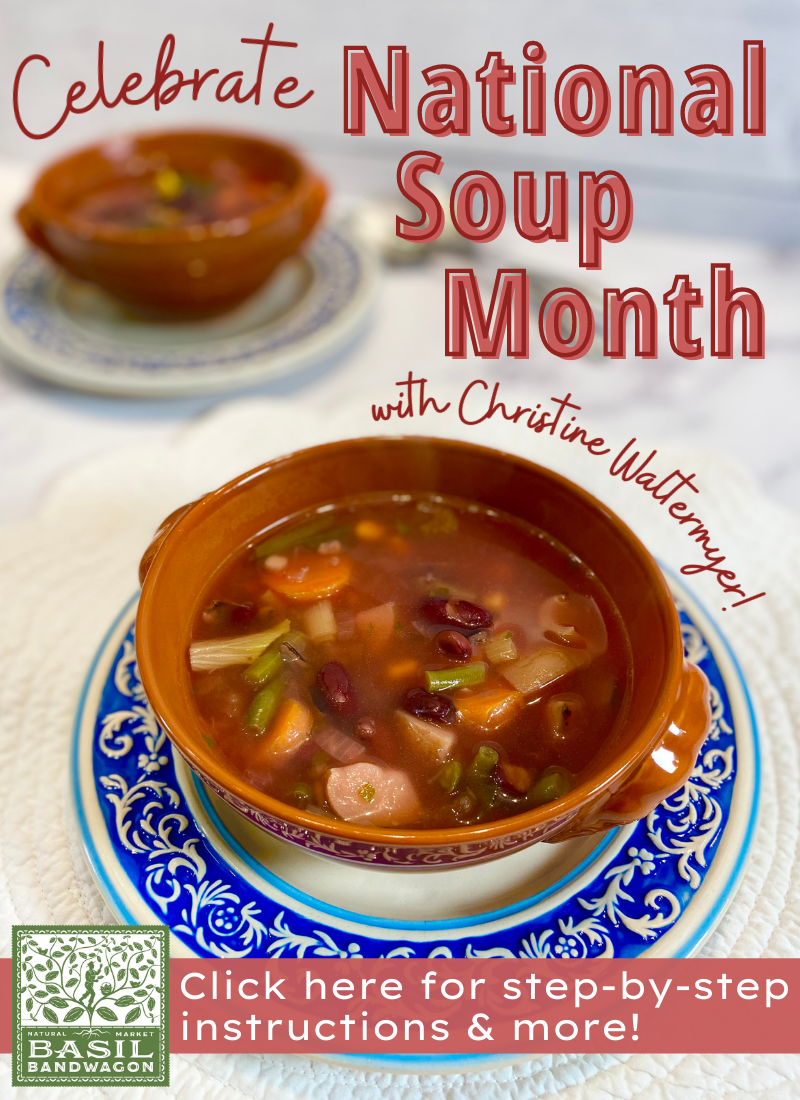
  • Celebrate National Soup Month with Christine Waltmyer

    Celebrate National Soup Month with Christine Waltmyer

    Celebrate National Soup Month

    with Christine Waltermyer

    Christine Waltermyer is a local Wellness Chef, private chef to celebrities, published cookbook author and founder of the Natural Kitchen Cooking School, which offers an online Plant-Based Cooking Program. She also loves shopping at Basil Bandwagon! Visit naturalkitchenschool.com to get your FREE copy of her cookbook, “7 Days of Deliciousness.”

    Vegetable Soup

    Serves 8-10

    Ingredients

    1 tablespoon olive oil

    ½ onion, chopped

    2 cloves minced garlic

    3 carrots, sliced

    3 – 4 ribs celery, sliced

    1 cup chopped potatoes (I used baby heirloom potatoes but you could use red-skinned potatoes)

    1 medium red beet, peeled and diced

    8 cups vegetable broth

    13 ounces cooked kidney beans

    ¼ cup wild rice, soaked in water to cover for several hours, then drained

    2 teaspoons fresh thyme leaves, or 1 teaspoon dried thyme 

    1 cup chopped green beans, trimmed and cut into 1-inch pieces

    4 scallions, chopped

    1 cup baby bok choy, chopped

    1 small zucchini, chopped

    1 small bunch parsley, stems removed and chopped

    1 cup corn kernels

    1 teaspoon sea salt, or more to taste

    Optional: Black pepper


    Method

    1. In an Instant Pot, pressure cooker or large soup pot, heat the olive oil over medium heat. Add the onion and garlic. Cook and stir for five minutes. Add the carrots, celery, beets and potatoes. Add 4 cups of the vegetable broth, along with the kidney beans, drained wild rice and thyme.

    2. Place the lid on your cooking pot of choice. 

    3. If using an Instant Pot or pressure cooker, bring up to full pressure. Once full pressure is achieved, reduce heat to cook for 10 minutes. Then turn off or remove from heat to allow pressure to drop naturally.

    4. If using a regular soup pot, bring to a boil over medium high heat. Reduce heat to cook on low, covered, for 30 minutes.

    5. Add the green beans, scallions, baby bok choy, zucchini, parsley, corn kernels, sea salt and enough vegetable broth to cover everything. If your Instant Pot or pressure cooker is too full you can cook in two batches.

    6. For Instant Pot or pressure cooker bring back up to full pressure. Reduce heat to cook on low for 5 more minutes.

    7. If using a regular soup pot, bring back to a boil over medium high heat, then reduce the heat to cook on low for 10 to 15 more minutes.

    8. Season with black pepper if desired, and additional sea salt to taste. I like to serve with a drizzle of olive oil as well. If a tart taste is desired you can add a splash of apple cider vinegar as well.

    9. Store leftover soup in a covered glass container in the refrigerator for up to 3 days, or freeze leftovers for up to a month.


    Thank you to Christine Waltermyer and the Natural Kitchen Cooking School for working with us to help promote healthy, nutritious meals and products that are affordable, full of nutrients, and simple to make at home!

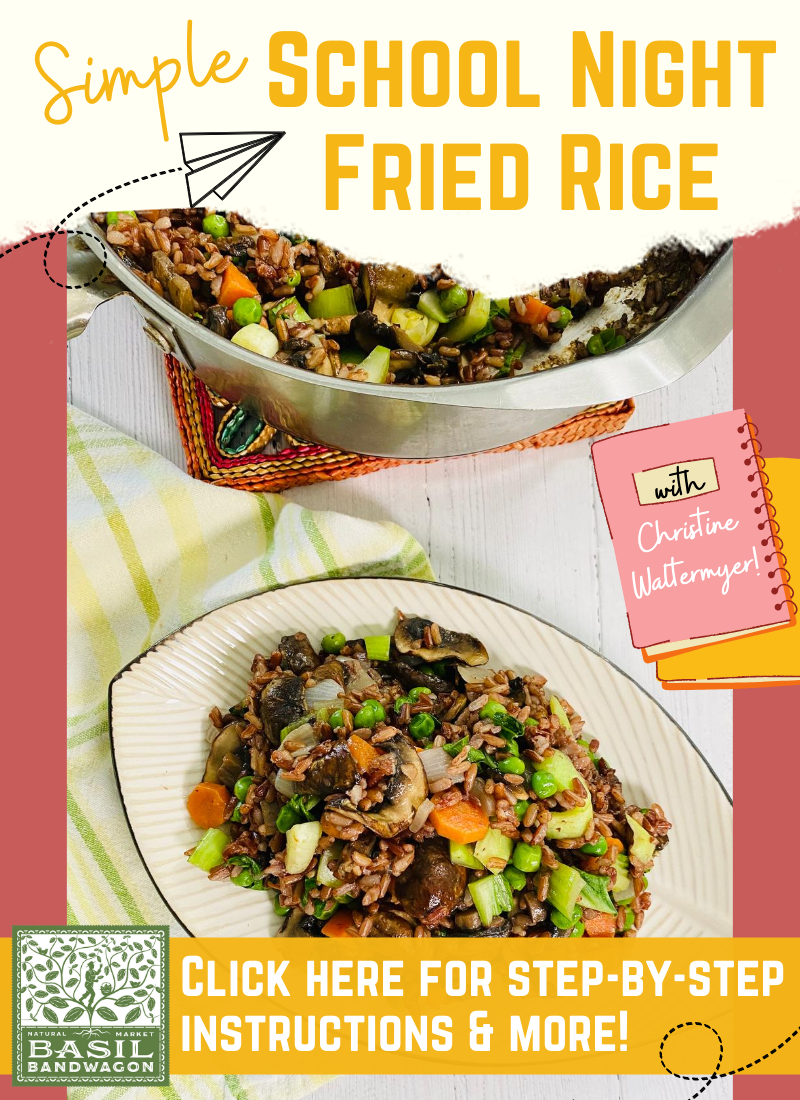
  • Simple School-Night Fried Rice

    Simple School-Night Fried Rice

    Simple School-Night Fried Rice

    with Christine Waltermyer

    Christine Waltermyer is a local Wellness Chef, private chef to celebrities, published cookbook author and founder of the Natural Kitchen Cooking School, which offers an online Plant-Based Cooking Program. She also loves shopping at Basil Bandwagon! Visit naturalkitchenschool.com to get your FREE copy of her cookbook, “7 Days of Deliciousness.”


    Simple School-Night Fried Rice

    Serves 4

    Ingredients

    2 teaspoons sesame oil

    ½ onion, chopped

    1 large carrot, diced

    8 oz mushrooms, sliced

    2 ½ cups cooked rice (I used red rice)

    1 tablespoon Coconut Aminos

    ½ cup peas

    1 baby bok choy, chopped


    Method

    1. Warm a large skillet over medium heat. Add the sesame oil and onion. Cook and stir for 1 minute. Add the carrots and mushrooms. Cook for 3 to 4 minutes, stirring occasionally.  Add the rice and the coconut aminos.  Stir and cook for 5 more minutes. You can cover the pot if you want, to help the vegetables to soften. Last, add the bok choy, and cook for one more minute.

    2. Season with extra Coconut Aminos, if desired.

    3. Enjoy!

    Note: Chopped garlic and ginger can also be added to this dish when cooking the onions.


    Thank you to Christine Waltermyer and the Natural Kitchen Cooking School for working with us to help promote healthy, nutritious meals and products that are affordable, full of nutrients, and simple to make at home!

  • How to Cook Corn on the Cob 3 Ways

    How to Cook Corn on the Cob 3 Ways

    Corn on the Cob 3 Ways

    with Christine Waltermyer

    Christine Waltermyer is a local Wellness Chef, private chef to celebrities, published cookbook author and founder of the Natural Kitchen Cooking School, which offers an online Plant-Based Cooking Program. She also loves shopping at Basil Bandwagon! Visit naturalkitchenschool.com to get your FREE copy of her cookbook, “7 Days of Deliciousness.”


    Ingredients

    Serves 4

    4 ears of fresh corn on the cob

    Optional: Vegan butter, olive oil or butter of your choice, Sea salt


    Boiled Corn on the Cob Method:

    1. Remove the husks from the corn. Use your fingers or a brush to remove the fine strands of corn silk.

    2. Bring a large pot of water to a boil, covered, over high heat. Salt the water if you want. Add the corn. Cook for 6 to 8 minutes. Use tongs to carefully remove from the water. Serve as is or with optional vegan butter, olive oil or butter of your choice. Sprinkle lightly with sea salt if you want.

    3. Enjoy!


    Steamed Corn Method:

    1. Remove the husks from the corn. Use your fingers or a brush to remove the fine strands of corn silk.

    2. Add about ½ inch of water on the bottom of a medium size pot. Place a steamer basket inside. Bring the water to a boil over medium high heat. Add the corn to the pot, on top of the steamer basket. Cover the pot and cook for 4-6 minutes. Serve as is or with optional vegan butter, olive oil or butter of your choice. Sprinkle lightly with sea salt if you want.

    3. Enjoy!


    Pressure Cooked or Instant Pot Corn Method:

    1. Remove the husks from the corn. Use your fingers or a brush to remove the fine strands of corn silk.

    2. Place ½-inch of water on the bottom of a pressure cooker or an Instant Pot. You can place a trivet on top if you want.

    3. Place the corn in the pressure cooker or Instant Pot. Cover with lid and seal it. Bring up to pressure over medium high heat. Once the pressure is high you can reduce the heat but keep it high enough to maintain pressure for 2 minutes. Turn off the heat. Transfer the pressure cooker from the heat to a trivet to cool and let the pressure reduce naturally.

    4. Once the pressure has fully released, carefully remove the lid and serve. Serve as is or with optional vegan butter, olive oil or butter of your choice. Sprinkle lightly with sea salt if you want.

    5. Enjoy!


    Thank you to Christine Waltermyer and the Natural Kitchen Cooking School for working with us to help promote healthy, nutritious meals and products that are affordable, full of nutrients, and simple to make at home!

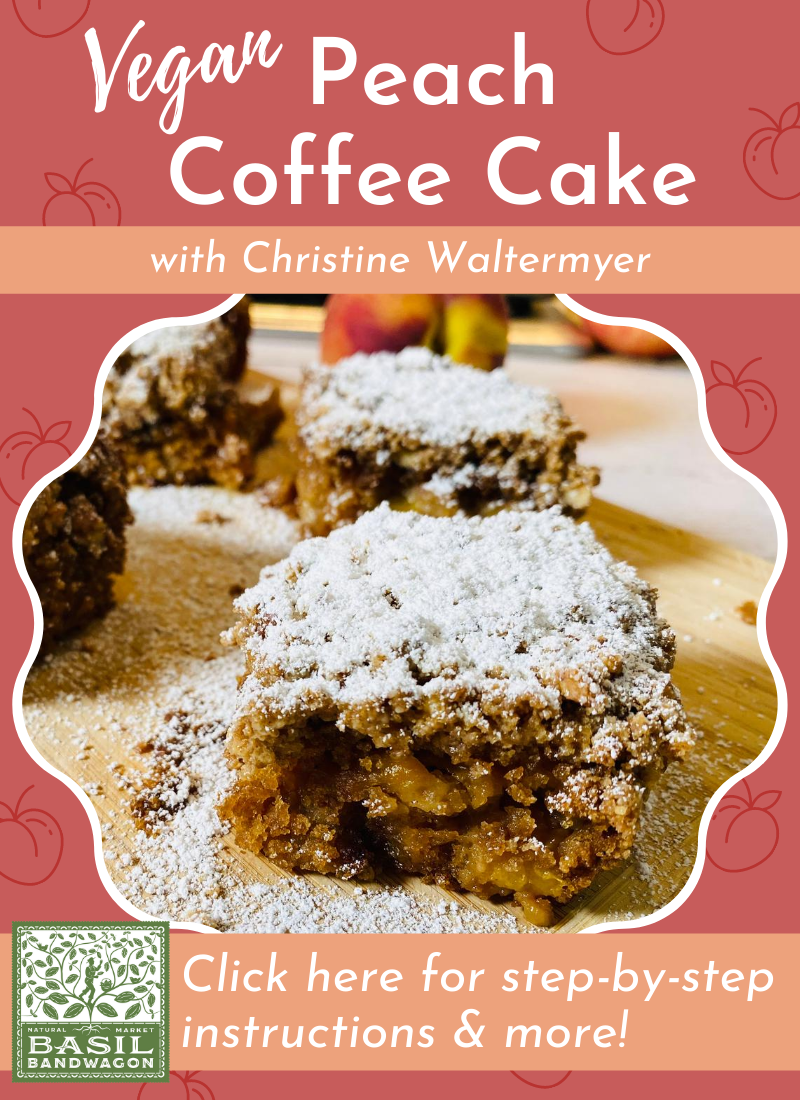
  • Vegan Peach Coffee Cake

    Vegan Peach Coffee Cake

    Vegan Peach Coffee Cake

    with Christine Waltermyer

    Christine Waltermyer is a local Wellness Chef, private chef to celebrities, published cookbook author and founder of the Natural Kitchen Cooking School, which offers an online Plant-Based Cooking Program. She also loves shopping at Basil Bandwagon! Visit naturalkitchenschool.com to get your FREE copy of her cookbook, “7 Days of Deliciousness.”


    Vegan Peach Coffee Cake

    Makes 9 squares

    Ingredients

    Cake:

    1 ¼ cup einkorn flour (or unbleached white flour or gluten free all purpose flour)

    ½ cup maple sugar

    1 teaspoon cinnamon

    1 teaspoon baking powder

    ¼ teaspoon sea salt

    Pinch of nutmeg

    1 cup almond milk

    1 teaspoon apple cider vinegar

    ⅓ cup refined coconut oil

    1 teaspoon vanilla

    1 cup diced peaches

    Topping:

    ¾ cup einkorn flour (or unbleached white flour or gluten free all purpose flour)

    ⅓ cup chopped walnuts or pecans

    ⅓ cup packed brown sugar

    ¼ teaspoon sea salt

    1 teaspoon cinnamon

    Pinch nutmeg

    ¼ cup refined coconut oil

    Powdered sugar


    Method

    1. Preheat the oven to 350 degrees F. Lightly brush or spray an 8 x 8-inch baking dish with refined coconut oil.

    2. To make the cake: In a large bowl, mix together the 1 ¼ cup of the einkorn flour, maple sugar, cinnamon, baking powder, sea salt, and nutmeg. In a small pot, place the almond milk and apple cider vinegar. Stir and let sit for a few minutes. Add the coconut oil and warm the mixture on low heat until the oil melts. Whisk to blend. Pour the almond milk mixture into the einkorn flour mixture. Whisk to combine. Stir in the vanilla. Fold in the peaches.

    3. To make the crumb topping: In a medium mixing bowl, stir together the ¾ cup of the einkorn flour, walnuts, brown sugar, sea salt, cinnamon, and nutmeg.  Add the melted coconut oil and mix until well combined and a nice crumbly texture. Use your hands if needed. Set aside.

    4. Pour the cake batter into the prepared pan and spread evenly.

    5. Gently sprinkle the crumb topping evenly over the cake batter.  Bake for 45 to 50 minutes, or until the center of the cake springs back to the touch.  Let the cake cool, then dust with the powdered sugar by sifting it through a sieve over the cake. Cut into squares.

    6. Enjoy!


    Thank you to Christine Waltermyer and the Natural Kitchen Cooking School for working with us to help promote healthy, nutritious meals and products that are affordable, full of nutrients, and simple to make at home!

  • Easy Homemade Face Mask for Glowing Skin

    Easy Homemade Face Mask for Glowing Skin

    Easy Homemade Face Mask for Glowing Skin

    with Christine Waltermyer

    Christine Waltermyer is a local Wellness Chef, private chef to celebrities, published cookbook author and founder of the Natural Kitchen Cooking School, which offers an online Plant-Based Cooking Program. She also loves shopping at Basil Bandwagon! Visit naturalkitchenschool.com to get your FREE copy of her cookbook, “7 Days of Deliciousness.”


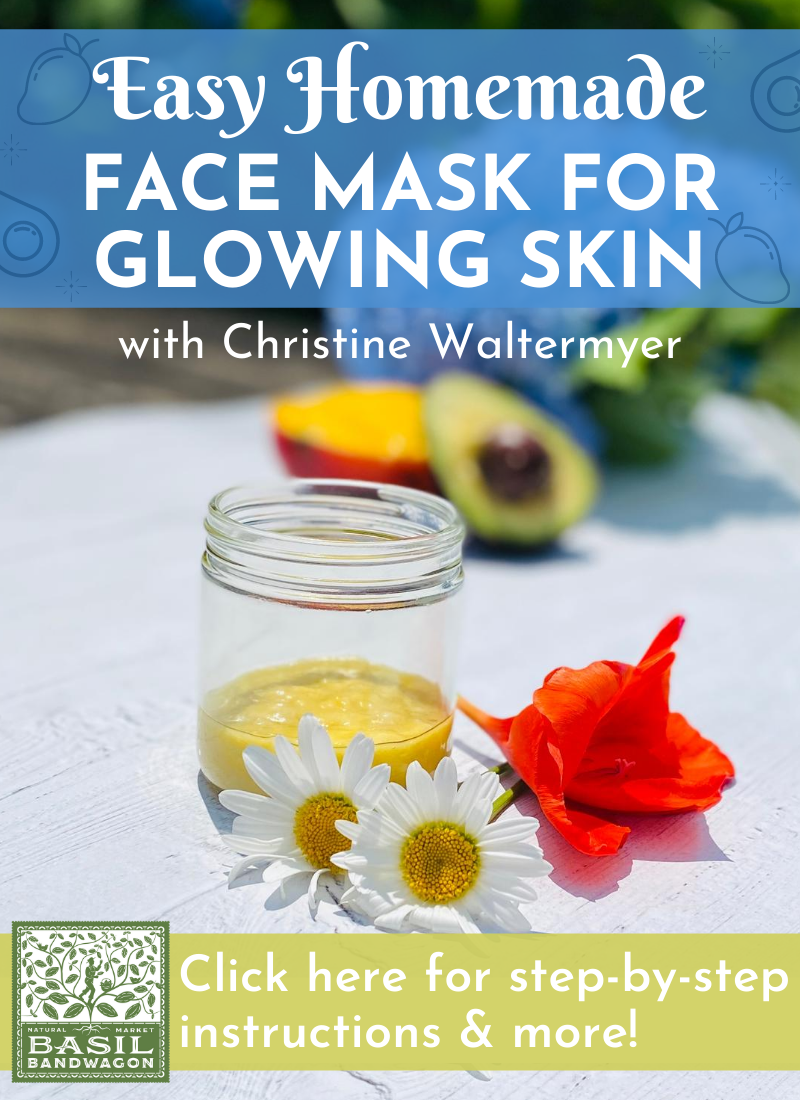
    Mango Avocado Face Mask

    Makes enough for 4 applications

    Ingredients

    2 teaspoons fresh aloe vera pulp or store-bought aloe vera gel intended for topical use

    2 teaspoons unrefined coconut oil

    1 tablespoon fresh avocado

    1 tablespoon fresh mango

    Optional: 2 drops Roman Chamomile Essential Oil (I used Wyndmere brand)


    Method

    1. Place all ingredients in a small bowl and mash everything together into as smooth consistency as possible. Apply 1 tablespoon all over your face and leave for 15 minutes. Rinse off with cool water.


    Thank you to Christine Waltermyer and the Natural Kitchen Cooking School for working with us to help promote healthy, nutritious meals and products that are affordable, full of nutrients, and simple to make at home!

  • Comfort Food Classics

    Comfort Food Classics

    Comfort Food Classics

    with Christine Waltermyer

    Christine Waltermyer is a local Wellness Chef, private chef to celebrities, published cookbook author and founder of the Natural Kitchen Cooking School, which offers an online Plant-Based Cooking Program. She also loves shopping at Basil Bandwagon! Visit naturalkitchenschool.com to get your FREE copy of her cookbook, “7 Days of Deliciousness.”


    Vegan Cinnamon Rolls

    Makes 6 to 8

    Ingredients

    1 cup almond milk + 1 tablespoon almond milk reserved for glaze (I used the Three Trees brand)

    1/4 cup vegan butter + 1/3 cup vegan butter reserved for filling (I used Miyoko’s brand) 

    2 Tablespoons organic raw sugar

    1/2 packet Red Star active dry yeast

    1/2 teaspoon sea salt

    2 ¼ cups unbleached flour

    1 Tablespoon ground cinnamon

    1/2 cup powdered sugar

    1/3 cup brown sugar

    1/2 teaspoon vanilla extract

    You will need: An 8-inch round cake pan, lightly oiled with rice bran oil (I used a stainless steel one)

    Method

    1. In a small saucepan, warm the almond milk, 1/4 cup butter and 2 tablespoons of sugar until the butter has melted. The mixture should be warm like bath water, not too hot, around 100 degrees F. Stir with a wooden spoon and add the active dry yeast. Let sit for 10 minutes until foamy.

    2. In a mixing bowl, place the powdered sugar, vanilla, and one tablespoon of almond milk. Stir together until you reach a glazed consistency.

    3. In a large mixing bowl, place the flour and sea salt. Add the yeast mixture. Mix thoroughly until combined. Cover the bowl with a damp towel or plastic wrap. Set aside in a warm place or at room temperature for 1 hour.

    4. Add the remaining 1/4 cup of flour to your dough and mix until well combined. On a floured board, form the dough into a big rectangle.

    5. Melt the remaining 1/3 cup vegan butter. Evenly brush the rectangle of dough with the melted butter. Sprinkle the brown sugar in an even layer over the dough. Sprinkle evenly with cinnamon.

    6. Roll the coated dough into a log and cut into 7 or 8 slices. Place one cinnamon roll in the center of the cake pan. Add the other slices around it. Cover with a damp towel or plastic wrap and let rise for another 30 minutes.

    7. Bake at 350 degrees F for 30 minutes. Remove the rolls from the oven and drizzle with the glaze. Serve warm and enjoy!


    Homemade Pizza

    Makes 2 pizzas

    Ingredients

    1 1/4 cup warm water 

    2 Tablespoons raw sugar

    1 ½ teaspoons active dry yeast

    1 teaspoon sea salt

    2 Tablespoons rice bran oil

    3 cups unbleached all purpose flour (plus extra for rolling out the pizza dough)

    1 jar pitted black olives

    1 can of pizza sauce (or homemade carrot sauce)

    Fresh basil leaves

    Shredded vegan Mozzarella

    Method

    1. In a small glass measuring cup, combine the warm water and sugar. Sprinkle the active dry yeast over the surface of the water. Let sit for a few minutes (up to 10  minutes) until foamy and activated. If you want to gently stir it, use a wooden spoon.

    2. In a large mixing bowl, combine the flour and sea salt. 

    3. In a food processor, add the yeast-sugar water mixture, rice bran oil and flour. Process until all ingredients are combined. The dough will be sticky. Transfer to a lightly oiled bowl and cover with plastic wrap. Let sit at room temperature (in a warm place) for 1 hour.

    4. Once the dough has doubled in size, place it on a lightly floured surface. Sprinkle with some flour and work the flour into the dough with your hands. Add just enough extra flour to achieve a smooth dough.  

    5. Cut the dough in half. Set one dough ball aside and place the other on a piece of parchment paper. Roll the dough flat, stretching gently as needed. Flatten into a circle. Keep the edges a little thicker.

    6. Preheat the oven to 465 degrees F. Place a stainless baking sheet or pizza pan on the bottom shelf of the oven to warm it for a few minutes. Remove from the oven and quickly place the parchment paper with pizza dough on top of the warmed baking sheet.

    7. Top the dough with an even thin layer of pizza sauce, shredded mozzarella cheese and black olives. You can add whatever toppings you like. Bake for about 12 minutes, or until desired doneness.

    8. Serve topped with some chopped fresh basil leaves. Enjoy!


    Thank you to Christine Waltermyer and the Natural Kitchen Cooking School for working with us to help promote healthy, nutritious meals and products that are affordable, full of nutrients, and simple to make at home!

  • Plant-Based Taco Tuesday with Christine Waltermyer!

    Plant-Based Taco Tuesday with Christine Waltermyer!

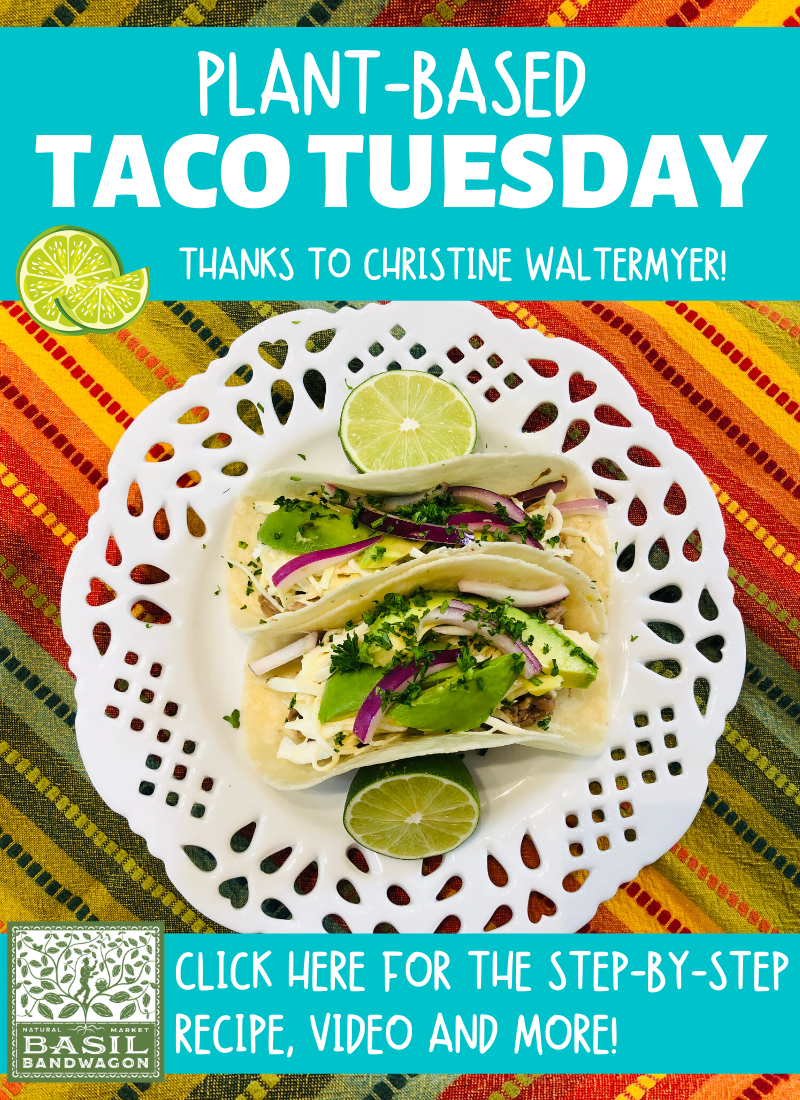
    Plant-Based Taco Tuesday

    with Christine Waltermyer

    Christine Waltermyer is a local Wellness Chef, private chef to celebrities, published cookbook author and founder of the Natural Kitchen Cooking School, which offers an online Plant-Based Cooking Program. She also loves shopping at Basil Bandwagon! Visit naturalkitchenschool.com to get your FREE copy of her cookbook, “7 Days of Deliciousness.”


    https://www.youtube.com/watch?v=v1Itki8wDu8

    Jackfruit Tacos

    Serves 4

    Ingredients

    1/2 red onion

    1 avocado

    1 package Siete brand Almond Flour Grain-free Tortillas

    Olive oil

    1 package Jackfruit Company Pulled Pork (vegan & gluten free)

    Juice of 1/2 lime 

    2 Tablespoons maple syrup

    1 teaspoon Dijon mustard 

    2 teaspoons of your favorite mayonnaise

    1/4 cup cilantro or parsley, chopped

    3 cups green cabbage, shredded


    Method

    1. In a small bowl place a couple tablespoons of the onion. Add 1 tablespoon of the lime juice and a pinch of salt. Rub with your fingers and set aside.

    2. Make the cabbage slaw: In a medium size bowl, place the shredded green cabbage, mustard, maple syrup, remaining lime juice and mayo. Mix together and set aside.

    3. In a heated skillet, over medium heat, add a teaspoon or two of the olive oil and the remaining onion. Cook and stir for 5 minutes. 

    4. Add the Jackfruit pulled pork. Cook and stir until fully heated and a little browned.

    5. Heat the tortillas: Warm a cast iron skillet over low heat. Once the skillet is hot you can add a tortilla, flipping frequently to prevent burning. Note: Almond flour tortillas burn more easily than traditional tortillas.  Once the tortilla has been warmed evenly on both sides, place it on a plate and cover with a towel. Continue until you have warmed all of the tortillas.

    6. Assemble the tacos: Place a tortilla on a plate. Add some of the Jackfruit pulled pork, a little cabbage slaw, a few slices of avocado, a pinch of marinated red onions and cilantro or parsley. Repeat with remaining ingredients. Serve topped with lime wedges. Enjoy!


    Thank you to Christine Waltermyer and the Natural Kitchen Cooking School for working with us to help promote healthy, nutritious meals and products that are affordable, full of nutrients, and simple to make at home!