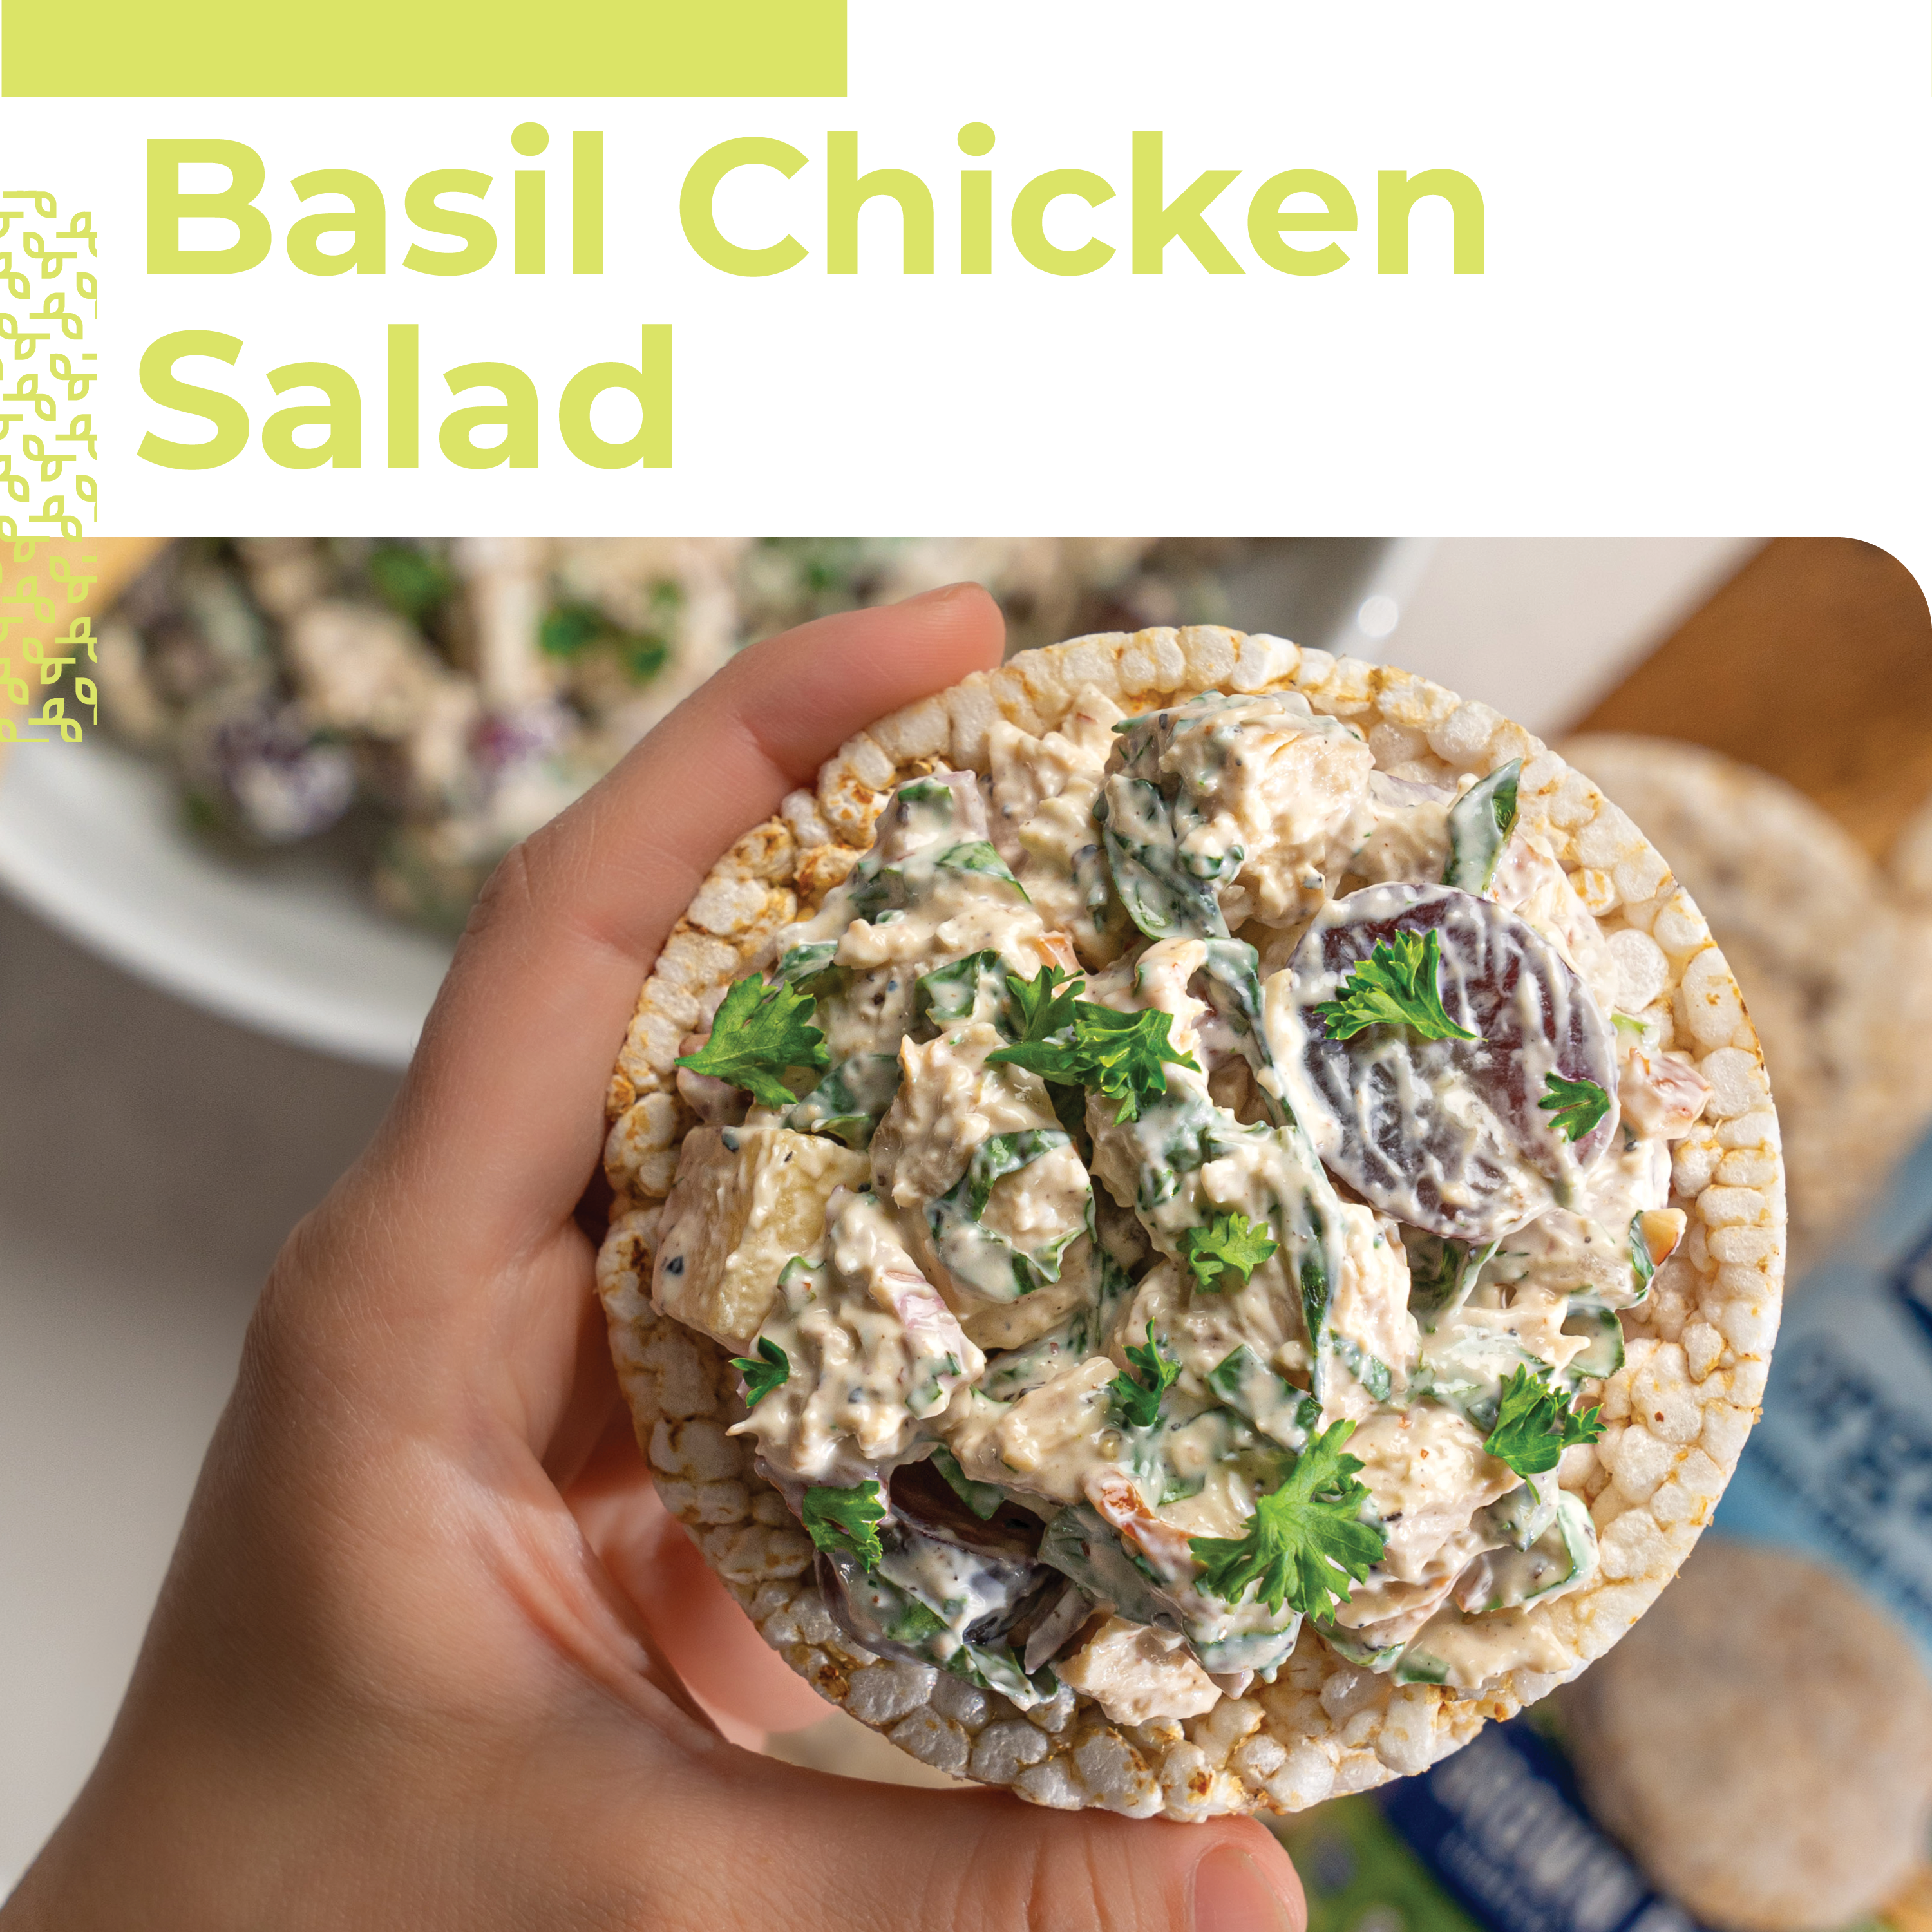
Lightly Salted Rice Cakes with Basil Chicken Salad
For a light lunch or satisfying snack, try topping Lightly Salted Rice Cakes with Basil Chicken Salad! Our recipe calls for fresh herbs and Greek yogurt to create a creamy texture and tangy flavor that’s perfectly balanced by organic brown rice. Plus, this pairing is packed with protein and plenty of whole grains to fill you up without weighing you down. Isn’t that delicious? 🌾😋
Season chicken breasts with sea salt and sauté in neutral oil on medium-high, turning occasionally. Cook until internal temperature reaches 165°F. Let rest for 10 minutes, dice, and refrigerate in a large bowl until cooled.
Add grapes, apples, red onion, and almonds to chilled chicken. Stir to fully incorporate. Add greek yogurt, mayo, basil, honey, dill, sea salt, and black pepper. Fold to fully incorporate.
Spread on Lundberg Organic Lightly Salted Rice Cakes. Top with basil, parsley, and black pepper.
Christine Waltermyer is a local and renowned Wellness Chef, private chef to celebrities, published cookbook author and founder of the Natural Kitchen Cooking School, which offers an online Plant-Based Cooking Program. She also loves shopping at Basil Bandwagon! Visit naturalkitchenschool.com to subscribe to her email newsletter for new recipes, tips, and FREE access to the Power of Veggies mini-course!
Tuesday, 10/26/21 is National Pumpkin Day! 🎃 What’s your favorite way to incorporate pumpkins this fall? Whether it’s as a decoration, gutted out for the seeds, or used in a recipe, the possibilities are endless. Christine Waltermyer and the Natural Kitchen Cooking School have picked the perfect recipe… that’s gluten-free AND egg-free! Shop all of the needed ingredients for this Paleo Pumpkin Pudding in all of our locations today!
Prep and cook the pumpkin if using: Cut the pumpkin in half. Use a large spoon to remove the seeds. Cut into big chunks. Place the chunks into a medium size saucepan. Add enough water to cover the bottom of the pan by one inch. Cover and bring to a boil over medium high heat. Reduce to simmer on medium low, covered, for 25 minutes, or until easily pierced with a fork. Transfer to a blender and blend until smooth.
In a small bowl, mix together the agar powder and warm water.
In a blender or food processor, combine ¾ cup of the pumpkin purée, coconut milk, maple syrup, almond butter, pumpkin pie spice, sea salt and vanilla bean powder. Blend for a minute or two. Transfer to a medium saucepan.
Over medium-high heat, bring the pumpkin mixture to a gentle boil, stirring occasionally. Stir in the agar-water mixture. Whisk well. Reduce the heat to low, cover, and cook for 20 minutes, whisking occasionally.
Meanwhile, make the coconut whipped cream: Place the heavy coconut cream, powdered monkfruit sweetener and vanilla bean powder in a blender. Blend until smooth. Drain any excess liquid that separates from the cream. Set aside. I don’t recommend chilling as it will get too hard.
Remove the pumpkin custard mixture from the heat. Transfer to 3 or 4 small pudding dishes. Cool to room temperature, then chill for 1 hour before serving. Serve the pumpkin custard with a dollop of coconut whipped cream and a pinch of nutmeg.
Enjoy!
Notes
Leftover pumpkin custard will keep in the refrigerator for up to 4 days.
Thank you to Christine Waltermyer and the Natural Kitchen Cooking School for working with us to help promote healthy, nutritious meals and products that are affordable, full of nutrients, and simple to make at home!
Christine Waltermyer is a local and renowned Wellness Chef, private chef to celebrities, published cookbook author and founder of the Natural Kitchen Cooking School, which offers an online Plant-Based Cooking Program. She also loves shopping at Basil Bandwagon! Visit naturalkitchenschool.com to subscribe to her email newsletter for new recipes, tips, and FREE access to the Power of Veggies mini-course!
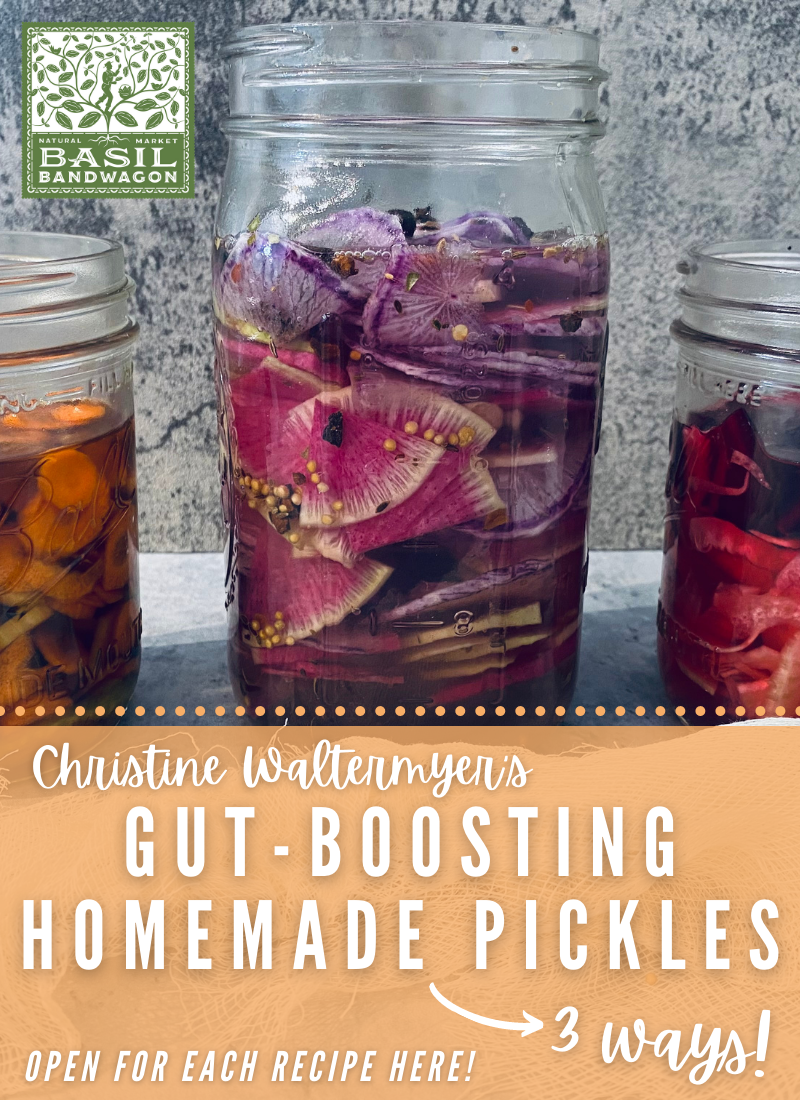
Did you know that gut health is essential for a strong immune system? Some of the best gut health boosting foods are those that are fermented and pickled! There are many health benefits of pickling, but the most talked about benefit is the fact that they are probiotic – and you can pickle so many different vegetables to change up your flavor profiles. Check out (& print!) these three simple homemade pickle recipes thanks to Christine Waltermyer!
Wide-mouth 16 oz glass canning jar with a lid (Make sure it’s really clean. You can even boil it for a minute to sterilize it.)
8 oz glass canning jar that fits inside the 16-ounce glass jar
Cheesecloth
Small pot
Ingredients
½cupwater
2 ½tablespoonstamari
2tablespoonsbrown rice vinegar
½cupbroccoli stems (peeled)sliced into thin rounds
½cupcarrot slices (thin)
½cupthinly sliced celery
1tablespoonmaple syrup
Instructions
Place the water in a small pot. Bring to a boil briefly, then shut off the heat and remove from the stove. Set aside to cool.
Once the water is cool, place it in the glass canning har. To make the pickling brine, add the tamari and brown rice vinegar. Place the lid on the har and shake well. Pour the pickling brine into a bowl.
Layer the vegetables in the glass jar. Pour the pickling brine over them. Place the smaller jar on top of the vegetables, inside the jar. The weight of the har will press the vegetables under the surface of the brine.
Cover the jar with a square of cheesecloth and secure it in place with a piece of kitchen twine or a rubber band.
Let the jar sit at room temperature for 24 hours. The room should be between 65 to 80 degrees F.
After 24 hours have passed, add the maple syrup. Place a lid on the jar and gently shake to mix the maple syrup into the brine. Refrigerate the pickles at this point. Enjoy a teaspoon or so at a time with a meal. Pickles will keep up to 5 days in the refrigerator.
16 oz glass canning jar with a lid (Make sure it’s really clean. You can even boil it for a minute to sterilize it.)
8 oz glass canning jar
Cheesecloth
Small pot
Ingredients
¾cupwater
¾cupfennelthinly sliced
¼beetthinly sliced
¼cupume ("umeboshi") vinegar
Instructions
Place the water in a small pot. Bring to a boil briefly, then shut off the heat and remove from the stove. Set aside to cool.
Once the water is cool, place it in the glass canning jar. To make the pickling brine, add the ume vinegar. Place the lid on the jar and shake well. Pour the pickling brine into a bowl.
Layer the vegetables in the glass jar. Pour the pickling brine over them. Place the smaller jar on top of the vegetables, inside the har. The weight of the har will press the vegetables under the surface of the brine. If the liquid is too high in the har, you can remove it as long as all of the vegetables are submerged under the brine liquid.
Cover the har with a square of cheesecloth and secure it in place with a piece of kitchen twine or a rubber band.
Let the jar sit at room temperature for 24 hours. The room should be between 65 to 80 degrees F.
After 24 hours have passed, place a lid on the jar. Refrigerate the pickles at this point. Enjoy a teaspoon or so at a time with a meal. If you find the pickles too strong tasting, rinse a small amount before serving them. Pickles will keep up to 10 days in the refrigerator.
32-ounce glass canning jar with a lid (Make sure it’s really clean. You can even boil it for a minute to sterilize it.)
Small pot
Ingredients
2cupswater
2cupsthinly sliced radishes (I used purple daikon radish and watermelon radish but red radish works too)
1 ½tablespoonssea salt
1teaspoonpickling spiceOPTIONAL – In the video I used 1 tablespoon but it’s a little strong tasting so I recommend using less for most people’s taste.
Instructions
Place the water in a small pot. Bring to a boil briefly, then shut off the heat and remove from the stove. Set aside to cool.
Once the water is cool, place it in the glass canning jar. To make the pickling brine, add the sea salt and pickling spice. Place the lid on the jar and shake well. Pour the pickling brine into a bowl.
Layer the vegetables in the glass jar. Pour the pickling brine over them. Make sure that all of the vegetables are submerged under the brine liquid.
Cover the jar with the lid.
Let the jar sit at room temperature for 3 days. The room should be between 65 to 80 degrees F.IMPORTANT: Unscrew the lid of the jar once a day to release some of the air that naturally builds up inside. At that time make sure the veggies are all submerged and if not, gently push them down under the liquid.
Taste after 3 days and if you want to let it ferment longer it should become more sour in another day or two. These pickles are salty so I recommend rinsing the pickles before serving. If you want to balance the flavor with some sweetness just add a tablespoon or two of your favorite sweetener and it will make them a little more mild tasting. Pickles will keep for 2 weeks in the refrigerator.
Thank you to Christine Waltermyer and the Natural Kitchen Cooking School for working with us to help promote healthy, nutritious meals and products that are affordable, full of nutrients, and simple to make at home!