Blog

  • Happy National Chocolate Chip Day with Christine Waltermyer

    Happy National Chocolate Chip Day with Christine Waltermyer

    Happy National Chocolate Chip Day

    with Christine Waltermyer

    Christine Waltermyer is a local and renowned Wellness Chef, private chef to celebrities, published cookbook author and founder of the Natural Kitchen Cooking School, which offers an online Plant-Based Cooking Program. She also loves shopping at Basil Bandwagon! Visit naturalkitchenschool.com to subscribe to her email newsletter for new recipes, tips, and FREE access to the Power of Veggies mini-course!


    Frozen Chocolate-Covered Bananas

    Course Appetizer, Dessert, Snack
    Keyword appetizer, Bananas, Chocolate, Chocolate chips, dessert, Kid snacks, Kids, snack
    Servings 8

    Equipment

    • 8 popsicle sticks (wooden or plastic)

    Ingredients

    • 4 Ripe bananas peeled
    • 1 cup (8 oz.) chocolate chips or carob chips
    • 2 tablespoons coconut oil

    Toppings of your choice, such as

    • Shredded coconut
    • Flaked sea salt
    • Naturally-colored sprinkles
    • Freeze-dried raspberries
    • Dried apple chips ground up
    • Roasted nuts (pecans or pistachios)

    Instructions

    • Cut the bananas in half lengthwise. Place each banana half (wider end) on a popsicle stick. Place the banana halves on a parchment-lined plate or container. Freeze for a minimum of 2 hours.
    • Arrange your toppings in little bowls. Melt the chocolate chips in a double boiler or a stainless steel bowl placed on top of a saucepan filled with simmering hot water on medium heat. Add the coconut oil. Whisk occasionally until melted.
    • Use a silicone brush to brush the melted chocolate onto the frozen bananas. While the chocolate is still soft, sprinkle with any toppings of your choice. Work quickly as the chocolate freezes quickly. Place on parchment or wax paper to set. Refreeze the bananas, storing in an air-tight container.
    • Enjoy!

    Notes

    Note: Instead of putting the bananas on sticks, you can just slice them before coating with melted chocolate and toppings.

    Vegan Cookie Dough Truffles

    Course Dessert, Snack
    Keyword dessert, kid friendly, Kid snacks, vegan
    Servings 8

    Ingredients

    • 1 cup gluten-free oat flour
    • 2 tablespoons maple syrup
    • 1 tablespoon coconut oil softened
    • 1 tablespoon almond butter
    • 1 teaspoon pure vanilla extract
    • 1 pinch sea salt
    • 8 oz. chocolate chips or carob chips divided
    • 2 tablespoons chocolate chips or carob chips divided
    • flaked sea salt optional

    Instructions

    • In a bowl, mix together the oat flour, maple syrup, coconut oil, almond butter, vanilla extract and sea salt. Stir well, then add 2 tablespoons of the carob chips. Roll into 8 bite-size little balls. Feel free to double the recipe if you want a larger batch. Refrigerate the cookie dough balls for about 12 minutes.
    • Using a double boiler or a stainless steel bowl placed over a saucepan of boiling water, melt the chocolate chips or carob chips. One at a time, drop the chilled cookie dough balls into the melted chocolate, turning it to completely cover it. Carefully place on a piece of parchment paper. Repeat with the remaining cookie dough balls. Feel free to sprinkle with flaked sea salt before they cool and harden. You can also use a spoon to drizzle a little extra melted chocolate on top. Chill the cookie dough balls again before serving.
    • Enjoy!

    Thank you to Christine Waltermyer and the Natural Kitchen Cooking School for working with us to help promote healthy, nutritious meals and products that are affordable, full of nutrients, and simple to make at home!
  • Cinco de Mayo with Christine Waltermyer

    Cinco de Mayo with Christine Waltermyer

    Cinco de Mayo

    with Christine Waltermyer

    Christine Waltermyer is a local and renowned Wellness Chef, private chef to celebrities, published cookbook author and founder of the Natural Kitchen Cooking School, which offers an online Plant-Based Cooking Program. She also loves shopping at Basil Bandwagon! Visit naturalkitchenschool.com to subscribe to her email newsletter for new recipes, tips, and FREE access to the Power of Veggies mini-course!


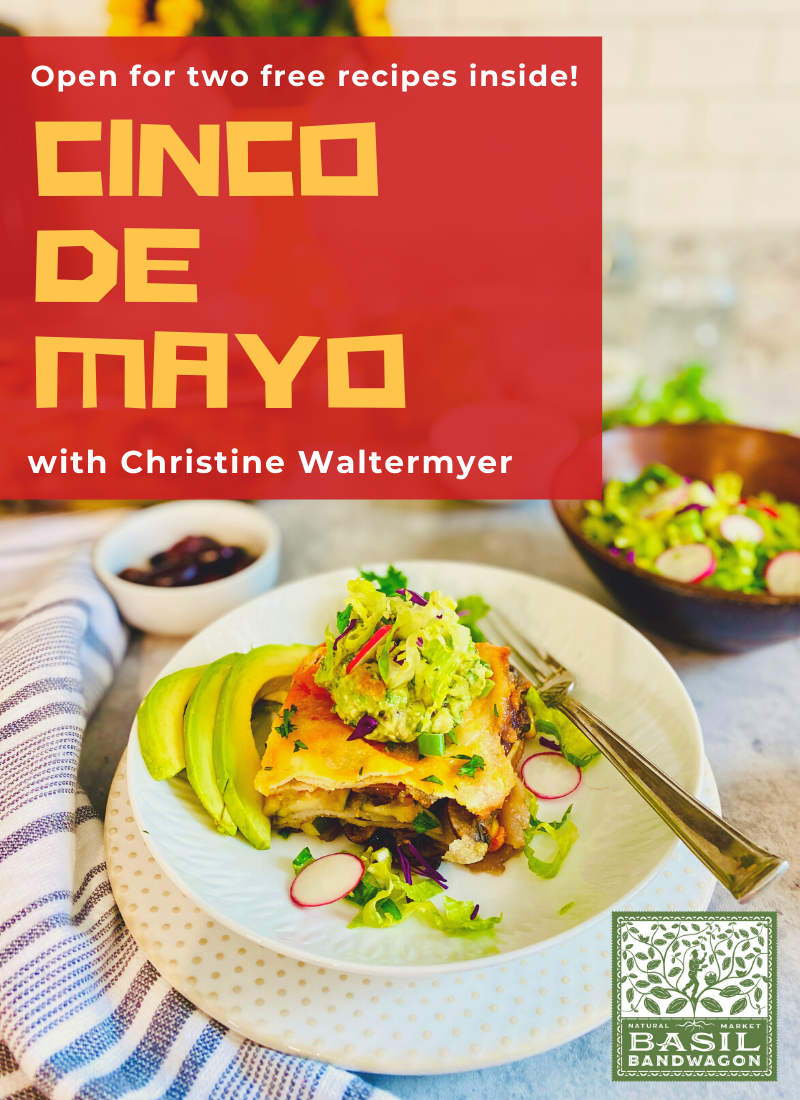
    Happy Cinco de Mayo! Looking for some healthy plant-based alternatives for your favorite traditional holiday recipes? Check out two of our Cinco de Mayo favorites from Christine Waltermyer and The Natural Kitchen Cooking School below!

    Fruit Salsa with Cinnamon Pita Chips

    Course Appetizer, Dessert, Snack
    Keyword appetizer, chips and dip, cinco de mayo, dessert, fruit salsa, pita chips, salsa, snack, summer
    Servings 4

    Ingredients

    • 16 oz ripe strawberries diced
    • ½ golden delicious apple diced
    • ½ granny smith apple diced
    • ½ any red variety red-skinned apple diced
    • 1 kiwi fruit peeled and diced
    • 8 oz red raspberries
    • 2 tablespoons pure maple syrup
    • pinch sea salt
    • ½ teaspoon pure vanilla extract
    • 2 tablespoons all-fruit strawberry jam
    • juice of ½ a lime
    • juice of a mandarin orange (or a few tablespoons fresh orange juice)

    Pita Chips

    • 4 whole grain pita pockets
    • avocado oil (spray or oil)
    • 4 teaspoons cinnamon
    • 4 tablespoons raw cane sugar

    Instructions

    • Preheat the oven to 350 degrees F.
    • In a large bowl, place all of the fruit. Add the maple syrup, sea salt, vanilla, jam, lime juice and orange juice. Stir gently.
    • Place the whole pita pockets on a baking sheet. Lightly spray or brush each one with a little avocado oil. Sprinkle each one with a tablespoon of raw cane sugar and a teaspoon of cinnamon. Cut each pita pocket into 4 pieces. Bake the pita chips in the preheated 350 degrees F. oven for 8 to 10 minutes. Cool for at least 15 minutes before serving them with the salsa.
    • Enjoy!

    Vegan Enchilada Casserole

    Course Main Course
    Keyword casserole, cinco de mayo, enchilada, entree, vegan
    Servings 6

    Ingredients

    Carrot Sauce

    • 3 large carrots cut into big chunks
    • ¼ large red onion chopped (½ cup)
    • 1 teaspoon chopped red beet
    • water
    • sea salt
    • lime (½ lime, juiced) optional

    Casserole

    • 2 cloves garlic minced
    • 1 yellow onion diced
    • 1 medium zucchini cut into half moons
    • 1 cup black kalamata olives chopped
    • 16 oz crimini or button mushrooms de-stemmed and sliced
    • 2 teaspoons olive oil
    • 1 teaspoon ground cumin
    • ½ cup frozen corn kernels
    • chili powder or crushed red pepper optional
    • 26 oz cooked kidney beans
    • ½ cup vegan shredded cheese or cheese of your choice, for the top (plus extra if you want to add some in the layers)
    • 1 8-count pack cassava flour tortillas or other tortillas

    Instructions

    • Lightly oil a 9 x 13 glass casserole dish.
    • Make the sauce: In a medium saucepan, place the carrots, red onion and red beet. Add just enough water to almost cover the vegetables. Bring to a boil over medium high heat. Cover and reduce the heat to simmer on low for 20 minutes, or until the vegetables are fork-tender.
    • Once the vegetables are soft, place the cooked carrots, red onion and any remaining cooking liquid in a small blender. Add ½ teaspoon of the sea salt. You can also add a squeeze of fresh lime juice.
    • Preheat the oven to 400 degrees F.
    • In a large frypan, heat the olive oil over medium heat for a minute. Add the onion and garlic. Add a sprinkle of the sea salt to help the onions soften. Cook and stir for a few minutes. Add the mushrooms. Add another generous pinch or two of sea salt. Cover and cook for a few more minutes, or until the mushrooms soften. Add the zucchini, a little more salt, the corn kernels and the black olives. If you want to add spicy ingredients like chili powder or crushed red pepper, you can add that now.
    • In the prepared casserole, place about ½ cup of the carrot sauce on the bottom. Spread it around. Add a layer of tortillas, then top with ½ of the vegetables and ½ of the kidney beans. Feel free to add a little vegan cheese in the layers. Top with ½ cup of the sauce. Repeat the layers with another layer of tortillas, then the remaining beans and veggies, another ½ cup sauce, and another layer of tortillas. Spread with any remaining sauce.
    • Cover with foil. Bake for 15 minutes. Uncover the casserole and bake for another 8 minutes. Top with cheese and bake for another minute. Let the casserole cool for 5 minutes before slicing into squares. Serve with a side salad and guacamole.
    • Enjoy!

    Notes

    Note: If you want more sauce in this casserole, feel free to double the amount of sauce ingredients.

    Thank you to Christine Waltermyer and the Natural Kitchen Cooking School for working with us to help promote healthy, nutritious meals and products that are affordable, full of nutrients, and simple to make at home!

  • “Spring” into a Better Skincare Routine with evanhealy

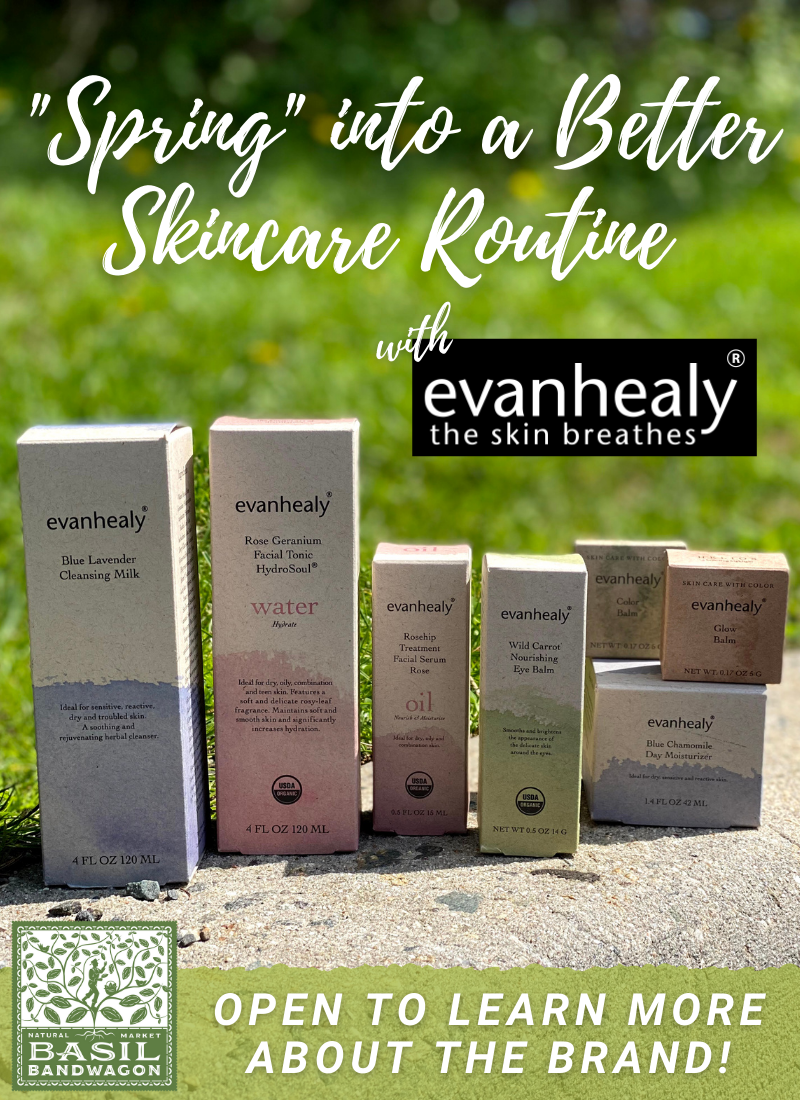
    “Spring” into a Better Skincare Routine with evanhealy

    Meet evanhealy

    evanhealy is a holistic skin care line created and formulated to work with the rhythms and physiology of the body, and to support long-term skin health and radiance.

    Holistic skin + body + cosmetics that go beyond organic

    Whole plant oils, waters and butters, as well as earthen clays, are our tools and allies. They source them directly from small family farms, women’s co-operatives and co-operative villages around the world.

    Inspired by ancient beauty practices, nature and its cycles, ayurveda, homeopathy and traditional western herbalism, their approach is a fusion of modalities centered around the goal of realigning skin with its highest potential and awakening its innate resilient, adaptable nature.

    The act of engaging in truly holistic beauty is an intimate one and through it we are working to transform, evolve, and reshape the modern perception of beauty, as well as our individual relationships with our skin and ourselves.

    Daily Spring Skin Ritual

    Cleanse

    • Begin by moistening your skin with three to four splashes of warm water.
    • Mix one pump of cleanser with a couple dribbles of warm water to dilute. Blend in your palms and then massage all over the skin, working in upward circular motions. 
    • Rinse with cool water and pat dry.

    Hydrate & Nourish

    • After cleansing, saturate your face with Rose Geranium HydroSoul.
    • In the palm of your hand, combine one to three pumps of Neem Immortelle Purifying Infusion with a couple of sprays of the HydroSoul. Blend the two together, then gently and slowly press the warmed emulsion into your skin.
    • Mist face with HydroSol and press in again

    Are you a visual person? Check out their YouTube page for how-to’s, product reviews, and more! https://www.youtube.com/c/evanhealyskin/videos

    Interested? Purchase any of their products for 20% OFF before this sale expires May 31st, 2021! Available in-store or online!

    Resources:

    https://www.evanhealy.com/

    https://www.evanhealy.com/pages/our-mission

    https://www.evanhealy.com/blogs/stories/springtime-skin?fbclid=IwAR1Ofc7Z7RD_PAbcGiJQO6DT0LPp4y7SmQsZUSopaAueQjkTGeHkiG9t3xA

  • Plant Beautiful Skincare Thanks To Pranarom

    Plant Beautiful Skincare Thanks To Pranarom

    Plant Beautiful Skincare – A Holistic Experience for Mind & Body

    Essential oils and beauty go together like peanut butter and jelly, grilled cheese and tomato soup, April showers and May flowers… well you get the point. According to Pranarom’s National Educator, Amy Galper, B.A. MA. Certified Aromatherapist, “a great clean beauty facial care product needs to nourish us in 3 ways: physically, emotionally and psycho-spiritually. Applying product to our faces is a deeply personal experience, and can help us be more present, foster self-reflection and confidence, and just make us feel really good.” And we all could use more of that!

    Simple. Effective. 100% Organic.

    Your skincare routine just got easier! Here are a few tips and suggestions for using Pranarom’s Plant Beautiful skincare and creating your own beauty ritual to nourish your skin and soul:

    1. Try cleansing your face with oil, rather than soap, and take note of how gently this lifts away dirt and grime without stripping your skin. The Pure Facial Cleansing Oil is perfect for this, as it’s easy to use and leaves a non-greasy feeling after rinsing.
    2. Use floral waters to tone and soothe sensitivity. After cleansing and patting your face dry, try misting with one of Pranarom’s Facial Mists – beautiful blends of a few different hydrosols and soothing aloe vera. They feel light and clean while imparting nuanced aromas that immediately calm both mind and skin. 
    3. After cleansing and toning, feed the skin with one of the deeply nutritive Treatment Moisture Oils, massaging gently for best results.
    4. Pay attention to the scent of the essential oils and how well they partner and align with the plant oils, and how the scent makes you feel.

    Stock up on your favorite products before their 20% off sale ends 4/30/2021!


    Looking for more unique products to add to your every day routines?

    Check out these great DIY recipes below!

    DIY Calming Meditation Spray

    Set the perfect atmosphere to get yourself ready for your daily skincare routine! This simple DIY room spray is a relaxing blend for de-stressing and calming the mind.

    Ingredients

    – 1 oz. spray bottle

    – 10 drops of Pranarom Bergamot essential oil

    – 6 drops of Pranarom Lavender essential oil

    – 4 teaspoons witch hazel

    – 4 teaspoons distilled water

    Method

    1. Mix witch hazel and distilled water in a glass pourable container. Add essential oils. Mix until oils are well incorporated. Pour into spray bottle. Voila! Relax into your day.


    Luxurious DIY Roller

    Apply directly to dry skin or mix with your favorite moisturizer for some extra hydration – the perfect addition all year-round!

    Ingredients

    – 8 ml. roller bottle

    – 10 drops of Pranarom Frankincense essential oil

    – 10 drops of Pranarom Lavender essential oil

    – 5 drops of Pranarom Helichrysum essential oil

    – Pranarom Rosehip Extra Virgin Plant Oil (to fill)

    Method

    1. Add essential oils to a roller bottle. Fill the remainder of the bottle with Rosehip oil and voila!


    DIY Immune Boosting Foot Roller

    Does your immune system need a little boost? Made with their immune boosting wellness formula of Lavender, Eucalyptus radiata, and tea tree, this kid friendly recipe is great to keep on hand (or foot!)

    Ingredients

    – 8 ml. roller bottle

    – 30 drops of Pranarom Immunity Boost essential oil blend

    – Jojoba Oil (to fill)

    Method

    1. Add essential oil to a roller bottle. Fill the remainder of the bottle with Jojoba oil. Rub on bottoms of feet or pulse points for an extra Immunity Boost!


    Resources:

    http://veriditasblog.blogspot.com/2020/01/1.html

    https://pranarom.us/products/plant-beautiful-skincare/

    https://pranarom.us/

    https://www.instagram.com/p/CNAr8hxgK65/

    https://www.instagram.com/p/CMh3Jt2giyi/

    https://www.instagram.com/p/CMzv2rbHNFw/?epik=dj0yJnU9ZjFFYTRyM0JFUldjeGJ2OWNEZHZ2N1dCVFdtM0MxN2wmcD0wJm49anBfY1FxWFJIeWpwUTNBRTQzdnNhZyZ0PUFBQUFBR0JzWTBz

  • Oranges, Strawberries and Raisins, OH MY!

    Oranges, Strawberries and Raisins, OH MY!

    Oranges, Strawberries and Raisins, OH MY!

    Please note: ALL produce available at Basil Bandwagon Natural Market is ORGANIC.

    The following information was provided by the Environmental Working Group (EWG) and pertains only to NON-ORGANIC produce.


    Raisins didn’t qualify for the Dirty Dozen™, since we don’t include processed foods in the list, but if they did, they would top the list by a mile. Ninety-nine percent of conventional raisins tested positive for at least two pesticides, including some that can harm kids’ developing brains!

    Click the image to learn more!

    Strawberries are once again at the top of this year’s Dirty Dozen™ list, taking first place for produce with the highest levels of pesticide residues. Ninety-nine percent of strawberries have pesticide residues, and up to 22 different pesticides were found on a single strawberry!

    Click the image to learn more!

    Many Americans enjoy starting their day with a healthy serving of citrus fruits, but they may be unknowingly getting a side of cancer-linked chemical. EWG scientists discovered cancer-linked imazalil on nearly 90 percent of non-organic citrus samples!

    Even after the fruit is peeled, the average concentration of imazalil was about 20 times higher than EWG’s recommended limit to protect children’s health! See the full results HERE.

    Click the image to sign the EWG’s petition to BAN imazalil!

    Resources:

    https://www.ewg.org/?gclid=Cj0KCQjwo-aCBhC-ARIsAAkNQisjbwcNiZlHOZAOGL3qCYkyK6KmBK0AScpklOZ-30BY2Qp9Ovi2vJQaAmCPEALw_wcB

    https://act.ewg.org/UOUNqQZubEqMFeX_xZjwTg2?sourceid=1020179&emci=bcf878fc-b488-eb11-85aa-00155d43c992&emdi=f49bef02-b588-eb11-85aa-00155d43c992&ceid=2820348

    https://www.ewg.org/foodnews/citrus.php?utm_source=newsletter&utm_campaign=202103FoodNewsLaunch&utm_medium=email&utm_content=pesticides&emci=bcf878fc-b488-eb11-85aa-00155d43c992&emdi=f49bef02-b588-eb11-85aa-00155d43c992&ceid=2820348

    https://www.ewg.org/foodnews/raisins.php?utm_source=newsletter&utm_campaign=202103FoodNewsLaunch&utm_medium=email&utm_content=pesticides&emci=bcf878fc-b488-eb11-85aa-00155d43c992&emdi=f49bef02-b588-eb11-85aa-00155d43c992&ceid=2820348

    https://www.ewg.org/foodnews/strawberries.php?utm_source=newsletter&utm_campaign=202103FoodNewsLaunch&utm_medium=email&utm_content=pesticides&emci=bcf878fc-b488-eb11-85aa-00155d43c992&emdi=f49bef02-b588-eb11-85aa-00155d43c992&ceid=2820348

  • Christine Waltermyer’s Quinoa Power Bowl with Orange Tahini Dressing

    Christine Waltermyer’s Quinoa Power Bowl with Orange Tahini Dressing

    Quinoa Power Bowl with Orange Tahini Dressing

    thanks to Christine Waltermyer!

    Christine Waltermyer is a local and renowned Wellness Chef, private chef to celebrities, published cookbook author and founder of the Natural Kitchen Cooking School, which offers an online Plant-Based Cooking Program. She also loves shopping at Basil Bandwagon! Visit naturalkitchenschool.com to subscribe to her email newsletter for new recipes, tips, and FREE access to the Power of Veggies mini-course!


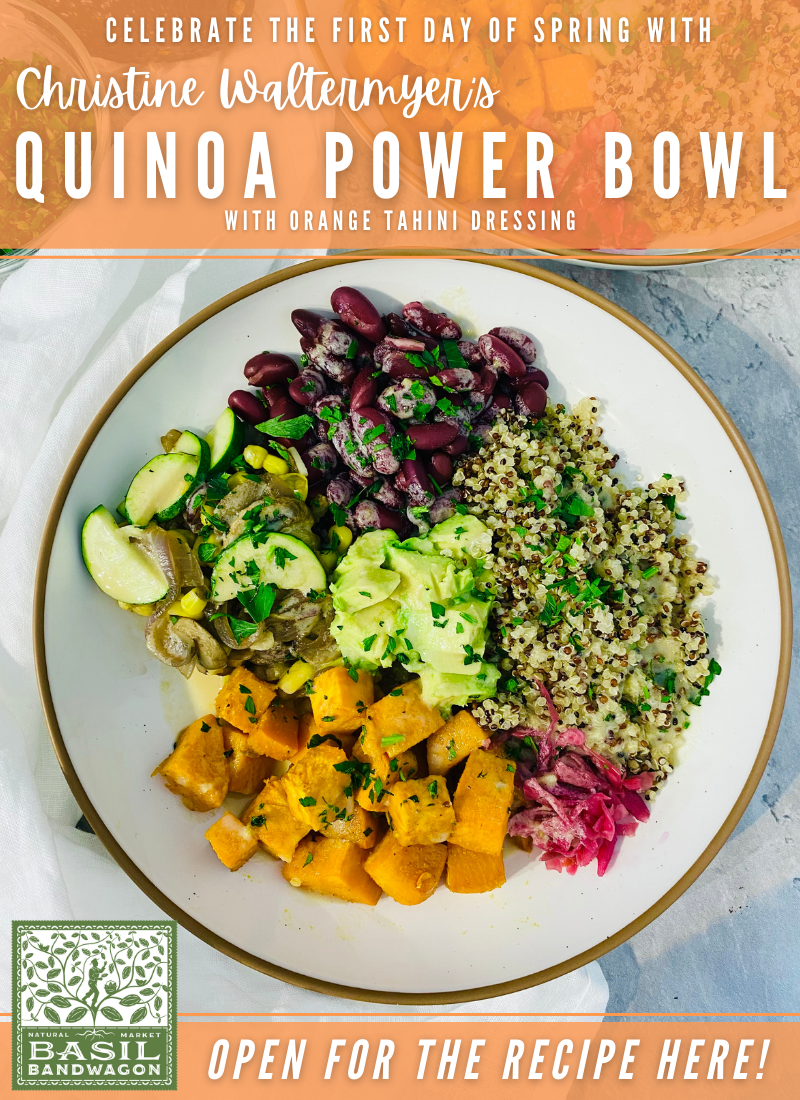
    What comes to mind when you think about the first day of spring? For us, it’s bright, fresh, fruits and vegetables to help energize us through the day. Thanks to Christine Waltermyer, we can combine all of that into a delicious & nutritious power bowl that’s perfect for lunch or dinner! Check out the recipe below…

    Quinoa Power Bowl with Orange Tahini Dressing

    Course Main Course
    Keyword dressing, power bowl, quinoa, vegan

    Equipment

    • Baking pan
    • Small saucepan
    • Large skillet
    • Medium bowl

    Ingredients

    • 1 large sweet potato or yam peeled and diced (½-inch dices)
    • 2 tablespoons avocado oil (or vinegar or vegetable broth)
    • Sea salt and black pepper to taste
    • 1 teaspoon onion powder
    • ½ teaspoon garlic powder
    • 1 cup quinoa (I used the pre-rinsed kind)
    • 2 cloves garlic minced
    • ½ red onion thinly sliced
    • 16 ounces sliced button mushrooms
    • 1 medium zucchini cut into half moons
    • ½ cup corn kernels
    • 2-4 tablespoons sesame tahini
    • 2 tablespoons maple syrup
    • 2 tablespoons apple cider vinegar
    • The juice of one orange
    • 1 avocado pitted and diced
    • 13 ounces cooked kidney beans (I used the Jovial brand)
    • Fresh parsley chopped, as a garnish (optional)

    Instructions

    • Preheat the oven to 425 degrees F.
    • Place the peeled and chopped sweet potato in a baking pan. Lightly drizzle it with 1 tablespoon of the avocado oil. Add sea salt and black pepper to taste. Sprinkle with onion powder and garlic powder. Mix the seasoning into the sweet potato with your hands. Bake for 30 to 40 minutes, or until fork-tender.
    • Meanwhile prepare the quinoa. In a small saucepan, place the quinoa. Add 2 cups water or vegetable broth. Bring to a boil over high heat. Add an optional pinch of sea salt. Reduce the heat to simmer on low, covered, for 15 to 20 minutes.
    • Heat a large skillet over medium heat. Add a tablespoon of the avocado oil. Add the onion and cook and stir for a minute or two. Add the mushrooms and a pinch of sea salt. Cook and stir for a minute, then cover with a tight-fitting lid to help release the moisture from the mushrooms. Cook for several minutes over medium heat. If it seems to be dry on the bottom you can add a teaspoon or so of water.
    • Add the garlic, corn and zucchini to the mushrooms. Cook and stir briefly, then season with salt and pepper. Cover and cook for a few more minutes. Uncover and stir.
    • Make the dressing: In a medium bowl, combine the tahini, maple syrup, apple cider vinegar and fresh orange juice. Whisk together and add more tahini if a thicker consistency is desired.
    • Place the avocado in a small bowl. If not serving the bowls right away you can toss it with a little lemon juice, lime juice or vinegar to prevent browning.
    • Now arrange the bowls. In two serving bowls, place a scoop of the cooked quinoa (there will be leftovers or enough for a third or fourth bowl), a portion of kidney beans, some sweet potato and the sautéed mushrooms, zucchini and corn. Add some avocado as well.
      Bonus! If you want to add a teaspoon of raw sauerkraut or another raw pickle that adds a nice touch.
    • Wipe the edges of the bowls if needed. Top with a drizzle of the tahini dressing over all of the ingredients. Sprinkle with optional chopped parsley.

    Thank you to Christine Waltermyer and the Natural Kitchen Cooking School for working with us to help promote healthy, nutritious meals and products that are affordable, full of nutrients, and simple to make at home!

  • Vegan St. Patrick’s Day Traditions with Christine Waltermyer

    Vegan St. Patrick’s Day Traditions with Christine Waltermyer

    Vegan St. Patrick’s Day Traditions

    with Christine Waltermyer

    Christine Waltermyer is a local and renowned Wellness Chef, private chef to celebrities, published cookbook author and founder of the Natural Kitchen Cooking School, which offers an online Plant-Based Cooking Program. She also loves shopping at Basil Bandwagon! Visit naturalkitchenschool.com to subscribe to her email newsletter for new recipes, tips, and FREE access to the Power of Veggies mini-course!


    Who said you can’t turn holiday traditions into diet-friendly favorites! Celebrate Irish culture with a warming vegan stew and naturally colorful shamrock sugar cookies.

    Vegan Irish Stew

    Course Main Course
    Keyword gluten free, St. Patrick’s Day, stew, vegan
    Servings 4 people

    Equipment

    • Large pot
    • Large mixing bowl
    • Small mixing bowl

    Ingredients

    • 1 tablespoon olive oil
    • 1 cup onion chopped
    • 2 cloves garlic minced
    • 8 ounces button mushrooms quartered
    • sea salt
    • 1 cup sliced carrots
    • 1 cup sliced celery
    • ¼ small head of green cabbage
    • 1 large parsnip peeled and chopped
    • 3 small Yukon Gold potatoes cut into bite-sized pieces
    • 2 cups vegetable broth
    • 1 cup beer (non-alcoholic or stout beer)
    • 1 teaspoon dried thyme
    • 1 tablespoon maple syrup
    • 1 tablespoon apple butter
    • 3 tablespoons kuzu starch (or cornstarch) to thicken the stew (more as needed)
    • freshly ground black pepper

    Dumplings

    • 1 teaspoon fresh rosemary or thyme (use ½ teaspoon if using dried herbs) minced
    • 1 ½ cups gluten-free all-purpose baking flour (or regular all-purpose baking flour)
    • ¾ teaspoon baking powder (aluminum-free)
    • 1 teaspoon sea salt
    • 3 tablespoons olive oil
    • 1 cup almond milk (or oat milk or rice milk)

    Instructions

    • In a large pot, heat the olive oil (or ¼ cup vegetable broth) over medium heat. Add the onion and garlic. Cook and stir for a few minutes, then add the mushrooms. Add a pinch of the sea salt. Cook and stir for a few minutes. Cover and let cook a few more minutes to help them soften up. You can add a small splash of water if needed.
    • Add the carrots, celery, cabbage, parsnip and potatoes. Add the broth, beer, thyme, maple syrup, and apple butter. Bring to a boil over medium high heat, then reduce the heat to cook, lightly covered, on low for 20 minutes.
    • To make the dumplings, in a large mixing bowl combine the all-purpose baking flour, baking powder, sea salt and fresh rosemary. Stir well. Add the olive oil and almond milk. Stir well again.
    • In a small bowl, stir the kuzu or cornstarch with a few tablespoons of cold water to dilute it. Add to the stew and stir until thickened. Add a little more if you want to achieve a thicker stew consistency.
    • Add the black pepper.
    • Now add spoonfuls (2 to 3 tablespoons in size) of the dumpling dough all around the pot. Cook, covered, for 15 minutes. The dumplings will rise. Serve hot with Irish soda bread, sourdough bread or gluten-free bread of your choice.
      Note: If you like fluffier dumplings you can add 1 full teaspoon of the baking powder.

    Shamrock Sand Tart Cookies

    Course Dessert
    Keyword cookies, St. Patrick’s Day, vegan
    Servings 3 Dozen

    Equipment

    • Large bowl
    • Small bowl
    • Rolling Pin
    • Baking sheet
    • Shamrock cookie cutter

    Ingredients

    Wet Ingredients

    • ½ cup plant-based butter or butter of your choice
    • 1 cup maple sugar or raw cane sugar
    • 1 tablespoon golden flaxseed meal
    • 3 tablespoons water
    • ¼ cup cooked pumpkin puree
    • 1 teaspoon pure vanilla extract

    Dry Ingredients

    • 2 cups soft wheat flour (or gluten-free flour)
    • ¼ teaspoon baking soda
    • ⅛ teaspoon sea salt

    Colored Sugar

    • ½ cup raw cane sugar
    • A few drops green liquid natural food coloring

    Instructions

    • In a large bowl, cream together the butter and maple sugar (or cane sugar).
    • In a small bowl stir together the flaxseed meal and water. Let sit for 5 or 10 minutes, until it has thickened up a bit.
    • Add the flaxseed meal mixture and pumpkin puree to the butter-sugar mixture. Stir well. Add the vanilla and stir again.
    • Sift together the flour, baking soda and sea salt. Add this to the butter-sugar mixture. Mix well, until you have a uniform cookie dough. Gather into a ball and wrap in wax paper. Refrigerate overnight.
    • Make the colored sugar: Mix together the raw cane sugar with the food coloring until it’s uniform in color. Let it sit overnight, uncovered, to let it dry out overnight. You can even spread it out on a piece of parchment paper to help it get really dry.
    • The next day, unwrap the chilled dough. Depending how thick the dough shape is, you can cut it half to make two flatter disks of dough. Place it on a floured board. Using a rolling pin, roll it out to about 1/8-inch thickness.
    • Preheat the oven to 350 degrees F. Lightly dust a baking sheet with a little flour.
    • Lightly dip the shamrock cookie cutter in flour, then press it into the dough to cut out shamrock shapes. Fit in as many shapes as you can over the dough’s surface. Then carefully pick them up using a spatula to place them onto the prepared baking sheet. Repeat with the remaining dough, spacing them out an inch or so apart.
    • Sprinkle each shamrock cookie evenly with some of the green-colored sugar.
      *Note: You can make other cookie shapes and use different colored sugar, depending on the holiday. For example, you can make heart-shaped cookies topped with red sugar for Valentine’s Day.
    • Bake for 7 to 8 minutes, checking them closely after 7 minutes. Lift one cookie with a spatula to check the bottom. If lightly browned and the edges are light brown, remove the baking sheet from the oven.
    • Transfer the cookies to a cooling rack to cool completely. The cookies will crisp up more as they cool. Once completely cool, serve the cookies or store in a cookie tin or glass container, loosely covered. The cookies will keep up to a week.

    Notes

    • Using the raw cane sugar will make the cookies crispier. 
    • Two eggs can be used in place of the flax egg and pumpkin puree.

    Thank you to Christine Waltermyer and the Natural Kitchen Cooking School for working with us to help promote healthy, nutritious meals and products that are affordable, full of nutrients, and simple to make at home!
  • Christine Waltermyer’s Gut-Boosting Homemade Pickles – 3 Ways!

    Christine Waltermyer’s Gut-Boosting Homemade Pickles – 3 Ways!

    Gut-Boosting Homemade Pickles

    with Christine Waltermyer

    Christine Waltermyer is a local and renowned Wellness Chef, private chef to celebrities, published cookbook author and founder of the Natural Kitchen Cooking School, which offers an online Plant-Based Cooking Program. She also loves shopping at Basil Bandwagon! Visit naturalkitchenschool.com to subscribe to her email newsletter for new recipes, tips, and FREE access to the Power of Veggies mini-course!


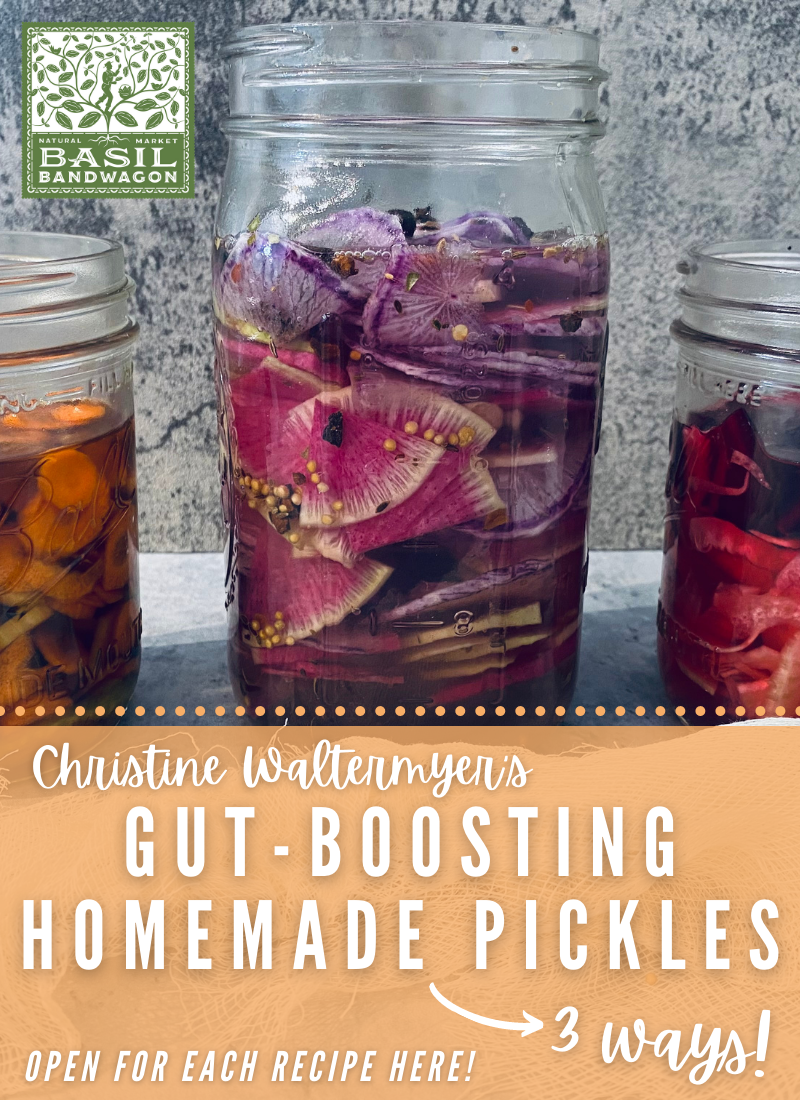
    Did you know that gut health is essential for a strong immune system? Some of the best gut health boosting foods are those that are fermented and pickled! There are many health benefits of pickling, but the most talked about benefit is the fact that they are probiotic – and you can pickle so many different vegetables to change up your flavor profiles. Check out (& print!) these three simple homemade pickle recipes thanks to Christine Waltermyer!

    24-Hour Mixed Vegetable Tamari Pickles

    Course Snack
    Keyword gut health, pickles
    Servings 1 cup of pickles

    Equipment

    • Wide-mouth 16 oz glass canning jar with a lid (Make sure it’s really clean. You can even boil it for a minute to sterilize it.)
    • 8 oz glass canning jar that fits inside the 16-ounce glass jar
    • Cheesecloth
    • Small pot

    Ingredients

    • ½ cup water
    • 2 ½ tablespoons tamari
    • 2 tablespoons brown rice vinegar
    • ½ cup broccoli stems (peeled) sliced into thin rounds
    • ½ cup carrot slices (thin)
    • ½ cup thinly sliced celery
    • 1 tablespoon maple syrup

    Instructions

    • Place the water in a small pot. Bring to a boil briefly, then shut off the heat and remove from the stove. Set aside to cool.
    • Once the water is cool, place it in the glass canning har. To make the pickling brine, add the tamari and brown rice vinegar. Place the lid on the har and shake well. Pour the pickling brine into a bowl.
    • Layer the vegetables in the glass jar. Pour the pickling brine over them. Place the smaller jar on top of the vegetables, inside the jar. The weight of the har will press the vegetables under the surface of the brine.
    • Cover the jar with a square of cheesecloth and secure it in place with a piece of kitchen twine or a rubber band.
    • Let the jar sit at room temperature for 24 hours. The room should be between 65 to 80 degrees F.
    • After 24 hours have passed, add the maple syrup. Place a lid on the jar and gently shake to mix the maple syrup into the brine. Refrigerate the pickles at this point. Enjoy a teaspoon or so at a time with a meal. Pickles will keep up to 5 days in the refrigerator.

    24-Hour Pink Fennel Pickles

    Course Snack
    Keyword gut health, pickles
    Servings 3 /4 cup of pickles

    Equipment

    • 16 oz glass canning jar with a lid (Make sure it’s really clean. You can even boil it for a minute to sterilize it.)
    • 8 oz glass canning jar
    • Cheesecloth
    • Small pot

    Ingredients

    • ¾ cup water
    • ¾ cup fennel thinly sliced
    • ¼ beet thinly sliced
    • ¼ cup ume ("umeboshi") vinegar

    Instructions

    • Place the water in a small pot. Bring to a boil briefly, then shut off the heat and remove from the stove. Set aside to cool.
    • Once the water is cool, place it in the glass canning jar. To make the pickling brine, add the ume vinegar. Place the lid on the jar and shake well. Pour the pickling brine into a bowl.
    • Layer the vegetables in the glass jar. Pour the pickling brine over them. Place the smaller jar on top of the vegetables, inside the har. The weight of the har will press the vegetables under the surface of the brine. If the liquid is too high in the har, you can remove it as long as all of the vegetables are submerged under the brine liquid.
    • Cover the har with a square of cheesecloth and secure it in place with a piece of kitchen twine or a rubber band.
    • Let the jar sit at room temperature for 24 hours. The room should be between 65 to 80 degrees F.
    • After 24 hours have passed, place a lid on the jar. Refrigerate the pickles at this point. Enjoy a teaspoon or so at a time with a meal. If you find the pickles too strong tasting, rinse a small amount before serving them. Pickles will keep up to 10 days in the refrigerator.

    3-Day Radish Pickles

    Course Snack
    Keyword gut health, pickles
    Servings 1 1/2 cups of pickles

    Equipment

    • 32-ounce glass canning jar with a lid (Make sure it’s really clean. You can even boil it for a minute to sterilize it.)
    • Small pot

    Ingredients

    • 2 cups water
    • 2 cups thinly sliced radishes (I used purple daikon radish and watermelon radish but red radish works too)
    • 1 ½ tablespoons sea salt
    • 1 teaspoon pickling spice OPTIONAL – In the video I used 1 tablespoon but it’s a little strong tasting so I recommend using less for most people’s taste.

    Instructions

    • Place the water in a small pot. Bring to a boil briefly, then shut off the heat and remove from the stove. Set aside to cool.
    • Once the water is cool, place it in the glass canning jar. To make the pickling brine, add the sea salt and pickling spice. Place the lid on the jar and shake well. Pour the pickling brine into a bowl.
    • Layer the vegetables in the glass jar. Pour the pickling brine over them. Make sure that all of the vegetables are submerged under the brine liquid.
    • Cover the jar with the lid.
    • Let the jar sit at room temperature for 3 days. The room should be between 65 to 80 degrees F.
      IMPORTANT: Unscrew the lid of the jar once a day to release some of the air that naturally builds up inside. At that time make sure the veggies are all submerged and if not, gently push them down under the liquid.
    • Taste after 3 days and if you want to let it ferment longer it should become more sour in another day or two. These pickles are salty so I recommend rinsing the pickles before serving. If you want to balance the flavor with some sweetness just add a tablespoon or two of your favorite sweetener and it will make them a little more mild tasting. Pickles will keep for 2 weeks in the refrigerator.

    Thank you to Christine Waltermyer and the Natural Kitchen Cooking School for working with us to help promote healthy, nutritious meals and products that are affordable, full of nutrients, and simple to make at home!

  • Looking to Keep Your Immune System Strong? Country Life Vitamins is Here to Help!

    Looking to Keep Your Immune System Strong? Country Life Vitamins is Here to Help!

    Take your immune health to the next level with Country Life Vitamins

    It’s not always easy to eat a balanced diet with all the nutrients we need, and something as important as our immune system needs extra attention. To fill the gaps we might be missing, adding in certain vitamins to our daily wellness routine makes sure we’re covering all our bases without the added stress. Thanks to Country Life Vitamins, we can trust that the ingredients they use in their products follow their 5 pledges – Authenticity, Cleanliness, Freshness, Consistency & Accuracy.

    Immune Support When It Matters

    Vitamin D

    Also known as the Sunshine Vitamin, Vitamin D aids in the absorption of calcium, helping to form and maintain healthy bones and teeth, as well as promote immune health.*

    Multivitamins

    Get the essential nutrients you need for  health and wellness. Their Core Daily-1 multivitamins simplify your daily nutrition with support across seven key nutritional areas.*

    Minerals

    Minerals are elements used by the body that are not produced by plants, and play an important role in metabolism and other various bodily functions.* Many of their minerals are chelated (bound to amino acids) and they provide both single forms as well as multi-mineral formulas.

    Calcium

    Formulated to maximize your body’s calcium absorption for healthier teeth and bones, their calcium supplements may also be blended with minerals for total-body utilization. Adequate calcium and vitamin D as part of a healthful diet, along with exercise, may reduce the risk of osteoporosis later in life.*

    Looking for a great way to add vitamins into your daily morning routine?

    Check out this refreshing smoothie recipe!

    Immune Boosting Berry Orange Smoothie

    Gluten-Free & Dairy-Free ~ Serves 2

    This delicious smoothie is rich in antioxidants, Vitamin C, with an added boost of sunshine – Vitamin D!

    Ingredients

    1 1/4 cups fresh squeeze orange juice

    1 cup of your frozen berry of choice – we used blueberries (can use fresh but will not be as thick)

    1/2 cup of fresh or frozen strawberries

    1/4 cup of almond or coconut milk (we used almond)

    1 banana

    1 tablespoon lemon juice

    1 teaspoon of honey or maple syrup

    4 sprays Country Life Vitamin D3 spray (2 sprays = daily serving size but this recipe yields 2 servings)

    Method

    Blend all ingredients in a blender until smooth. Pour into 2 glasses and enjoy!

    DISCLAIMER: *These statements have not been evaluated by the Food and Drug Administration. These products are not intended to diagnose, treat, cure or prevent any disease.

    References:

    https://www.countrylifevitamins.com/

    https://www.instagram.com/countrylifevitamins/

    https://www.cottercrunch.com/cranberry-orange-smoothie-dairy-free/

  • Introducing: Hudson Valley Fisheries

    Introducing: Hudson Valley Fisheries

    Healthy. Local. Sustainable.

    Hudson Valley Fisheries was inspired by their commitment to environmental stewardship. Their goal is to protect wild populations and the environment through a state-of-the-art land-based biosecure Recirculating Aquaculture System (RAS).

    As an aquaculture teaching facility, they are educating future fish farmers in best practices, collaborating with the Culinary Institute of America and numerous colleges and universities in the Hudson Valley region. Every aspect of their business model is designed to keep their carbon footprint small, including their central location, to offer impeccably fresh, local fish via delivery trucks, thus eliminating the environmental costs of trans-Atlantic and international seafood transportation.

    Fed a responsibly-sourced, GMO-free and balanced diet of natural antioxidants, proteins and lipids, New York Steelhead are completely traceable from egg to place.

    Flavor Profile

    • Clean flavor, subtle and herbaceous

    • Pairs well with many flavors and ingredients

    • Rich in omega 3 and fatty acids

    Texture Profile

    • Smooth and velvety

    • Meaty, lean with nice fat content

    • Medium moist flake that holds together with cooking

    • Pan roasting and grilling yield a wonderfully crisp skin

    What makes Hudson Valley Fisheries healthy?

    Unlike open-sea fish farms that regularly use harsh chemicals to control pathogens, parasites and sea lice, our land-based farm uses RAS technology which provides optimal conditions for our fish to grow without the need for antibiotics, vaccines or growth hormones. Our land-based facility offers round the clock dedicated animal care and the strictest biosecurity which guarantees our fish never disrupt native ecosystems or wild seafood populations.

    What makes Hudson Valley Fisheries sustainable?

    It all starts with RAS. Our bio-secure facility uses a Recirculating Aquaculture System which provides optimal conditions for our fish to grow without the use of antibiotics, vaccines, or hormones. Fish waste is recycled into nutrient-rich plant food and kept out of our rivers and oceans. With a land-based facility, our fish never disrupt native ecosystems or wild populations.

    Looking for a way to prepare your New York Steelhead?

    Check out this delicious recipe below!


    Crispy Steelhead Trout Tenders

    with Herbed Yogurt Dipping Sauce

    Ingredients:

    New York Steelhead fillets
    (6 oz. New York Steelhead, filet), skinned and cut into 5 x 2 inch pieces

    2 eggs

    1 teaspoon dijon mustard

    1 cup panko breadcrumbs

    1 teaspoon lemon zest

    1/8 teaspoon salt

    1/8 teaspoon pepper

    1 lemon, squeezed

    For Sauce:

    1/2 cup whole greek yogurt

    1/4 teaspoon onion powder

    1/8 teaspoon garlic powder

    1/2 teaspoon chopped chives

    1/4 teaspoon chopped parsley

    1/8 teaspoon salt

    1/8 teaspoon pepper

    Method

    Fish Directions:
    Combine breadcrumbs, salt, pepper and lemon zest, in a plate. In a separate plate, combine eggs and mustard. Dip each tender in the egg mixture and then into the breadcrumb mixture. Set coated tenders aside on a plate. Spray tenders with olive oil cooking spray and place on a parchment lined baking sheet. Bake for 12 minutes at 375F flipping once.


    Sauce Directions:
    Mix well and allow to sit in the fridge for 1 hour for a stronger ranch flavor. Enjoy with tenders!

    References:

    https://www.hudsonvalleyfisheries.com/

    https://www.hudsonvalleyfisheries.com/blogs/steelheadcooking/crispy-steelhead-tenders-with-herbed-yogurt-dipping-sauce

    https://www.instagram.com/hudsonvalleyfisheries/