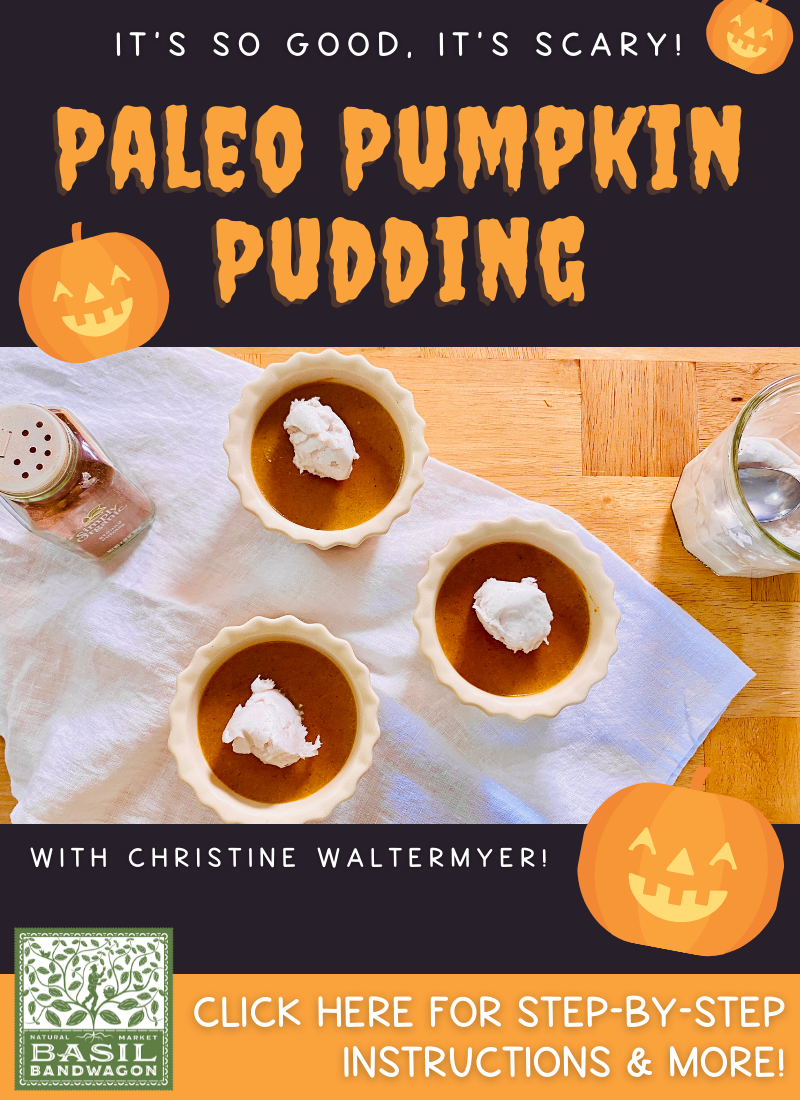
Category: Recipes

  • Christine Waltermyer’s Quinoa Power Bowl with Orange Tahini Dressing

    Christine Waltermyer’s Quinoa Power Bowl with Orange Tahini Dressing

    Quinoa Power Bowl with Orange Tahini Dressing

    thanks to Christine Waltermyer!

    Christine Waltermyer is a local and renowned Wellness Chef, private chef to celebrities, published cookbook author and founder of the Natural Kitchen Cooking School, which offers an online Plant-Based Cooking Program. She also loves shopping at Basil Bandwagon! Visit naturalkitchenschool.com to subscribe to her email newsletter for new recipes, tips, and FREE access to the Power of Veggies mini-course!


    What comes to mind when you think about the first day of spring? For us, it’s bright, fresh, fruits and vegetables to help energize us through the day. Thanks to Christine Waltermyer, we can combine all of that into a delicious & nutritious power bowl that’s perfect for lunch or dinner! Check out the recipe below…

    Quinoa Power Bowl with Orange Tahini Dressing

    Course Main Course
    Keyword dressing, power bowl, quinoa, vegan

    Equipment

    • Baking pan
    • Small saucepan
    • Large skillet
    • Medium bowl

    Ingredients

    • 1 large sweet potato or yam peeled and diced (½-inch dices)
    • 2 tablespoons avocado oil (or vinegar or vegetable broth)
    • Sea salt and black pepper to taste
    • 1 teaspoon onion powder
    • ½ teaspoon garlic powder
    • 1 cup quinoa (I used the pre-rinsed kind)
    • 2 cloves garlic minced
    • ½ red onion thinly sliced
    • 16 ounces sliced button mushrooms
    • 1 medium zucchini cut into half moons
    • ½ cup corn kernels
    • 2-4 tablespoons sesame tahini
    • 2 tablespoons maple syrup
    • 2 tablespoons apple cider vinegar
    • The juice of one orange
    • 1 avocado pitted and diced
    • 13 ounces cooked kidney beans (I used the Jovial brand)
    • Fresh parsley chopped, as a garnish (optional)

    Instructions

    • Preheat the oven to 425 degrees F.
    • Place the peeled and chopped sweet potato in a baking pan. Lightly drizzle it with 1 tablespoon of the avocado oil. Add sea salt and black pepper to taste. Sprinkle with onion powder and garlic powder. Mix the seasoning into the sweet potato with your hands. Bake for 30 to 40 minutes, or until fork-tender.
    • Meanwhile prepare the quinoa. In a small saucepan, place the quinoa. Add 2 cups water or vegetable broth. Bring to a boil over high heat. Add an optional pinch of sea salt. Reduce the heat to simmer on low, covered, for 15 to 20 minutes.
    • Heat a large skillet over medium heat. Add a tablespoon of the avocado oil. Add the onion and cook and stir for a minute or two. Add the mushrooms and a pinch of sea salt. Cook and stir for a minute, then cover with a tight-fitting lid to help release the moisture from the mushrooms. Cook for several minutes over medium heat. If it seems to be dry on the bottom you can add a teaspoon or so of water.
    • Add the garlic, corn and zucchini to the mushrooms. Cook and stir briefly, then season with salt and pepper. Cover and cook for a few more minutes. Uncover and stir.
    • Make the dressing: In a medium bowl, combine the tahini, maple syrup, apple cider vinegar and fresh orange juice. Whisk together and add more tahini if a thicker consistency is desired.
    • Place the avocado in a small bowl. If not serving the bowls right away you can toss it with a little lemon juice, lime juice or vinegar to prevent browning.
    • Now arrange the bowls. In two serving bowls, place a scoop of the cooked quinoa (there will be leftovers or enough for a third or fourth bowl), a portion of kidney beans, some sweet potato and the sautéed mushrooms, zucchini and corn. Add some avocado as well.
      Bonus! If you want to add a teaspoon of raw sauerkraut or another raw pickle that adds a nice touch.
    • Wipe the edges of the bowls if needed. Top with a drizzle of the tahini dressing over all of the ingredients. Sprinkle with optional chopped parsley.

    Thank you to Christine Waltermyer and the Natural Kitchen Cooking School for working with us to help promote healthy, nutritious meals and products that are affordable, full of nutrients, and simple to make at home!

  • Vegan St. Patrick’s Day Traditions with Christine Waltermyer

    Vegan St. Patrick’s Day Traditions with Christine Waltermyer

    Vegan St. Patrick’s Day Traditions

    with Christine Waltermyer

    Christine Waltermyer is a local and renowned Wellness Chef, private chef to celebrities, published cookbook author and founder of the Natural Kitchen Cooking School, which offers an online Plant-Based Cooking Program. She also loves shopping at Basil Bandwagon! Visit naturalkitchenschool.com to subscribe to her email newsletter for new recipes, tips, and FREE access to the Power of Veggies mini-course!


    Who said you can’t turn holiday traditions into diet-friendly favorites! Celebrate Irish culture with a warming vegan stew and naturally colorful shamrock sugar cookies.

    Vegan Irish Stew

    Course Main Course
    Keyword gluten free, St. Patrick’s Day, stew, vegan
    Servings 4 people

    Equipment

    • Large pot
    • Large mixing bowl
    • Small mixing bowl

    Ingredients

    • 1 tablespoon olive oil
    • 1 cup onion chopped
    • 2 cloves garlic minced
    • 8 ounces button mushrooms quartered
    • sea salt
    • 1 cup sliced carrots
    • 1 cup sliced celery
    • ¼ small head of green cabbage
    • 1 large parsnip peeled and chopped
    • 3 small Yukon Gold potatoes cut into bite-sized pieces
    • 2 cups vegetable broth
    • 1 cup beer (non-alcoholic or stout beer)
    • 1 teaspoon dried thyme
    • 1 tablespoon maple syrup
    • 1 tablespoon apple butter
    • 3 tablespoons kuzu starch (or cornstarch) to thicken the stew (more as needed)
    • freshly ground black pepper

    Dumplings

    • 1 teaspoon fresh rosemary or thyme (use ½ teaspoon if using dried herbs) minced
    • 1 ½ cups gluten-free all-purpose baking flour (or regular all-purpose baking flour)
    • ¾ teaspoon baking powder (aluminum-free)
    • 1 teaspoon sea salt
    • 3 tablespoons olive oil
    • 1 cup almond milk (or oat milk or rice milk)

    Instructions

    • In a large pot, heat the olive oil (or ¼ cup vegetable broth) over medium heat. Add the onion and garlic. Cook and stir for a few minutes, then add the mushrooms. Add a pinch of the sea salt. Cook and stir for a few minutes. Cover and let cook a few more minutes to help them soften up. You can add a small splash of water if needed.
    • Add the carrots, celery, cabbage, parsnip and potatoes. Add the broth, beer, thyme, maple syrup, and apple butter. Bring to a boil over medium high heat, then reduce the heat to cook, lightly covered, on low for 20 minutes.
    • To make the dumplings, in a large mixing bowl combine the all-purpose baking flour, baking powder, sea salt and fresh rosemary. Stir well. Add the olive oil and almond milk. Stir well again.
    • In a small bowl, stir the kuzu or cornstarch with a few tablespoons of cold water to dilute it. Add to the stew and stir until thickened. Add a little more if you want to achieve a thicker stew consistency.
    • Add the black pepper.
    • Now add spoonfuls (2 to 3 tablespoons in size) of the dumpling dough all around the pot. Cook, covered, for 15 minutes. The dumplings will rise. Serve hot with Irish soda bread, sourdough bread or gluten-free bread of your choice.
      Note: If you like fluffier dumplings you can add 1 full teaspoon of the baking powder.

    Shamrock Sand Tart Cookies

    Course Dessert
    Keyword cookies, St. Patrick’s Day, vegan
    Servings 3 Dozen

    Equipment

    • Large bowl
    • Small bowl
    • Rolling Pin
    • Baking sheet
    • Shamrock cookie cutter

    Ingredients

    Wet Ingredients

    • ½ cup plant-based butter or butter of your choice
    • 1 cup maple sugar or raw cane sugar
    • 1 tablespoon golden flaxseed meal
    • 3 tablespoons water
    • ¼ cup cooked pumpkin puree
    • 1 teaspoon pure vanilla extract

    Dry Ingredients

    • 2 cups soft wheat flour (or gluten-free flour)
    • ¼ teaspoon baking soda
    • teaspoon sea salt

    Colored Sugar

    • ½ cup raw cane sugar
    • A few drops green liquid natural food coloring

    Instructions

    • In a large bowl, cream together the butter and maple sugar (or cane sugar).
    • In a small bowl stir together the flaxseed meal and water. Let sit for 5 or 10 minutes, until it has thickened up a bit.
    • Add the flaxseed meal mixture and pumpkin puree to the butter-sugar mixture. Stir well. Add the vanilla and stir again.
    • Sift together the flour, baking soda and sea salt. Add this to the butter-sugar mixture. Mix well, until you have a uniform cookie dough. Gather into a ball and wrap in wax paper. Refrigerate overnight.
    • Make the colored sugar: Mix together the raw cane sugar with the food coloring until it’s uniform in color. Let it sit overnight, uncovered, to let it dry out overnight. You can even spread it out on a piece of parchment paper to help it get really dry.
    • The next day, unwrap the chilled dough. Depending how thick the dough shape is, you can cut it half to make two flatter disks of dough. Place it on a floured board. Using a rolling pin, roll it out to about 1/8-inch thickness.
    • Preheat the oven to 350 degrees F. Lightly dust a baking sheet with a little flour.
    • Lightly dip the shamrock cookie cutter in flour, then press it into the dough to cut out shamrock shapes. Fit in as many shapes as you can over the dough’s surface. Then carefully pick them up using a spatula to place them onto the prepared baking sheet. Repeat with the remaining dough, spacing them out an inch or so apart.
    • Sprinkle each shamrock cookie evenly with some of the green-colored sugar.
      *Note: You can make other cookie shapes and use different colored sugar, depending on the holiday. For example, you can make heart-shaped cookies topped with red sugar for Valentine’s Day.
    • Bake for 7 to 8 minutes, checking them closely after 7 minutes. Lift one cookie with a spatula to check the bottom. If lightly browned and the edges are light brown, remove the baking sheet from the oven.
    • Transfer the cookies to a cooling rack to cool completely. The cookies will crisp up more as they cool. Once completely cool, serve the cookies or store in a cookie tin or glass container, loosely covered. The cookies will keep up to a week.

    Notes

    • Using the raw cane sugar will make the cookies crispier. 
    • Two eggs can be used in place of the flax egg and pumpkin puree.

    Thank you to Christine Waltermyer and the Natural Kitchen Cooking School for working with us to help promote healthy, nutritious meals and products that are affordable, full of nutrients, and simple to make at home!

  • Christine Waltermyer’s Gut-Boosting Homemade Pickles – 3 Ways!

    Christine Waltermyer’s Gut-Boosting Homemade Pickles – 3 Ways!

    Gut-Boosting Homemade Pickles

    with Christine Waltermyer

    Christine Waltermyer is a local and renowned Wellness Chef, private chef to celebrities, published cookbook author and founder of the Natural Kitchen Cooking School, which offers an online Plant-Based Cooking Program. She also loves shopping at Basil Bandwagon! Visit naturalkitchenschool.com to subscribe to her email newsletter for new recipes, tips, and FREE access to the Power of Veggies mini-course!


    Did you know that gut health is essential for a strong immune system? Some of the best gut health boosting foods are those that are fermented and pickled! There are many health benefits of pickling, but the most talked about benefit is the fact that they are probiotic – and you can pickle so many different vegetables to change up your flavor profiles. Check out (& print!) these three simple homemade pickle recipes thanks to Christine Waltermyer!

    24-Hour Mixed Vegetable Tamari Pickles

    Course Snack
    Keyword gut health, pickles
    Servings 1 cup of pickles

    Equipment

    • Wide-mouth 16 oz glass canning jar with a lid (Make sure it’s really clean. You can even boil it for a minute to sterilize it.)
    • 8 oz glass canning jar that fits inside the 16-ounce glass jar
    • Cheesecloth
    • Small pot

    Ingredients

    • ½ cup water
    • 2 ½ tablespoons tamari
    • 2 tablespoons brown rice vinegar
    • ½ cup broccoli stems (peeled) sliced into thin rounds
    • ½ cup carrot slices (thin)
    • ½ cup thinly sliced celery
    • 1 tablespoon maple syrup

    Instructions

    • Place the water in a small pot. Bring to a boil briefly, then shut off the heat and remove from the stove. Set aside to cool.
    • Once the water is cool, place it in the glass canning har. To make the pickling brine, add the tamari and brown rice vinegar. Place the lid on the har and shake well. Pour the pickling brine into a bowl.
    • Layer the vegetables in the glass jar. Pour the pickling brine over them. Place the smaller jar on top of the vegetables, inside the jar. The weight of the har will press the vegetables under the surface of the brine.
    • Cover the jar with a square of cheesecloth and secure it in place with a piece of kitchen twine or a rubber band.
    • Let the jar sit at room temperature for 24 hours. The room should be between 65 to 80 degrees F.
    • After 24 hours have passed, add the maple syrup. Place a lid on the jar and gently shake to mix the maple syrup into the brine. Refrigerate the pickles at this point. Enjoy a teaspoon or so at a time with a meal. Pickles will keep up to 5 days in the refrigerator.

    24-Hour Pink Fennel Pickles

    Course Snack
    Keyword gut health, pickles
    Servings 3 /4 cup of pickles

    Equipment

    • 16 oz glass canning jar with a lid (Make sure it’s really clean. You can even boil it for a minute to sterilize it.)
    • 8 oz glass canning jar
    • Cheesecloth
    • Small pot

    Ingredients

    • ¾ cup water
    • ¾ cup fennel thinly sliced
    • ¼ beet thinly sliced
    • ¼ cup ume ("umeboshi") vinegar

    Instructions

    • Place the water in a small pot. Bring to a boil briefly, then shut off the heat and remove from the stove. Set aside to cool.
    • Once the water is cool, place it in the glass canning jar. To make the pickling brine, add the ume vinegar. Place the lid on the jar and shake well. Pour the pickling brine into a bowl.
    • Layer the vegetables in the glass jar. Pour the pickling brine over them. Place the smaller jar on top of the vegetables, inside the har. The weight of the har will press the vegetables under the surface of the brine. If the liquid is too high in the har, you can remove it as long as all of the vegetables are submerged under the brine liquid.
    • Cover the har with a square of cheesecloth and secure it in place with a piece of kitchen twine or a rubber band.
    • Let the jar sit at room temperature for 24 hours. The room should be between 65 to 80 degrees F.
    • After 24 hours have passed, place a lid on the jar. Refrigerate the pickles at this point. Enjoy a teaspoon or so at a time with a meal. If you find the pickles too strong tasting, rinse a small amount before serving them. Pickles will keep up to 10 days in the refrigerator.

    3-Day Radish Pickles

    Course Snack
    Keyword gut health, pickles
    Servings 1 1/2 cups of pickles

    Equipment

    • 32-ounce glass canning jar with a lid (Make sure it’s really clean. You can even boil it for a minute to sterilize it.)
    • Small pot

    Ingredients

    • 2 cups water
    • 2 cups thinly sliced radishes (I used purple daikon radish and watermelon radish but red radish works too)
    • 1 ½ tablespoons sea salt
    • 1 teaspoon pickling spice OPTIONAL – In the video I used 1 tablespoon but it’s a little strong tasting so I recommend using less for most people’s taste.

    Instructions

    • Place the water in a small pot. Bring to a boil briefly, then shut off the heat and remove from the stove. Set aside to cool.
    • Once the water is cool, place it in the glass canning jar. To make the pickling brine, add the sea salt and pickling spice. Place the lid on the jar and shake well. Pour the pickling brine into a bowl.
    • Layer the vegetables in the glass jar. Pour the pickling brine over them. Make sure that all of the vegetables are submerged under the brine liquid.
    • Cover the jar with the lid.
    • Let the jar sit at room temperature for 3 days. The room should be between 65 to 80 degrees F.
      IMPORTANT: Unscrew the lid of the jar once a day to release some of the air that naturally builds up inside. At that time make sure the veggies are all submerged and if not, gently push them down under the liquid.
    • Taste after 3 days and if you want to let it ferment longer it should become more sour in another day or two. These pickles are salty so I recommend rinsing the pickles before serving. If you want to balance the flavor with some sweetness just add a tablespoon or two of your favorite sweetener and it will make them a little more mild tasting. Pickles will keep for 2 weeks in the refrigerator.

    Thank you to Christine Waltermyer and the Natural Kitchen Cooking School for working with us to help promote healthy, nutritious meals and products that are affordable, full of nutrients, and simple to make at home!

  • Looking to Keep Your Immune System Strong? Country Life Vitamins is Here to Help!

    Looking to Keep Your Immune System Strong? Country Life Vitamins is Here to Help!

    Take your immune health to the next level with Country Life Vitamins

    It’s not always easy to eat a balanced diet with all the nutrients we need, and something as important as our immune system needs extra attention. To fill the gaps we might be missing, adding in certain vitamins to our daily wellness routine makes sure we’re covering all our bases without the added stress. Thanks to Country Life Vitamins, we can trust that the ingredients they use in their products follow their 5 pledges – Authenticity, Cleanliness, Freshness, Consistency & Accuracy.

    Immune Support When It Matters

    Vitamin D

    Also known as the Sunshine Vitamin, Vitamin D aids in the absorption of calcium, helping to form and maintain healthy bones and teeth, as well as promote immune health.*

    Multivitamins

    Get the essential nutrients you need for  health and wellness. Their Core Daily-1 multivitamins simplify your daily nutrition with support across seven key nutritional areas.*

    Minerals

    Minerals are elements used by the body that are not produced by plants, and play an important role in metabolism and other various bodily functions.* Many of their minerals are chelated (bound to amino acids) and they provide both single forms as well as multi-mineral formulas.

    Calcium

    Formulated to maximize your body’s calcium absorption for healthier teeth and bones, their calcium supplements may also be blended with minerals for total-body utilization. Adequate calcium and vitamin D as part of a healthful diet, along with exercise, may reduce the risk of osteoporosis later in life.*

    Looking for a great way to add vitamins into your daily morning routine?

    Check out this refreshing smoothie recipe!

    Immune Boosting Berry Orange Smoothie

    Gluten-Free & Dairy-Free ~ Serves 2

    This delicious smoothie is rich in antioxidants, Vitamin C, with an added boost of sunshine – Vitamin D!

    Ingredients

    1 1/4 cups fresh squeeze orange juice

    1 cup of your frozen berry of choice – we used blueberries (can use fresh but will not be as thick)

    1/2 cup of fresh or frozen strawberries

    1/4 cup of almond or coconut milk (we used almond)

    1 banana

    1 tablespoon lemon juice

    1 teaspoon of honey or maple syrup

    4 sprays Country Life Vitamin D3 spray (2 sprays = daily serving size but this recipe yields 2 servings)

    Method

    Blend all ingredients in a blender until smooth. Pour into 2 glasses and enjoy!

    DISCLAIMER: *These statements have not been evaluated by the Food and Drug Administration. These products are not intended to diagnose, treat, cure or prevent any disease.

    References:

    https://www.countrylifevitamins.com/

    https://www.instagram.com/countrylifevitamins/

    https://www.cottercrunch.com/cranberry-orange-smoothie-dairy-free/

  • Introducing: Hudson Valley Fisheries

    Introducing: Hudson Valley Fisheries

    Healthy. Local. Sustainable.

    Hudson Valley Fisheries was inspired by their commitment to environmental stewardship. Their goal is to protect wild populations and the environment through a state-of-the-art land-based biosecure Recirculating Aquaculture System (RAS).

    As an aquaculture teaching facility, they are educating future fish farmers in best practices, collaborating with the Culinary Institute of America and numerous colleges and universities in the Hudson Valley region. Every aspect of their business model is designed to keep their carbon footprint small, including their central location, to offer impeccably fresh, local fish via delivery trucks, thus eliminating the environmental costs of trans-Atlantic and international seafood transportation.

    Fed a responsibly-sourced, GMO-free and balanced diet of natural antioxidants, proteins and lipids, New York Steelhead are completely traceable from egg to place.

    Flavor Profile

    • Clean flavor, subtle and herbaceous

    • Pairs well with many flavors and ingredients

    • Rich in omega 3 and fatty acids

    Texture Profile

    • Smooth and velvety

    • Meaty, lean with nice fat content

    • Medium moist flake that holds together with cooking

    • Pan roasting and grilling yield a wonderfully crisp skin

    What makes Hudson Valley Fisheries healthy?

    Unlike open-sea fish farms that regularly use harsh chemicals to control pathogens, parasites and sea lice, our land-based farm uses RAS technology which provides optimal conditions for our fish to grow without the need for antibiotics, vaccines or growth hormones. Our land-based facility offers round the clock dedicated animal care and the strictest biosecurity which guarantees our fish never disrupt native ecosystems or wild seafood populations.

    What makes Hudson Valley Fisheries sustainable?

    It all starts with RAS. Our bio-secure facility uses a Recirculating Aquaculture System which provides optimal conditions for our fish to grow without the use of antibiotics, vaccines, or hormones. Fish waste is recycled into nutrient-rich plant food and kept out of our rivers and oceans. With a land-based facility, our fish never disrupt native ecosystems or wild populations.

    Looking for a way to prepare your New York Steelhead?

    Check out this delicious recipe below!


    Crispy Steelhead Trout Tenders

    with Herbed Yogurt Dipping Sauce

    Ingredients:

    New York Steelhead fillets
    (6 oz. New York Steelhead, filet), skinned and cut into 5 x 2 inch pieces

    2 eggs

    1 teaspoon dijon mustard

    1 cup panko breadcrumbs

    1 teaspoon lemon zest

    1/8 teaspoon salt

    1/8 teaspoon pepper

    1 lemon, squeezed

    For Sauce:

    1/2 cup whole greek yogurt

    1/4 teaspoon onion powder

    1/8 teaspoon garlic powder

    1/2 teaspoon chopped chives

    1/4 teaspoon chopped parsley

    1/8 teaspoon salt

    1/8 teaspoon pepper

    Method

    Fish Directions:
    Combine breadcrumbs, salt, pepper and lemon zest, in a plate. In a separate plate, combine eggs and mustard. Dip each tender in the egg mixture and then into the breadcrumb mixture. Set coated tenders aside on a plate. Spray tenders with olive oil cooking spray and place on a parchment lined baking sheet. Bake for 12 minutes at 375F flipping once.


    Sauce Directions:
    Mix well and allow to sit in the fridge for 1 hour for a stronger ranch flavor. Enjoy with tenders!

    References:

    https://www.hudsonvalleyfisheries.com/

    https://www.hudsonvalleyfisheries.com/blogs/steelheadcooking/crispy-steelhead-tenders-with-herbed-yogurt-dipping-sauce

    https://www.instagram.com/hudsonvalleyfisheries/

  • Plant-Based Meal Prep with Christine Waltermyer

    Plant-Based Meal Prep with Christine Waltermyer

    Plant-Based Meal Prep – What to Eat in A Day

    with Christine Waltermyer

    Christine Waltermyer is a local Wellness Chef, private chef to celebrities, published cookbook author and founder of the Natural Kitchen Cooking School, which offers an online Plant-Based Cooking Program. She also loves shopping at Basil Bandwagon! Visit naturalkitchenschool.com to get your FREE copy of her cookbook, “7 Days of Deliciousness.”

    BREAKFAST

    Creamy Brown Rice Cereal with Apple Pear Compote

    Serves 1

    Ingredients

    1 cup cooked brown rice

    1 cup water

    1 pear, cored and chopped

    1 apple, cored and chopped

    Small handful of walnuts

    Cinnamon

    1-2 tablespoons maple syrup, plus extra for drizzling


    Method

    1. Chop up the fruit and place in a small pot with a pinch of sea salt. Add 1 to 2 tablespoons of the maple syrup, and ½ teaspoon of cinnamon. Bring to a gentle boil, then lower to simmer for 20 to 25 minutes. 

    2. Place the brown rice and water in a small pot. Bring to a boil over medium high heat. Reduce the heat to simmer on low for 20 minutes or so, tilting the lid to avoid cookovers.

    3. Chop the walnuts. Using a potato masher, you can partly mash the rice at this point.

    4. Place the cooked brown rice cereal in a bowl. Top with desired amount of apple pear compote and walnuts, adding extra maple syrup if you wish.


    LUNCH

    Vegetarian Sushi

    Serves 1-2

    Ingredients

    1 cup cooked brown rice

    1 sheet sushi nori

    1 package Pumfu or firm tofu, cut into long strips

    1-2 tablespoons almond butter (or peanut butter) – I used the sprouted kind

    2 tablespoons raw sauerkraut, drained and pressed to remove liquid

    3-4 long thin carrot strips

    2 cups kale leaves, chopped up

    Coconut aminos or soy sauce 

    Equipment: bamboo sushi mat


    Method

    1. Steam the carrot strips and kale in a steamer basket over boiling water, covered, for 5 minutes or until the carrots and kale are tender but still brightly colored. 

    2. Place the pumfu or tofu strips in a frypan with a ¼ cup water and 1 tablespoon of coconut aminos or soy sauce. Bring to a boil over medium high heat, then reduce heat to simmer on medium low for about 15 minutes, or until the water has cooked off. Transfer the pumpfu or tofu to a plate to cool.

    3. Place the nori on a sushi mat. Cover most of the lower portion of the nori sheet with rice, leaving about an inch on top that is uncovered. Add a horizontal line of the almond butter, then add the carrots, pumfu and kale. Using your thumbs, lift the sushi mat up and over the fillings. Tuck the nori and rice over them and roll forward, pulling out the mat. Tightly tuck the roll, then roll all the way forward and tuck again. Using a sawing motion, carefully slice the sushi roll in half, and then into about 8 pieces. Serve with coconut aminos or soy sauce.


    DINNER

    Mexican Buddha Bowl

    Serves 1-2

    Ingredients

    2 – 4 tortillas of your choice (I love the Siete brand almond flour tortillas)

    1 13-oz.  jar or can kidney beans, black beans or pinto beans (Jovial brand is great)

    1 medium red onion, diced

    3 cloves garlic, minced

    cumin

    Cilantro

    ½ teaspoon apple cider vinegar

    2 carrots, peeled and diced

    Olive oil

    Japanese yams

    Avocados

    1 to 2 limes

    Shredded lettuce

    1 cup cooked quinoa

    Dressing:

    3 tablespoons olive oil

    1 – 2 tablespoons lime juice

    ¼ teaspoon sea salt

    1-2 teaspoons chopped cilantro

    Optional: 1 – 2 teaspoons maple syrup


    Method

    1. In a small pot, cover the carrots with water. Bring to a boil over medium high heat, then reduce heat to simmer on medium until soft. Drain and set aside. 

    2. Place the sweet potatoes in a small pot and cover with water. Boil for about 20 minutes, or until soft. When finished 

    3. Place about ⅓ cup of the diced onion in a bowl to save for later to cook with the beans. Place the remaining diced onion in a bowl and add ¼ teaspoon of the sea salt and ½ teaspoon of apple cider vinegar. Let it sit for 15 minutes.

    4. To cook the beans: Heat a small pan over medium heat. Add 1 or 2 teaspoons of the olive oil. Add the ⅓ cup diced onion, 2 cloves minced garlic and a pinch of salt. Cook and stir for 8 to 10 minutes, or until the onion has softened. 

    5. Meanwhile, make the carrot salsa: Add 1 tablespoon of apple cider vinegar or lime juice to the cooked carrots. Add 2-3 tablespoons chopped cilantro and 1-2 teaspoons of the marinated red onion. Stir to combine.

    6. To the cooking onion and garlic add the beans, cumin and sea salt to taste. Feel free to add cayenne, chopped jalapeno etc. if you like it hot. Cook for 5 to 10 minutes.

    7. Make the guacamole: Chop up a few more tablespoons of cilantro and place in a bowl. Remove the pits from 2 avocados. Score the avocado flesh into little squares and scoop out the contents into the bowl. Add 1 clove minced garlic, juice of one lime and ½ teaspoon of sea salt, or to taste. Stir together, partly mashing the avocado to make it a little creamy.

    8. Check on the sweet potatoes and beans. Cook longer if needed.

    9. Briefly warm the tortillas on a warm cast iron skillet, a few minutes on each side over medium heat. Keep the tortillas warm under a towel.

    10. When the sweet potatoes have finished cooking, peel them and slice them.

    11. In a large shallow bowl, arrange equal portions of the beans, quinoa, sweet potatoes, guacamole, lettuce, and carrot salsa. Drizzle evenly with the dressing and serve.


    Thank you to Christine Waltermyer and the Natural Kitchen Cooking School for working with us to help promote healthy, nutritious meals and products that are affordable, full of nutrients, and simple to make at home!

  • Introducing Sunscoop – From the Earth, But Out of This World.

    Introducing Sunscoop – From the Earth, But Out of This World.

    “We are powered by the sun to make the most delicious plant-based ice cream from organic coconut cream, superfoods, and no refined sugar.”

    They’re taking over the freezer aisle with a plant-based ice cream that is absolutely delicious, allergen-friendly, and makes you feel good. Their flavors are reimagined classics with a superfood twist. They’ve sourced the highest quality ingredients and let their tastes and nutrients shine.

    From the Founder Carli Blum

    Eat, Pray, Sneeze. Story of my life. Being born with food allergies is not easy. I love food, I celebrate with food, and I am endlessly inspired by it. Food for me is both my hardest challenge and biggest blessing. Being allergic to dairy, gluten, nuts, soy, eggs, and sensitive to refined sugar, I’ve struggled with inflammation and fatigue my whole life.

    In the journey of discovering what foods triggered me I also found the foods that healed. Being a lover of ice cream, I was never able to find a brand that was allergen-friendly and tasted good. One day I asked myself, why can’t dairy-free ice cream taste insanely delicious, have clean ingredients, and make your body feel good? From that point on I knew I wanted to bring Sunscoop to the world. 

    I hope you and your body feel the love and intention in every bite. Most importantly I hope you can truly enjoy the indulgence and feel great afterwards.  


    Love & Light,
    Carli

    They Are Proudly

    ☑️ Dairy-Free

    ☑️ Plant-Based

    ☑️ Vegan

    ☑️ Refined Sugar-Free

    ☑️ Gluten-Free

    ☑️ Nut-Free

    ☑️ Soy-Free

    ☑️ Allergen Friendly

    Pure Sun in A Mug Cake

    Gluten-Free & Vegan ~ Serves 1

    This is the perfect recipe for when you don’t feel like making a whole cake, cleaning a mound of dishes, or worrying about eating an entire batch of sweets. Not only is it OUT OF THIS WORLD but it’s packed with superfoods!

    Ingredients

    1/4 cup gluten free flour

    2 tablespoons coconut sugar

    1/4 teaspoon cinnamon

    1/4 teaspoon baking soda

    1 tablespoon plant-based milk

    1 tablespoon melted coconut oil

    1 scoop of your favorite Sunscoop flavor!

    Method

    1. Whisk all ingredients in a small bowl

    2. Coat a mug with a thin layer of coconut oil.

    3. Pour batter into mug.

    4. Microwave for 2 minutes.

    5. Add scoop of Sunscoop.

    6. Enjoy!

    References:

    https://sunscoop.com/

    https://www.instagram.com/p/CHOCYHmJ9BO/?hl=en

  • Introducing MUSH – The New Way to Eat Breakfast in 2021

    Introducing MUSH – The New Way to Eat Breakfast in 2021

    Cold. Creamy. Like Pudding.

    Just what you were looking for – an easy, healthy breakfast that’s perfect on-the-go. They make healthy food convenient and delicious so that you can incorporate more of it into your life. Because after all, you are what you eat.

    Why Overnight Oats?

    All grains including oats contain phytic acid, which binds to nutrients and makes them harder to absorb. Soaking oats breaks down the acid and helps increase the absorption of nutrients, like zinc and iron.

    Soaking the oats also facilitates the break down of the natural starches, a type of complex carbohydrate, found in oats. This helps to improve digestion, aid in weight loss, and increase feelings of fullness.

    Better absorption. Better digestion. BETTER YOU.

    “Mushy. In all the right ways.”

    Made with simple, whole food ingredients, each Mush Overnight Oats product contains 8 or less real ingredients. Available in these amazing flavors year-round: Apple Pie, Coffee + Coconut Cream, Dark Chocolate, Strawberry, Vanilla Bean, & Wild Blueberry. If you love these, keep your eye out for their fun seasonal flavors available for limited times!

    Did we mention how healthy their overnight oats actually are?

    No heat pasteurization. No preservatives. No fillers. No artificial flavors or colors. Gluten free. Dairy free. Non-GMO. Protein rich. High in fiber. Plant-based.

    Save $1 on 5oz. MUSH Overnight Oats during the month of January – try them all!

    Overnight Oats Smoothie

    Vegan ~ Serves 1

    Making healthy on-the-go breakfast smoothies is now even easier! Mix up your morning smoothie everyday of the week without the worry of buying so many ingredients.

    Ingredients

    1 5oz Mush tub – any flavor you like!

    1/2 cup of plant-based milk – almond milk, oat milk, hemp milk, etc.

    A handful of fresh fruit – will vary depending on the flavor of Mush you’d like to pair with

    Optional Toppings: fresh fruit, honey, maple syrup, chia seeds, etc. – the possibilities are endless!

    Method

    Combine all ingredients in a blender and blend until you’ve reached your favorite smoothie consistency. Pour into glass, add toppings if you prefer and enjoy!

    References:

    https://eatmush.com/

    https://www.instagram.com/p/CGu-Qw1D6Hg/

  • Homemade Immune Boosting Essentials thanks to Christine Waltermyer!

    Homemade Immune Boosting Essentials thanks to Christine Waltermyer!

    Homemade Immune Boosting Essentials

    thanks to Christine Waltermyer!

    Christine Waltermyer is a local Wellness Chef, private chef to celebrities, published cookbook author and founder of the Natural Kitchen Cooking School, which offers an online Plant-Based Cooking Program. She also loves shopping at Basil Bandwagon! Visit naturalkitchenschool.com to get your FREE copy of her cookbook, “7 Days of Deliciousness.”

    Vegetable Broth

    Makes 8 cups

    Ingredients

    1 cup fresh maitake mushrooms, or ½ cup dried

    2 celery stalks, cut into big chunks

    2 carrots, cut into chunks

    2 to 3 cups winter squash, cut in big chunks

    ½ cup fresh burdock root, cut into pieces (or ¼ cup dried burdock)

    1 small bunch parsley (you can leave the stems on)

    1 tablespoon fresh ginger root slices

    ½ large onion, cut into big chunks

    1 tablespoon fresh thyme (or 1 teaspoon dried thyme)

    3 dried shiitake mushrooms (or 6 fresh shiitake mushrooms)

    2 bay leaves

    2 cloves garlic

    ½ gallon water


    Method

    This vegetable broth can be made in an Instapot, pressure cooker or regular soup pot. 

    For Instant Pot or pressure cooker: Place all ingredients in the Instant Pot or a large pressure cooker. Place the lid on your pressure cooker or Instant Pot and bring to full pressure on high heat. After 15 minutes, remove the pot from the heat and let the pressure reduce naturally.  Strain out the ingredients by pouring the broth through a strainer into a large bowl. Remove the lid and cool completely before pouring into tall glass mason jars.

    For regular soup pot: Place all ingredients in a large soup pot. Cover with a lid and bring to a boil over medium high heat. Reduce heat to simmer on low for 1 hour. Remove from heat. Strain out the ingredients by pouring the broth through a strainer into a large bowl. Cool before pouring into glass mason jars.

    Store the vegetable broth in covered jars in the refrigerator for 3 to 5 days, or freeze for up to 4 months.


    Lemon Sage Cold Care Tea

    Serves 1

    Ingredients

    1 cup (8 oz.) water

    10 fresh sages leaves (or one teaspoon dried sage leaves)

    1 teaspoon fresh lemon juice

    1 teaspoon raw honey or brown rice syrup


    Method

    Place the water in a small saucepan. Bring to a boil over medium high heat. Turn off the heat and add the sage leaves. Remove from the heat and let steep for 15 minutes. Strain the tea through a small strainer into a mug. Add the lemon juice and sweetener of your choice. Enjoy warm.


    Thank you to Christine Waltermyer and the Natural Kitchen Cooking School for working with us to help promote healthy, nutritious meals and products that are affordable, full of nutrients, and simple to make at home!

  • Celebrate National Soup Month with Christine Waltmyer

    Celebrate National Soup Month with Christine Waltmyer

    Celebrate National Soup Month

    with Christine Waltermyer

    Christine Waltermyer is a local Wellness Chef, private chef to celebrities, published cookbook author and founder of the Natural Kitchen Cooking School, which offers an online Plant-Based Cooking Program. She also loves shopping at Basil Bandwagon! Visit naturalkitchenschool.com to get your FREE copy of her cookbook, “7 Days of Deliciousness.”

    Vegetable Soup

    Serves 8-10

    Ingredients

    1 tablespoon olive oil

    ½ onion, chopped

    2 cloves minced garlic

    3 carrots, sliced

    3 – 4 ribs celery, sliced

    1 cup chopped potatoes (I used baby heirloom potatoes but you could use red-skinned potatoes)

    1 medium red beet, peeled and diced

    8 cups vegetable broth

    13 ounces cooked kidney beans

    ¼ cup wild rice, soaked in water to cover for several hours, then drained

    2 teaspoons fresh thyme leaves, or 1 teaspoon dried thyme 

    1 cup chopped green beans, trimmed and cut into 1-inch pieces

    4 scallions, chopped

    1 cup baby bok choy, chopped

    1 small zucchini, chopped

    1 small bunch parsley, stems removed and chopped

    1 cup corn kernels

    1 teaspoon sea salt, or more to taste

    Optional: Black pepper


    Method

    1. In an Instant Pot, pressure cooker or large soup pot, heat the olive oil over medium heat. Add the onion and garlic. Cook and stir for five minutes. Add the carrots, celery, beets and potatoes. Add 4 cups of the vegetable broth, along with the kidney beans, drained wild rice and thyme.

    2. Place the lid on your cooking pot of choice. 

    3. If using an Instant Pot or pressure cooker, bring up to full pressure. Once full pressure is achieved, reduce heat to cook for 10 minutes. Then turn off or remove from heat to allow pressure to drop naturally.

    4. If using a regular soup pot, bring to a boil over medium high heat. Reduce heat to cook on low, covered, for 30 minutes.

    5. Add the green beans, scallions, baby bok choy, zucchini, parsley, corn kernels, sea salt and enough vegetable broth to cover everything. If your Instant Pot or pressure cooker is too full you can cook in two batches.

    6. For Instant Pot or pressure cooker bring back up to full pressure. Reduce heat to cook on low for 5 more minutes.

    7. If using a regular soup pot, bring back to a boil over medium high heat, then reduce the heat to cook on low for 10 to 15 more minutes.

    8. Season with black pepper if desired, and additional sea salt to taste. I like to serve with a drizzle of olive oil as well. If a tart taste is desired you can add a splash of apple cider vinegar as well.

    9. Store leftover soup in a covered glass container in the refrigerator for up to 3 days, or freeze leftovers for up to a month.


    Thank you to Christine Waltermyer and the Natural Kitchen Cooking School for working with us to help promote healthy, nutritious meals and products that are affordable, full of nutrients, and simple to make at home!