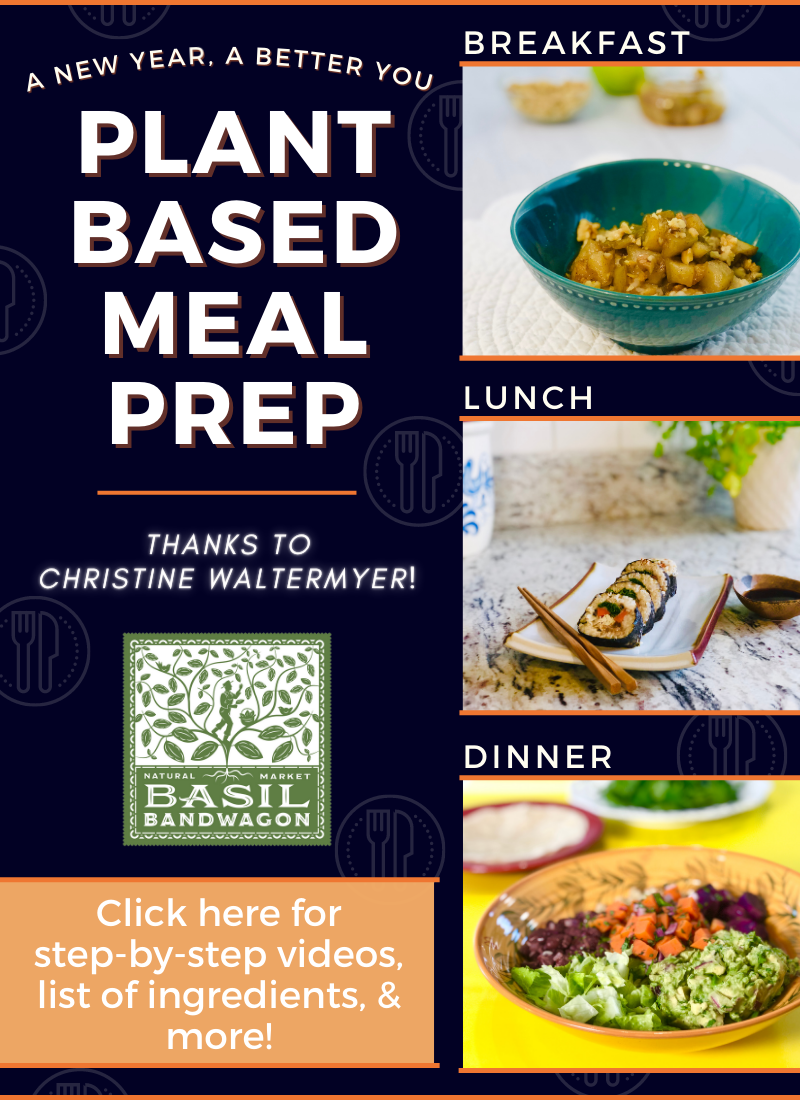
Category: Recipes

  • Better-For-You Thanksgiving Recipes with Christine Waltermyer!

    Better-For-You Thanksgiving Recipes with Christine Waltermyer!

    Better-For-You Thanksgiving Recipes

    with Christine Waltermyer


    MENU:

    Lentil Loaf

    Vegan Scalloped Potatoes

    Vegan Green Bean Casserole

    Vegan Squash Pie


    Thank you to Christine Waltermyer and the Natural Kitchen Cooking School for working with us to help promote healthy, nutritious meals that are affordable, full of nutrients, and simple to make at home!

  • Meet Hemp’s Biggest Fan: Manitoba Harvest!

    Meet Hemp’s Biggest Fan: Manitoba Harvest!

    Manitoba Harvest’s mission to transform consumer health starts simply and sustainably: with hemp. Since 1998, they’ve grown their portfolio of hemp products with a dedication to quality, sustainability, and consumer wellness that has positioned the company as the global leader in hemp foods.

    They’re Hemp’s Biggest Fan

    Their passion for hemp foods is rooted in their founder Mike Fata’s personal transformation. He used to weigh over 300 pounds and was sick and tired of being sick and tired. When he decided it was time for a change, he overhauled his diet, focusing on protein, healthy fats, and fiber – all nutrients found in hemp foods!

    Since hemp foods played such an essential role in Mike’s health transformation, he wanted everyone to be able to try them.

    Shop Hemp

    We’ve have them in all shapes, sizes, and flavors: Hemp Yeah! granola, Hemp Yeah! milk*, Hemp Yeah! snack bars, hemp hearts, Hemp Yeah! protein, hemp seed oil and capsules!

    *not pictured

    There are so many ways to add their products in your everyday meals! We’ve added their Organic Hemp Hearts in our October Smoothie of the Month – Caramel Craze! It’s everything we would imagine fall to be with bananas, dry oats, local apple butter, almonds, seasonal spices, apple juice, almondmilk, & a vegan caramel drizzle!

    Check out a few of these creative recipes that you can use Manitoba Harvest’s Hemp Hearts at home!

    Hemp Crusted Tofu

    from Dixya at Food, Pleasure, and Health

    Ingredients

    -1-16 oz. firm, tofu block

    -1 tablespoon sesame oil (or use olive, canola oil)

    -1 tablespoon soy sauce (or tamari for a gluten free option)

    -2 tablespoons almond flour

    -3 tablespoons hemp hearts

    Method

    1. Drain water from tofu and gently squeeze as much water as possible using your palms.

    2. Place tofu on a plate and place another plate over it. Then place a heavy object (i.e. a book, canned goods, or a skillet) to help squeeze additional water for 30 minutes or so. Drain water in between that accumulates on plate.

    3. Cut tofu into cubes and use a paper towel to absorb additional moisture and pat dry. You may have to repeat process a couple of times.

    4. Preheat oven to 400° F.

    5. Line a baking sheet with parchment paper or silicon mat.

    6. In a medium bowl, combine tofu with sesame oil, soy sauce, and combine well.

    7. Mix in almond flour and hemp seeds until tofu is evenly coated.

    8. Arrange tofu in an even layer on a baking sheet.

    9. Bake for 30-35 minutes. Toss it half way and continue baking until it looks golden brown.

    10. Enjoy by itself or mix with your favorite salad!


    Creamy Chai Hemp Latte

    from Half Baked Harvest

    Ingredients

    -1 cup water

    -1-2 chai tea bags

    -1/4 teaspoon ground cinnamon

    -1/8 teaspoon ground ginger

    -1/2 teaspoon vanilla

    -1-2 tablespoons honey or maple syrup

    -2 tablespoons raw hemp seeds

    -1 rounded tablespoon roasted cashews

    Method

    1. Bring water to a boil over high heat. Add the tea bags, cover and steep for 10 minutes.

    2. In a high power blender, combine the cinnamon, ginger, vanilla, honey, hemp seeds, cashews, and steeped tea. Blen on medium for 2 minutes, then blend on high for about 1 minute – or until the drink is smooth and frothy. Pour into a mug. If desired, top with a sprinkle of cinnamon and hemp seeds. Enjoy!


    Chocolate Superfood Energy Balls

    from Deryn Macey at Running on Real Food

    Ingredients

    -1 cup packed, pitted dates

    -1 1/2 cups raw walnuts

    -2 tablespoons chia seeds

    -2 tablespoons hemp seeds

    -1 tablespoon ground flax seeds

    -2 tablespoons hemp protein powder

    -2 tablespoons cacao powder

    -2 tablespoons cinnamon

    -1/2 teaspoon unrefinded sea salt

    -2 tablespoons water

    Method

    1. Blend walnuts for a minute or so until they’re broken down.

    2. Add the rest of the ingredients and blend until a dough forms.

    3. Roll into approximately 16 balls and let them set in the freezer for a couple hours. These can be stored in the fridge for at least a week or in the freezer for up to 3 months.

    4. Enjoy!

    NOTE: You can roll them in a mixture of coconut sugar and cinnamon for an extra treat, or you can roll them in hemp seeds, chia seeds, coconut or cacao powder for an extra treat!

    References:

    https://manitobaharvest.com/

    https://www.foodpleasureandhealth.com/blog/2016/07/hemp-crusted-tofu.html

    https://runningonrealfood.com/chocolate-superfood-energy-balls/

    https://www.halfbakedharvest.com/chai-cashew-and-hemp-latte/

  • Snacking Made Simple with MadeGood!

    Snacking Made Simple with MadeGood!

    We can #TrustInSomethingGood with all of MadeGood’s products! MadeGood snacks are baked with good intentions with organic ingredients, whole grains, and veggies.

    Their snacks check all of the boxes:

    – Have 6 hidden veggies in every snack

    – Free from the most common allergens

    – Certified organic, vegan, and gluten free

    – Non-GMO Project certified

    – Safe for schools

    – Super delicious

    No wonder why their snacks are loved by kids and grown-ups!

    Stock up on MadeGood Crispy Squares and Granola Minis before their 2 for $7 sale ends on September 30th, 2020!

    Check out these simple recipes you can make at home with MadeGood snacks!

    All ingredients can be found in all Basil Bandwagon Natural Market locations.


    Morning Breakfast Parfait

    Whether you or your kids are going to school virtually or in person, this recipe is the perfect start to your day! The best part – it can be customized to fit everyone’s needs and likings.

    Watching your serving sizes? Pro tip – stock up on your favorite yogurt or yogurt alternative cups and use one per parfait. Now you can mix and match all of your favorite flavors!

    Ingredients for 1 Serving

    -1 MadeGood Granola Minis packet

    -Your favorite fresh fruit

    -1 cup of your favorite yogurt

    Method

    1. Alternate layers of fruit and granola with yogurt until your glass is full. Serve parfaits immediately.

    2. Enjoy!


    Granola Stuffed Baked Apples

    Looking for a warm and cozy fall dessert? We found the perfect one – Granola Stuffed Baked Apples!

    For a quick step-by-step video, visit:

    https://www.instagram.com/tv/CEWnpcmFVmv/

    Ingredients for 4 Servings

    -2 MadeGood Apple Cinnamon Granola Minis packets

    -2/3 cup gluten free rolled oats

    -1 tablespoon maple syrup

    -1/4 teaspoon ground cinnamon

    -1/4 cup dairy-free milk (I used oat milk)

    -4 Honeycrisp Apples

    Method

    1. Preheat oven to 375° F.

    2. Remove the MadeGood granola minis and crumble them into a medium bowl.

    3. In the same medium bowl, combine crumble granola minis, oats, maple syrup, ground cinnamon, and milk. Stir until fully mixed and set aside.

    4. Remove stem and core from the apples. Using a small spoon, remove a little more of the core in order to have enough room to fill apples.

    5. Generously fill the cored apples with the granola mixture.

    6. Place granola filled apples in an 8×8 baking pan and add 1 cup water into pan.

    7. Bake apples for 30 minutes or until apples are tender.

    8. Let cool for 5 minutes before serving. Serve with caramel drizzle, a scoop of your favorite ice cream, or just with a utensil.

    9. Enjoy!

    References: Baked Apple Recipe found on MadeGood’s Instagram

  • Simple School-Night Fried Rice

    Simple School-Night Fried Rice

    Simple School-Night Fried Rice

    with Christine Waltermyer

    Christine Waltermyer is a local Wellness Chef, private chef to celebrities, published cookbook author and founder of the Natural Kitchen Cooking School, which offers an online Plant-Based Cooking Program. She also loves shopping at Basil Bandwagon! Visit naturalkitchenschool.com to get your FREE copy of her cookbook, “7 Days of Deliciousness.”


    Simple School-Night Fried Rice

    Serves 4

    Ingredients

    2 teaspoons sesame oil

    ½ onion, chopped

    1 large carrot, diced

    8 oz mushrooms, sliced

    2 ½ cups cooked rice (I used red rice)

    1 tablespoon Coconut Aminos

    ½ cup peas

    1 baby bok choy, chopped


    Method

    1. Warm a large skillet over medium heat. Add the sesame oil and onion. Cook and stir for 1 minute. Add the carrots and mushrooms. Cook for 3 to 4 minutes, stirring occasionally.  Add the rice and the coconut aminos.  Stir and cook for 5 more minutes. You can cover the pot if you want, to help the vegetables to soften. Last, add the bok choy, and cook for one more minute.

    2. Season with extra Coconut Aminos, if desired.

    3. Enjoy!

    Note: Chopped garlic and ginger can also be added to this dish when cooking the onions.


    Thank you to Christine Waltermyer and the Natural Kitchen Cooking School for working with us to help promote healthy, nutritious meals and products that are affordable, full of nutrients, and simple to make at home!

  • How to Cook Corn on the Cob 3 Ways

    How to Cook Corn on the Cob 3 Ways

    Corn on the Cob 3 Ways

    with Christine Waltermyer

    Christine Waltermyer is a local Wellness Chef, private chef to celebrities, published cookbook author and founder of the Natural Kitchen Cooking School, which offers an online Plant-Based Cooking Program. She also loves shopping at Basil Bandwagon! Visit naturalkitchenschool.com to get your FREE copy of her cookbook, “7 Days of Deliciousness.”


    Ingredients

    Serves 4

    4 ears of fresh corn on the cob

    Optional: Vegan butter, olive oil or butter of your choice, Sea salt


    Boiled Corn on the Cob Method:

    1. Remove the husks from the corn. Use your fingers or a brush to remove the fine strands of corn silk.

    2. Bring a large pot of water to a boil, covered, over high heat. Salt the water if you want. Add the corn. Cook for 6 to 8 minutes. Use tongs to carefully remove from the water. Serve as is or with optional vegan butter, olive oil or butter of your choice. Sprinkle lightly with sea salt if you want.

    3. Enjoy!


    Steamed Corn Method:

    1. Remove the husks from the corn. Use your fingers or a brush to remove the fine strands of corn silk.

    2. Add about ½ inch of water on the bottom of a medium size pot. Place a steamer basket inside. Bring the water to a boil over medium high heat. Add the corn to the pot, on top of the steamer basket. Cover the pot and cook for 4-6 minutes. Serve as is or with optional vegan butter, olive oil or butter of your choice. Sprinkle lightly with sea salt if you want.

    3. Enjoy!


    Pressure Cooked or Instant Pot Corn Method:

    1. Remove the husks from the corn. Use your fingers or a brush to remove the fine strands of corn silk.

    2. Place ½-inch of water on the bottom of a pressure cooker or an Instant Pot. You can place a trivet on top if you want.

    3. Place the corn in the pressure cooker or Instant Pot. Cover with lid and seal it. Bring up to pressure over medium high heat. Once the pressure is high you can reduce the heat but keep it high enough to maintain pressure for 2 minutes. Turn off the heat. Transfer the pressure cooker from the heat to a trivet to cool and let the pressure reduce naturally.

    4. Once the pressure has fully released, carefully remove the lid and serve. Serve as is or with optional vegan butter, olive oil or butter of your choice. Sprinkle lightly with sea salt if you want.

    5. Enjoy!


    Thank you to Christine Waltermyer and the Natural Kitchen Cooking School for working with us to help promote healthy, nutritious meals and products that are affordable, full of nutrients, and simple to make at home!

  • Vegan Peach Coffee Cake

    Vegan Peach Coffee Cake

    Vegan Peach Coffee Cake

    with Christine Waltermyer

    Christine Waltermyer is a local Wellness Chef, private chef to celebrities, published cookbook author and founder of the Natural Kitchen Cooking School, which offers an online Plant-Based Cooking Program. She also loves shopping at Basil Bandwagon! Visit naturalkitchenschool.com to get your FREE copy of her cookbook, “7 Days of Deliciousness.”


    Vegan Peach Coffee Cake

    Makes 9 squares

    Ingredients

    Cake:

    1 ¼ cup einkorn flour (or unbleached white flour or gluten free all purpose flour)

    ½ cup maple sugar

    1 teaspoon cinnamon

    1 teaspoon baking powder

    ¼ teaspoon sea salt

    Pinch of nutmeg

    1 cup almond milk

    1 teaspoon apple cider vinegar

    ⅓ cup refined coconut oil

    1 teaspoon vanilla

    1 cup diced peaches

    Topping:

    ¾ cup einkorn flour (or unbleached white flour or gluten free all purpose flour)

    ⅓ cup chopped walnuts or pecans

    ⅓ cup packed brown sugar

    ¼ teaspoon sea salt

    1 teaspoon cinnamon

    Pinch nutmeg

    ¼ cup refined coconut oil

    Powdered sugar


    Method

    1. Preheat the oven to 350 degrees F. Lightly brush or spray an 8 x 8-inch baking dish with refined coconut oil.

    2. To make the cake: In a large bowl, mix together the 1 ¼ cup of the einkorn flour, maple sugar, cinnamon, baking powder, sea salt, and nutmeg. In a small pot, place the almond milk and apple cider vinegar. Stir and let sit for a few minutes. Add the coconut oil and warm the mixture on low heat until the oil melts. Whisk to blend. Pour the almond milk mixture into the einkorn flour mixture. Whisk to combine. Stir in the vanilla. Fold in the peaches.

    3. To make the crumb topping: In a medium mixing bowl, stir together the ¾ cup of the einkorn flour, walnuts, brown sugar, sea salt, cinnamon, and nutmeg.  Add the melted coconut oil and mix until well combined and a nice crumbly texture. Use your hands if needed. Set aside.

    4. Pour the cake batter into the prepared pan and spread evenly.

    5. Gently sprinkle the crumb topping evenly over the cake batter.  Bake for 45 to 50 minutes, or until the center of the cake springs back to the touch.  Let the cake cool, then dust with the powdered sugar by sifting it through a sieve over the cake. Cut into squares.

    6. Enjoy!


    Thank you to Christine Waltermyer and the Natural Kitchen Cooking School for working with us to help promote healthy, nutritious meals and products that are affordable, full of nutrients, and simple to make at home!

  • Easy Homemade Face Mask for Glowing Skin

    Easy Homemade Face Mask for Glowing Skin

    Easy Homemade Face Mask for Glowing Skin

    with Christine Waltermyer

    Christine Waltermyer is a local Wellness Chef, private chef to celebrities, published cookbook author and founder of the Natural Kitchen Cooking School, which offers an online Plant-Based Cooking Program. She also loves shopping at Basil Bandwagon! Visit naturalkitchenschool.com to get your FREE copy of her cookbook, “7 Days of Deliciousness.”


    Mango Avocado Face Mask

    Makes enough for 4 applications

    Ingredients

    2 teaspoons fresh aloe vera pulp or store-bought aloe vera gel intended for topical use

    2 teaspoons unrefined coconut oil

    1 tablespoon fresh avocado

    1 tablespoon fresh mango

    Optional: 2 drops Roman Chamomile Essential Oil (I used Wyndmere brand)


    Method

    1. Place all ingredients in a small bowl and mash everything together into as smooth consistency as possible. Apply 1 tablespoon all over your face and leave for 15 minutes. Rinse off with cool water.


    Thank you to Christine Waltermyer and the Natural Kitchen Cooking School for working with us to help promote healthy, nutritious meals and products that are affordable, full of nutrients, and simple to make at home!

  • Chill Out This Summer with PlusCBD Oil!

    Chill Out This Summer with PlusCBD Oil!

    Have you been interested in hemp products? Well now’s the time to start! PlusCBD Oil has been a pioneer in the CBD industry, taking extraordinary efforts to make high-quality, safe, and effective hemp CBD oil products.

    Why should I take CBD oil? Great question! CBD can have a positive effect on general well-being, impacting mood, sleep, stress levels, and so much more. Everyone has their preference on the way they consume CBD- capsules, topically, liquid droppers, gummies, etc. Luckily for us, PlusCBD Oil just had a price decrease for all of their products so now you can try more than one and feel like you’re not breaking the bank!

    How much should I take? Well that can be tricky… The best thing to do is start small and work your way up. Start with a couple of drops a day at bedtime (that way if you take too much and it makes you sleepy, you’ll be ready for bed!). If you feel like it didn’t help, try a couple more drops and work your body into it. Everyone has different tolerances so a strength that may work for your best friend may not work for you – and that’s okay! Check out some other common CBD concerns below:

    Do you have more questions? Come on in or call us! Our amazing Wellness Ambassadors are on the sales floors and ready to help you find the perfect CBD for you!

    Scroll down for recipes, savings, & more ↓


    Keep Calm and Chai On

    Ingredients

    Strong brewed chai tea

    nut milk (use your favorite!)

    PlusCBD Oil unflavored oil

    sweetener of your choice (sugar, honey, whichever kind you prefer)

    cinnamon

    nutmeg

    ice cubes

    Method

    1. In whatever cup you plan on drinking out of, pour in the milk and chai tea you want (I prefer about half of each in the glass). It’s also easier to measure these liquids in the glass so I don’t over-pour for myself.

    2. Add CBD oil. There is no right or wrong amount of oil but make sure you use only the dosage you normally take. If you haven’t used CBD before, start with a couple of drops and you can always add more as you go. Mix.

    3. Add your sweetener. There’s no right or wrong amount of sweetener either, as long as you’re using what you like you’re good to go! 🙂

    4. Next, add a dash of cinnamon and a small sprinkle of nutmeg. Mix.

    5. Add ice cubes, mix once more, and enjoy!


    Triple C Milkshake

    Ingredients

    4 large scoops (about 1 1/2 cups) cookies & cream ice cream

    1/4 cup milk

    PlusCBD Oil unflavored oil

    Method

    1. In a blender, blend together ice cream, milk, and CBD oil.

    2. Pour into a glass, top with your favorite toppings, and enjoy!


    But First, Coffee!

    Ingredients

    8oz freshly brewed coffee

    creamer (use your favorite!)

    PlusCBD Oil unflavored oil

    ice cubes

    collagen peptides (optional; use your favorite!)

    cinnamon (optional)

    Method

    1. Brew coffee and place in refrigerator.

    2. Once cooled, combine coffee, creamer, CBD Oil, collagen, and ice in a glass.

    3. Top with a sprinkle of cinnamon and enjoy!


    Stock up on all PlusCBD Oil products by the end of June to take advantage of their 25% OFF discount!

    BOGO DEAL! With the purchase of any PlusCBD Oil product, you’ll receive a FREE 10ct 5mg gummy pack!**

    *PLEASE NOTE: These statements have not been evaluated by the Food and Drug Administration. These products are not intended to diagnose, treat, cure, or prevent any disease.

    **While supplies last. Available in all stores.

    References:

    https://pluscbdoil.com/faqs/

    https://pluscbdoil.com/blog/

    https://pluscbdoil.com/what-is-cbd/

    https://www.pluscbdoil.com/learn.html#benefits

  • Comfort Food Classics

    Comfort Food Classics

    Comfort Food Classics

    with Christine Waltermyer

    Christine Waltermyer is a local Wellness Chef, private chef to celebrities, published cookbook author and founder of the Natural Kitchen Cooking School, which offers an online Plant-Based Cooking Program. She also loves shopping at Basil Bandwagon! Visit naturalkitchenschool.com to get your FREE copy of her cookbook, “7 Days of Deliciousness.”


    Vegan Cinnamon Rolls

    Makes 6 to 8

    Ingredients

    1 cup almond milk + 1 tablespoon almond milk reserved for glaze (I used the Three Trees brand)

    1/4 cup vegan butter + 1/3 cup vegan butter reserved for filling (I used Miyoko’s brand) 

    2 Tablespoons organic raw sugar

    1/2 packet Red Star active dry yeast

    1/2 teaspoon sea salt

    2 ¼ cups unbleached flour

    1 Tablespoon ground cinnamon

    1/2 cup powdered sugar

    1/3 cup brown sugar

    1/2 teaspoon vanilla extract

    You will need: An 8-inch round cake pan, lightly oiled with rice bran oil (I used a stainless steel one)

    Method

    1. In a small saucepan, warm the almond milk, 1/4 cup butter and 2 tablespoons of sugar until the butter has melted. The mixture should be warm like bath water, not too hot, around 100 degrees F. Stir with a wooden spoon and add the active dry yeast. Let sit for 10 minutes until foamy.

    2. In a mixing bowl, place the powdered sugar, vanilla, and one tablespoon of almond milk. Stir together until you reach a glazed consistency.

    3. In a large mixing bowl, place the flour and sea salt. Add the yeast mixture. Mix thoroughly until combined. Cover the bowl with a damp towel or plastic wrap. Set aside in a warm place or at room temperature for 1 hour.

    4. Add the remaining 1/4 cup of flour to your dough and mix until well combined. On a floured board, form the dough into a big rectangle.

    5. Melt the remaining 1/3 cup vegan butter. Evenly brush the rectangle of dough with the melted butter. Sprinkle the brown sugar in an even layer over the dough. Sprinkle evenly with cinnamon.

    6. Roll the coated dough into a log and cut into 7 or 8 slices. Place one cinnamon roll in the center of the cake pan. Add the other slices around it. Cover with a damp towel or plastic wrap and let rise for another 30 minutes.

    7. Bake at 350 degrees F for 30 minutes. Remove the rolls from the oven and drizzle with the glaze. Serve warm and enjoy!


    Homemade Pizza

    Makes 2 pizzas

    Ingredients

    1 1/4 cup warm water 

    2 Tablespoons raw sugar

    1 ½ teaspoons active dry yeast

    1 teaspoon sea salt

    2 Tablespoons rice bran oil

    3 cups unbleached all purpose flour (plus extra for rolling out the pizza dough)

    1 jar pitted black olives

    1 can of pizza sauce (or homemade carrot sauce)

    Fresh basil leaves

    Shredded vegan Mozzarella

    Method

    1. In a small glass measuring cup, combine the warm water and sugar. Sprinkle the active dry yeast over the surface of the water. Let sit for a few minutes (up to 10  minutes) until foamy and activated. If you want to gently stir it, use a wooden spoon.

    2. In a large mixing bowl, combine the flour and sea salt. 

    3. In a food processor, add the yeast-sugar water mixture, rice bran oil and flour. Process until all ingredients are combined. The dough will be sticky. Transfer to a lightly oiled bowl and cover with plastic wrap. Let sit at room temperature (in a warm place) for 1 hour.

    4. Once the dough has doubled in size, place it on a lightly floured surface. Sprinkle with some flour and work the flour into the dough with your hands. Add just enough extra flour to achieve a smooth dough.  

    5. Cut the dough in half. Set one dough ball aside and place the other on a piece of parchment paper. Roll the dough flat, stretching gently as needed. Flatten into a circle. Keep the edges a little thicker.

    6. Preheat the oven to 465 degrees F. Place a stainless baking sheet or pizza pan on the bottom shelf of the oven to warm it for a few minutes. Remove from the oven and quickly place the parchment paper with pizza dough on top of the warmed baking sheet.

    7. Top the dough with an even thin layer of pizza sauce, shredded mozzarella cheese and black olives. You can add whatever toppings you like. Bake for about 12 minutes, or until desired doneness.

    8. Serve topped with some chopped fresh basil leaves. Enjoy!


    Thank you to Christine Waltermyer and the Natural Kitchen Cooking School for working with us to help promote healthy, nutritious meals and products that are affordable, full of nutrients, and simple to make at home!

  • Plant-Based Taco Tuesday with Christine Waltermyer!

    Plant-Based Taco Tuesday with Christine Waltermyer!

    Plant-Based Taco Tuesday

    with Christine Waltermyer

    Christine Waltermyer is a local Wellness Chef, private chef to celebrities, published cookbook author and founder of the Natural Kitchen Cooking School, which offers an online Plant-Based Cooking Program. She also loves shopping at Basil Bandwagon! Visit naturalkitchenschool.com to get your FREE copy of her cookbook, “7 Days of Deliciousness.”


    https://www.youtube.com/watch?v=v1Itki8wDu8

    Jackfruit Tacos

    Serves 4

    Ingredients

    1/2 red onion

    1 avocado

    1 package Siete brand Almond Flour Grain-free Tortillas

    Olive oil

    1 package Jackfruit Company Pulled Pork (vegan & gluten free)

    Juice of 1/2 lime 

    2 Tablespoons maple syrup

    1 teaspoon Dijon mustard 

    2 teaspoons of your favorite mayonnaise

    1/4 cup cilantro or parsley, chopped

    3 cups green cabbage, shredded


    Method

    1. In a small bowl place a couple tablespoons of the onion. Add 1 tablespoon of the lime juice and a pinch of salt. Rub with your fingers and set aside.

    2. Make the cabbage slaw: In a medium size bowl, place the shredded green cabbage, mustard, maple syrup, remaining lime juice and mayo. Mix together and set aside.

    3. In a heated skillet, over medium heat, add a teaspoon or two of the olive oil and the remaining onion. Cook and stir for 5 minutes. 

    4. Add the Jackfruit pulled pork. Cook and stir until fully heated and a little browned.

    5. Heat the tortillas: Warm a cast iron skillet over low heat. Once the skillet is hot you can add a tortilla, flipping frequently to prevent burning. Note: Almond flour tortillas burn more easily than traditional tortillas.  Once the tortilla has been warmed evenly on both sides, place it on a plate and cover with a towel. Continue until you have warmed all of the tortillas.

    6. Assemble the tacos: Place a tortilla on a plate. Add some of the Jackfruit pulled pork, a little cabbage slaw, a few slices of avocado, a pinch of marinated red onions and cilantro or parsley. Repeat with remaining ingredients. Serve topped with lime wedges. Enjoy!


    Thank you to Christine Waltermyer and the Natural Kitchen Cooking School for working with us to help promote healthy, nutritious meals and products that are affordable, full of nutrients, and simple to make at home!