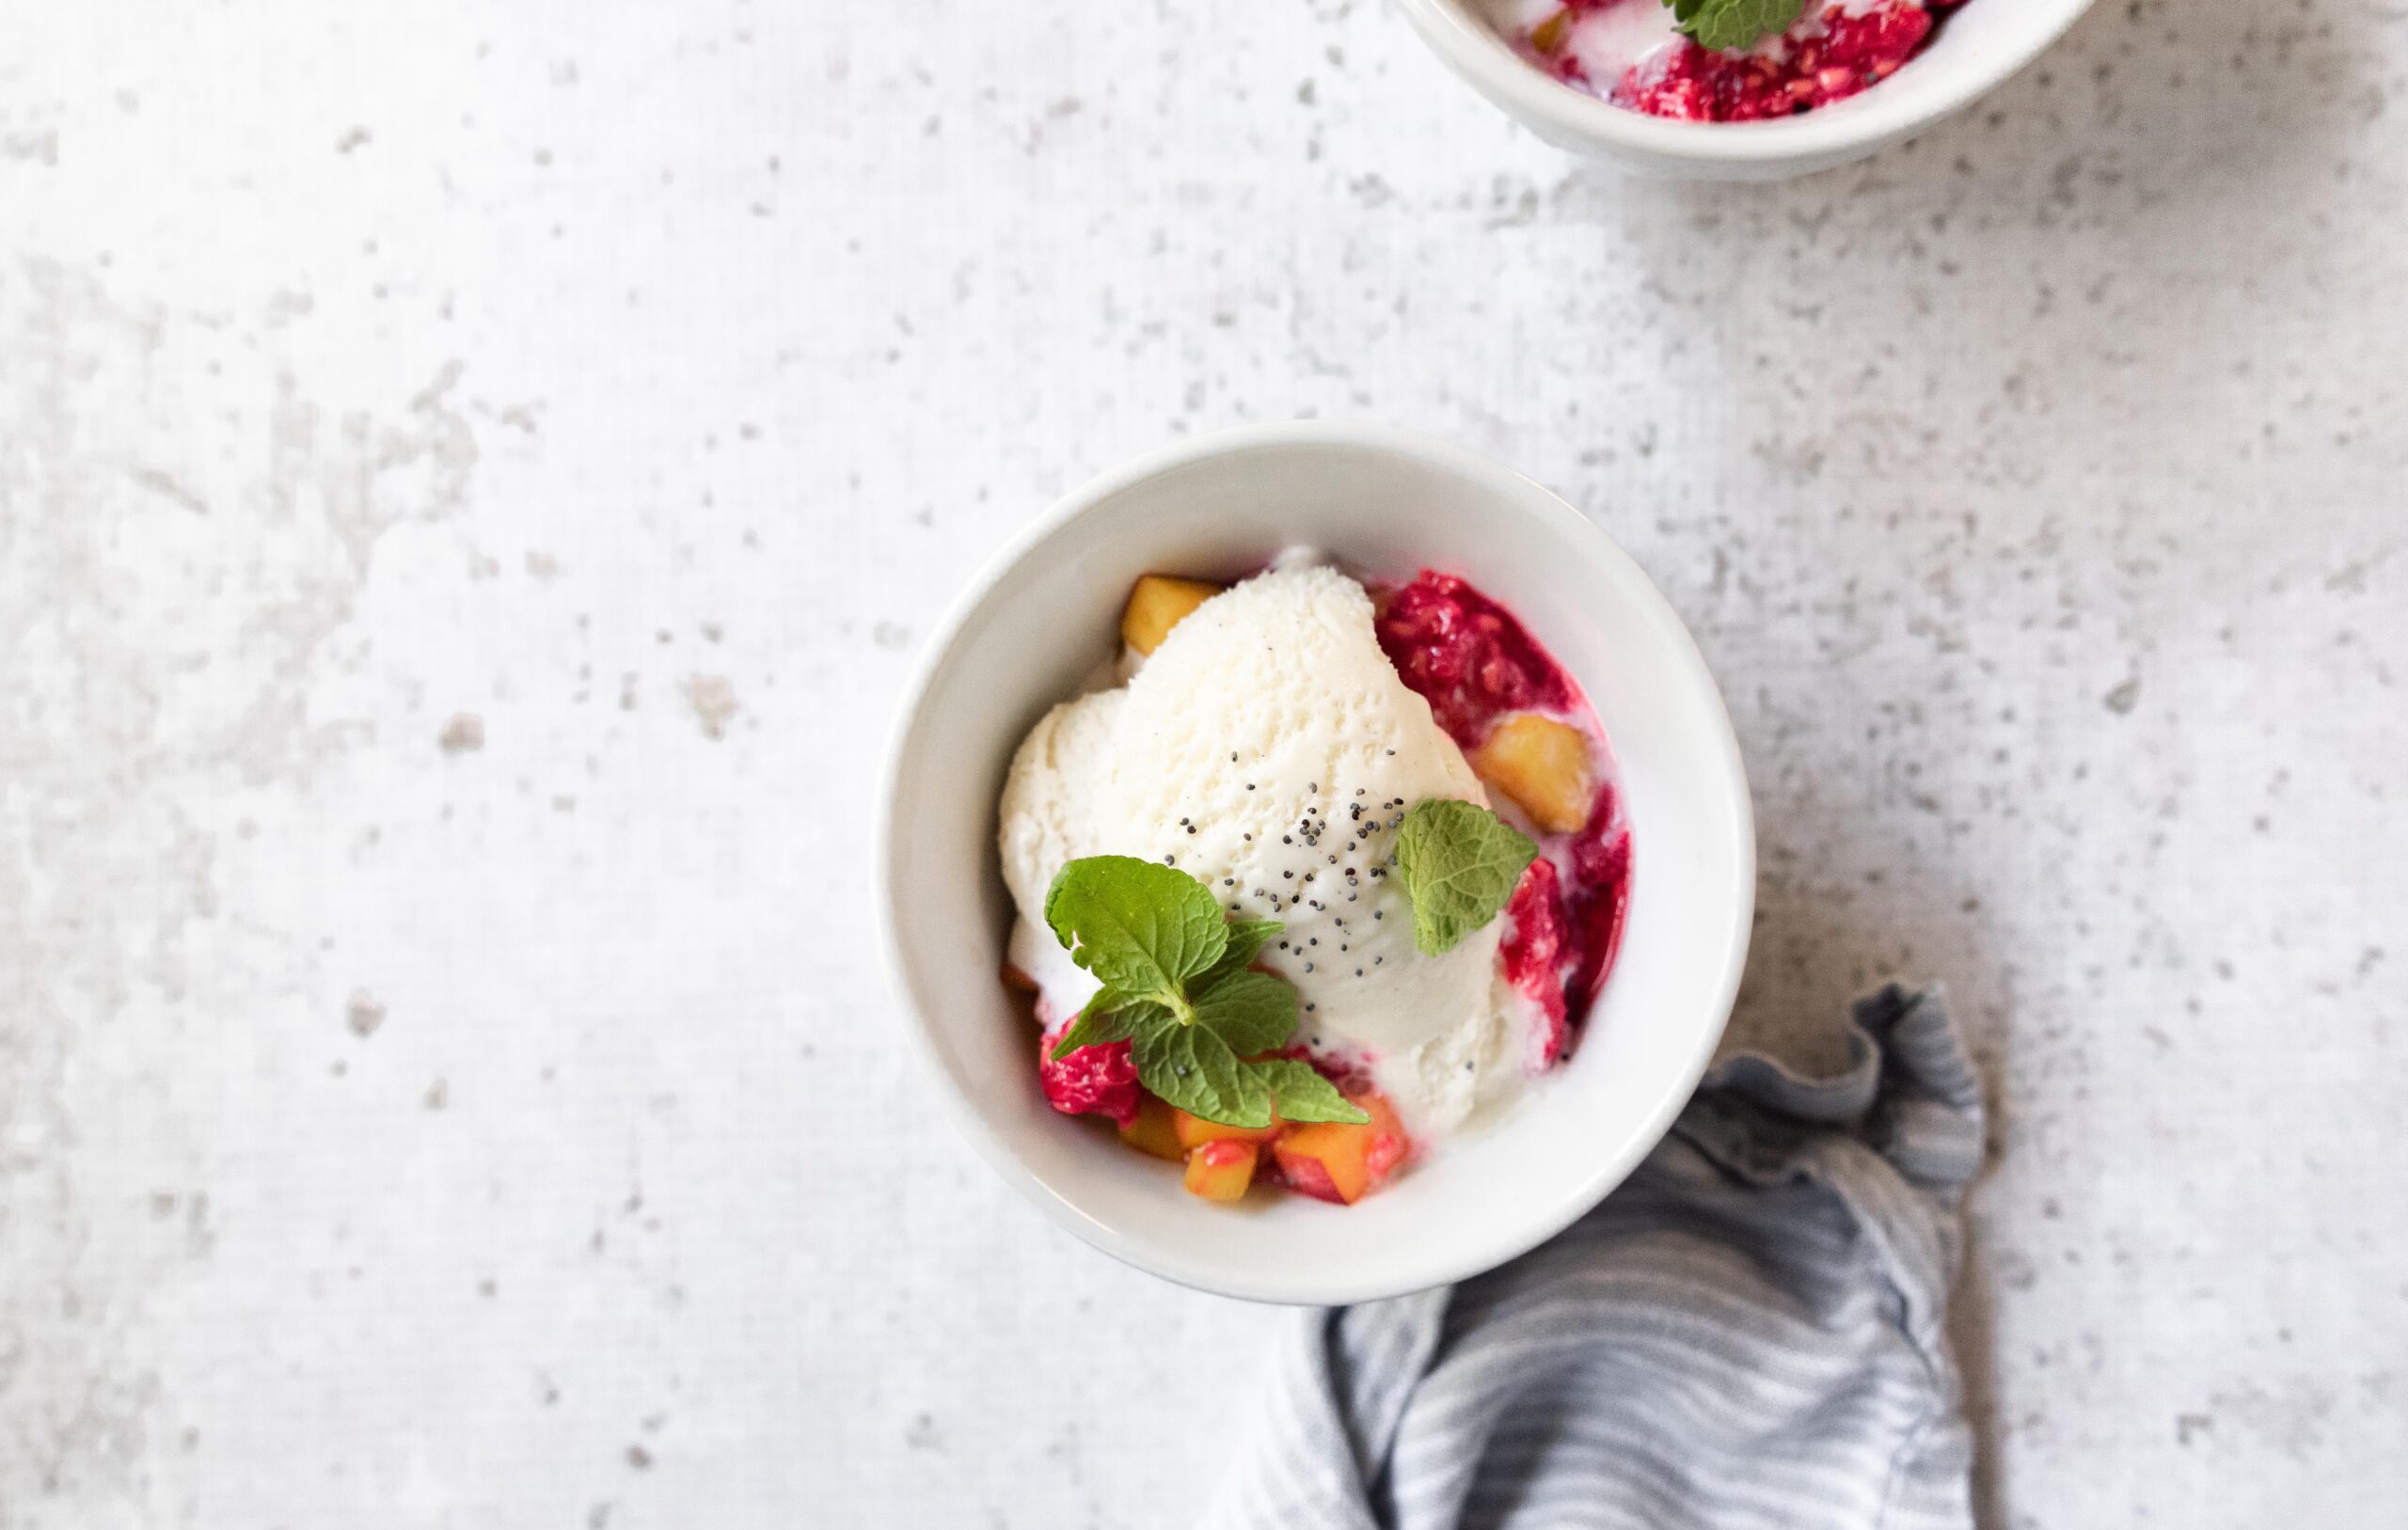
In a small bowl, toss raspberries with 1 tablespoon sugar or to taste and set aside. If raspberries do not release juices, press with the back of a spoon. In another bowl, toss peaches with remaining sugar and set aside.Allow fruit to rest for 15 minutes or until juices release.
To serve, place peaches at the bottom of serving dishes and scoop frozen yogurt on top.Spoon over raspberries and garnish with fresh mint.Serve immediately.
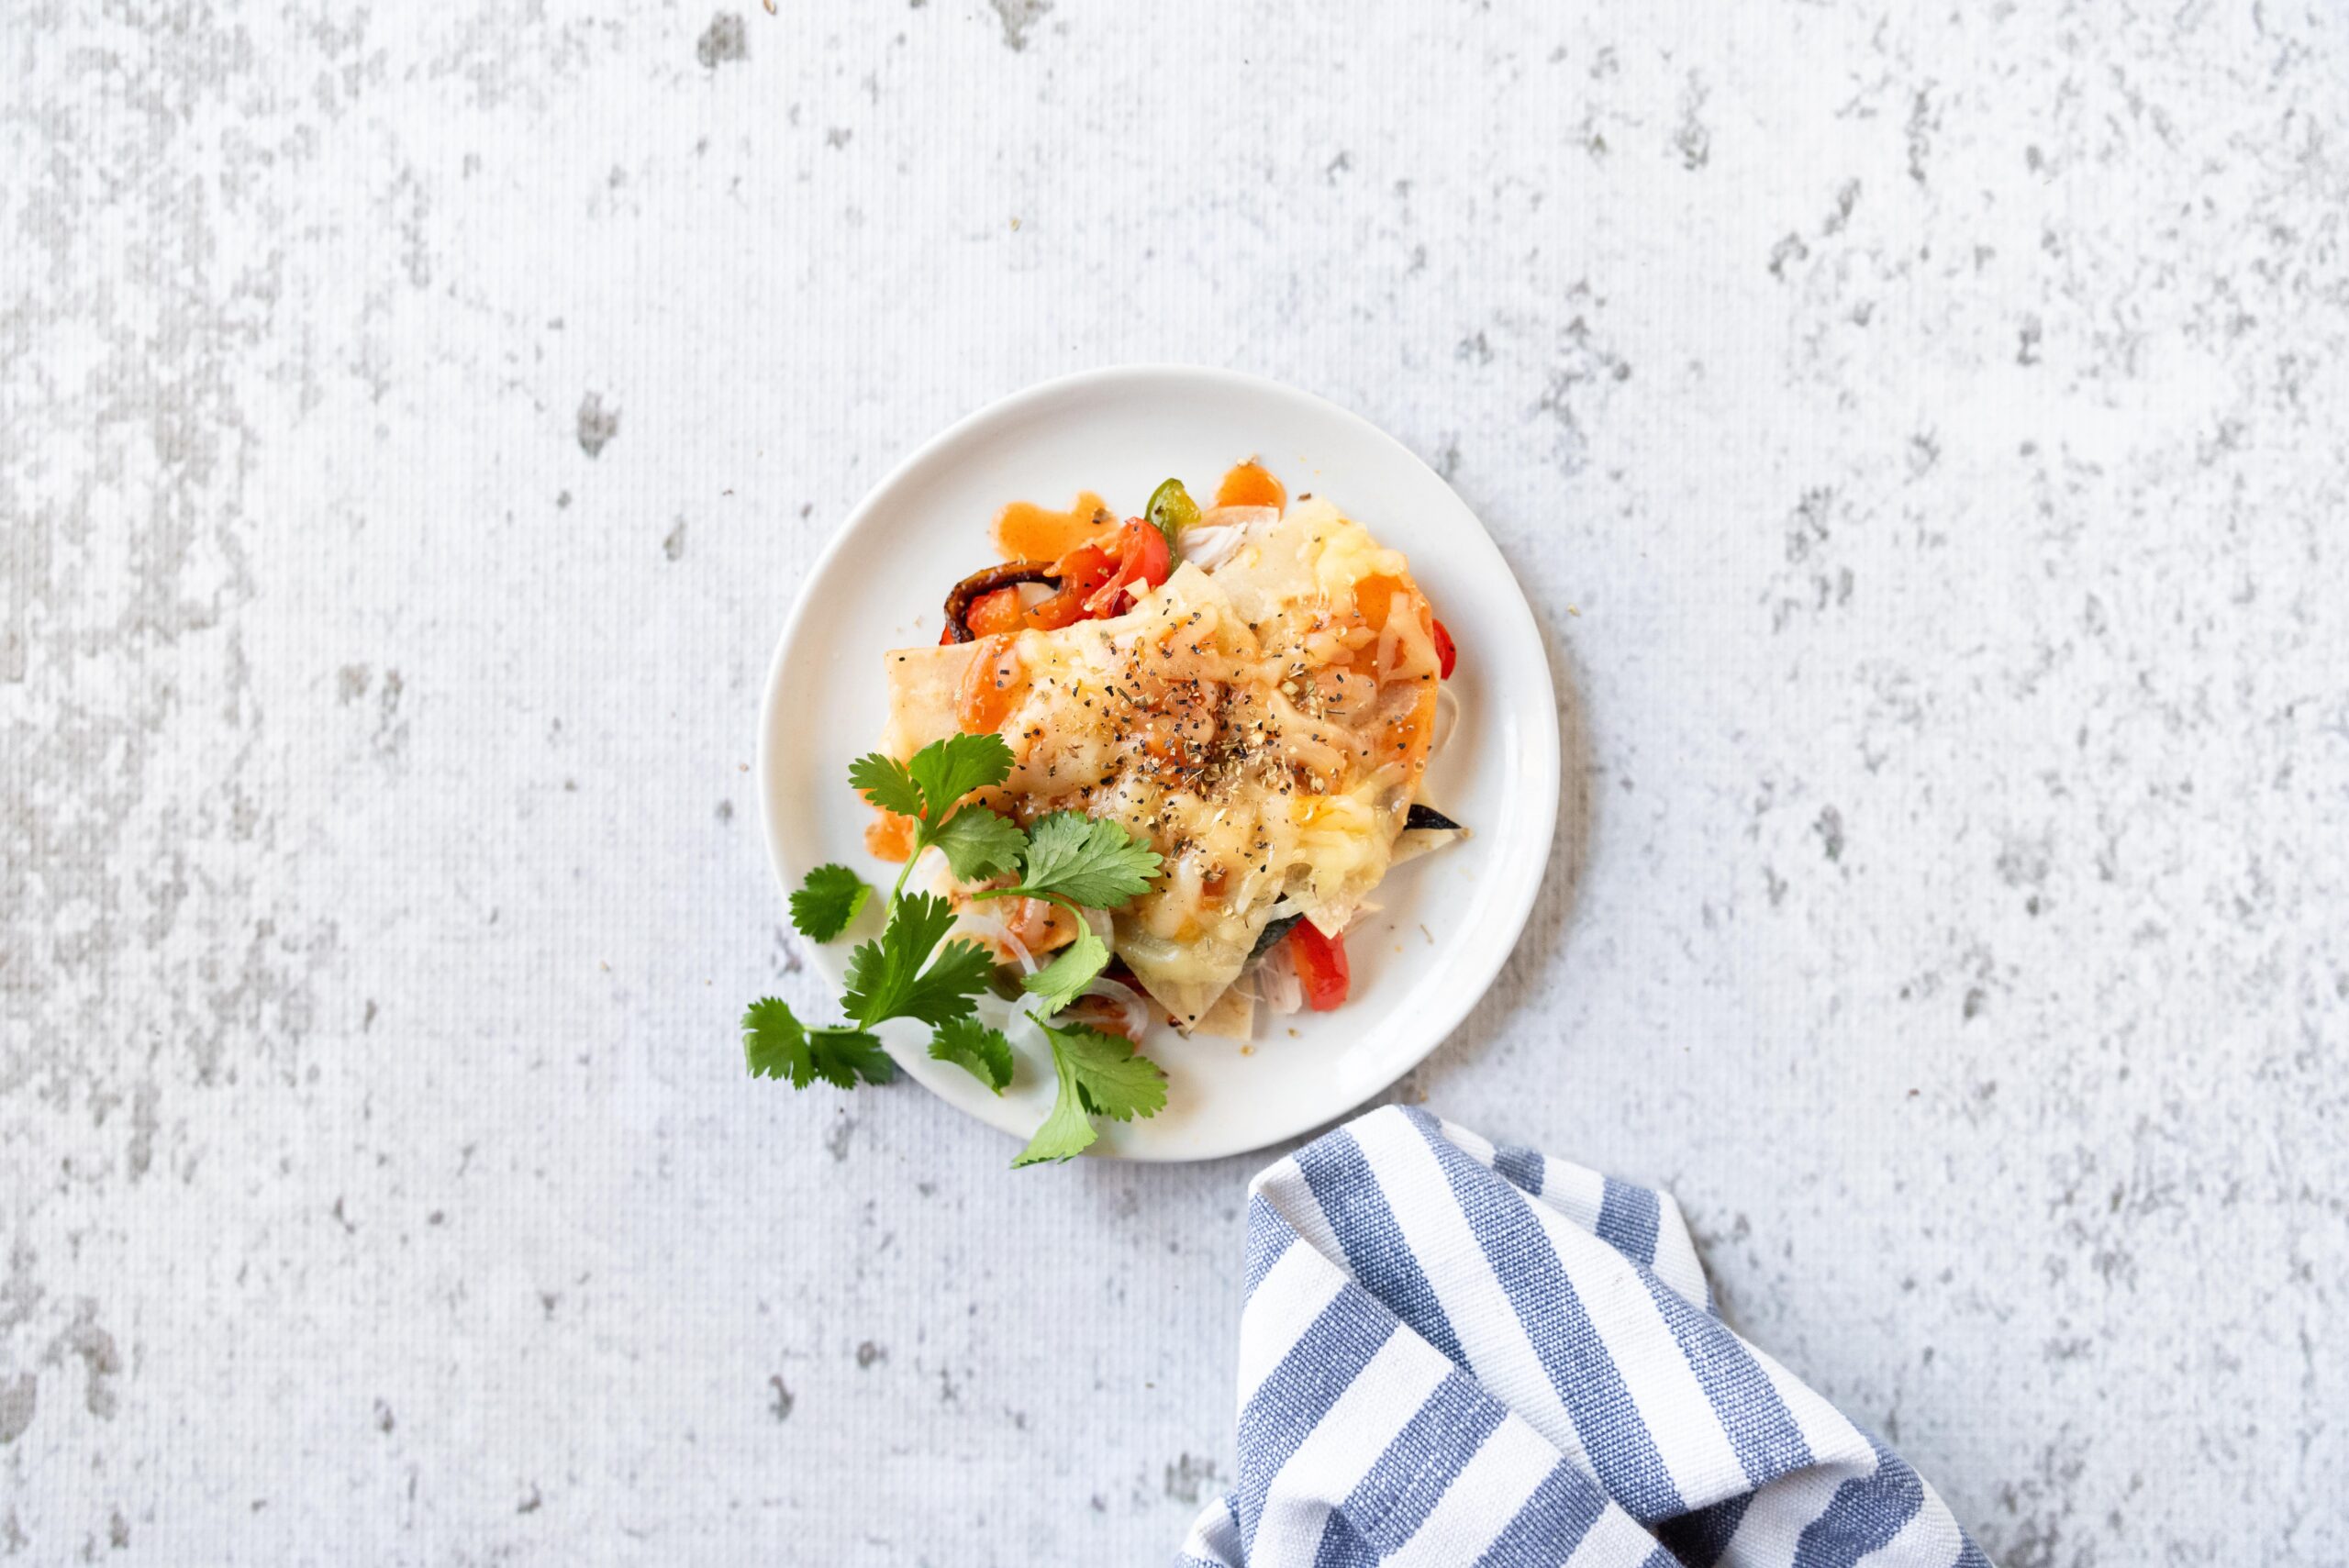
Preheat oven to 350°F. Toss pulled chicken with chili powder, oregano, salt, pepper and 2 tablespoons olive oil in a large bowl.
In a large skillet, sauté bell peppers, onions, and red pepper flakes with remaining olive oil over high heat until tender crisp and starting to char. Season with salt and pepper to taste. Set aside to cool.
To assemble, place a quarter of the sauce on the bottom of a 9"x13" baking dish. Layer ingredients as follows: 6 tortillas, half of the chicken, beans, and cooked pepper and onions. Pour on a quarter of the sauce followed by a third of the cheese and repeat one more time. Top with the remaining tortillas, sauce, and finish with the rest of the cheese.
Cover assembled enchilada with foil and bake for 30 minutes. Remove foil and continue to bake until bubbling and cheese is starting to brown.
Thanks to Christine Waltermyer & The Natural Kitchen Cooking School!
Christine Waltermyer is a local and renowned Wellness Chef, private chef to celebrities, published cookbook author and founder of the Natural Kitchen Cooking School, which offers an online Plant-Based Cooking Program. She also loves shopping at Basil Bandwagon! Visit naturalkitchenschool.com to subscribe to her email newsletter for new recipes, tips, and FREE access to the Power of Veggies mini-course!
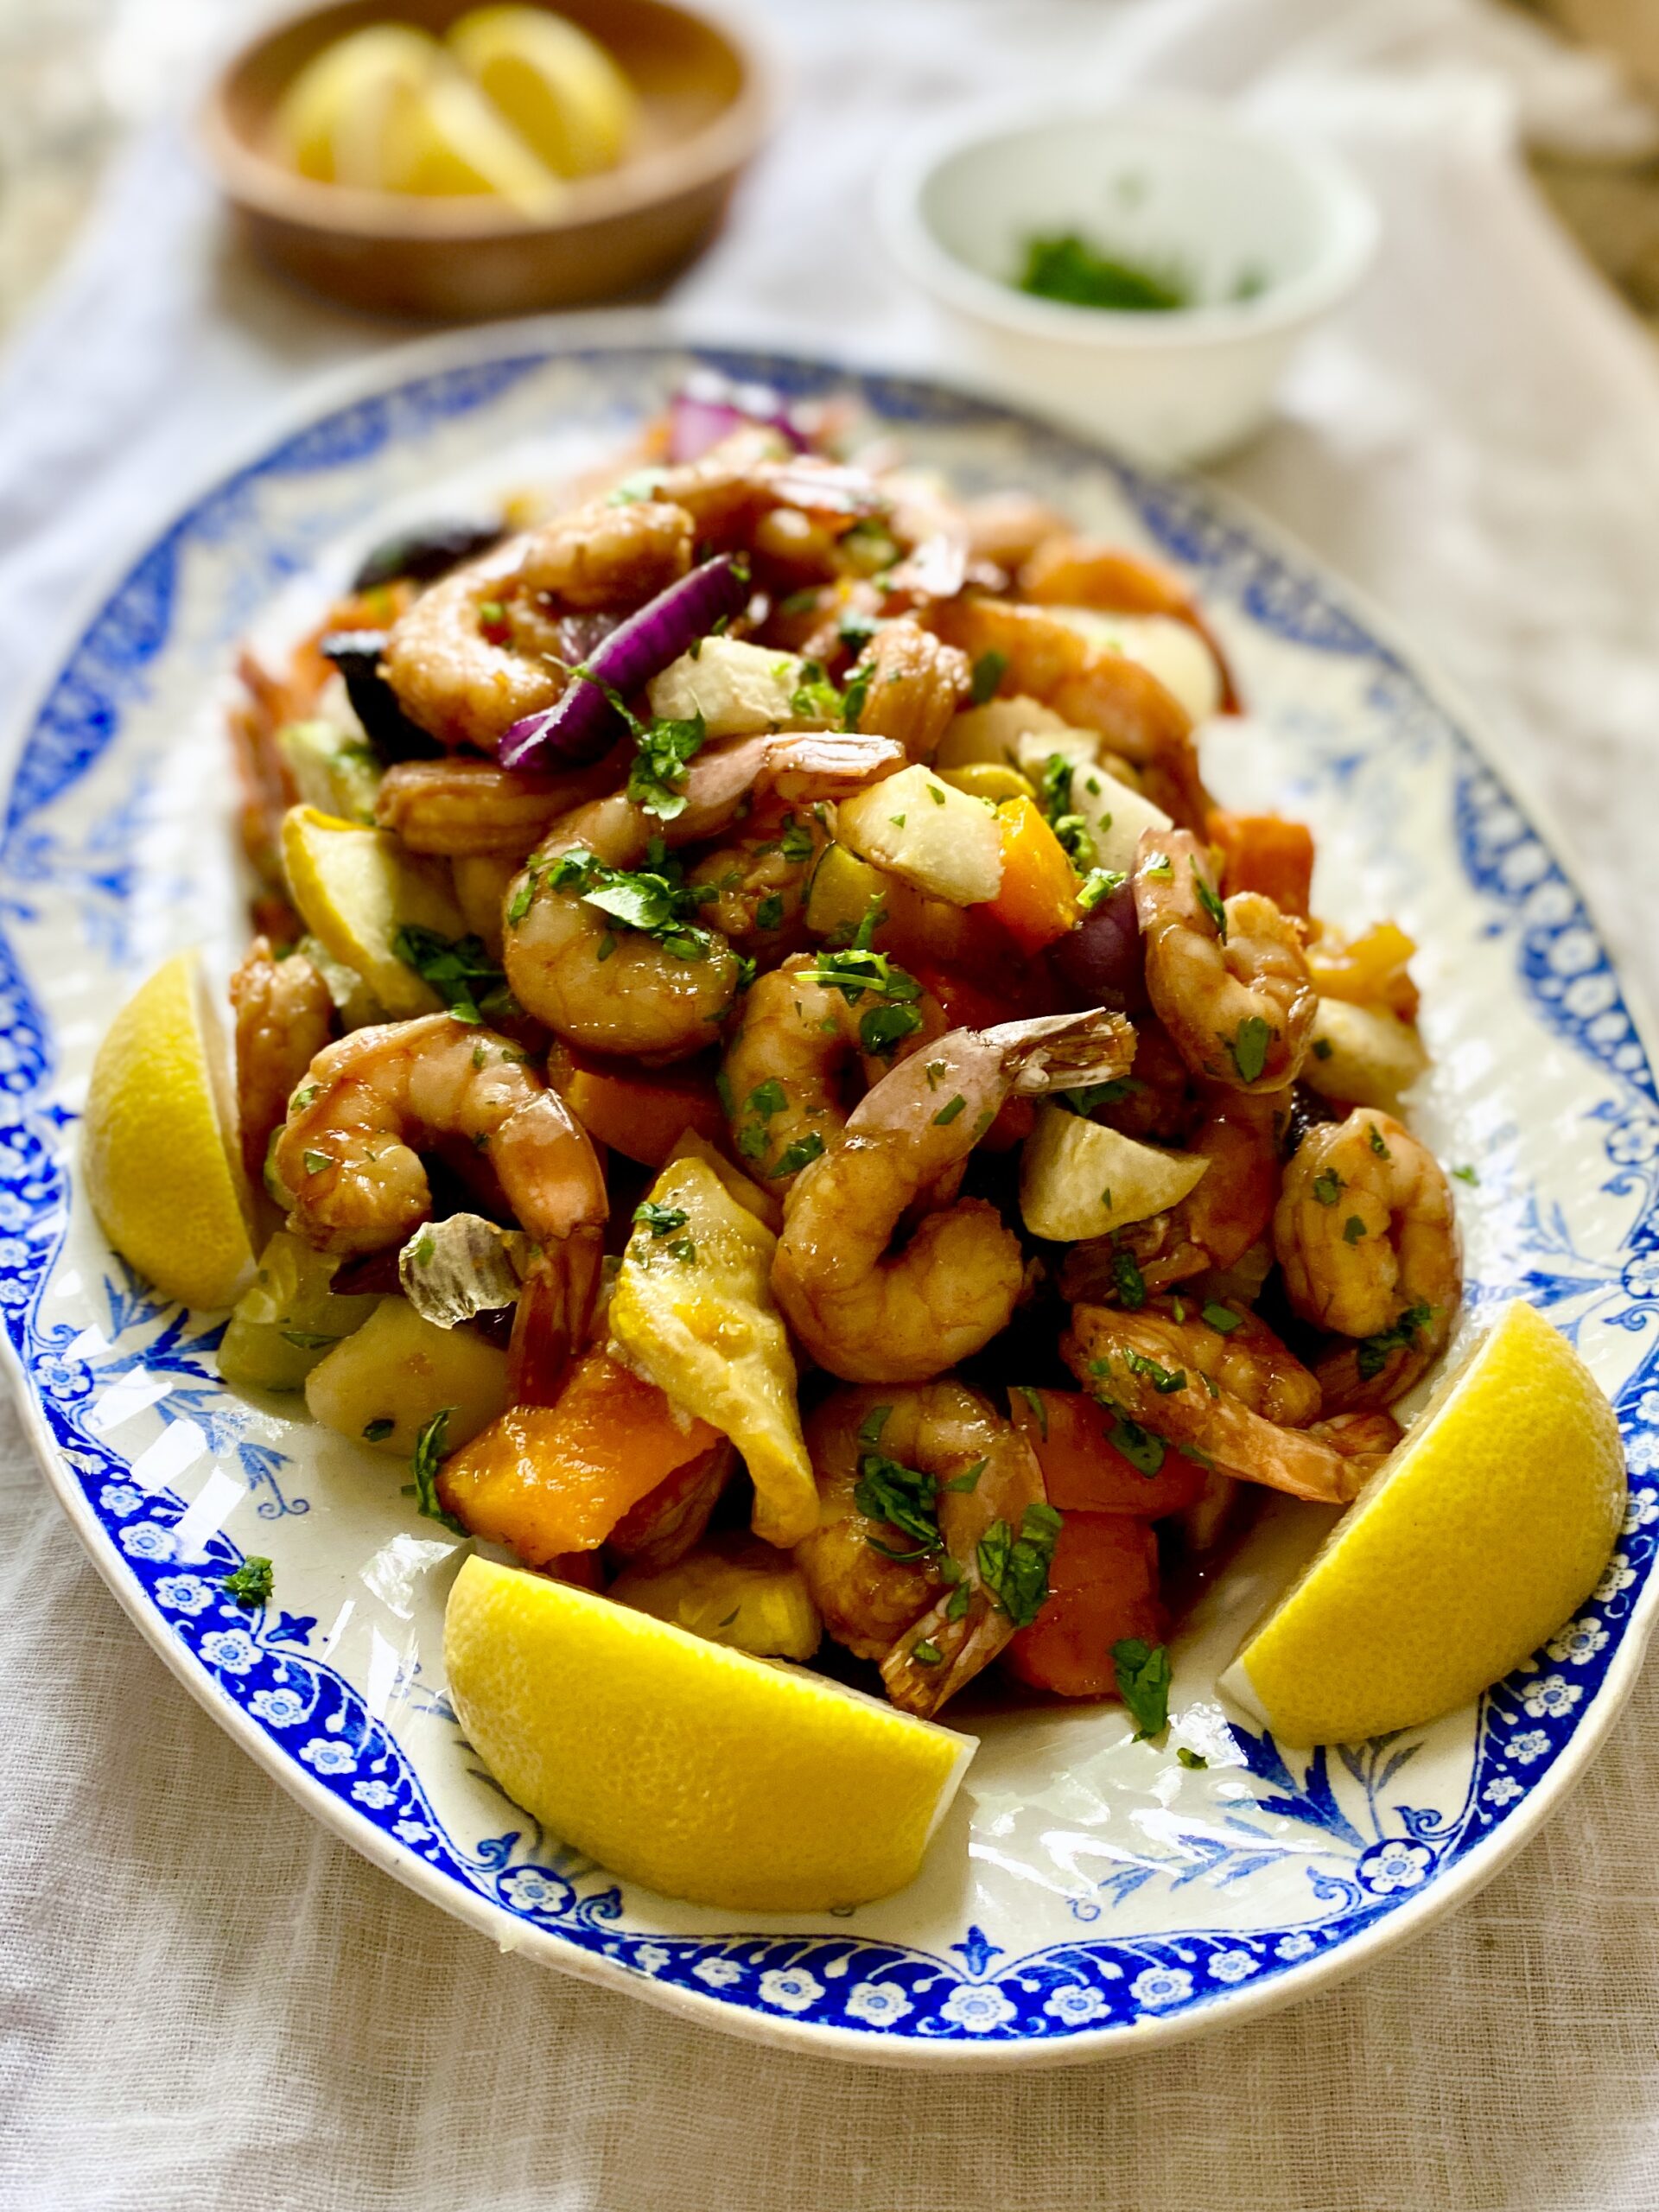
Do you have a busy schedule? Are you looking for an easy, weeknight meal? Well thanks to Christine Waltermyer and The Natural Kitchen Cooking School, you can make your family a delicious honey glazed shrimp sheet pan dinner with this simple recipe!
Make the Marinade: In a medium mixing bowl, whisk together the honey, coconut aminos, ½ teaspoon of the onion powder and sea salt and white pepper to taste. You will use half of this marinade to marinate the shrimp. Save the other half for cooking the shrimp.
Marinate the Shrimp: Place the shrimp in a medium size glass bowl. Add 1/2 of the marinade and toss well to combine. Cover the bowl and place it in the refrigerator for at least 15 minutes. To make the shrimp even more flavorful you can marinate them up to 8 hours, or overnight. Pour the rest of the marinade into a glass jar and refrigerate.
Preheat the oven to 375-degrees F. Line a large, rimmed baking sheet with parchment paper.
Season and roast the vegetables: Add the vegetables to the baking sheet and toss with the coconut oil. Season with the remaining onion powder and sea salt and white pepper to taste. Toss again. Arrange the vegetables in a single layer. Roast for 15 minutes. Remove the sheet pan from the oven. Flip the vegetables over. Return to oven and roast for 15 more minutes.
Add shrimp + bake: Remove the baking sheet from the oven. Use a spatula or tongs to carefully move the vegetables over to one side to make room for the shrimp. Add the shrimp to the baking sheet. Discard the used marinade. Drizzle the shrimp with the remaining unused marinade in the jar. Return the baking sheet to the oven and bake for 5 to 7 minutes, or until the shrimp are pink and firm to the touch.
Serve the roasted vegetables and shrimp with lemon wedges and garnished with the cilantro. This goes well served over some fluffy cooked white rice.
Enjoy!
Thank you to Christine Waltermyer and the Natural Kitchen Cooking School for working with us to help promote healthy, nutritious meals and products that are affordable, full of nutrients, and simple to make at home!
Thanks to Christine Waltermyer & The Natural Kitchen Cooking School!
Christine Waltermyer is a local and renowned Wellness Chef, private chef to celebrities, published cookbook author and founder of the Natural Kitchen Cooking School, which offers an online Plant-Based Cooking Program. She also loves shopping at Basil Bandwagon! Visit naturalkitchenschool.com to subscribe to her email newsletter for new recipes, tips, and FREE access to the Power of Veggies mini-course!
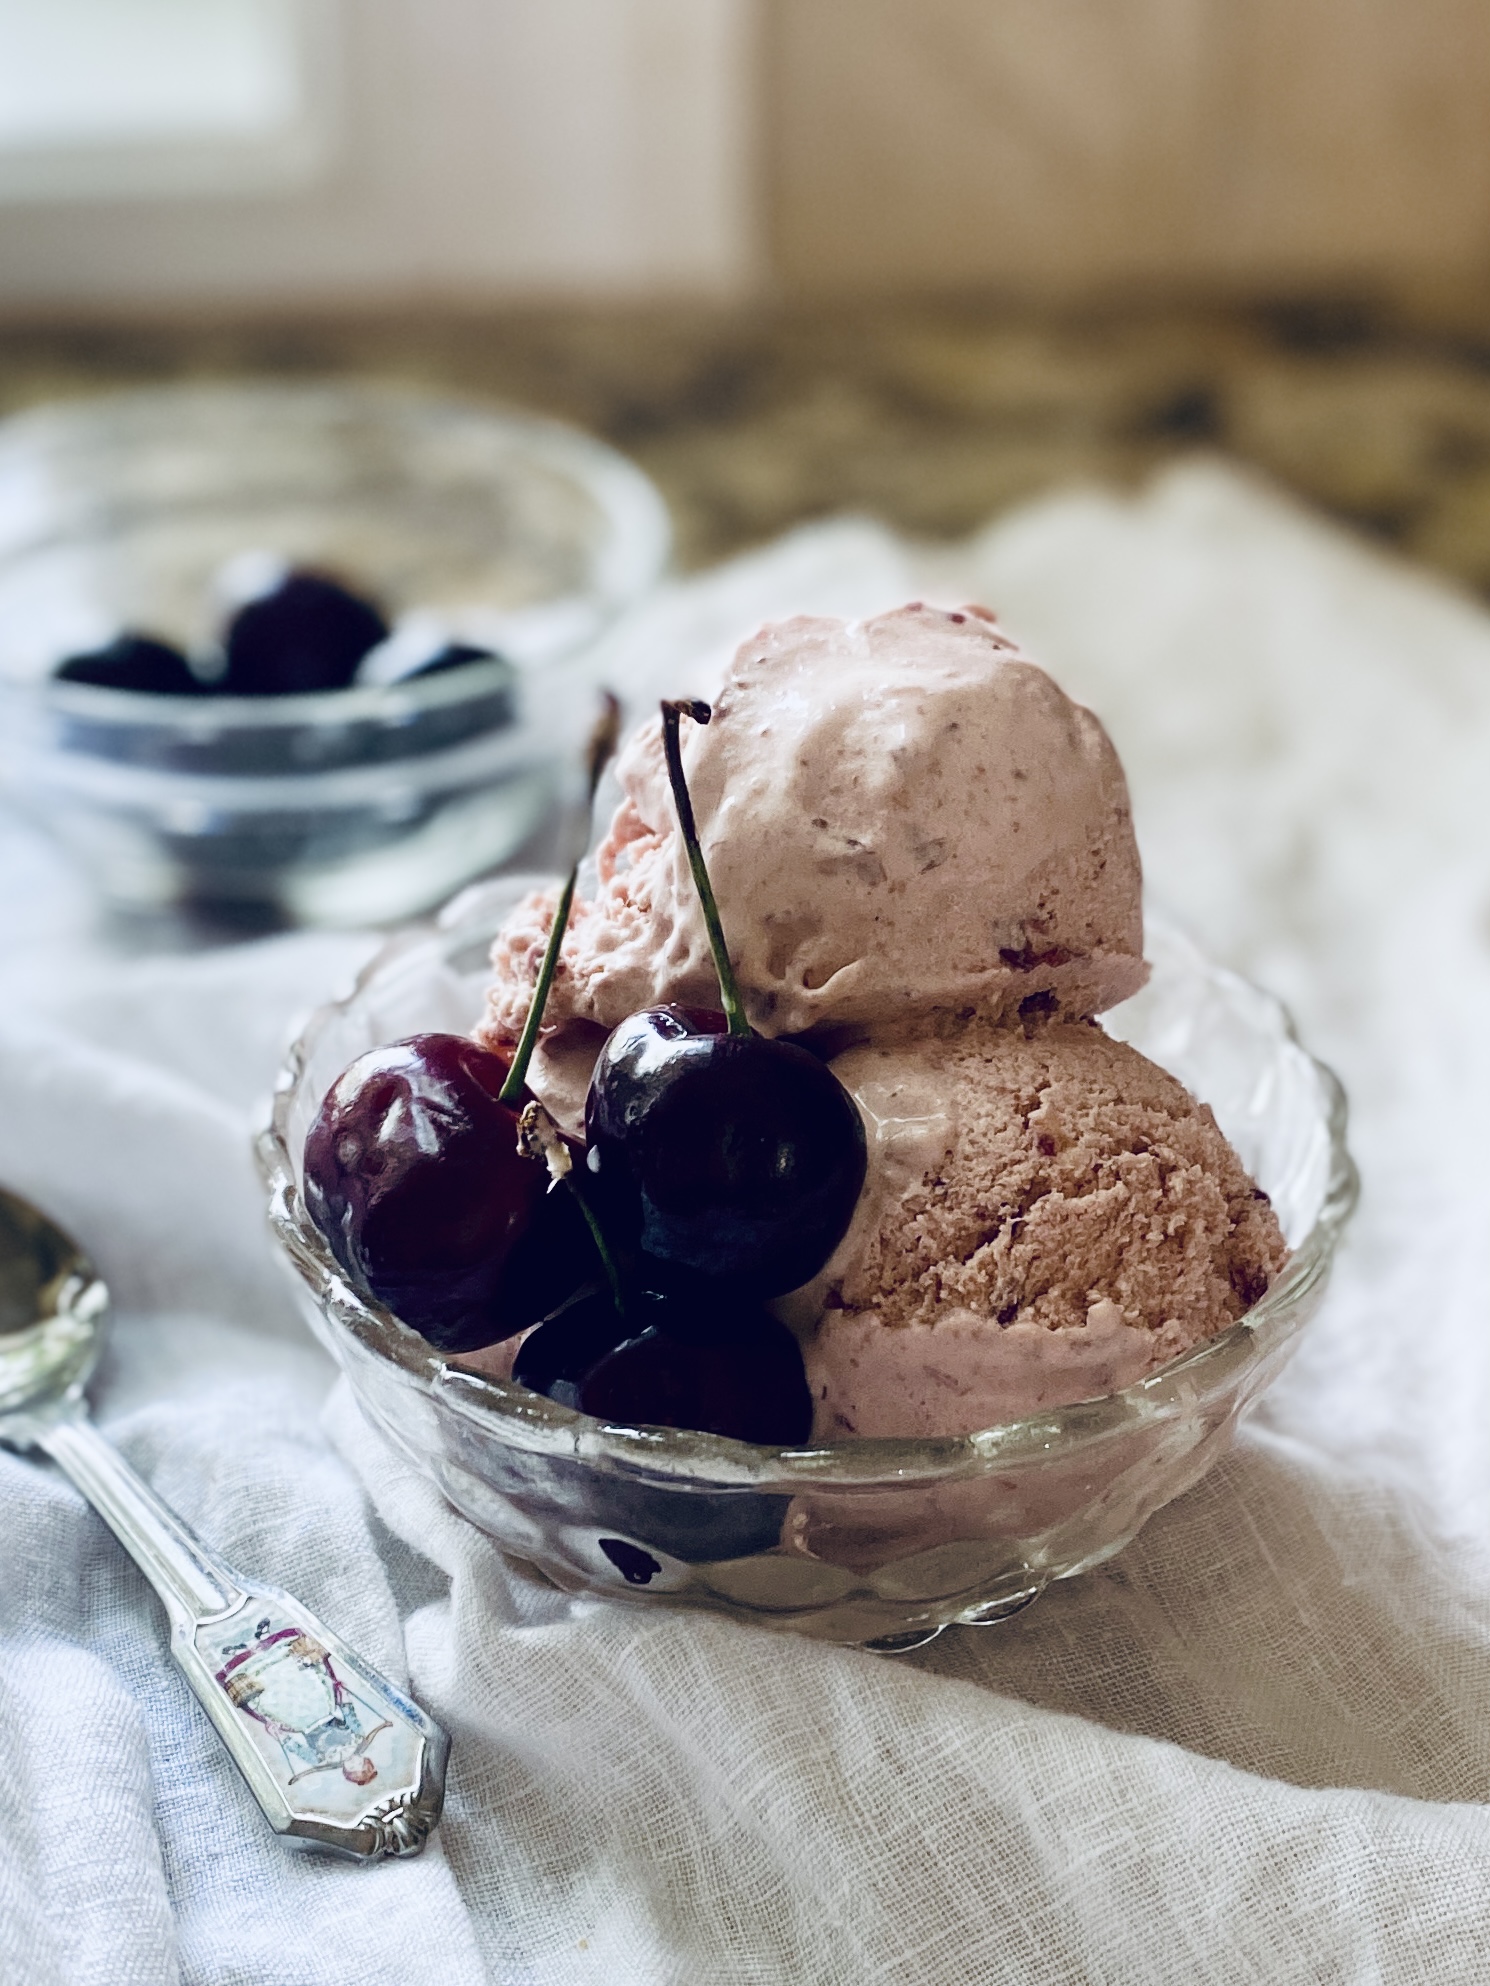
Summer is time for ice cream – but let’s make it homemade! It’s easier than you think and thanks to Christine Waltermyer and the Natural Kitchen Cooking School, we have an easy cherry vanilla ice cream recipe that you can try at home today 🍒🍦
1cupheavy cream (I used dairy but you could use coconut-based cream for non-dairy)
2cupsfrozen sweet cherries
¼cuppowdered sugar
Pinch sea salt
1teaspoonvanilla powder (or vanilla extract)
1teaspoonlemon juiceoptional
1pasteurized egg yolkoptional
Instructions
Pour the heavy cream into the bowl of a food processor. Whip it until fluffy. Add the frozen cherries, heavy cream, sugar, sea salt, vanilla powder, and optional lemon juice and egg yolk. Puree until completely smooth.
Freeze the ice cream using one of these two methods:1. Pour the ice cream into small single serving containers and freeze them. This makes it easy to take out and bring to room temperature for a few minutes to help it soften before serving.2. Or, pour the whole batch into a shallow pan and freeze for 1 hour. Swirl with a fork and freeze again. Stir every hour until firm, then transfer into a storage container.
Enjoy!
Notes
This is a firmer ice cream once it’s frozen, so just allow for letting it sit at room temperature for a few minutes before serving and you’ll be all set to enjoy delicious creamy ice cream!
Thank you to Christine Waltermyer and the Natural Kitchen Cooking School for working with us to help promote healthy, nutritious meals and products that are affordable, full of nutrients, and simple to make at home!
Christine Waltermyer is a local and renowned Wellness Chef, private chef to celebrities, published cookbook author and founder of the Natural Kitchen Cooking School, which offers an online Plant-Based Cooking Program. She also loves shopping at Basil Bandwagon! Visit naturalkitchenschool.com to subscribe to her email newsletter for new recipes, tips, and FREE access to the Power of Veggies mini-course!
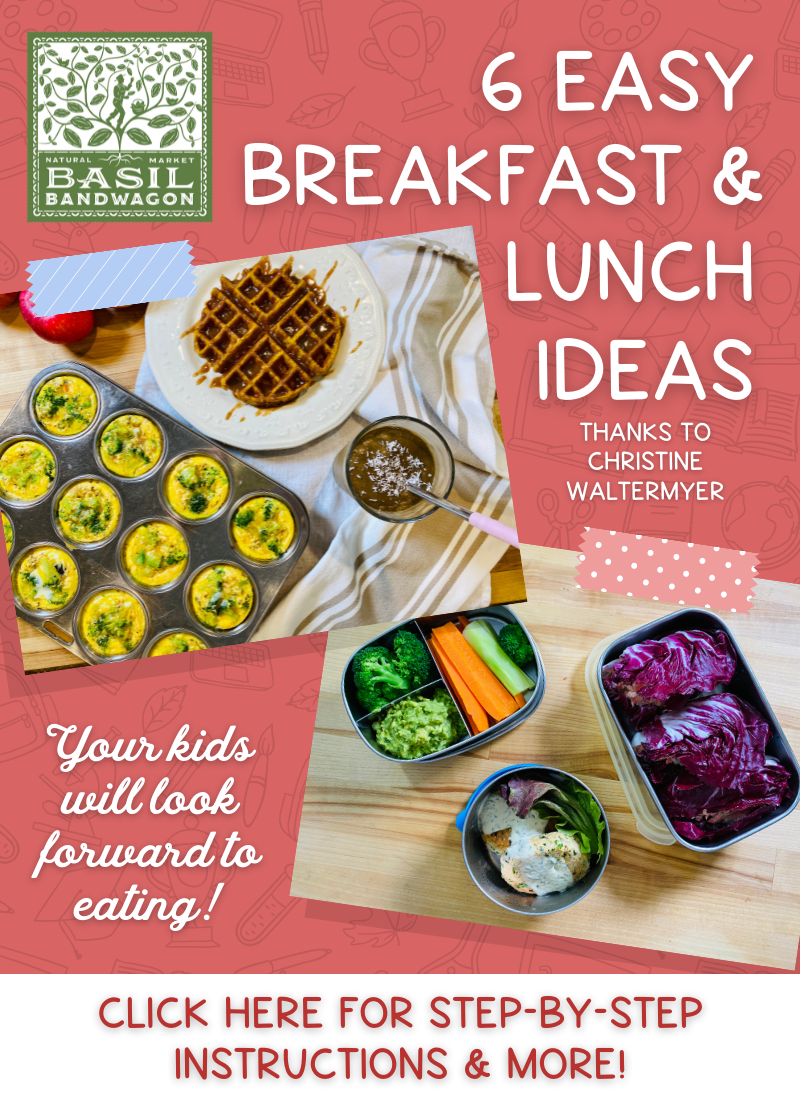
We’re more than halfway through the first half of this school year! 🤓 What better time to switch up your breakfast and lunch routines. Christine Waltermyer and the Natural Kitchen Cooking School have whipped up 6 easy recipes for us – 3 before-school breakfasts to keep them full until lunch 🧇 & 3 school lunch ideas that your kids will look forward to eating! 🥗
Place the shredded coconut and water into a blender. Blend on high for a few minutes, scraping down the sides as needed. Strain through a nut milk bag if desired.
In the blender, place the milk and all remaining ingredients. Puree until smooth.
Optional: Add a scoop of your favorite protein powder or some walnuts to add protein to this smoothie.
2tablespoonsLakanto monk fruit sweetener with erythritol
½cupunsweetened almond milk
¼cupavocado oil or melted coconut oiloptional
2eggs
½cupshredded carrot
Maple Almond Butter Topping:
¼cup almond butter
¼cupmaple syrup
Instructions
In a large bowl, combine the almond flour, coconut flour, sea salt, baking powder, vanilla powder, pumpkin pie spice, and monk fruit sweetener. Whisk to blend together.
Add the almond milk and optional avocado oil if using. In a small bowl, beat the eggs, then add them to the almond flour mixture. Stir well. Add the shredded carrot and fold in gently.
Preheat the waffle iron. Just before adding the batter, lightly brush with a silicone brush or spray the waffle iron with a little avocado oil or coconut oil. Using a spoon or measuring cup, quickly add half of the batter (about 1 cup). Spread it evenly over the waffle iron, then close it.
If you have the kind of waffle iron you can flip, cook for about 2 to 3 minutes on one side, then flip it. Cook for an additional 2 ½ minutes on the other side. If you have a regular waffle iron that does not flip, just cook for 4 to 5 minutes.
Carefully open the waffle iron. Let the cooked waffle cool slightly before removing. Repeat with remaining batter.
To make the maple almond butter topping: In a small bowl, mix together the almond butter and maple syrup. Serve the waffles warm, spread with the maple almond butter.
Heat a medium size cast iron skillet or other skillet of your choice over medium heat. Add the red onion, a small splash of water and a pinch of the sea salt. Cook for a few minutes, until they start to soften. Add the carrots, and another pinch of sea salt and splash of water. Cook for another few minutes, or until all vegetables are tender.
Crack all of the eggs into a large bowl. Beat the eggs. Add the Dijon mustard, sea salt and black pepper. Stir again.
Preheat the oven to 350 degrees F.
Prepare your muffin tin by generously greasing each muffin cup with some coconut oil or avocado oil. Add a spoonful of the cooked red onion-carrot mixture to each cup, evenly distributing the veggies among the 12 muffin cups.
Pour some of the egg mixture into each muffin cup, dividing equally. Bake for 25 minutes or until the tops are set and no longer wet. Cool for 15 minutes. Use a knife around the edges to release the egg muffin cups from the muffin tin.
½teaspoonsea salt (+ more for sprinkling on the finished patties)
a few grinds of freshly cracked black pepper
2tablespoonsavocado oil or coconut oil for frying
For the Dill Sauce:
½cupavocado mayonnaise
1teaspoondijon mustard
1tablespoonfresh dillfinely chopped
2teaspoonslemon juice
Instructions
Drain the canned salmon and place in a large bowl.
Add the eggs, almond flour, scallions, parsley, sea salt and pepper. Mix well, cover and refrigerate for 15 minutes.
Form the salmon mixture into 7 or so patties.
Heat a large skillet over medium heat. Add the avocado or coconut oil, and quickly add the salmon patties. Depending on the size of your skillet, you can add all of them or just 4 patties at a time.
Cook for about 4 or 5 minutes on one side. Using a spatula, carefully turn each patty. Fry for another few minutes on the other side.
To make the dill sauce: In a small bowl, combine all of the dill sauce ingredients. Stir well. Serve the salmon patties warm, drizzled with the dill sauce.
Pat the salmon dry using a paper towel. Sprinkle with sea salt and pepper.
Heat a skillet over medium heat. Add the avocado oil, then quickly add the salmon, flesh side-down. Cook uncovered for 4 to 5 minutes. Use a spatula to turn the salmon. Cook for three more minutes on the other side.
Once the salmon has cooled to the touch, remove any bones. You can also remove the skin and gray-colored fat if desired. Using a fork, flake the salmon apart. Place the prepared salmon in a large bowl.
Add the celery, onion, lemon juice, sea salt and pepper to taste, fresh dill and mayonnaise. Stir to combine and adjust seasoning to taste.
Fill radicchio or butter lettuce leaves with a generous spoonful of the salmon salad per leaf.
1cupbroccoli – a combination of broccoli florets & peeled stemssliced
sea salt
1avocadopitted
2teaspoonsfresh cilantrochopped
½teaspoonsea saltor to taste
black pepperto taste
1tablespoonchopped onion
1teaspoonfresh lime juiceor more to taste
Instructions
In a medium saucepan, bring a few inches of lightly salted water to a boil over medium high heat. Keep a strainer or colander nearby, with a plate underneath. Drop the broccoli florets and peeled stems into the water. Cook for a few minutes.
Remove the broccoli with a slotted spoon. Place them in the strainer to cool.
Bring the water back to a boil, then drop in the carrot planks. Cook for a few minutes. Remove the carrot planks with a slotted spoon. Place them in the strainer to cool.
Make the guacamole: In a large bowl, mash the avocados. Add the sea salt and black pepper to taste. Add the lime juice, cilantro, chopped onion and lime juice. Stir well.
Serve the cooled vegetables and guacamole, or pack them into a portioned lunch container as a snack on the go.
Enjoy!
Thank you to Christine Waltermyer and the Natural Kitchen Cooking School for working with us to help promote healthy, nutritious meals and products that are affordable, full of nutrients, and simple to make at home!
Christine Waltermyer is a local and renowned Wellness Chef, private chef to celebrities, published cookbook author and founder of the Natural Kitchen Cooking School, which offers an online Plant-Based Cooking Program. She also loves shopping at Basil Bandwagon! Visit naturalkitchenschool.com to subscribe to her email newsletter for new recipes, tips, and FREE access to the Power of Veggies mini-course!
Cut the bananas in half lengthwise. Place each banana half (wider end) on a popsicle stick. Place the banana halves on a parchment-lined plate or container. Freeze for a minimum of 2 hours.
Arrange your toppings in little bowls. Melt the chocolate chips in a double boiler or a stainless steel bowl placed on top of a saucepan filled with simmering hot water on medium heat. Add the coconut oil. Whisk occasionally until melted.
Use a silicone brush to brush the melted chocolate onto the frozen bananas. While the chocolate is still soft, sprinkle with any toppings of your choice. Work quickly as the chocolate freezes quickly. Place on parchment or wax paper to set. Refreeze the bananas, storing in an air-tight container.
Enjoy!
Notes
Note: Instead of putting the bananas on sticks, you can just slice them before coating with melted chocolate and toppings.
In a bowl, mix together the oat flour, maple syrup, coconut oil, almond butter, vanilla extract and sea salt. Stir well, then add 2 tablespoons of the carob chips. Roll into 8 bite-size little balls. Feel free to double the recipe if you want a larger batch. Refrigerate the cookie dough balls for about 12 minutes.
Using a double boiler or a stainless steel bowl placed over a saucepan of boiling water, melt the chocolate chips or carob chips. One at a time, drop the chilled cookie dough balls into the melted chocolate, turning it to completely cover it. Carefully place on a piece of parchment paper. Repeat with the remaining cookie dough balls. Feel free to sprinkle with flaked sea salt before they cool and harden. You can also use a spoon to drizzle a little extra melted chocolate on top. Chill the cookie dough balls again before serving.
Enjoy!
Thank you to Christine Waltermyer and the Natural Kitchen Cooking School for working with us to help promote healthy, nutritious meals and products that are affordable, full of nutrients, and simple to make at home!
Christine Waltermyer is a local Wellness Chef, private chef to celebrities, published cookbook author and founder of the Natural Kitchen Cooking School, which offers an online Plant-Based Cooking Program. She also loves shopping at Basil Bandwagon! Visit naturalkitchenschool.com to get your FREE copy of her cookbook, “7 Days of Deliciousness.”
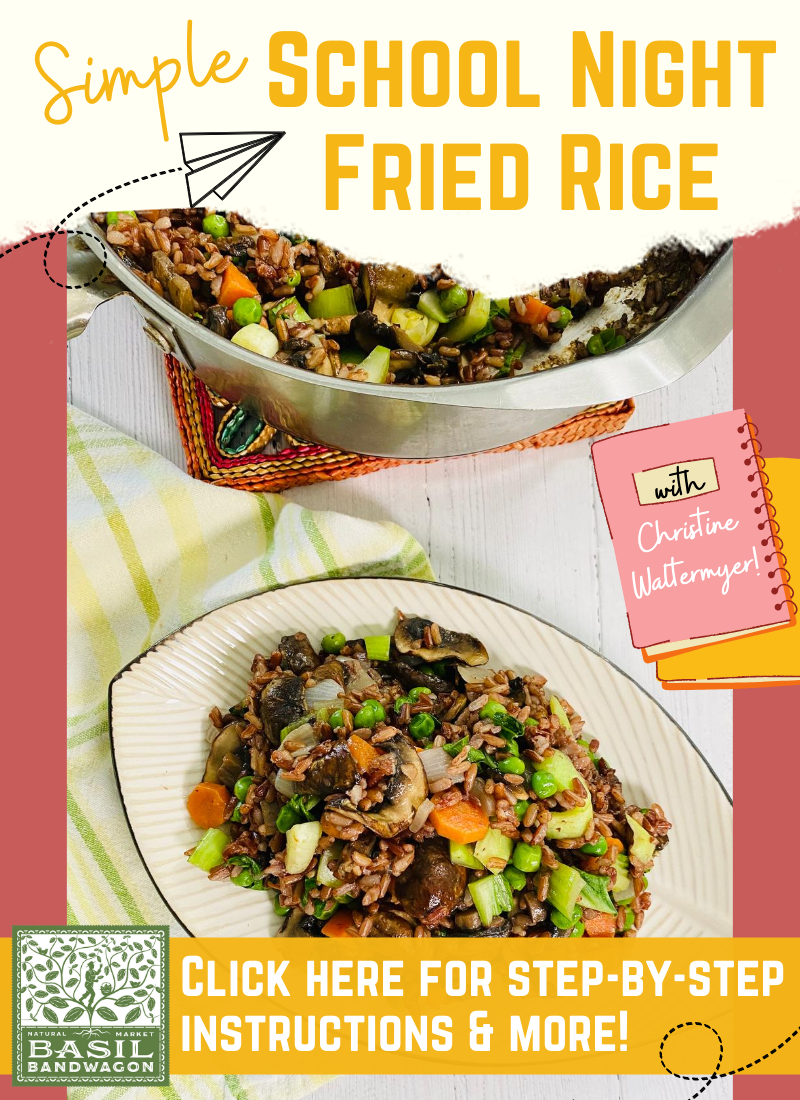
Simple School-Night Fried Rice
Serves 4
Ingredients
2 teaspoons sesame oil
½ onion, chopped
1 large carrot, diced
8 oz mushrooms, sliced
2 ½ cups cooked rice (I used red rice)
1 tablespoon Coconut Aminos
½ cup peas
1 baby bok choy, chopped
Method
1. Warm a large skillet over medium heat. Add the sesame oil and onion. Cook and stir for 1 minute. Add the carrots and mushrooms. Cook for 3 to 4 minutes, stirring occasionally. Add the rice and the coconut aminos. Stir and cook for 5 more minutes. You can cover the pot if you want, to help the vegetables to soften. Last, add the bok choy, and cook for one more minute.
2. Season with extra Coconut Aminos, if desired.
3. Enjoy!
Note: Chopped garlic and ginger can also be added to this dish when cooking the onions.
Thank you to Christine Waltermyer and the Natural Kitchen Cooking School for working with us to help promote healthy, nutritious meals and products that are affordable, full of nutrients, and simple to make at home!
Christine Waltermyer is a local Wellness Chef, private chef to celebrities, published cookbook author and founder of the Natural Kitchen Cooking School, which offers an online Plant-Based Cooking Program. She also loves shopping at Basil Bandwagon! Visit naturalkitchenschool.com to get your FREE copy of her cookbook, “7 Days of Deliciousness.”
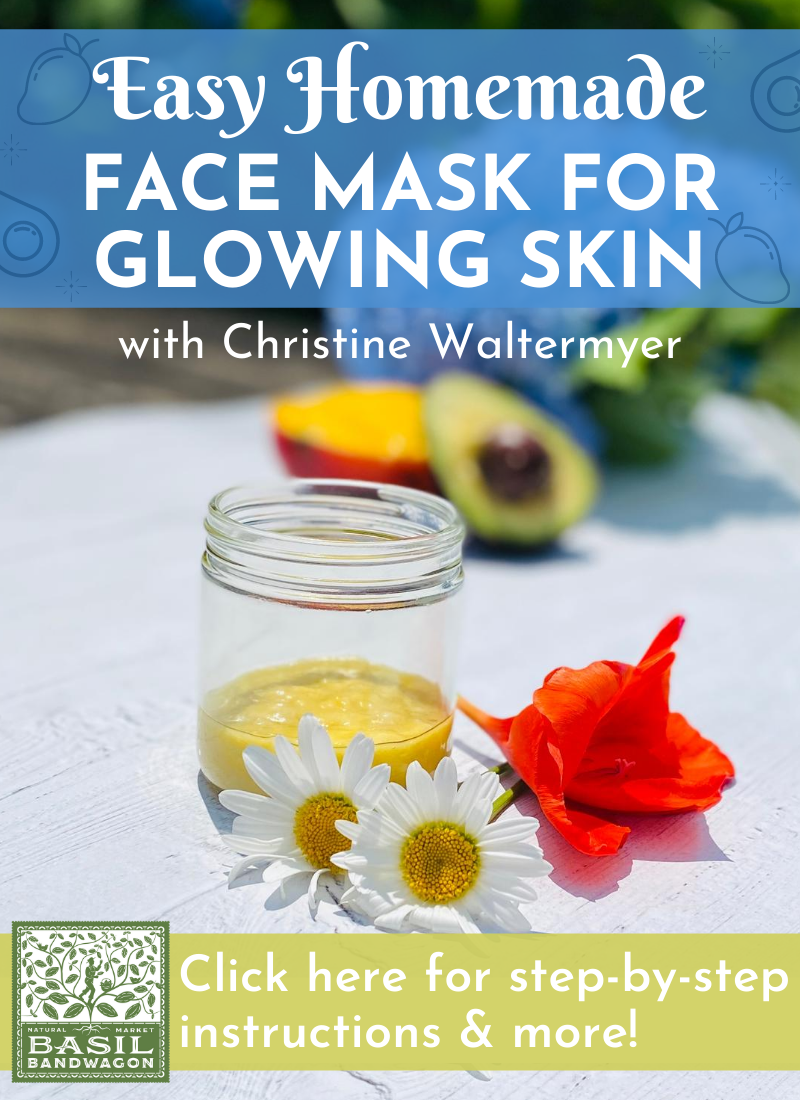
Mango Avocado Face Mask
Makes enough for 4 applications
Ingredients
2 teaspoons fresh aloe vera pulp or store-bought aloe vera gel intended for topical use
2 teaspoons unrefined coconut oil
1 tablespoon fresh avocado
1 tablespoon fresh mango
Optional: 2 drops Roman Chamomile Essential Oil (I used Wyndmere brand)
Method
1. Place all ingredients in a small bowl and mash everything together into as smooth consistency as possible. Apply 1 tablespoon all over your face and leave for 15 minutes. Rinse off with cool water.
Thank you to Christine Waltermyer and the Natural Kitchen Cooking School for working with us to help promote healthy, nutritious meals and products that are affordable, full of nutrients, and simple to make at home!
On sale this week (8/26-9/1): Organic Raspberries $3.99 each!
This quick and easy chocolate raspberry bark recipe is just what you need this school year! It’s the snack that every kid will want to trade their whole lunch for. The added benefit- you can enjoy it so many ways! Use as an edible decoration, eat it by itself, or add to your favorite dessert for a bonus treat.
Bonus- Justin’s Almond Butter (16oz jar) is also on sale until the end of this month for $8.99 each!
Ingredients
3/4 Cup Cacao Butter
1/4 Cup Maple Syrup
1 lb. Dark Chocolate, chopped
1/4 Cup Unsweetened Almond Milk
2 Tablespoons Almond Butter (also found in our bulk section!)
6 Ounces Raspberries
Flaky Salt
Method
1. Line a baking pan with parchment paper.
2. Combine cacao butter and maple syrup in small saucepan and warm over medium heat until completely melted.
3. Add chocolate and stir until incorporated. Once combined, remove from heat.
4. Add almond milk and nut butter into mixture and whisk until smooth and glossy.
5. Pour chocolate mixture into prepared pan and spread into an even layer.
6. Sprinkle with raspberries and flaky salt and freeze for about 1 hour or until set.
7. Once set, take out of freezer and allow to come to room temperature.
8. Break or cut chocolate bark into pieces and enjoy!
Before you enjoy your quick and easy chocolate raspberry bark, make sure you take a picture of your masterpiece! Post it on social media and tag your favorite produce market, Basil Bandwagon Natural Market! #basilbandwagon #producerecipeoftheweek