Blog

  • Tech neck

    Tech neck

    How screen time is straining your body

    Tech neck: how screen time is straining your body

    From laptops to smartphones, screens have become a constant companion in modern life. But the hours we spend hunched over our devices are contributing to a common complaint known as tech neck.”

    Characterized by neck stiffness, headaches, and shoulder pain, the condition is largely the result of prolonged forward head posture while looking down at screens.

    When the head tilts forward, the strain on the neck increases dramatically. Research suggests that even a modest downward tilt can place several times the normal load on the cervical spine. Over time, this posture can irritate muscles, compress joints, and lead to chronic tension in the neck, shoulders, and upper back. Many people also experience tension headaches or eye strain, especially after long stretches of computer work.

    Fortunately, a few small changes can make a big difference.

    Adjust your screen position Ideally, the top of your computer screen should be at or slightly below eye level so you’re looking straight ahead rather than downward. If you work on a laptop, consider using a stand or stack of books to raise the screen and pair it with an external keyboard.

    Check your posture: Sit with your shoulders relaxed and your ears aligned over your shoulders—not drifting forward. Your feet should rest flat on the floor, with knees roughly level with your hips.

    Use ergonomic micro-adjustments Instead of staying frozen in one position, shift your posture frequently. Adjust your chair angle, change the angle of your screen, or sit slightly farther back for a few minutes. These small movements help prevent muscle fatigue and reduce tension buildup.

    Protect your eyes Eye strain can contribute to neck tension because people tend to lean forward when they struggle to see clearly. Follow the “20-20-20 rule”: every 20 minutes, look at something about 20 feet away for at least 20 seconds to relax the eye muscles.

    Stretch it out Simple stretches throughout the day can help counteract screen-time strain.

    • Chin tuck: Sit tall and gently draw your chin straight back, as if making a double chin. Hold for five seconds and repeat five times to strengthen deep neck muscles.
    • Shoulder rolls: Lift your shoulders toward your ears, then roll them back and down. Repeat 10 times to release upper-back tension.
    • Neck side stretch: Tilt your left ear toward your left shoulder until you feel a gentle stretch along the opposite side of your neck. Hold for 15 seconds and repeat on the other side.

    By Carimé Lane

    Article Courtesy of Alive Magazine

  • Greenifying the concrete jungle

    Greenifying the concrete jungle

    How urban green spaces combat environmental challenges

    As our cities grow, the importance of green spaces becomes increasingly evident. While skyscrapers and bustling streets are iconic of urban environments, access to natural landscapes and parks is invaluable.

    The impact of green spaces on urban environments

    Green spaces can act as natural air filters, absorbing pollutants and releasing oxygen. Therefore, the more green spaces in a community, the better the air quality.

    In addition, urban dwellers with access to more green areas experience fewer instances of mental distress and are less likely to suffer from anxiety, depression, and other diseases.

    Urban Heat Island effect

    The urban heat island (UHI) effect is a phenomenon creating waves for city dwellers in multiple areas. Big cities where natural vegetation has been replaced with dense concentrations of buildings and large amounts of materials such as asphalt, concrete, and pavement result in higher temperatures than surrounding rural areas due to surfaces absorbing and retaining heat from the sun. Nature’s natural cooling systems, such as trees and vegetation, are no longer available to mitigate the heat.

    UHIs can lead to heat-related illnesses, higher energy consumption, and increased air pollution (from air conditioning units, for example). Green spaces help to combat this issue by providing shade, evaporative cooling, and natural ventilation.

    Start a community garden

    Interested in growing a garden, but don’t have a big enough space? Here are some tips on how start your own community garden:

    1. Gather interested community members and form a garden committee to plan and organize.
    2. Find a suitable location, such as a vacant lot or a space within a park.
    3. Seek out grants and funding opportunities to help with the costs of materials and tools.
    4. Consider partnering with local organizations and businesses for support.

    With determination and collaboration, a community garden can be a thriving green space for all to enjoy and reflect the uniqueness of your community.

    By Adam Meyer

    Article Courtesy of Alive Magazine
  • Healthy hydration for your next vacation

    Healthy hydration for your next vacation

    Sip your way to a better summer holiday

    While you may be focused on bookmarking favourite sightseeing spots in your travel guide and packing essentials like sunscreen, don’t forget an oft-overlooked essential of healthy travel: a healthy hydration plan.

    Hydration―an essential part of a great vacation

    Many people often get sick after a vacation. This may be due to an array of factors, all of which hydration can play a part in ameliorating.

    Weakened immune system

    That enclosed airplane cabin is notoriously germ-ridden. Staying hydrated improves your immune system strength. For example, mucous membranes in your sinuses stay moist with proper hydration, thus aiding them in their role as natural defenders against viruses. Drinking water also flushes out toxins that build up on your trip, whether it’s bacteria or too many greasy poolside burgers.

    Travel fatigue and time zone changes

    Don’t let those red-eye flights leave you too tired to enjoy your destination. Lack of quality sleep weakens your immune system. Staying hydrated can help improve sleep and helps you overcome jet lag.

    “Fasten seat belt” sign = dehydration

    Dehydration during travel is a common issue. This is especially true if you’re flying. Airplanes have a much lower percentage of moisture in the air, because airplanes pull air from outside to pressurize the cabins; and being at a high altitude makes the air naturally dry. Airplane cabins are also dehumidified. These two factors create an environment that has about 5 to 20 percent humidity, whereas the average home has about 40 to 60 percent.

    The result? Faster water loss simply by being on an airplane.

    What to pack to stay hydrated

    Pre-flight checklist

    Don’t wait until you’re thirsty; start hydrating at least four hours before you hit the road. Try to up my water and eat foods with a high water content: things like cucumbers and oranges.

    Reusable water bottle

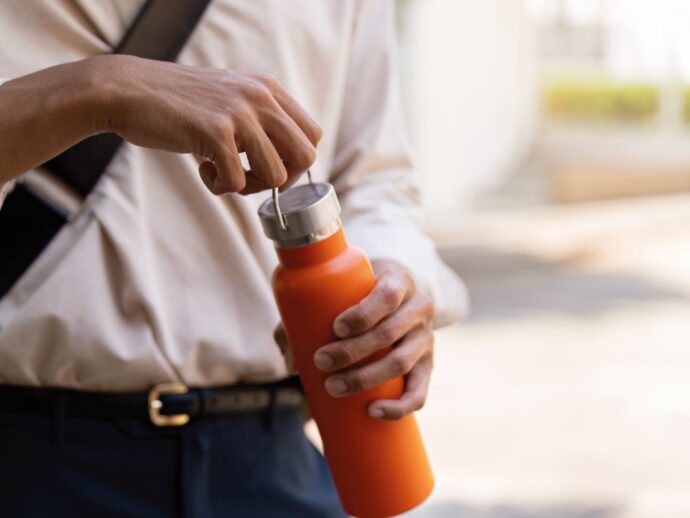
    Bring a refillable water bottle and fill it after going through security. Having a refillable bottle is also really handy during your trip.

    Electrolytes and supplements

    Replacing your sodium, potassium, and magnesium is especially helpful after flights. Try coconut water, hyaluronic acid supplements, and B vitamins to help with energy and cellular hydration.

    Safe water FAQs

    Is the drinking water at my destination safe?

    Choose bottled water if you have any doubts about water safety. In some countries, it may be a good idea to skip ice in your drinks and use bottled water to brush your teeth.

    When should I see a doctor?

    If you discover the water you’ve consumed is contaminated water, consult a doctor if you’ve been sick for longer than two days, have severe pains, notice blood after going to the bathroom, or have a fever above 39 C (102 F).

    By Joshua Duvauchelle

    Article Courtesy of Alive Magazine
  • Through the fog

    Through the fog

    Hope and healing beyond conventional chronic pain methods

    The ebb and flow of chronic pain is tough to navigate. A complex and deeply personal experience, it comes crashing in waves on some days and feels like treading water on others.

    The complexities of pain

    Fibromyalgia, arthritis, herniated discs—the list of chronic conditions is varied and long. Without effective treatment, the pain associated with these conditions can affect many aspects of life, including work, social functions, and family life.

    The complex nature of chronic pain often demands a multifaceted approach to treatment. By exploring and combining alternative treatments with traditional ones, we can create a personalized path toward greater comfort, balance, and overall wellness.

    The need for a new approach

    While conventional medicine provides essential tools—medications, surgical interventions, counselling—they often aren’t enough to fully address the root cause of pain.

    Alternative therapies can offer ways to manage symptoms and restore a sense of control over your body―to complement conventional methods, rather than replacing them.

    Alternative pain relief options

    Integrating alternative approaches into a broader pain management strategy may also empower one to actively participate in the healing journey.

    TENS

    Transcutaneous electrical nerve stimulation (TENS) provides a mild electrical current to the nerves. It’s thought that this offers pain relief by blocking or altering the perception of pain and raising the body’s endorphin level.

    Sound therapy

    Used to influence a person’s physiological and psychological states, sound therapy is thought to help recalibrate the brain’s perception of pain and discomfort and promote relaxation.

    Examples of sound therapy can include the following:

    • chimes
    • singing bowls
    • chanting
    • drumming
    • music

    Other excellent modalities

    Other complementary alternative therapies include acupuncture, massage therapy, and meditation.

    Although it may be an ongoing challenge, with a holistic approach that embraces both modern medicine and alternative healing, we can shift focus from pain to self-care and from limitation to possibility.

    Catch some zzzs

    Even short bouts of sleep can often feel elusive when dealing with chronic pain.

    Some simple tips can help alleviate or improve your health outcomes; after all, <some> relief is better than no relief:

    • Try relaxing distraction: Look into guided meditation or rhythmic breathing to alter your focus.
    • Take pain medications right before bed: Help your body relax and feel more comfortable when trying to wind down.
    • Stay consistent: Aim to fall asleep and wake up at the same time every day to create a routine.

    Eating for chronic pain

    Anti-inflammatory foods, such as the following, can help manage symptoms and improve pain outcomes:

    • fatty fish (salmon, sardines)
    • leafy greens (kale, spinach)
    • fruits (berries, grapes)
    • nuts (almonds and walnuts)
    • seeds (chia, hemp)
    • extra-virgin olive oil
    • tomatoes
    • citrus fruits (grapefruit, oranges)
    • whole grains (wheat, brown rice)

    By Melissa Curman

    Article Courtesy of Alive Magazine

  • Smashed Cucumber Salad

    Smashed Cucumber Salad

    Smashed Cucumber Salad

    Total Time 30 minutes
    Servings: 4

    Ingredients
      

    • 3 large English cucumbers
    • teaspoons sea salt
    • 1 small shallot peeled and thinly sliced
    • tablespoons champagne vinegar
    • 3 tablespoons toasted sesame oil
    • 2 teaspoons Sriracha
    • teaspoons cane sugar
    • ¾ teaspoon garlic powder
    • ½ teaspoon crushed red chilies
    • 1 tablespoon Gomasio seasoning or toasted sesame seeds
    • ½ bunch cilantro cut into 2-inch sprigs

    Method
     

    1. Quarter the cucumbers lengthwise and remove the seeds. Cut into 1-inch diagonal pieces, discarding the ends.Place cucumbers in a resealable bag and gently smash with a rolling pin until lightly cracked.
    2. Transfer cucumbers to a bowl and toss with sea salt. Let rest for 15-20 minutes to draw out excess moisture. Drain, pat dry with paper towels, and return cucumbers to the bowl. Add sliced shallots.
    3. In a separate bowl, whisk together the champagne vinegar, toasted sesame oil, sriracha, cane sugar, garlic powder, crushed red chilies, and Gomasio seasoning.
    4. Toss cucumbers and shallots with the dressing until evenly coated. Fold in cilantro and chill briefly or serve immediately.
  • Roasted Cauliflower Hummus Bowl

    Roasted Cauliflower Hummus Bowl

    Roasted Cauliflower Hummus Bowl

    Total Time 30 minutes
    Servings: 4

    Ingredients
      

    • 1 teaspoon paprika
    • 1 teaspoon ground cumin
    • ½ teaspoon garlic powder
    • ½ teaspoon turmeric
    • ½ teaspoon sea salt
    • 4 tablespoons olive oil
    • 2 pounds bite-size cauliflower florets
    • 16 ounces roasted red pepper hummus
    • 2 avocados peeled, pitted, and sliced
    • cup pickled red onion
    • ½ cup crumbled feta cheese
    • 2 large handfuls microgreens
    • 4 poached eggs

    Method
     

    1. Preheat oven to 375°F. Line two baking sheets with parchment paper.
    2. In a large mixing bowl, combine paprika, cumin, garlic powder, turmeric, sea salt, and olive oil. Toss with cauliflower until evenly coated.
    3. Spread cauliflower evenly on the baking sheets and roast for 15-20 minutes, until tender and lightly browned. Rotate pans halfway through for even roasting.
    4. To assemble each bowl, spread hummus onto the bottom of a shallow bowl or plate, creating a slightly thicker rim around the edges.
    5. Arrange roasted cauliflower in the center. Top with avocado slices, poached egg, pickled red onion, feta cheese, and microgreens.
    6. Drizzle with additional olive oil if desired and serve immediately.
  • Sheet Pan Gyro Meat

    Sheet Pan Gyro Meat

    Sheet Pan Gyro Meat

    Total Time 30 minutes
    Servings: 6

    Ingredients
      

    • pounds ground meat such as turkey, pork, lamb, beef, or chicken
    • 2 teaspoons paprika
    • teaspoon sea salt
    • 1 teaspoon garlic powder
    • 1 teaspoon ground cumin
    • 1 teaspoon dried oregano
    • 1 teaspoon coarse ground black pepper
    • 3 tablespoons olive oil
    • 2 teaspoons red wine vinegar
    • ½ medium onion grated

    Method
     

    1. Preheat oven to 375°F. In a large mixing bowl, combine all ingredients and mix well until fully incorporated.
    2. Spread the mixture between two sheets of parchment paper, sized to fit your baking sheet.
    3. Once flattened evenly, remove and discard the top sheet of parchment paper.
    4. Using the bottom parchment paper, roll the meat into a log shape and place it in the center of the baking sheet.
    5. Bake for 35-40 minutes, or until the internal temperature reaches 165°F.
    6. Remove from the oven and cool slightly.Unroll and break or slice into desired size pieces.

    Notes

    Serving Suggestion: Use in gyro wraps or add to salads.
  • Ginger Lime Chicken Skewers

    Ginger Lime Chicken Skewers

    Ginger Lime Chicken Skewers

    Cook Time 25 minutes
    Servings: 6 skewers

    Ingredients
      

    • ¾ cup prepared Teriyaki Marinade
    • 1 tablespoon sriracha hot sauce
    • 1 tablespoon grated fresh ginger
    • 2 tablespoons fresh lime juice
    • 1 teaspoon smoked paprika
    • 2 pounds boneless, skinless chicken breast
    • 6 bamboo skewers

    Method
     

    1. In a mixing bowl, whisk together teriyaki marinade, sriracha, ginger, lime juice, and smoked paprika.
    2. Cut chicken into 1-inch pieces and toss with marinade. Cover and refrigerate for 2-4 hours, stirring occasionally. Meanwhile, soak bamboo skewers in water for at least 30 minutes.
    3. When chicken has marinated, thread onto skewers. Reserve remaining marinade.
    4. Place skewers on a preheated grill over medium heat and cook for 3-4 minutes per side, or until the internal temperature reaches 165°F.
    5. In a small saucepan, bring reserved marinade to a boil over medium high heat. Cook, stirring frequently for 3-5 minutes until thoroughly heated and reduced slightly. When chicken is cooked, brush with marinade and serve.
  • Whipped Feta Dip

    Whipped Feta Dip

    Total Time 40 minutes

    Ingredients
      

    • 8 ounces feta cheese drained if in brine
    • ½ cup Greek plain yogurt
    • 4 tablespoons olive oil divided
    • ¼ teaspoon ground black pepper
    • 4 bell peppers (mix of red, yellow, and orange) cored and cut into 2" pieces
    • 1 large zucchini cut into ½" thick slices
    • 1 package pita bread cut into wedges

    Method
     

    1. To make dip, combine feta, yogurt, 2 tablespoons olive oil, and pepper in a food processor and process until smooth. Place in a container and refrigerate for 30 minutes to firm up.
    2. Meanwhile, prepare vegetables as described above and place in a mixing bowl. Toss with remaining 2 tablespoons olive oil and season with salt and pepper to taste.
    3. Grill vegetables over medium heat, about 3 minutes per side or until tender-crisp.
    4. To serve, place a small bowl of dip in the center of a serving platter. Arrange grilled vegetables and pita around the dip. Garnish as desired with chili flakes, paprika, and fresh herbs.
  • Buffalo Mozzarella Toasts with Roasted Tomatoes and Fruit

    Buffalo Mozzarella Toasts with Roasted Tomatoes and Fruit

    Buffalo Mozzarella Toasts with Roasted Tomatoes and Fruit

    Buffalo-milk cheese (mozzarella or feta), roasted cherry tomatoes, and fruit top sourdough toasts for a breakfast, snack, or BBQ side that’s both savoury and sweet.
    Servings: 4

    Ingredients
      

    • 4 – 6 thick slices rustic sourdough or gluten-free bread
    • 3 tablespoons extra-virgin olive oil divided
    • 3 cups cherry tomatoes
    • 1 clove garlic peeled and crushed
    • 4 fresh apricots or 2 peaches pitted and diced
    • ¼ cup sliced fresh basil more to serve
    • ½ teaspoon red wine vinegar
    • ¼ teaspoon sea salt
    • 8 ounces buffalo mozzarella torn
    • ¼ teaspoon coarsely ground black pepper

    Method
     

    1. Preheat oven to 375°F.
    2. On large baking sheet, place bread slices and brush with 1 tablespoon olive oil on both sides, and then set aside.
    3. In large cast iron skillet or glass baking dish, combine tomatoes, olive oil, and garlic. Roast in preheated oven for 15 to 20 minutes, until tomatoes are burst. Transfer to large bowl, discard garlic clove, and cool for 10 minutes.
    4. Meanwhile, toast bread in oven for about 10 minutes, until golden brown, flipping once halfway through. Keep an eye on bread, as ovens can range in how quickly they toast.
    5. To roasted tomatoes, gently stir in remaining ingredients except for cheese. Add toasted bread to serving platter and top with tomato mixture, followed by torn mozzarella, additional basil, and black pepper. Serve immediately.

    By Alison Day

    Recipe Courtesy of Alive Magazine