Tag: organic

  • 9 ways to ergonomically optimize your workspace

    9 ways to ergonomically optimize your workspace


    9 ways to ergonomically optimize your workspace

    Eliminate daily aches and pains

    Whether you work from home or at the office, you shouldn’t sit in a way that leaves you with neck pain, headaches, or fatigue. By creating an ergonomic workstation, you’ll feel comfortable and be more productive.

    Straighten up
    You may not even realize it, but you could be slouching over your workstation. Since sitting up straight helps prevent back pain, make sure you maintain a good sitting posture.

    Properly position your keyboard and mouse
    When typing, make sure your wrist is in line with the back of your hand so that your arms reach for the keys instead of overstretching your fingers.

    Consider getting a headset
    Holding your phone between your ear and your shoulder results in excessive strain on your neck and upper back. If you use your phone a lot during the day, you may want to invest in a headset. If that’s not an option, use your speakerphone more often, especially if you’re typing while talking.

    Lighten up
    Working in a poorly lit room may affect your productivity and result in headaches, fatigue, and back pain. Place a lamp close to your workstation and adjust the light according to your preference and comfort level.

    Be mindful of where and how you sit
    Find a chair with lumbar (lower back) support. It should keep your back in an upright position with a comfortable arch. If it doesn’t, you can roll a towel and place it between your lower back and chair.

    Eliminate eye strain
    Symptoms of digital eye strain (DES) may include dry eyes, blurred vision, and headaches. Counter DES by using computer glasses and make sure the screen is an arm’s length from you. Use a humidifier to help with dry eyes, and if you have contact lenses, wear glasses every so often to give your eyes a break.

    Adjust your computer monitor’s position
    Since your eyes have a natural downward cast, placing your computer screen about 15 degrees below your eye level is ideal. Your monitor should be straight ahead and not off to the side, and it should be close enough so you don’t need to lean forward to read the screen.

    Invest in a standing desk
    By using a standing desk, you can work and protect your health at the same time. If you can’t, change the way you work so you’re forced to move more often. This could mean standing every time you talk on the phone or moving filing cabinets across the room so you have to walk to them.

    Find a footrest
    Your feet should rest firmly on the ground while your thighs are parallel to the floor. You should avoid crossing your legs for extended periods, as doing so can lead to poor posture over time.

    Content courtesy of Alive Magazine

  • Homemade Fire Cider

    Homemade Fire Cider


    Homemade Fire Cider

    Fire cider is a traditional herbal remedy known for its immune-boosting and warming properties. It is a potent infusion of herbs, spices, and vegetables steeped in apple cider vinegar.


    Fire cider is known for its potent and spicy flavor, as well as its potential health benefits. Feel free to adjust the ingredients to suit your taste and heat tolerance.

    Here are some common uses for fire cider:

    Immune Support

    Fire cider is often consumed as a daily tonic or during cold and flu season to help support the immune system. Its ingredients, such as garlic, ginger, and horseradish, are believed to have immune-boosting properties.

    Cold and Flu Relief

    Many people use fire cider at the onset of a cold or flu to help alleviate symptoms and speed up recovery. The warming and spicy nature of fire cider can help clear congestion and soothe a sore throat.

    Digestive Aid

    Fire cider can aid digestion and help relieve symptoms like indigestion, gas, and bloating. The combination of apple cider vinegar and herbs like ginger and rosemary may promote digestive health.

    Anti-Inflammatory

    Some of the ingredients in fire cider, such as turmeric and cayenne pepper, are known for their anti-inflammatory properties. It may be used by some individuals to help reduce inflammation in the body.

    Energy Booster

    The spicy and tangy nature of fire cider can provide an energy boost. It’s often taken in the morning as a natural pick-me-up.

    Circulation Support

    Ingredients like cayenne pepper in fire cider may help improve blood circulation. Some people use it to promote cardiovascular health.

    Sinus Congestion Relief

    The spicy components in fire cider, particularly horseradish and chili peppers, can help clear sinuses and provide relief from nasal congestion.

    General Wellness

    Many people incorporate fire cider into their wellness routines as a preventive measure to maintain overall health and vitality.

    Before using fire cider or any herbal remedy, it’s advisable to consult with a healthcare professional, especially if you have underlying health conditions, are pregnant or nursing, or are taking medications.


    Homemade Fire Cider

    Fire cider is a traditional immune-supporting remedy with deep roots in folk medicine.

    Ingredients
      

    • 1 medium onion chopped
    • 1/2 cup fresh horseradish root grated
    • 1/2 cup fresh ginger root grated
    • 1/2 cup fresh turmeric root grated
    • 10 cloves garlic crushed or minced
    • 2 jalapeño peppers chopped, adjust for spice preference
    • Zest and juice of 1 lemon
    • Zest and juice of 1 orange
    • 2 tbsp dried rosemary
    • 2 tbsp dried thyme
    • 1/4 tsp cayenne pepper adjust for spice preference
    • raw, unfiltered apple cider vinegar enough to cover all ingredients
    • raw honey to taste, optional

    Method
     

    1. Wash and chop the onion, horseradish, ginger, turmeric, garlic, and jalapeño peppers. You can leave the seeds in the jalapeños for extra heat, or remove them for milder fire cider.
    2. Zest the lemon and orange, and then juice them.
    3. In a clean, quart-sized glass jar, layer the chopped onion, grated horseradish, grated ginger, minced garlic, chopped jalapeño peppers, lemon zest, orange zest, dried rosemary, dried thyme, and cayenne pepper.
    4. Pour raw, unfiltered apple cider vinegar over the ingredients in the jar until they are completely covered. Make sure to leave a little space at the top for expansion.
    5. Seal the jar with a tight-fitting lid. If using a metal lid, place a piece of parchment paper or plastic wrap between the jar and the lid to prevent corrosion.
    6. Place the jar in a dark, cool place (like a pantry) for about 3 to 4 weeks. Shake the jar daily to help mix the ingredients.
    7. After 3 to 4 weeks, strain the mixture through a fine-mesh sieve or cheesecloth into a clean glass container.
    8. If you find the fire cider too strong, you can add raw honey to taste. This will also sweeten it a bit and make it more palatable.
    9. Store your fire cider in the refrigerator, where it can last for several months.
    10. To use, take 1-2 tablespoons daily as a tonic or when you feel like you need an immune boost. You can also use it in cooking or as a salad dressing ingredient.

  • Back to School Snack Ideas

    Back to School Snack Ideas


    Back to School Snack Ideas

    Creating delicious and healthy snacks for kids as they head back to school is a great way to ensure they have energy and focus throughout the day. Here are some simple and nutritious snack ideas:

    Fruit Kabobs:

    Ingredients: Assorted fruits (e.g., strawberries, grapes, pineapple chunks, melon), wooden skewers, yogurt or honey for dipping.
    Instructions: Thread the fruit onto the skewers and serve with yogurt or honey for dipping.


    Homemade Trail Mix:

    Ingredients: Nuts (almonds, cashews, or mixed nuts), dried fruits (raisins, cranberries, apricots), whole-grain cereal, and dark chocolate chips (in moderation).
    Instructions: Mix these ingredients together in a bowl, and portion them into small snack bags for easy grab-and-go snacks.


    Vegetable Sticks with Hummus:

    Ingredients: Carrot sticks, cucumber slices, celery sticks, bell pepper strips, and your child’s favorite flavor of hummus.
    Instructions: Wash and cut the vegetables, and serve with hummus for dipping.


    Yogurt Parfait:

    Ingredients: Greek yogurt, granola, fresh berries, and a drizzle of honey.
    Instructions: Layer yogurt, granola, and berries in a glass or container. Drizzle honey on top.


    Mini Quesadillas:

    Ingredients: Whole-grain tortillas, shredded cheese, and diced cooked chicken (optional).
    Instructions: Sprinkle cheese and chicken (if using) on a tortilla, top with another tortilla, and heat in a skillet until the cheese melts. Cut into wedges.


    Homemade Energy Bites:

    Ingredients: Rolled oats, honey, peanut butter, mini chocolate chips, and chia seeds.
    Instructions: Mix all the ingredients together, roll into small balls, and refrigerate until firm.


    Apple “Cookies”:

    Ingredients: Apple slices, peanut butter or almond butter, and toppings like raisins, shredded coconut, or mini chocolate chips.
    Instructions: Spread nut butter on apple slices and sprinkle with toppings.


    Ants on a Log:

    Ingredients: Celery sticks, peanut butter or cream cheese, and raisins.
    Instructions: Fill the celery with peanut butter or cream cheese and top with raisins.


    Cheese and Whole-Grain Crackers:

    Ingredients: Sliced cheese and whole-grain crackers.
    Instructions: Pair slices of cheese with whole-grain crackers for a simple yet satisfying snack.


    Smoothie Popsicles:

    Ingredients: Blend yogurt, fresh or frozen fruit, a bit of honey, and pour into popsicle molds.
    Instructions: Freeze until solid for a refreshing, healthy treat.

    Remember to consider any food allergies or dietary restrictions your child may have when preparing these snacks. These snacks are not only tasty but also provide essential nutrients to help your kids stay energized and focused throughout the school day.

  • Smoked Salmon and White Bean Spread

    Smoked Salmon and White Bean Spread


    Smoked Salmon and White Bean Spread

    A creamy base of white beans plus a hit of freshness from herbs gives you a balanced and exciting spread for your next get together or when you’re craving snacks for dinner.

    Bright herbs and capers, creamy white beans, and smoked fish are perfectly balanced and an unexpected combination. The recipe is gluten-free, so if you’re looking to keep the meal that way, you can use seed crackers, veggies, corn chips, or gluten-free bread and crackers. It’s still high time for grilling, so toss some bread on the grill.

    We call for smoked salmon here, as it’s a highly approachable and familiar ingredient. Feel free to experiment: trout would be another classic to substitute or go wild with smoked mackerel or smoked mussels. Flaking smoked fish on top of this spread is a great way to enjoy the savory richness of seafood without needing to purchase a large quantity to satisfy the crowd. If you’re looking to cut down, either on your costs or your animal protein consumption, consider this a great blueprint!

    The final thing we’ll say about this recipe is that it just might be your next pantry staple dish. Canned seafood and canned or dried beans are items you can keep stocked in your pantry. The addition of a few fresh herbs, picked up at the store or snipped from a windowsill herb garden, means you can whip it up on the fly year-round and for any occasion.


    Smoked Salmon and White Bean Spread

    A creamy base of white beans plus a hit of freshness from herbs gives you a balanced and exciting spread for your next get together or when you're craving snacks for dinner.

    Ingredients
      

    • 1 15 ounce can white beans drained and rinsed
    • 4 tbsp olive oil divided
    • 2 tbsp lemon juice
    • 2 large garlic cloves minced
    • 1/2 tsp sea salt
    • 1/2 tsp coarse ground black pepper
    • 6 ounces smoked trout or smoked salmon flaked
    • 2 tbsp chopped chives
    • 2 tbsp fresh oregano leaves or ¼ teaspoon dried oregano
    • 1 tbsp capers drained
    • Crackers or bread to serve

    Method
     

    1. In a food processor combine beans, olive oil, lemon juice, garlic, salt, and pepper.
    2. Run processor until mixture is smooth.
    3. Spread bean mixture onto a service plate creating swirls.
    4. Drizzle on remaining olive oil and top with flaked smoked fish, fresh herbs, and capers.
    5. Serve with crackers or sliced artisan bread.
    6. Enjoy!

    Recipe Courtesy of INFRA

  • Eat for life

    Eat for life


    Eat for life

    The lifelong impact of a child’s diet

    Today, three-quarters of children and teens don’t meet many of health experts’ basic recommendations. And nearly one-quarter of these kids’ daily calories come from high-fat, high-sugar processed foods.

    “The first five years of a child’s life is a period of rapid growth, when proper nutrition is essential for development,” says board-certified nutritionist Tara Bassi. “This period is also a crucial time when children develop eating behaviors that lay the foundation for their future diet and health.”

    Unless corrected, your child will be paying for their early food habits for years to come. A poor diet is associated with several health concerns, such as:

    • a weaker immune system
    • an increased risk of mental health
    • the risk of childhood obesity, which has tripled in the last few decades

    Cooking up a healing remedy

    Registered dietitian Trista Best says it’s common for parents and caregivers to feel overwhelmed when it comes to their child’s diet. “Parents are inundated with information and opinions regarding whenhow, and what they should feed their kids,” explains Best. “But we tend to overcomplicate their needs.”

    If you want to motivate children to eat healthily, Best’s best tips are all about returning to the basics.

    Fruits and vegetables

    Children need four to six servings of produce daily. Teens need seven to eight servings. “Offer a fruit and/or vegetable at every meal,” suggests Best, “and introduce a new one every week. Don’t stress about them eating it. Simply place it on their plate and allow them to discover it for themselves.”

    Whole grains

    At least half of your child’s grain intake should be from whole grains. “Replace your child’s common refined carbohydrates with whole grains,” says Best. “Try to ensure they’re eating at least one form of whole grain a day.”

    Protein

    “Plant proteins, eggs, and dairy can provide an adequate amount of protein for your child,” says Best. “Getting protein at every meal can look as simple as adding a serving of legumes, nut butter, eggs, or yogurt.”

    Keep it simple

    “These may sound like difficult rules to follow,” says Best, “but all of them can be achieved by replacing your child’s afternoon snack with a piece of raw fruit like an apple or a banana; adding carrots and hummus to their lunch plate in place of chips; or opting for juice with natural sweetener rather than refined sugar.”

    She also suggests reducing mealtime stress. “Try not to make food and mealtimes too stressful,” advises Best. “The more we build anxiety around food, the more likely our children will [be to] develop disordered eating habits.”

    By Joshua Duvauchelle

    Content courtesy of Alive Magazine

  • Are our kids getting enough?

    Are our kids getting enough?


    Are our kids getting enough?

    If you’re a parent, you’ve probably spent plenty of time worrying—about all manner of childhood issues, including whether your kids are eating enough to keep them healthy. Because it can be such a worry, we explore how nutrient deficiencies can affect our kids, how to spot them, and, also, how to prevent them. Remember, always check with your health care practitioner before giving your child a new supplement.

    Vitamin Bs

    Collectively, B vitamins are essential to many aspects of brain function, energy production, and our body’s ability to build and repair muscle mass. Deficiencies in B vitamins are most often seen in vitamin B12 (especially for vegan and vegetarian kids) and B9 (folate).

    Signs of deficiency

    • fatigue
    • weakness
    • anemia
    • loss of appetite, weight loss
    • failure to thrive and grow
    • difficulty with memory and concentration

    Vitamin C

    With critical roles in our immune system, wound healing, bone health, and antioxidant protection, it’s especially important for our kids to get enough in their diets. Luckily, there are plenty of vitamin C-rich foods that’ll help keep intake up and their diet fun.

    Signs of deficiency

    • irritability
    • poor appetite
    • bleeding gums
    • easy bruising
    • dry skin
    • slow wound healing

    How to get more

    • bell peppers
    • citrus fruits
    • berries
    • kiwi fruit
    • Brussels sprouts, dark green veggies

    Supplements: powders, drops, chewable tablets, gummies, multis

    Vitamin D

    Also known as the sunshine vitamin, this fat-soluble essential vitamin aids in the regulation of calcium and phosphorous in our bodies. Because of this, vitamin D plays a very important role in building and maintaining our bones and teeth.

    Signs of deficiency

    • bone pain
    • muscle aches
    • fatigue
    • mood changes
    • dental problems

    How to get more

    • fortified dairy products
    • fatty fish (salmon, tuna, sardines)
    • egg yolks

    Supplements: capsules, drops, gummies, multis

    Calcium

    Bone calcium stops increasing in young adulthood, so getting off to a healthy start is critical to strong bones later in life.

    Signs of deficiency

    • muscle cramps or weakness
    • numbness or tingling in fingers, lips, feet
    • poor appetite
    • confusion, forgetfulness

    How to get more

    • cheese
    • yogurt
    • dark green veggies (broccoli, kale, spinach)
    • fish (canned salmon, sardine—with bones)
    • almonds

    Supplements: (often with vitamin D) chewable tablets, capsules, liquids, powders

    Magnesium

    Magnesium is also crucial for activating vitamin D, which has long been recognized as essential for a healthy immune system. Some older children can be more at risk of deficiency of this important mineral.

    Signs of deficiency

    • loss of appetite
    • nausea/vomiting
    • fatigue
    • weakness

    How to get more

    • leafy green veggies (spinach, kale)
    • nuts and seeds (almonds, pumpkin seeds)
    • cheese
    • yogurt
    • whole grains
    • avocado

    Supplements: capsules, tablets, liquids, multis

    Potassium

    The fact that kids consume far more sodium than is healthy for their long-term health is concerning, since the combination of too much sodium and too little potassium in our diet is associated with higher blood pressure.

    Signs of deficiency

    • muscle weakness
    • cramps
    • constipation
    • fatigue
    • confusion

    How to get more

    • dried fruit (apricots, prunes)
    • winter squash (acorn, butternut)
    • potato/sweet potato
    • banana
    • beans, lentils
    • yogurt

    Supplements: fizzy dissolving tablets, capsules, powders, liquids, multis

    Iron

    Children need a steady intake of iron to fuel their rapid growth and development. It’s especially important for teenage girls to replenish the iron that their bodies lose during menstruation.

    Signs of deficiency

    • weakness, fatigue
    • shortness of breath
    • dizziness, headache
    • irritability
    • feeling cold
    • pale skin

    How to get more

    • meat, poultry, seafood (beef, turkey, shrimp)
    • leafy green veggies (spinach, kale)
    • nuts and seeds (almonds, pumpkin seeds)
    • legumes (beans, lentils, chickpeas)
    • whole grains
    • soy (tempeh, tofu)

    Supplements: tablets, liquids, multis

    Zinc

    Zinc is important for growing kids’ brain development, sensory processing, memory, and cognition. It’s also an important element in immune function.

    Signs of deficiency

    • loss of appetite
    • hair loss
    • diarrhea
    • weight loss
    • delayed wound healing

    How to get more

    • chicken, turkey
    • whole grains
    • pumpkin seeds
    • cheese
    • eggs

    Supplements: chewable tablets, gummies, lozenges, liquids, multis

    Content courtesy of Alive Magazine

  • Life lessons from an Olympian

    Life lessons from an Olympian


    Life lessons from an Olympian

    The philosophy of sports and self-expression

    Simon Whitfield is a four-time Olympian! But 22 years after stepping onto his first Olympic podium, Whitfield sees sport as more than just a competition. It’s about self-expression, living in the moment, and being your best self.

    Putting Whitfield’s philosophy into play
    Today, Whitfield is a dad of two daughters. He offers sage advice to young and old who want to find the joy of self-expression through sport.

    1. Make it about experiences and not outcomes
      He says when you reframe sports as not something where you have to win, but simply a safe space to express yourself through movement, it completely changes the game.

    “My parents would tell me to just go express yourself whatever it is you do,” says Whitfield. “Just have a love of sport, whether that was my childhood backyard or the pothole on the street that was our center ice. It was truly about embracing the idea of play.”

    1. Find the joy in what you play
      Whitfield’s children are part of a running club. Sometimes they race. Sometimes they simply walk and tell their teammates stories.

    “It’s fantastic,” he says. “It’s all about the joy of being outside and running, simply because humans can run for no other reason. The fundamental teaching is that there is a real joy in just being able to run and move your body. That’s impacted how we convey to our kids the joy of sport.”

    1. Cheer for the effort, not the trophy
      After a game, Whitfield’s parents wouldn’t ask him if he won. They’d ask him if he tried his best. He strives to embody that with his kids.

    “There are ‘winners’—people who come first in this arbitrary thing we made up,” he says. “But my favorite thing to tell my kids is, ‘Wow, that’s the fastest time anyone has ever done on this day at this time.’”

    He even loves cheering for the kids on his children’s opposing teams and says he often gets quizzical looks from the other parents. “I think that just frees kids to know that at the end of the day, it doesn’t actually matter,” he laughs. “It’s just about the theater. It’s just about being present and not thinking about anything else.

    “At the end of the day, what my parents wanted to see me do was express myself through hard work,” says Whitfield. “They did not care how I did as long as I expressed myself through hard effort. It gives you so much freedom to … stand on the starting line and realize, ‘Okay, my family isn’t going to be let down. They just want me to express myself, and whatever the outcome is the outcome.’”

    And that’s a powerful lesson for every other area of our lives.

    By Joshua Duvauchelle

    Content courtesy of Alive Magazine

  • Peach-Thyme Compote

    Peach-Thyme Compote


    Peach-Thyme Compote

    This peach-thyme compote is easier than making jam, but you can use it anywhere you’d use jam or jelly. Toast? French toast? Cheese boards? Ice Cream?!? It does it all!

    While stone fruit season runs throughout the summer months, August is National Peach Month. If you’ve got a small bounty of peaches, try making this peach-thyme compote. With just four ingredients and a bit of water, you can make an elevated spread that captures the essence of summer.

    Thyme adds complexity while the acidity of lemon juice tames the sweetness. You can switch different herbs and get creative. Since you’re not canning a jam, you don’t need to worry about straying from the recipe basics. Want to mix stone fruit or other seasonal goodies? If it grows together, it goes together!


    Peach-Thyme Compote

    Use the compote in sweet or savory applications. Grilled cheese sandwiches, as a glaze for organic chicken, with crepes, on a biscuit, or as an ice cream topper, this compote will complement your meals for the rest of the summer! 

    Ingredients
      

    • 2 lbs ripe, firm peaches
    • 1/4 cup organic sugar
    • 1/4 cup water
    • 2 tbsp fresh lemon juice
    • 1 thyme sprig

    Method
     

    1. Bring a medium pot of water to a simmer.
    2. Drop in peaches for 15-30 seconds then remove from simmering water and place in cold water.
    3. Remove skins once cool enough to handle.
    4. Chop peaches, remove stones, and place in a medium saucepan. Add remaining ingredients and bring to a hard boil.
    5. Cook for 5-8 minutes or until peaches are cooked.
    6. Spread cooked peach mixture on a rimmed backing sheet for rapid cooling. Discard thyme sprig.
    7. Store cooled peach compote in a sealable container in the refrigerator until ready to use.

    Recipe Courtesy of INFRA

  • Seed Cycling: Using Essential Fatty Acids and Minerals for Hormone Balancing

    Seed Cycling: Using Essential Fatty Acids and Minerals for Hormone Balancing


    • The four phases of the menstrual cycle are menstruation, follicular, ovulation, and luteal. It’s important to recognize that each one of these phases may need individualized support (mainly through diet and exercise), especially when hormone imbalances are a concern.
    • Seed cycling is a powerful hormone-balancing tool that uses the fatty acids, minerals, lignans, antioxidants, and vitamins in different seeds to create balance and rhythm in the body while restoring depleted nutrients.
    • While seed cycling shouldn’t replace any prescribed hormone treatment you’re already doing, it can be a great addition to your daily routine and could make a long-term difference, especially if you’re deficient in fatty acids.

    As a woman, your hormone levels are balanced and managed by these four essential phases:

    • Menstruation gets the most attention, as progesterone levels drop to shed the uterine lining in the absence of pregnancy, causing bleeding. 
    • Then we have the follicular phase, where the follicles in the ovaries begin to grow. This phase is characterized by the rise of estrogen and progesterone.
    • Ovulation occurs when the egg is ready and released into the body. Estrogen and testosterone are at their highest levels during this phase.
    • Finally, the luteal phase is characterized by a rise in progesterone and a drop in testosterone and estrogen. 

    Especially if you struggle with hormone-related symptoms, understanding your hormonal phases is key to managing hormone fluctuations and getting your life back on track. After all, there are a lot of changes to your hormone levels throughout the month, and learning how to support your body in each phase isn’t something most of us are taught growing up.

    Luckily, a little knowledge of your cycle and a few essential fatty acids can take you a long way. There are many all-natural methods you can try to take charge of your hormonal health, especially as it relates to the four phases. One of these methods is called seed cycling. 

    What is Seed Cycling?

    Seed cycling uses ground sunflower, sesame, flax, and pumpkin seeds to optimize the hormones released in each cycle phase. The goal is to create balance and rhythm in the body while providing essential nutrients to help you build and release these hormones.

    Seed cycling is a newer holistic therapy (introduced around 2012), but the science behind it is ancient. The idea of seed cycling is to harness naturally occurring lignans (a type of polyphenol) and fatty acids found in seeds to improve menstrual and hormonal symptoms. Though studies are still being done on the overall benefits of seed cycling, many women swear by it!

    Unlike complicated diets or lifestyle changes, seed cycling is pretty simple. You only need one afternoon to prepare the seeds for an entire month’s cycle. While there are four hormonal phases, seed cycling targets the longest two phases in particular: Follicular and luteal. The goal is to take 1-2 tablespoons of the recommended seeds per day during each phase. That’s it!

    Seeds for the Follicular Phase

    A dose of flax and pumpkin seeds is recommended to support your follicular phase, when estrogen levels naturally rise. These seeds should be ground up together (half pumpkin seeds and half flax seeds), then saved in the fridge or freezer for your daily dose. Take 1-2 tablespoons of the ground mixture every day mixed in your smoothie, salad, yogurt bowl, or applesauce.

    Flax seed is high in vitamin B, magnesium, fatty acids, and lignans. Since they are also high in fiber, they can also keep stool moving out, pushing out unwanted toxins and remaining hormones from the previous phase in your cycle.

    Pumpkin seeds are high in dietary fiber and essential fatty acids. They are also high in minerals like zinc, iron, and magnesium which are much needed during any hormonal phase. 

    While grinding up flax and pumpkin seeds together is the easiest way to get your seed cycling dose, it’s not the only way. You can also sprinkle these seeds whole on salads, add them to baked oatmeal, homemade granola bars, and protein balls.

    Seeds for the Luteal Phase

    The seeds recommended for the luteal phase are sesame seeds and sunflower seeds. The goal of these seeds is to help balance progesterone while supporting the detox pathways for optimal estrogen release.

    Sesame seeds contain vitamin B, antioxidants, and fiber for a well-balanced approach to hormonal health. Like pumpkin seeds, they also pack a rich dose of minerals — much needed for the hormonal phases, especially as we are getting fewer minerals in our diet due to farming practices and climate change. 

    Sunflower seeds contain fatty acids vitamin E, calcium, amino acids, magnesium, and more. They pack a heavy punch as the final dose of seeds required for seed cycling. They are also high in selenium, which supports the liver as it detoxes unneeded estrogen from the follicular phase. 

    Adding these seeds to your diet doesn’t have to be complicated and won’t look much different from the follicular phase. Incorporate them in smoothies, oatmeal, yogurt, or even a healthy batch of brownies (shh we won’t tell).

    Seed Creams

    Another creative way to make seed cycling a part of your daily routine is to make what we call seed cream. Determine your dose of seeds for up to a week and soak them in water with several tablespoons of BodyBio E-Lyte for 48 hours. (You could omit the E-Lyte if you wanted, but we are looking to add extra minerals.) Then blend to create a “seed cream,” adding water as needed. This is easy to freeze and store in ice cube trays and then add to smoothies, seed puddings, and other meals. 

    Essential Fatty Acids to Boost Hormone Health

    What’s one thing all these seeds have in common? Essential fatty acids.

    From our decades of research on healthy fats, we know that essential fatty acids (omega-3 and omega-6) are a must-have for regulating hormones. Seed cycling relies on the strategic timing of different fatty acids during different parts of your cycle. It’s part of the reason seed cycling works!

    Not only do fatty acids help to regulate your hormones, but they’re also beneficial for brain health, cellular health, thyroid and adrenal function, liver wellness, blood pressure, and inflammation regulation. 

    Beware Toxic Seed Oils

    While we’re on the topic of seeds and seed oils, it’s important to mention that not all seed oils are created equal. Some include toxic fillers, heavy processing using high heat, or an imbalance of omega 3’s and omega 6’s, which defeats the purpose of seed cycling.

    High-quality and minimally processed oils retain their nutritional benefits, while heavily processed oils become toxic to our cells. It’s essential to pay attention to processing methods and quality when researching seeds and seed oils in supplements and personal care products. For seed cycling, we highly recommend purchasing organic, whole seeds and grinding them yourself. This will get you the highest nutritional value possible.

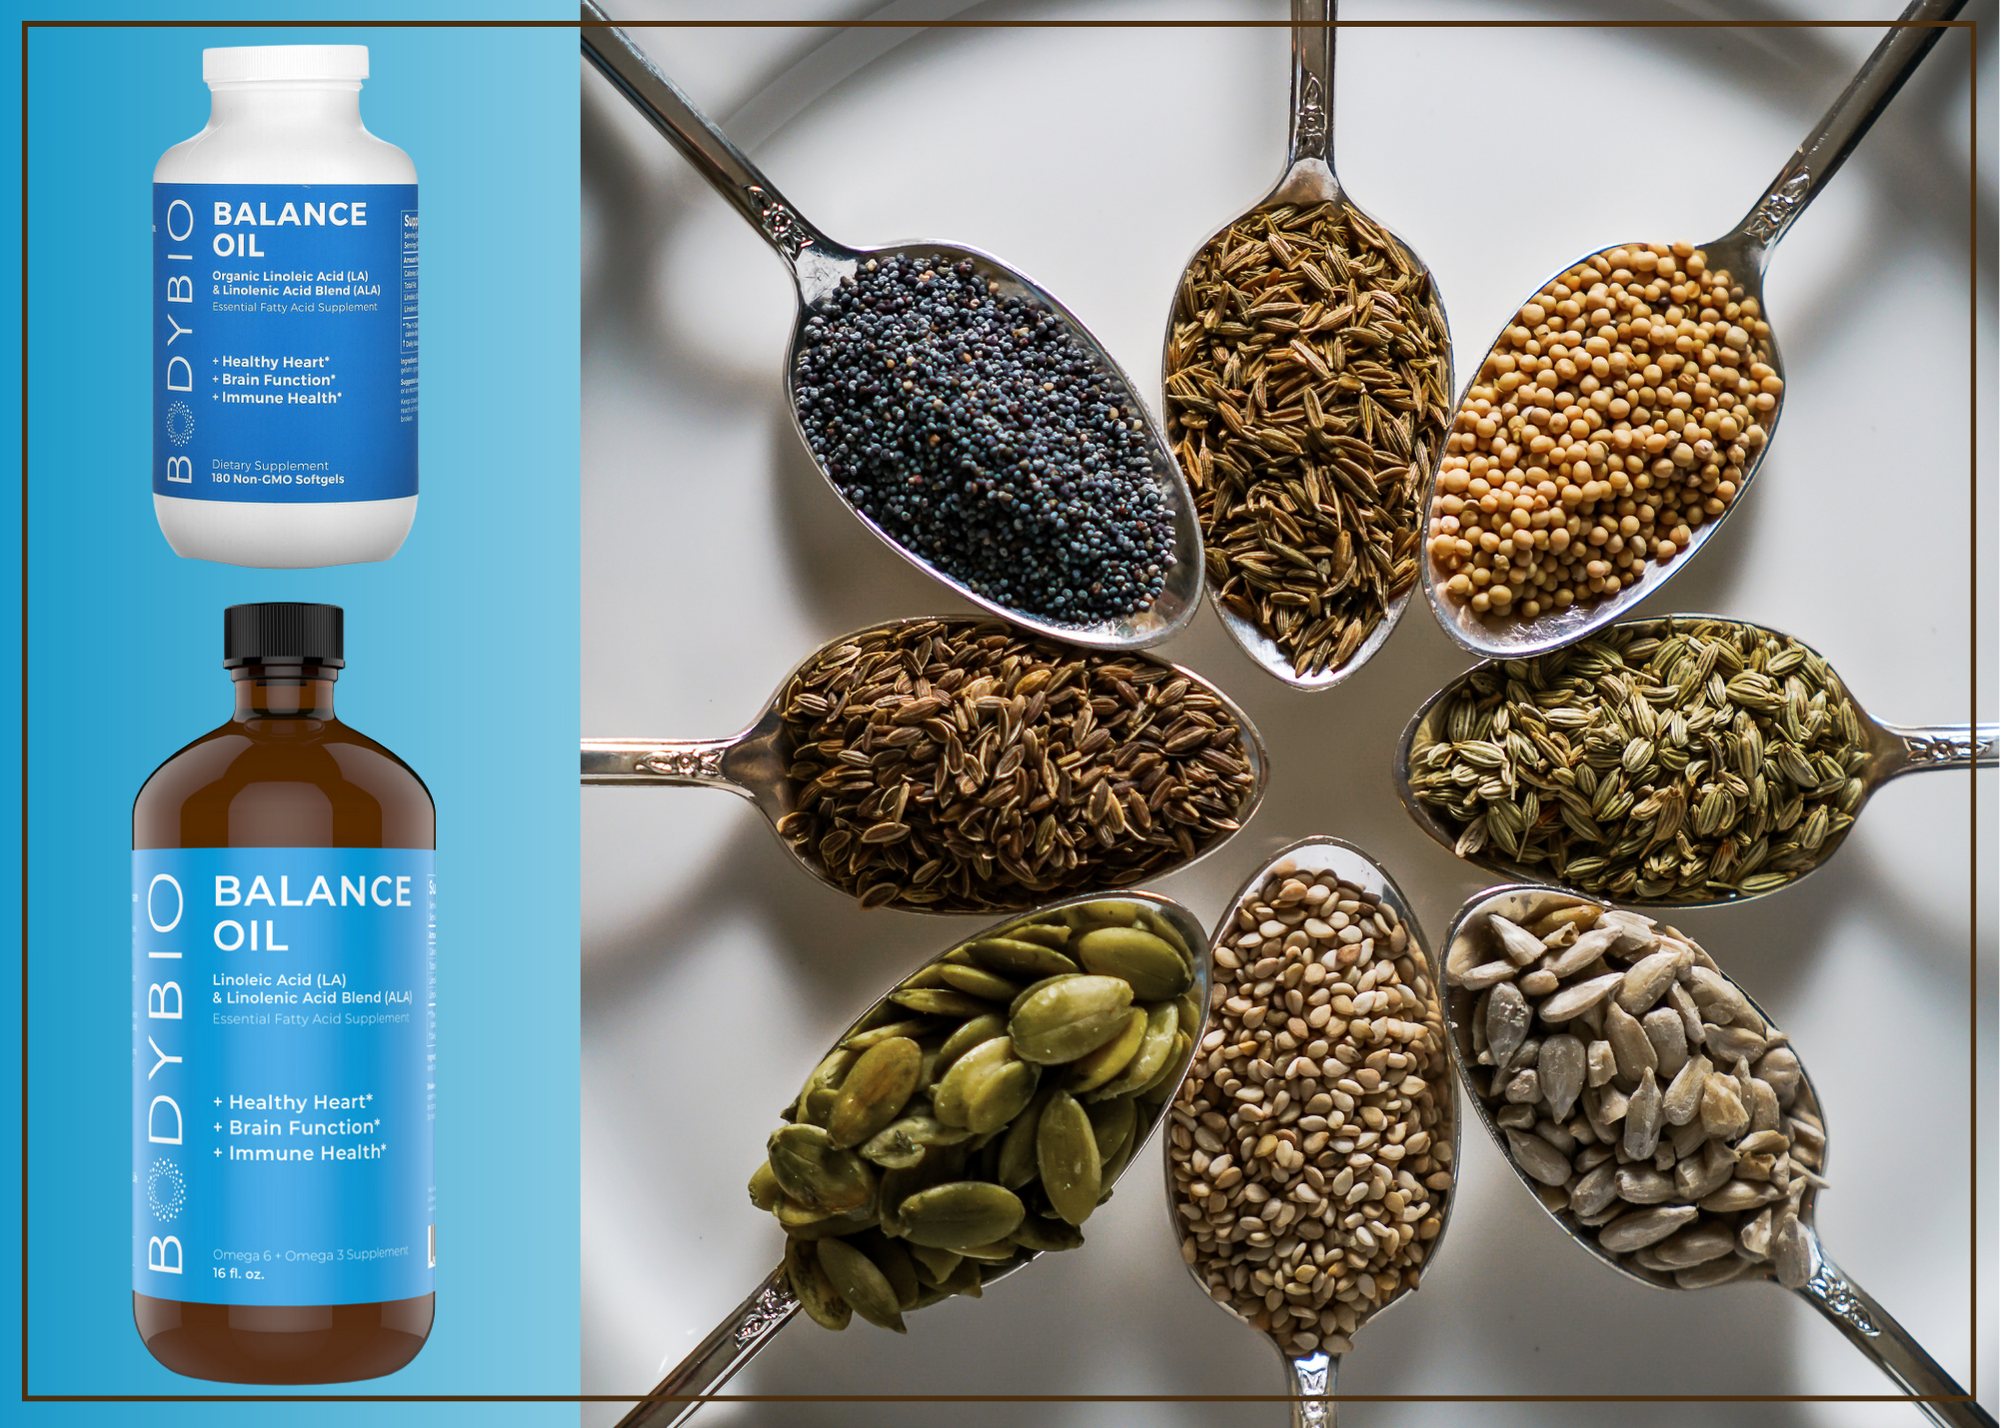
    If you’re looking for a high quality seed oil for general omega-6 and omega-3 intake, look no further than BodyBio Balance Oil.

    Is Seed Cycling a Good Idea for Hormone Health?

    While seed cycling itself is still undergoing studies, there are so many great medical resources that explain the benefits of essential fatty acids, lignans, minerals, and high-quality seeds and seed oils for hormonal health. 

    If you struggle with PCOS, thyroid issues, amenorrhoea, or endometriosis, seed cycling can be a great addition to your care plan. It’s easy to start, simple to maintain, and many women swear it makes a difference. 

    If seed cycling isn’t for you or if you want to supplement it with a dose of powerful (and well-balanced) essential fatty acids, BodyBio created Balance Oil to be just that. It’s perfectly formulated to provide a rich dose of omega-3 and omega-6 EFAs right to your cells. 


    References:

    Phipps, W. R., Martini, M. C., Lampe, J. W., Slavin, J. L., & Kurzer, M. S. (1993). Effect of flax seed ingestion on the menstrual cycle. The Journal of clinical endocrinology and metabolism, 77(5), 1215–1219. https://doi.org/10.1210/jcem.77.5.8077314

    Adlercreutz, H., Höckerstedt, K., Bannwart, C., Bloigu, S., Hämäläinen, E., Fotsis, T., & Ollus, A. (1987). Effect of dietary components, including lignans and phytoestrogens, on enterohepatic circulation and liver metabolism of estrogens and on sex hormone binding globulin (SHBG). Journal of steroid biochemistry, 27(4-6), 1135–1144. https://doi.org/10.1016/0022-4731(87)90200-7

    Ouladsahebmadarek, E., Khaki, A., Khanahmadi, S., Ahmadi Ashtiani, H., Paknejad, P., & Ayubi, M. R. (2014). Hormonal and metabolic effects of polyunsaturated fatty acid (omega-3) on polycystic ovary syndrome induced rats under diet. Iranian journal of basic medical sciences, 17(2), 123–127.

    Goyal, A., Sharma, V., Upadhyay, N., Gill, S., & Sihag, M. (2014). Flax and flaxseed oil: an ancient medicine & modern functional food. Journal of food science and technology, 51(9), 1633–1653. https://doi.org/10.1007/s13197-013-1247-9


    Written by Dr. Thomas Wnorowski for BodyBio

  • Lemon Blueberry Cheesecake Pops

    Lemon Blueberry Cheesecake Pops


    Lemon Blueberry Cheesecake Pops

    Who says you can’t indulge in something sweet and refreshing that’s also healthy and affordable?

    Made with whole ingredients like lemon yogurt, fresh blueberries, and a crunchy granola topping, these pops are tasty and nutritious. Plus, making your own summer treats at home can be a lot more affordable than buying them at the store.

    Not only are these pops healthy, they’re also easy to make. Simply combine the ingredients with a hand mixer, pour into popsicle molds, and let them freeze. In just a few hours, you’ll have a batch of delicious and refreshing treats that you can enjoy guilt-free all summer long.

    The next time you’re craving something sweet, skip the store-bought options and make your own Lemon Blueberry Cheesecake Pops. Not only will your taste buds thank you, but your wallet and your body will too!


    Lemon Blueberry Cheesecake Pops

    Lemon blueberry cheesecake pops are a refreshing and delicious treat that's perfect for summer! Made with whole ingredients, these pops are easy and a cinch to make!
    Servings: 8

    Ingredients
      

    • 1 Pint fresh blueberries
    • 1/3 Cup cane sugar divided
    • 2 Tablespoons water
    • 1 Teaspoon lemon zest
    • 2 Cups softened cream cheese
    • 1 Cup lemon yogurt
    • 1/2 Cup granola
    • 8 paper cups
    • 8 wooden popsicle sticks or small reusable popsicle molds with sticks

    Method
     

    1. Place blueberries, two tablespoons sugar, water, and lemon zest in a small saucepan and bring to a simmer. Cook for five minutes or until blueberries are tender and mixture has thickened. Set aside to cool.
    2. In a mixing bowl, use a hand mixer to cream together cream cheese and remaining sugar until fluffy. Stir in yogurt until thoroughly mixed. Fold in blueberry mixture to create swirls of fruit.
    3. Spoon mixture into eight small paper cups leaving a quarter inch of space from the top of the cups.
    4. Top off cups with granola and gently press into the cheesecake mixture. Insert a popsicle stick into the center of each cup and freeze for a minimum of four hours.
    5. To serve, peel away paper cup and enjoy!

    Recipe Courtesy of INFRA