Looking for a warm bowl of cozy? Look no further than this potato & corn soup. It’s luscious and creamy, without any cream! This savory soup is a no brainer for cold nights.
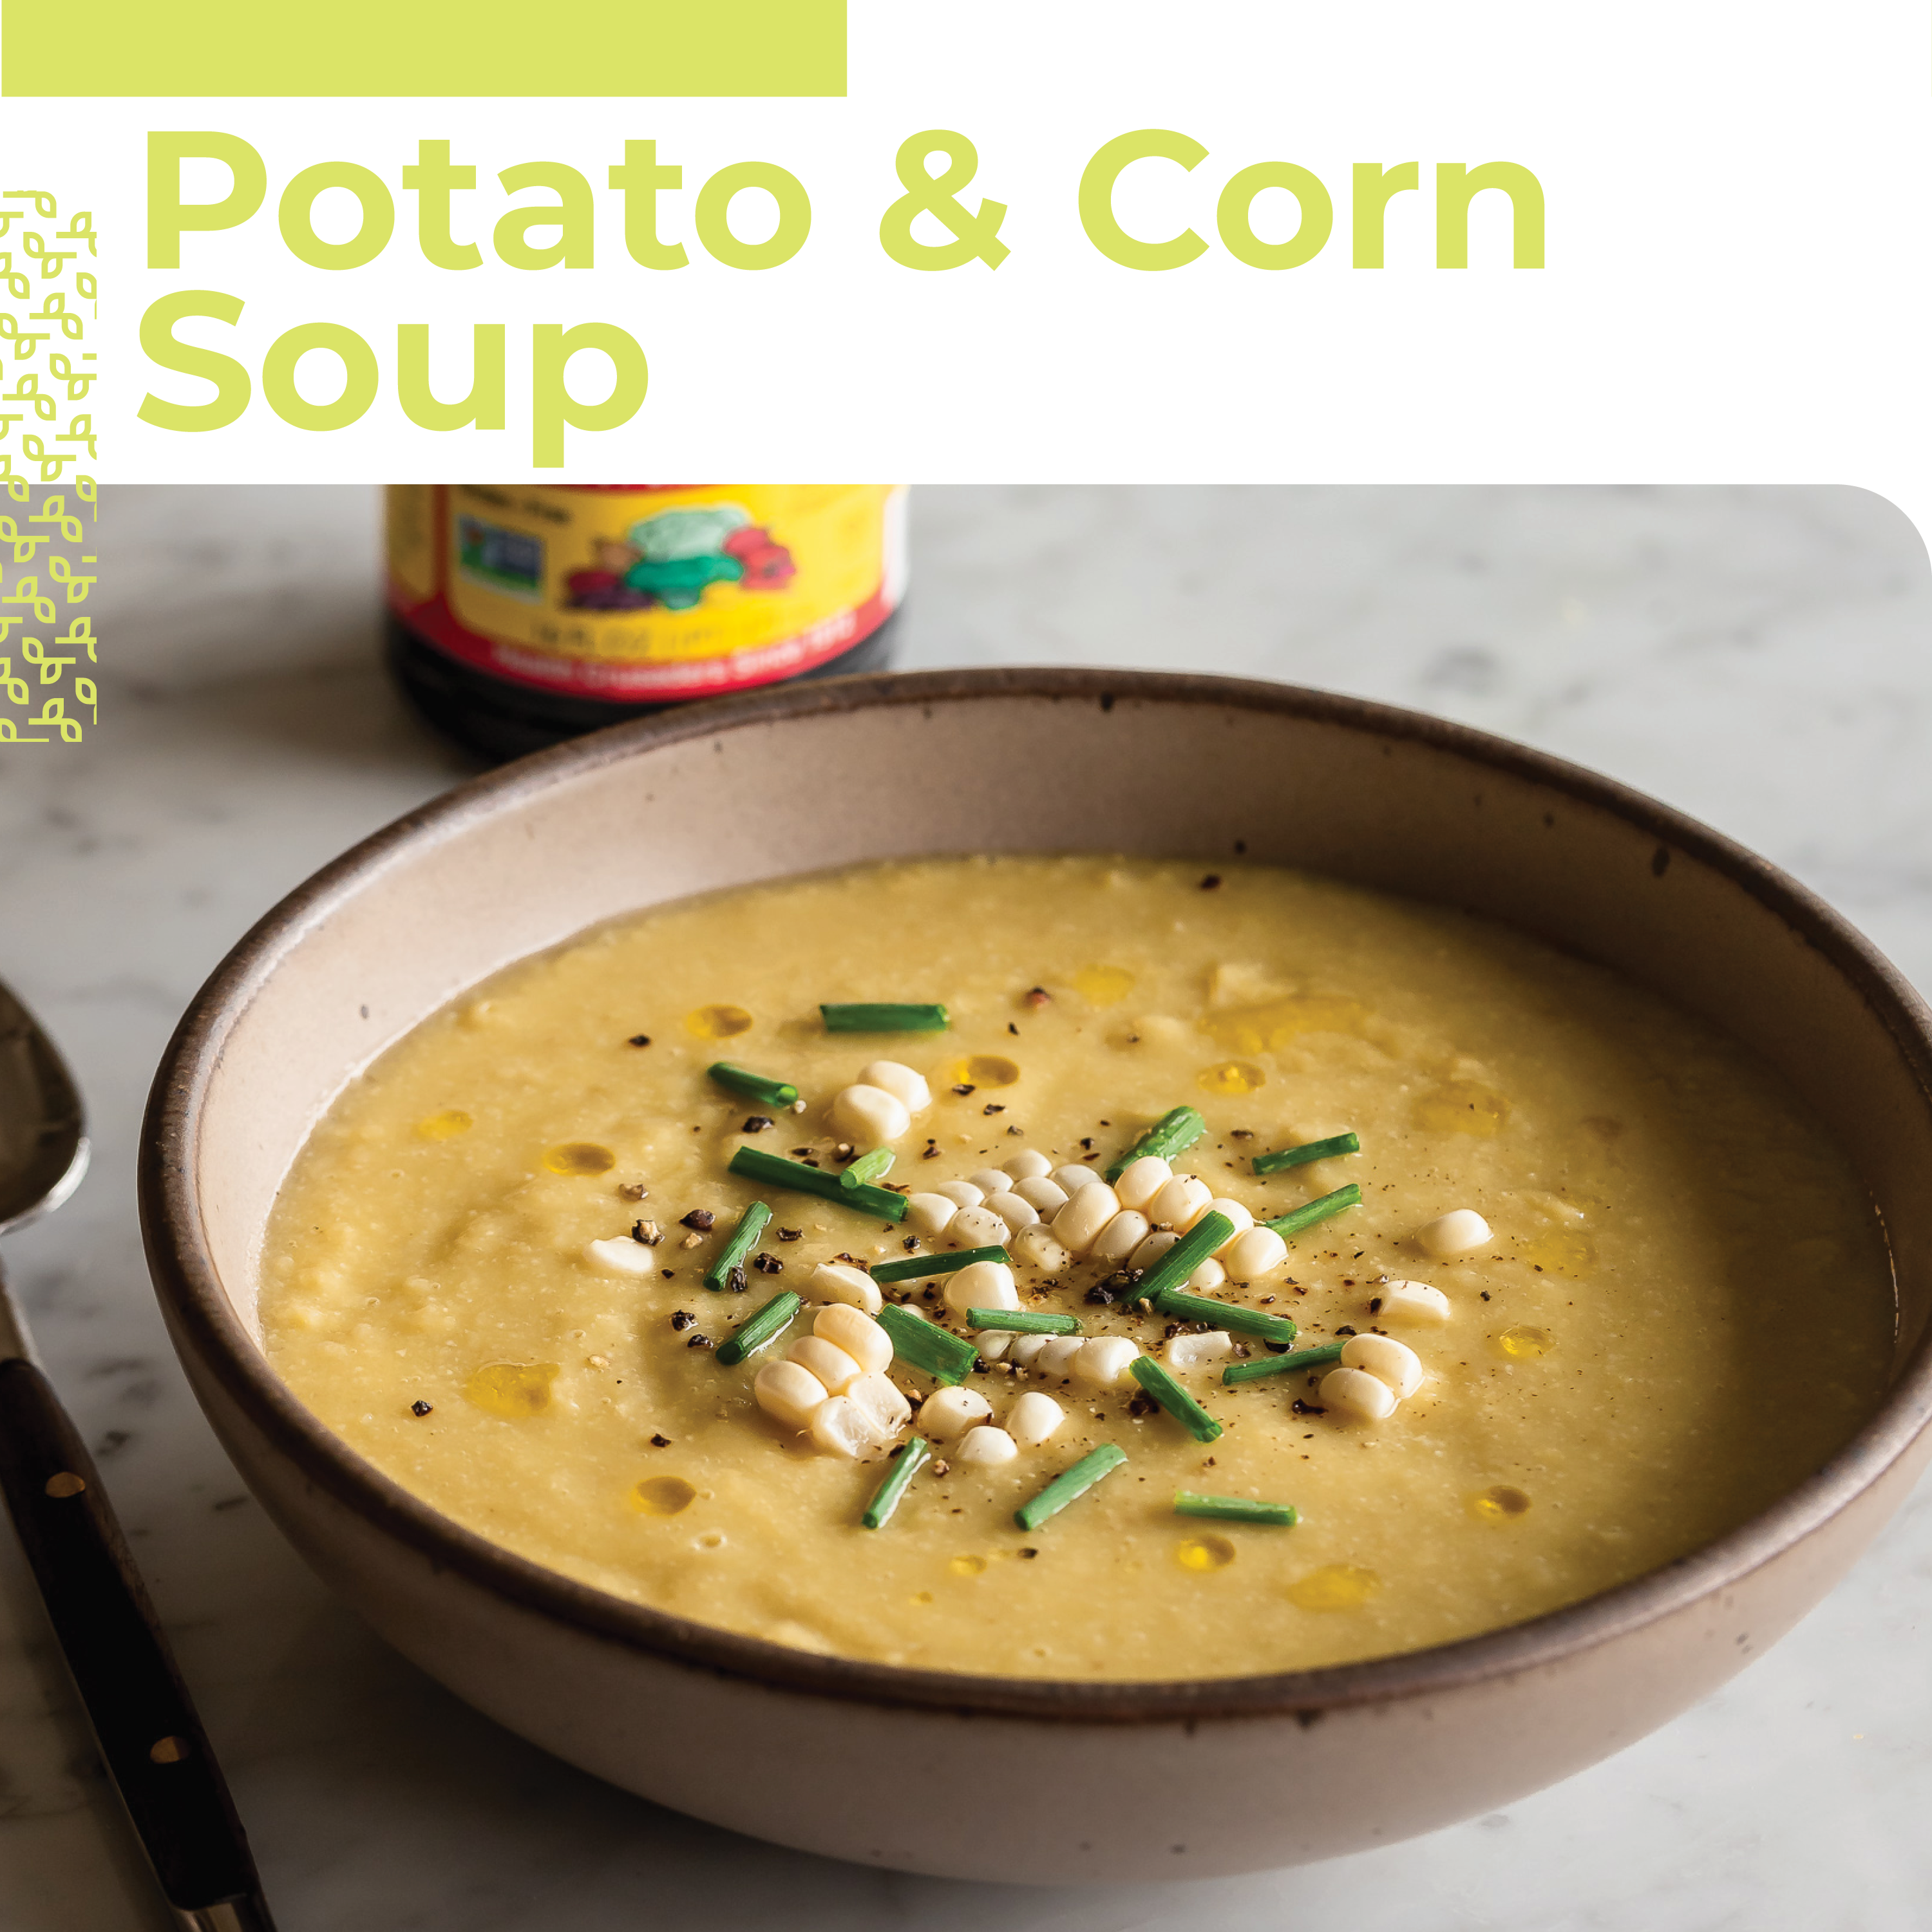
Potato & Corn Soup
Looking for a warm bowl of cozy? Look no further than this potato & corn soup. It’s luscious and creamy, without any cream! This savory soup is a no brainer for cold nights.
These cheddar & chive smashed potatoes are simply elegant! Equal emphasis on the simple and the elegant. Cheddar and fresh chives combine for the perfect side dish. Plus, it’s vegan!
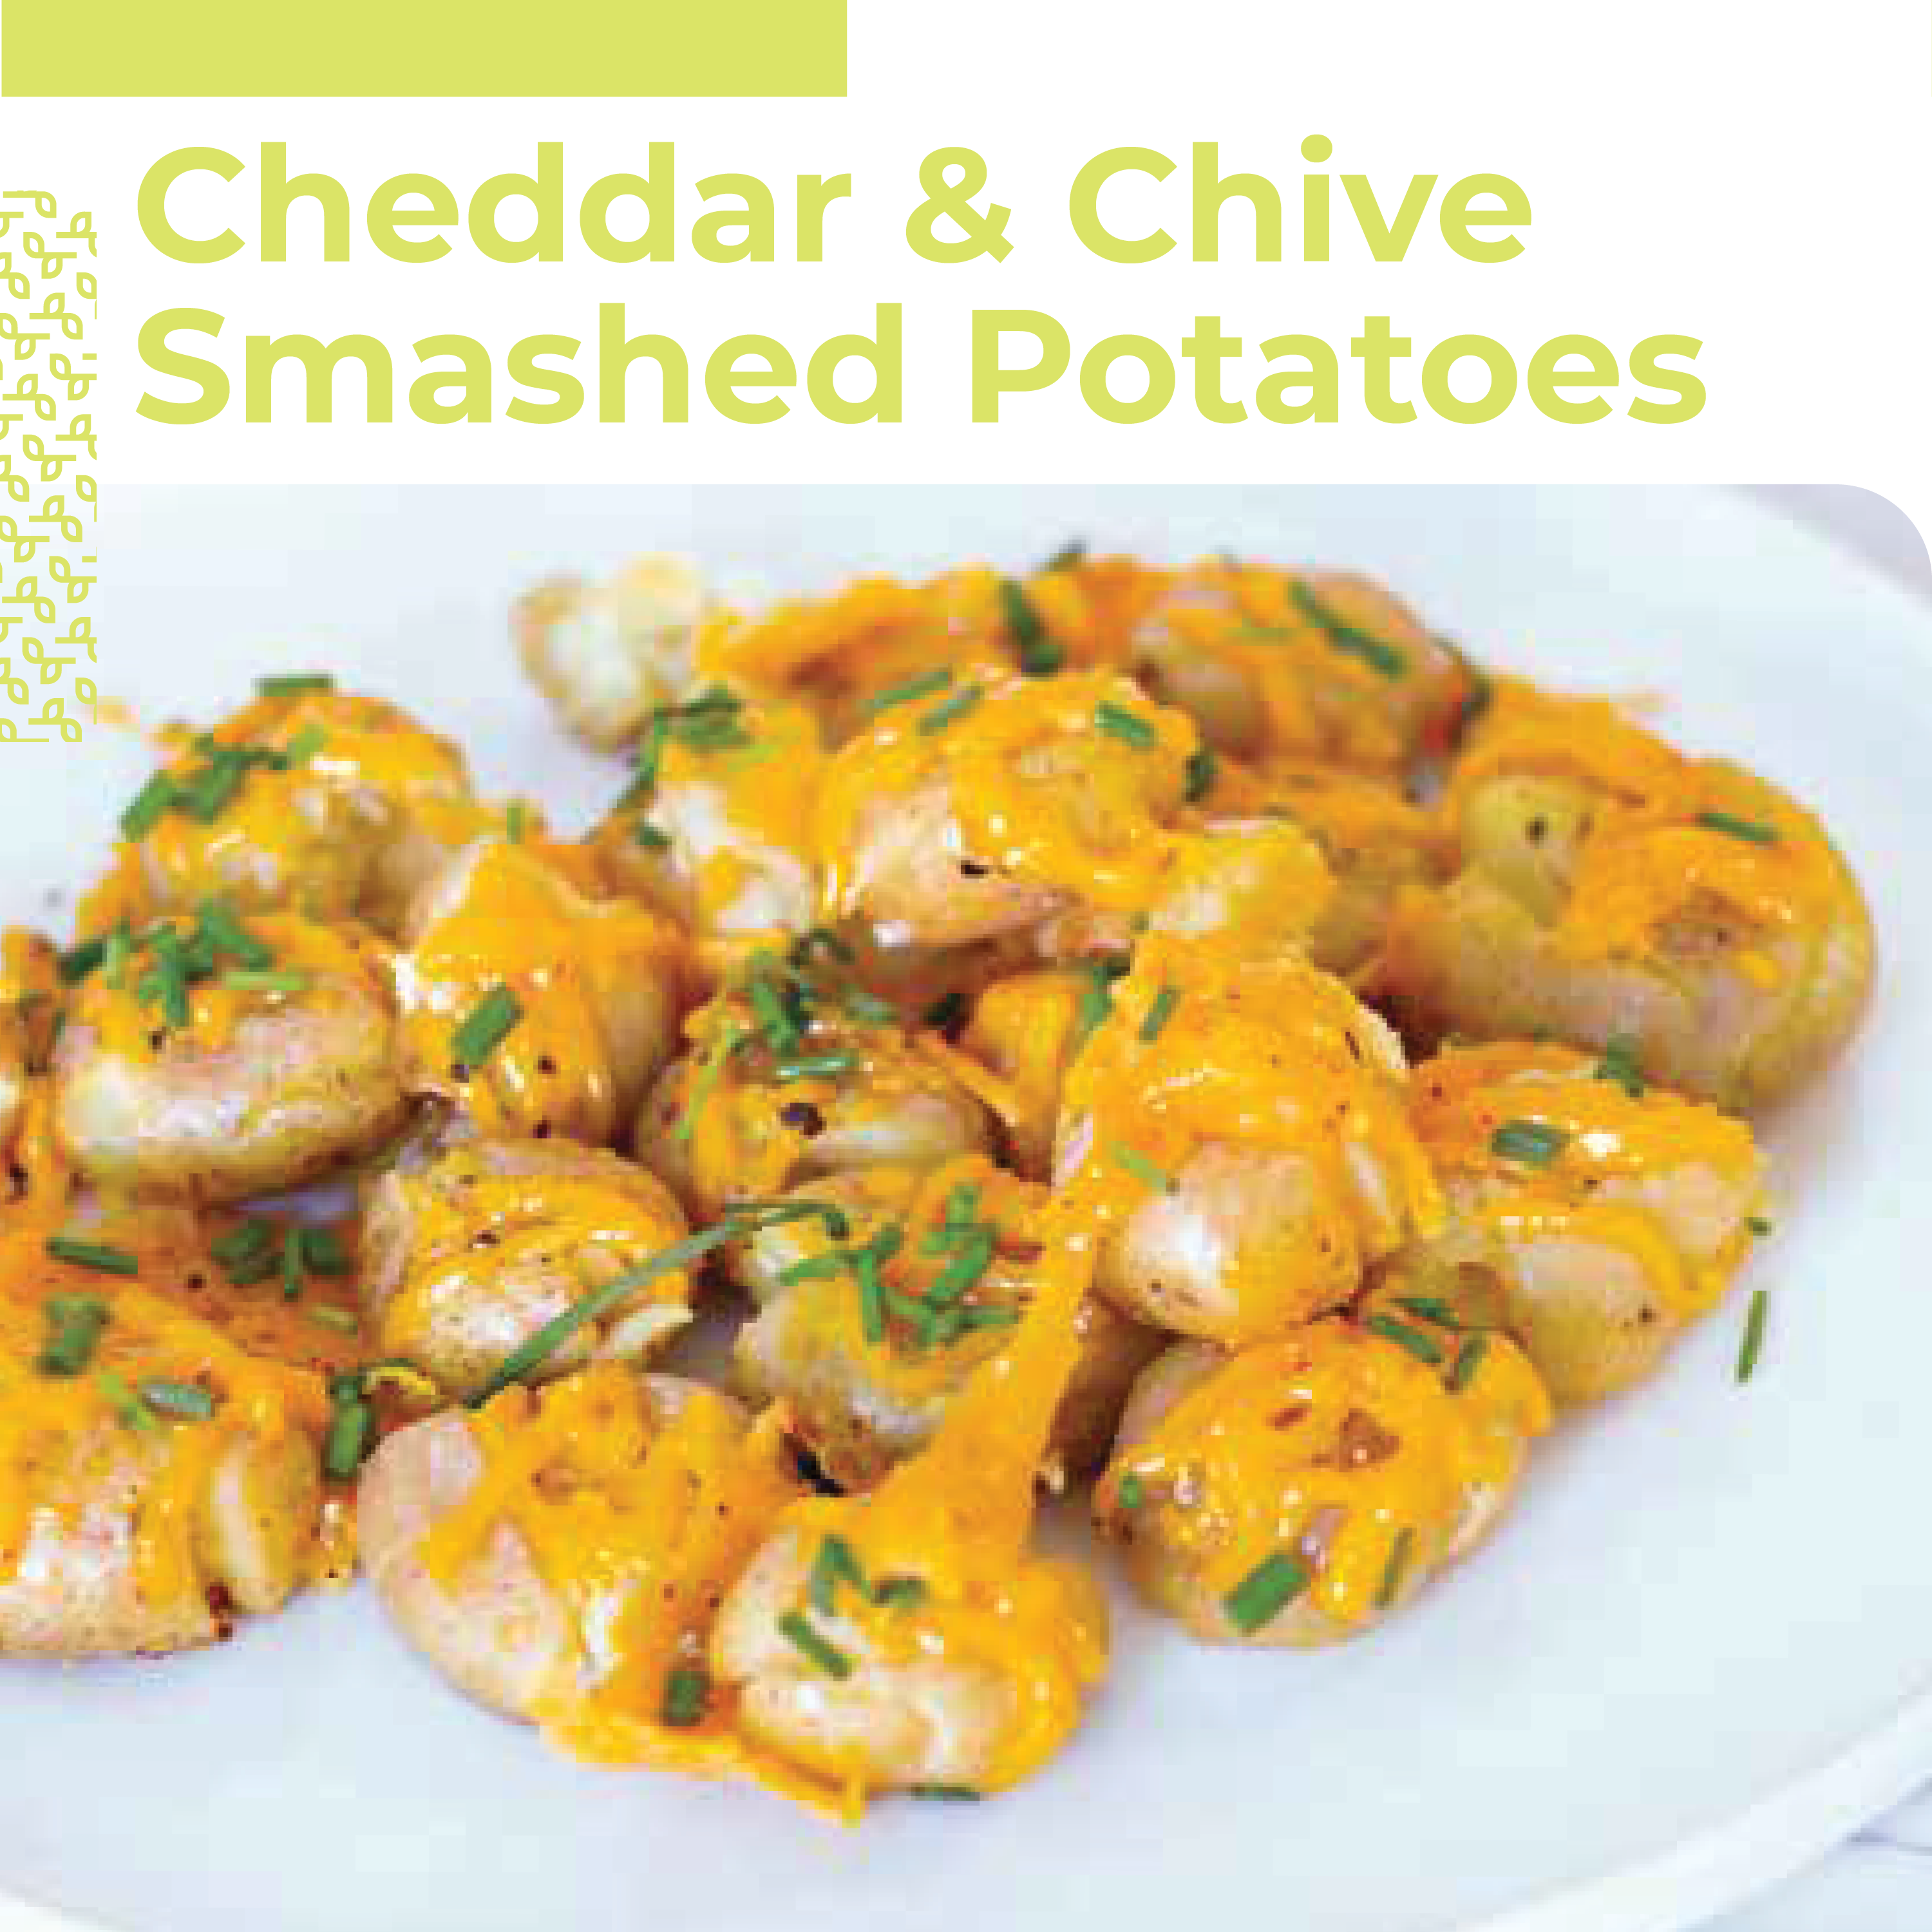
Cheddar & Chive Smashed Potatoes
These cheddar & chive smashed potatoes are simply elegant! Equal emphasis on the simple and the elegant. Cheddar and fresh chives combine for the perfect side dish. Plus, it’s vegan!
This classic lasagna is a hearty vegetarian meal for chilly days. Don’t be intimidated by the 90-minute recipe. Most of that time is hands off—the cheese is getting nice and bubbly in the oven. The hardest part is waiting for the #GlutenFree deliciousness.
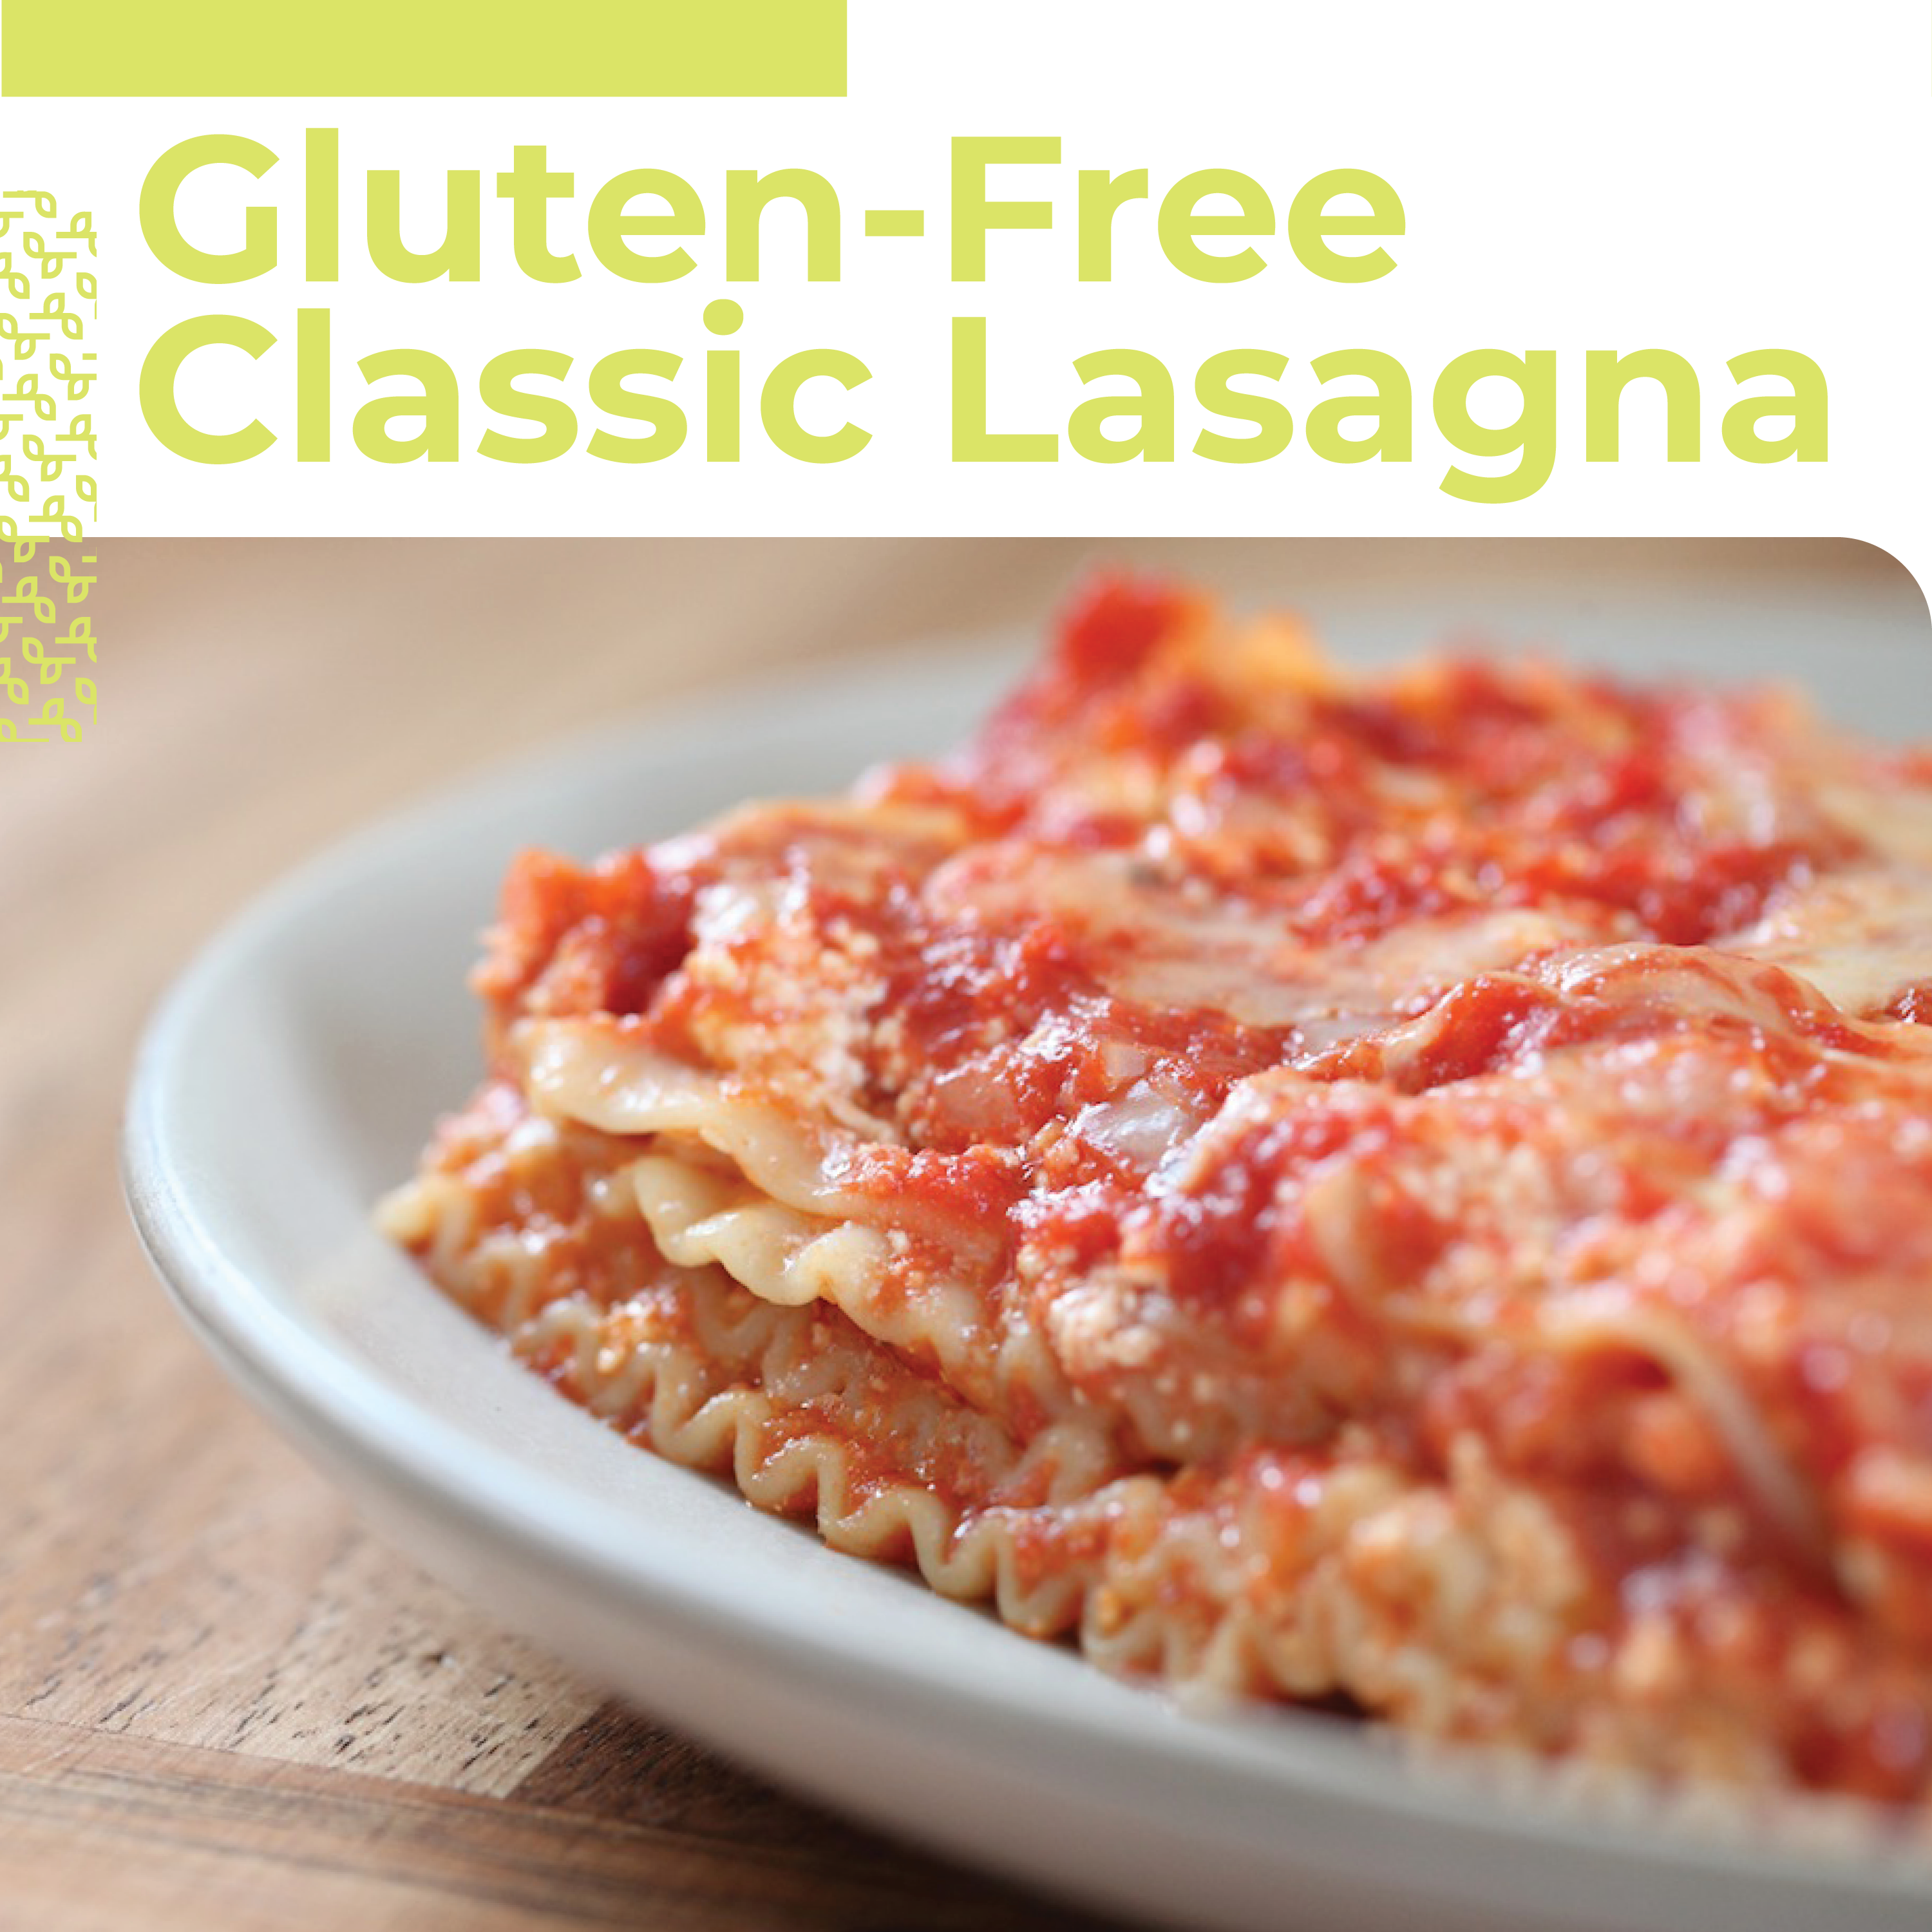
Gluten-Free Classic Lasagna
This classic lasagna is a hearty vegetarian meal for chilly days. Don’t be intimidated by the 90-minute recipe. Most of that time is hands off—the cheese is getting nice and bubbly in the oven. The hardest part is waiting for the #GlutenFree deliciousness.
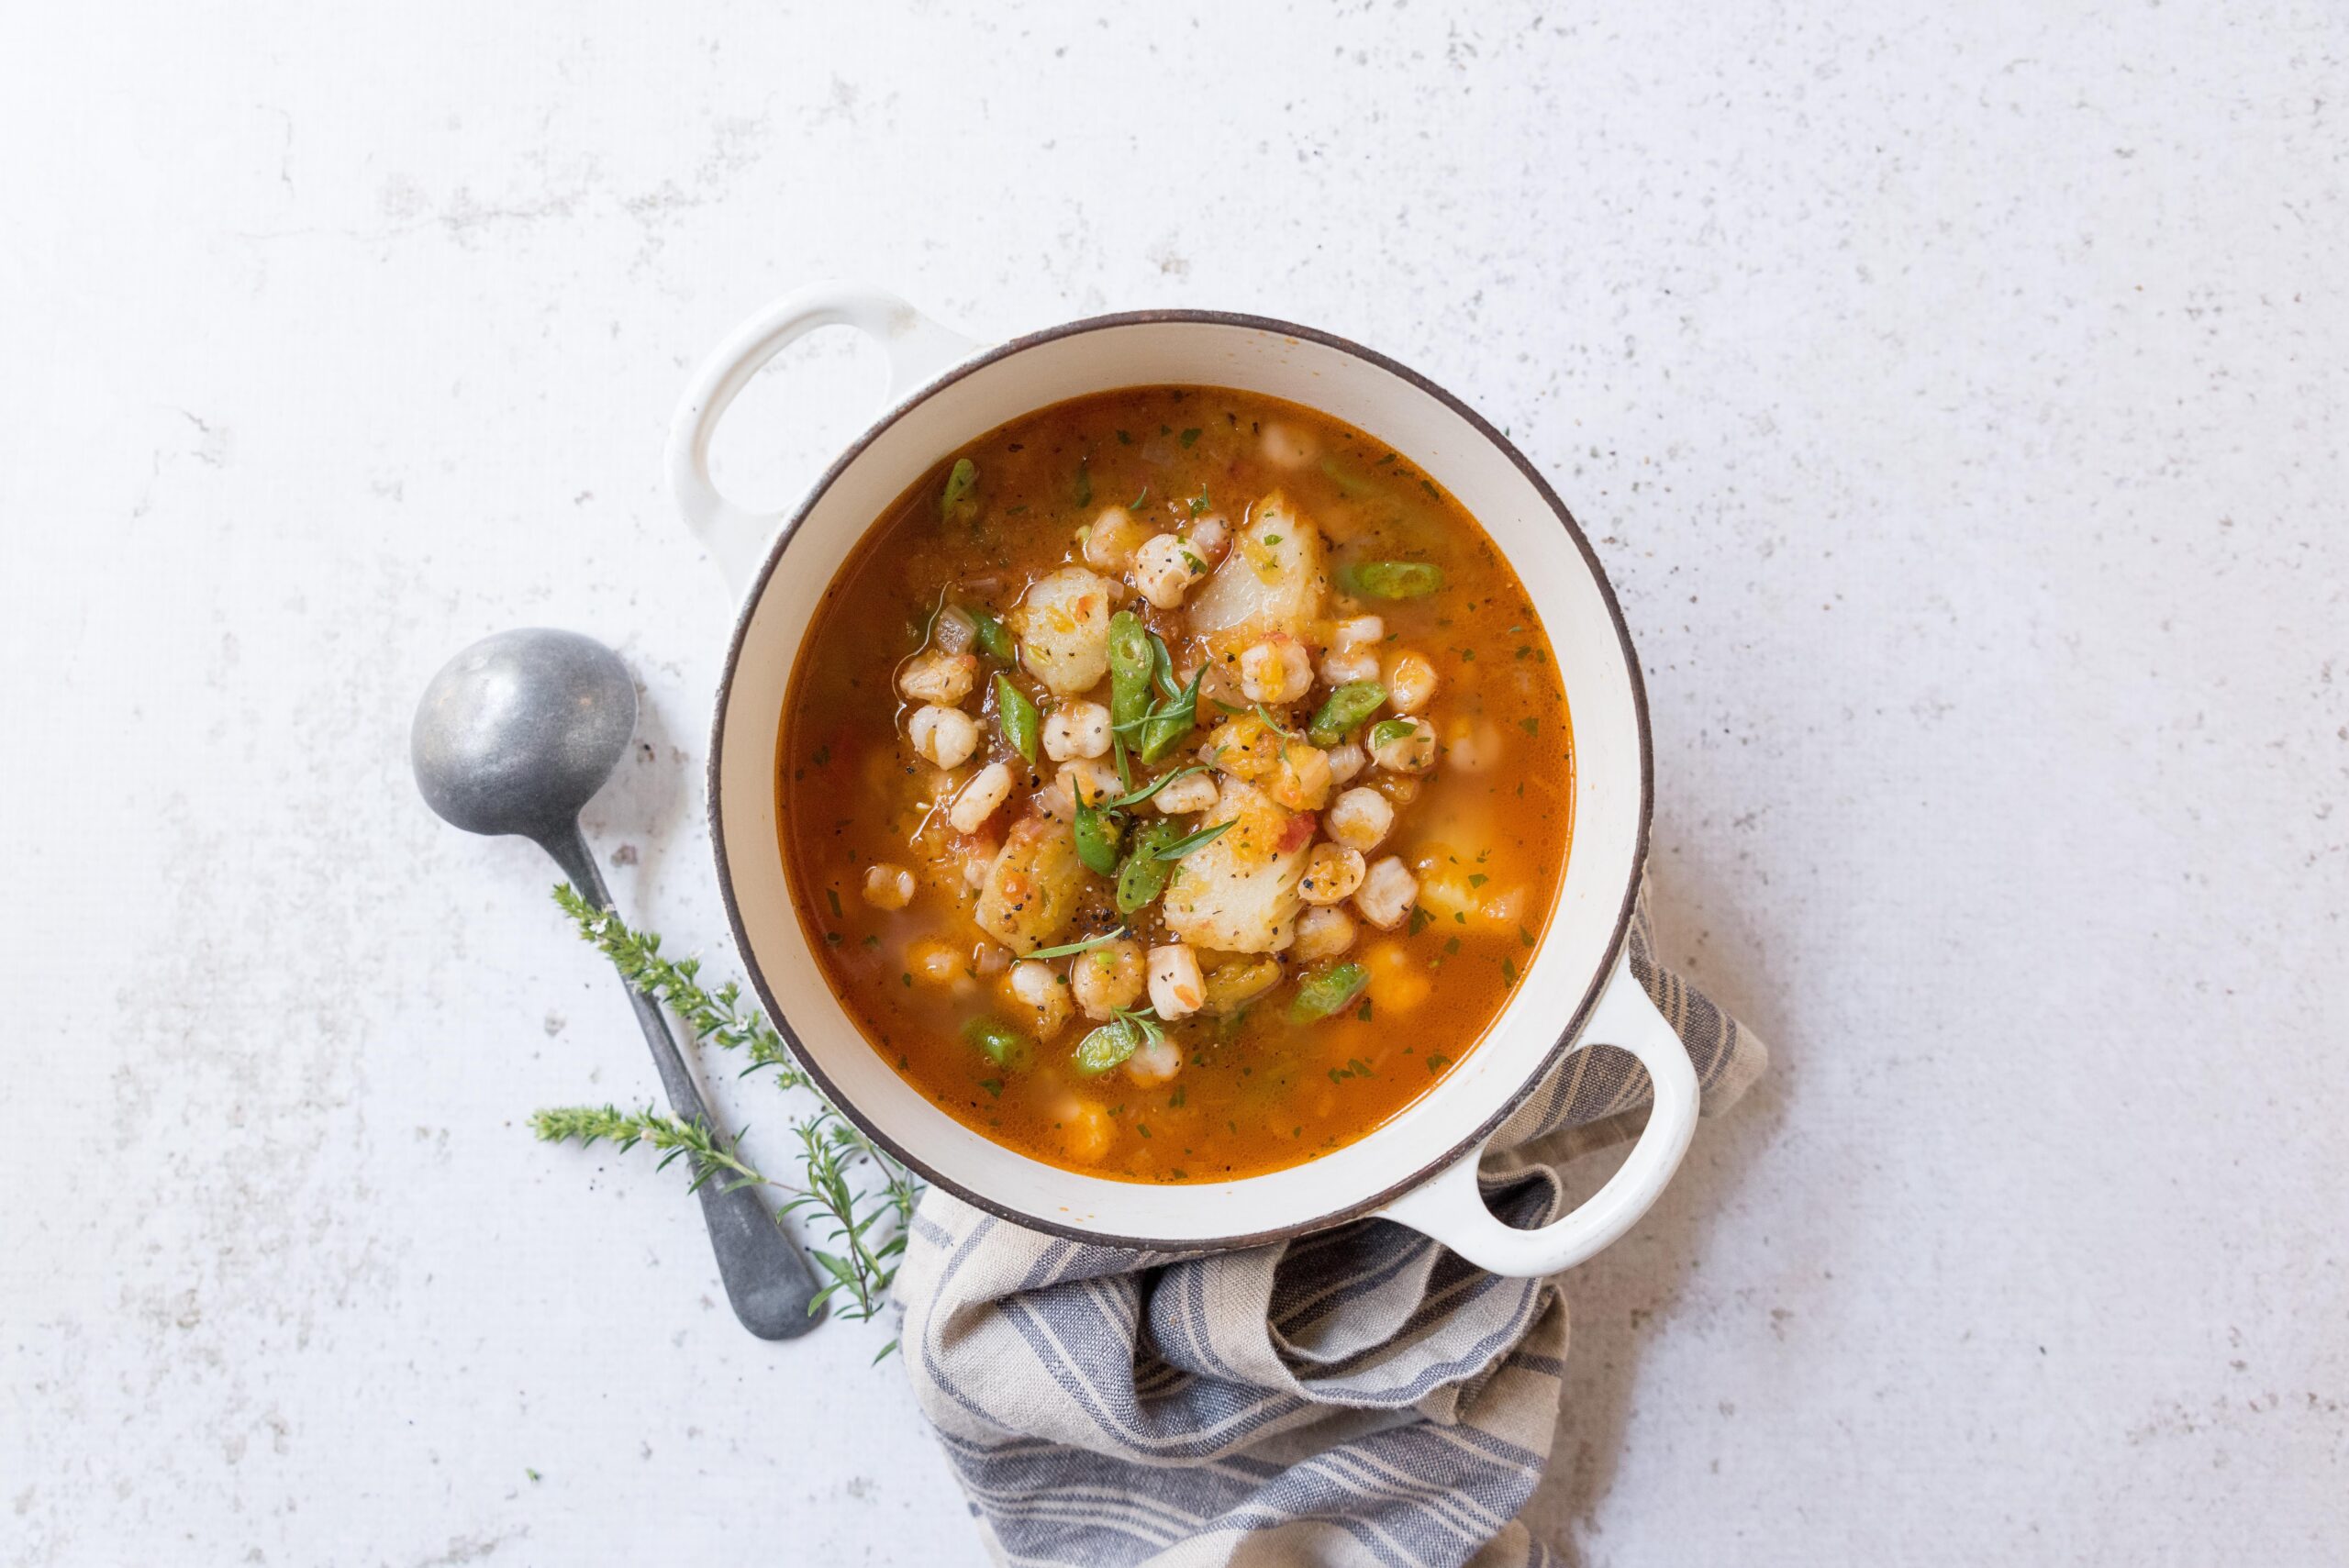
This three sisters stew is named after the indigenous agricultural practice of planting beans, corn, and squash together. Not only do these ingredients taste great together, but they also actually help one another grow! Corn stalks form a trellis that the beans can climb. Squash leaves help shade the soil and reduce evaporation, so the plants need less water. The beans deposit nitrogen back into the soil that the corn needs. It’s a wonderful system where each piece plays an important part to benefit the whole. This Three Sisters Stew is a warm bowl of simple veggie stew that is sure to keep you satisfied.
Three Sisters Stew
This Three Sisters stew is named after the indigenous agricultural practice of planting beans, corn, and squash together. Not only do these ingredients taste great together, they actually help one another grow!
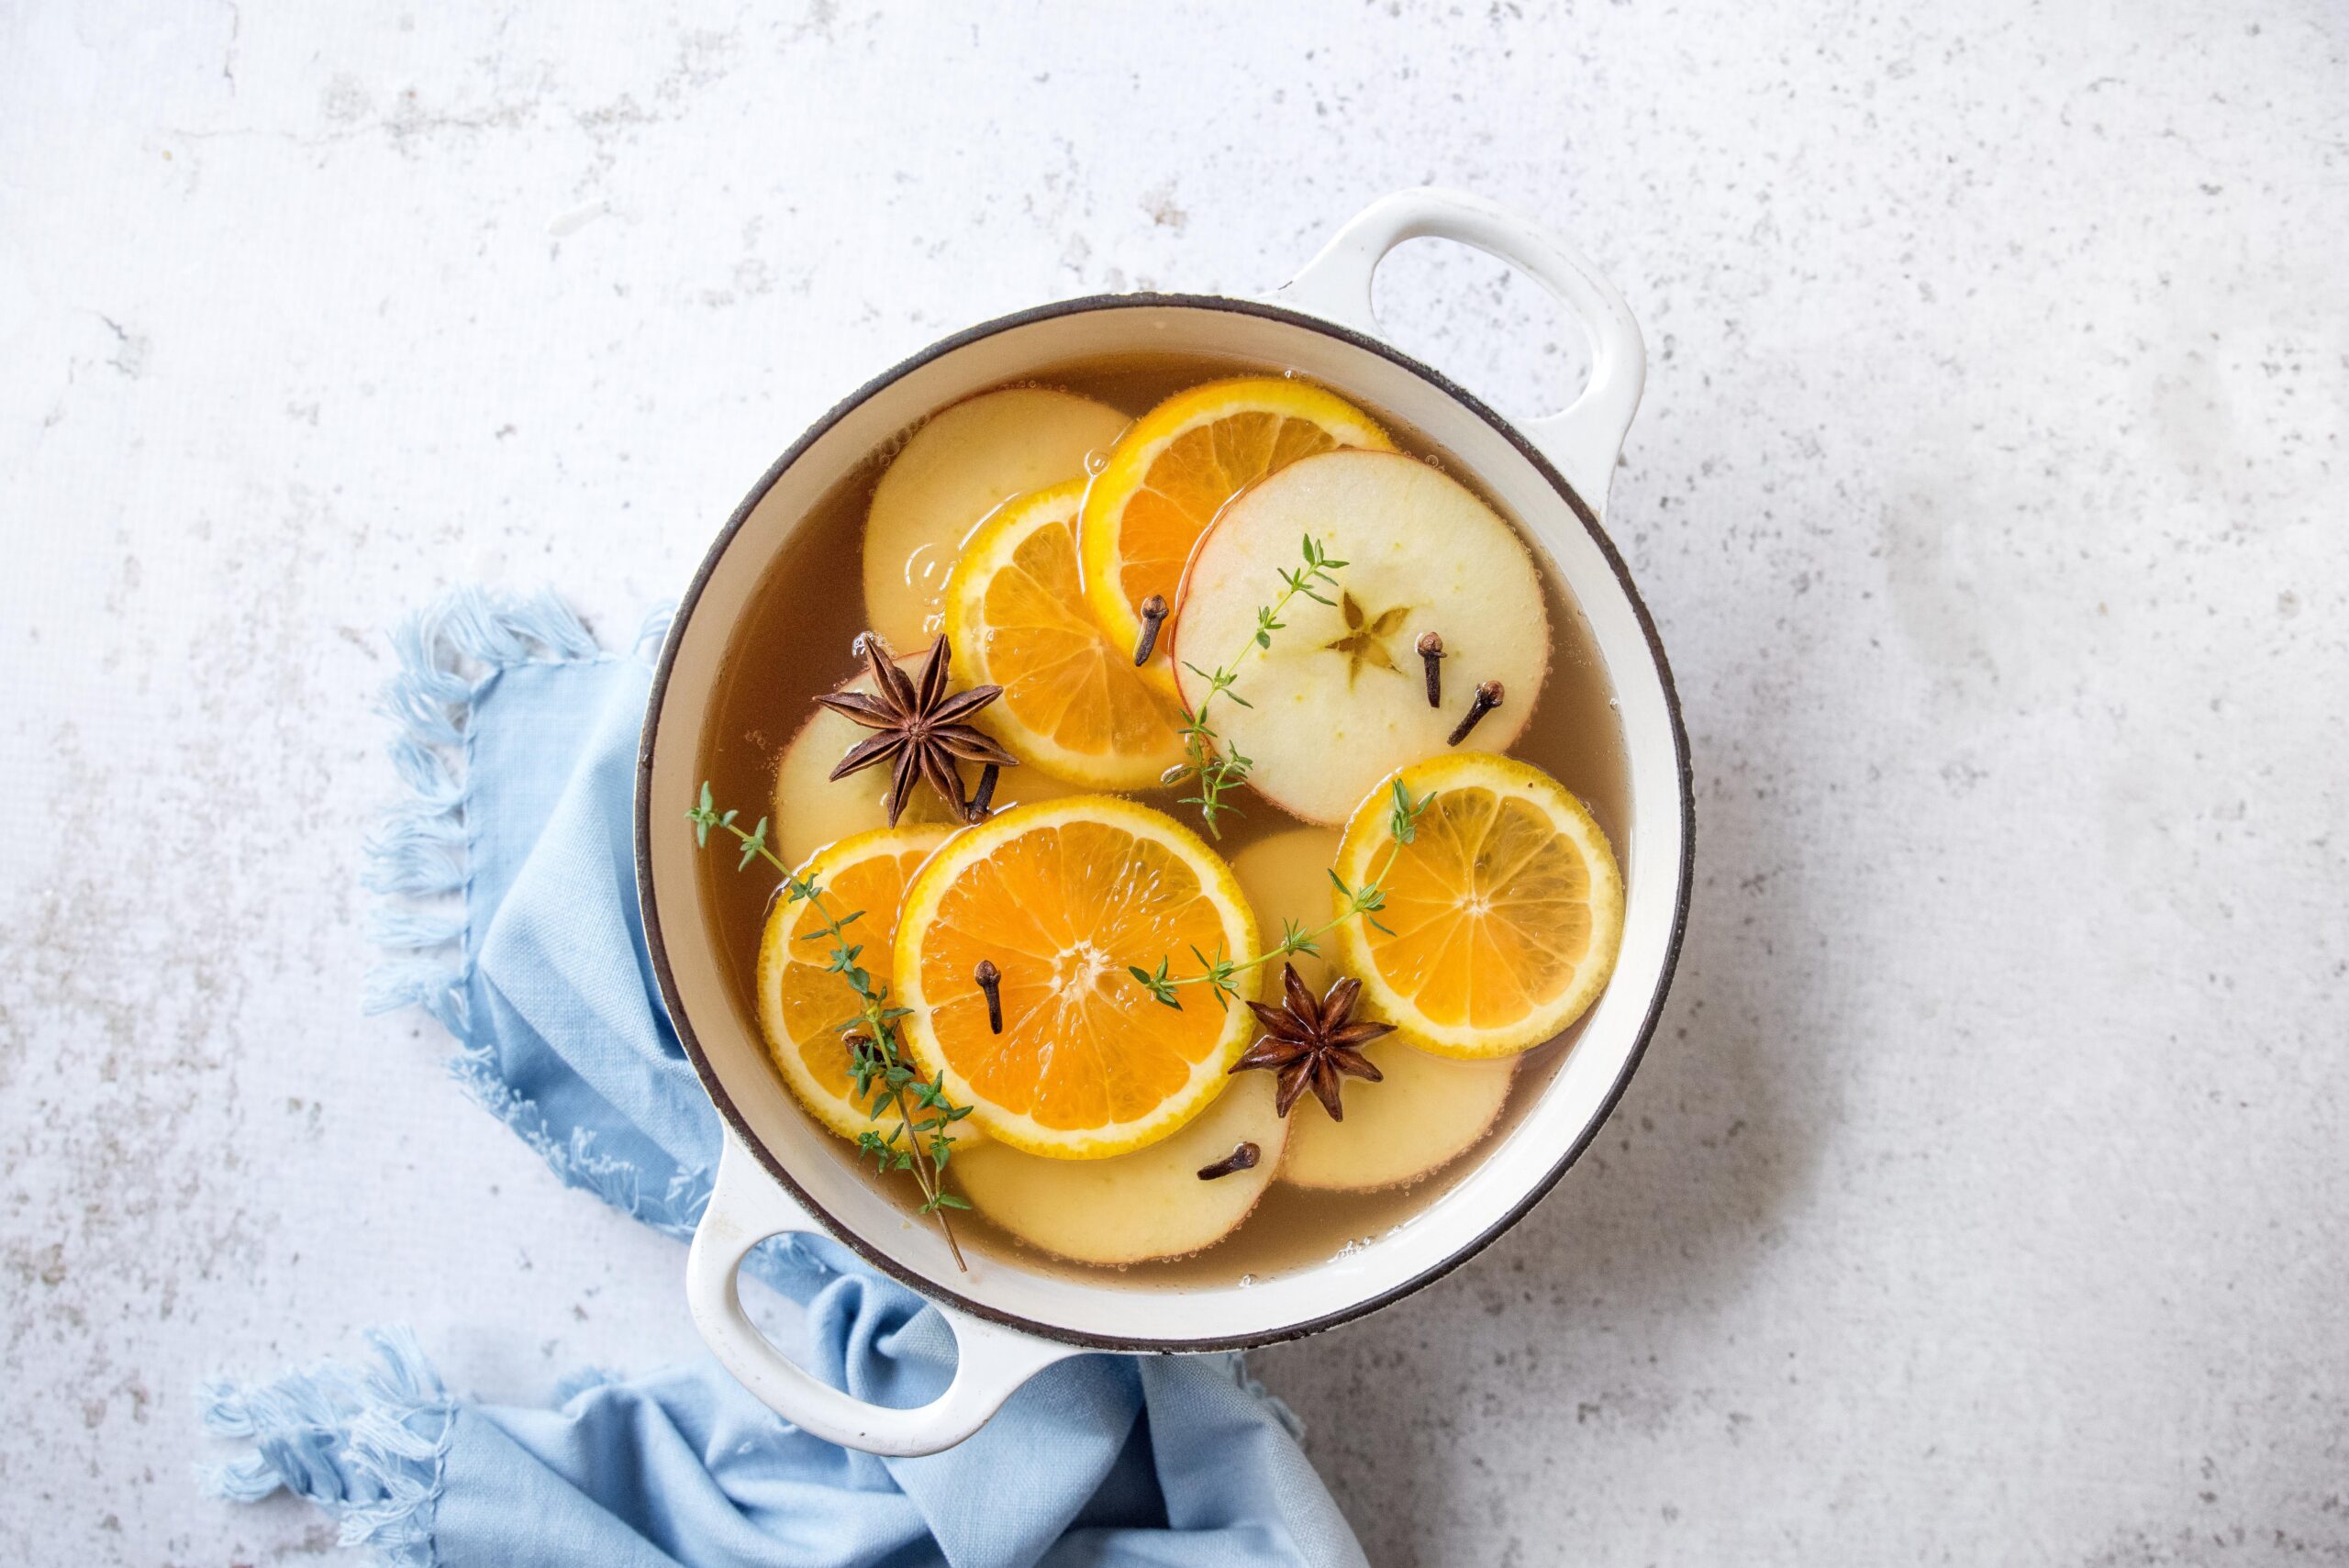
Looking for a fun beverage for your next fall gathering? Infuse cider with your favorite fall baking spices and add bubbles—either sparkling juice or the adults-only prosecco. This Sparkling Spiced Cider is easy enough to pull off for unexpected guests. Don’t forget the sliced fruit for the punch bowl. It takes it to the next level! Serving this punch warm is a nod to mulled wine and the chillier temps. The addition of sparkling wine or juice keeps it festive.
Sparkling Spiced Cider
Looking for a fun beverage for your next fall gathering? Infuse cider with your favorite fall baking spices and add bubbles—either sparkling juice or the adults-only prosecco. This sparkling spiced cider is easy enough to pull off for unexpected guests.
In a 6-quart stockpot, bring apple cider, pear juice, half of the orange slices, cinnamon sticks, cloves, and star anise to just under a simmer and cook for 15 minutes.
Remove from heat and carefully strain into a large serving vessel, top with prosecco or sparkling pear juice. Serve warm, garnish with remaining orange slices, apple slices, and fresh thyme sprigs.
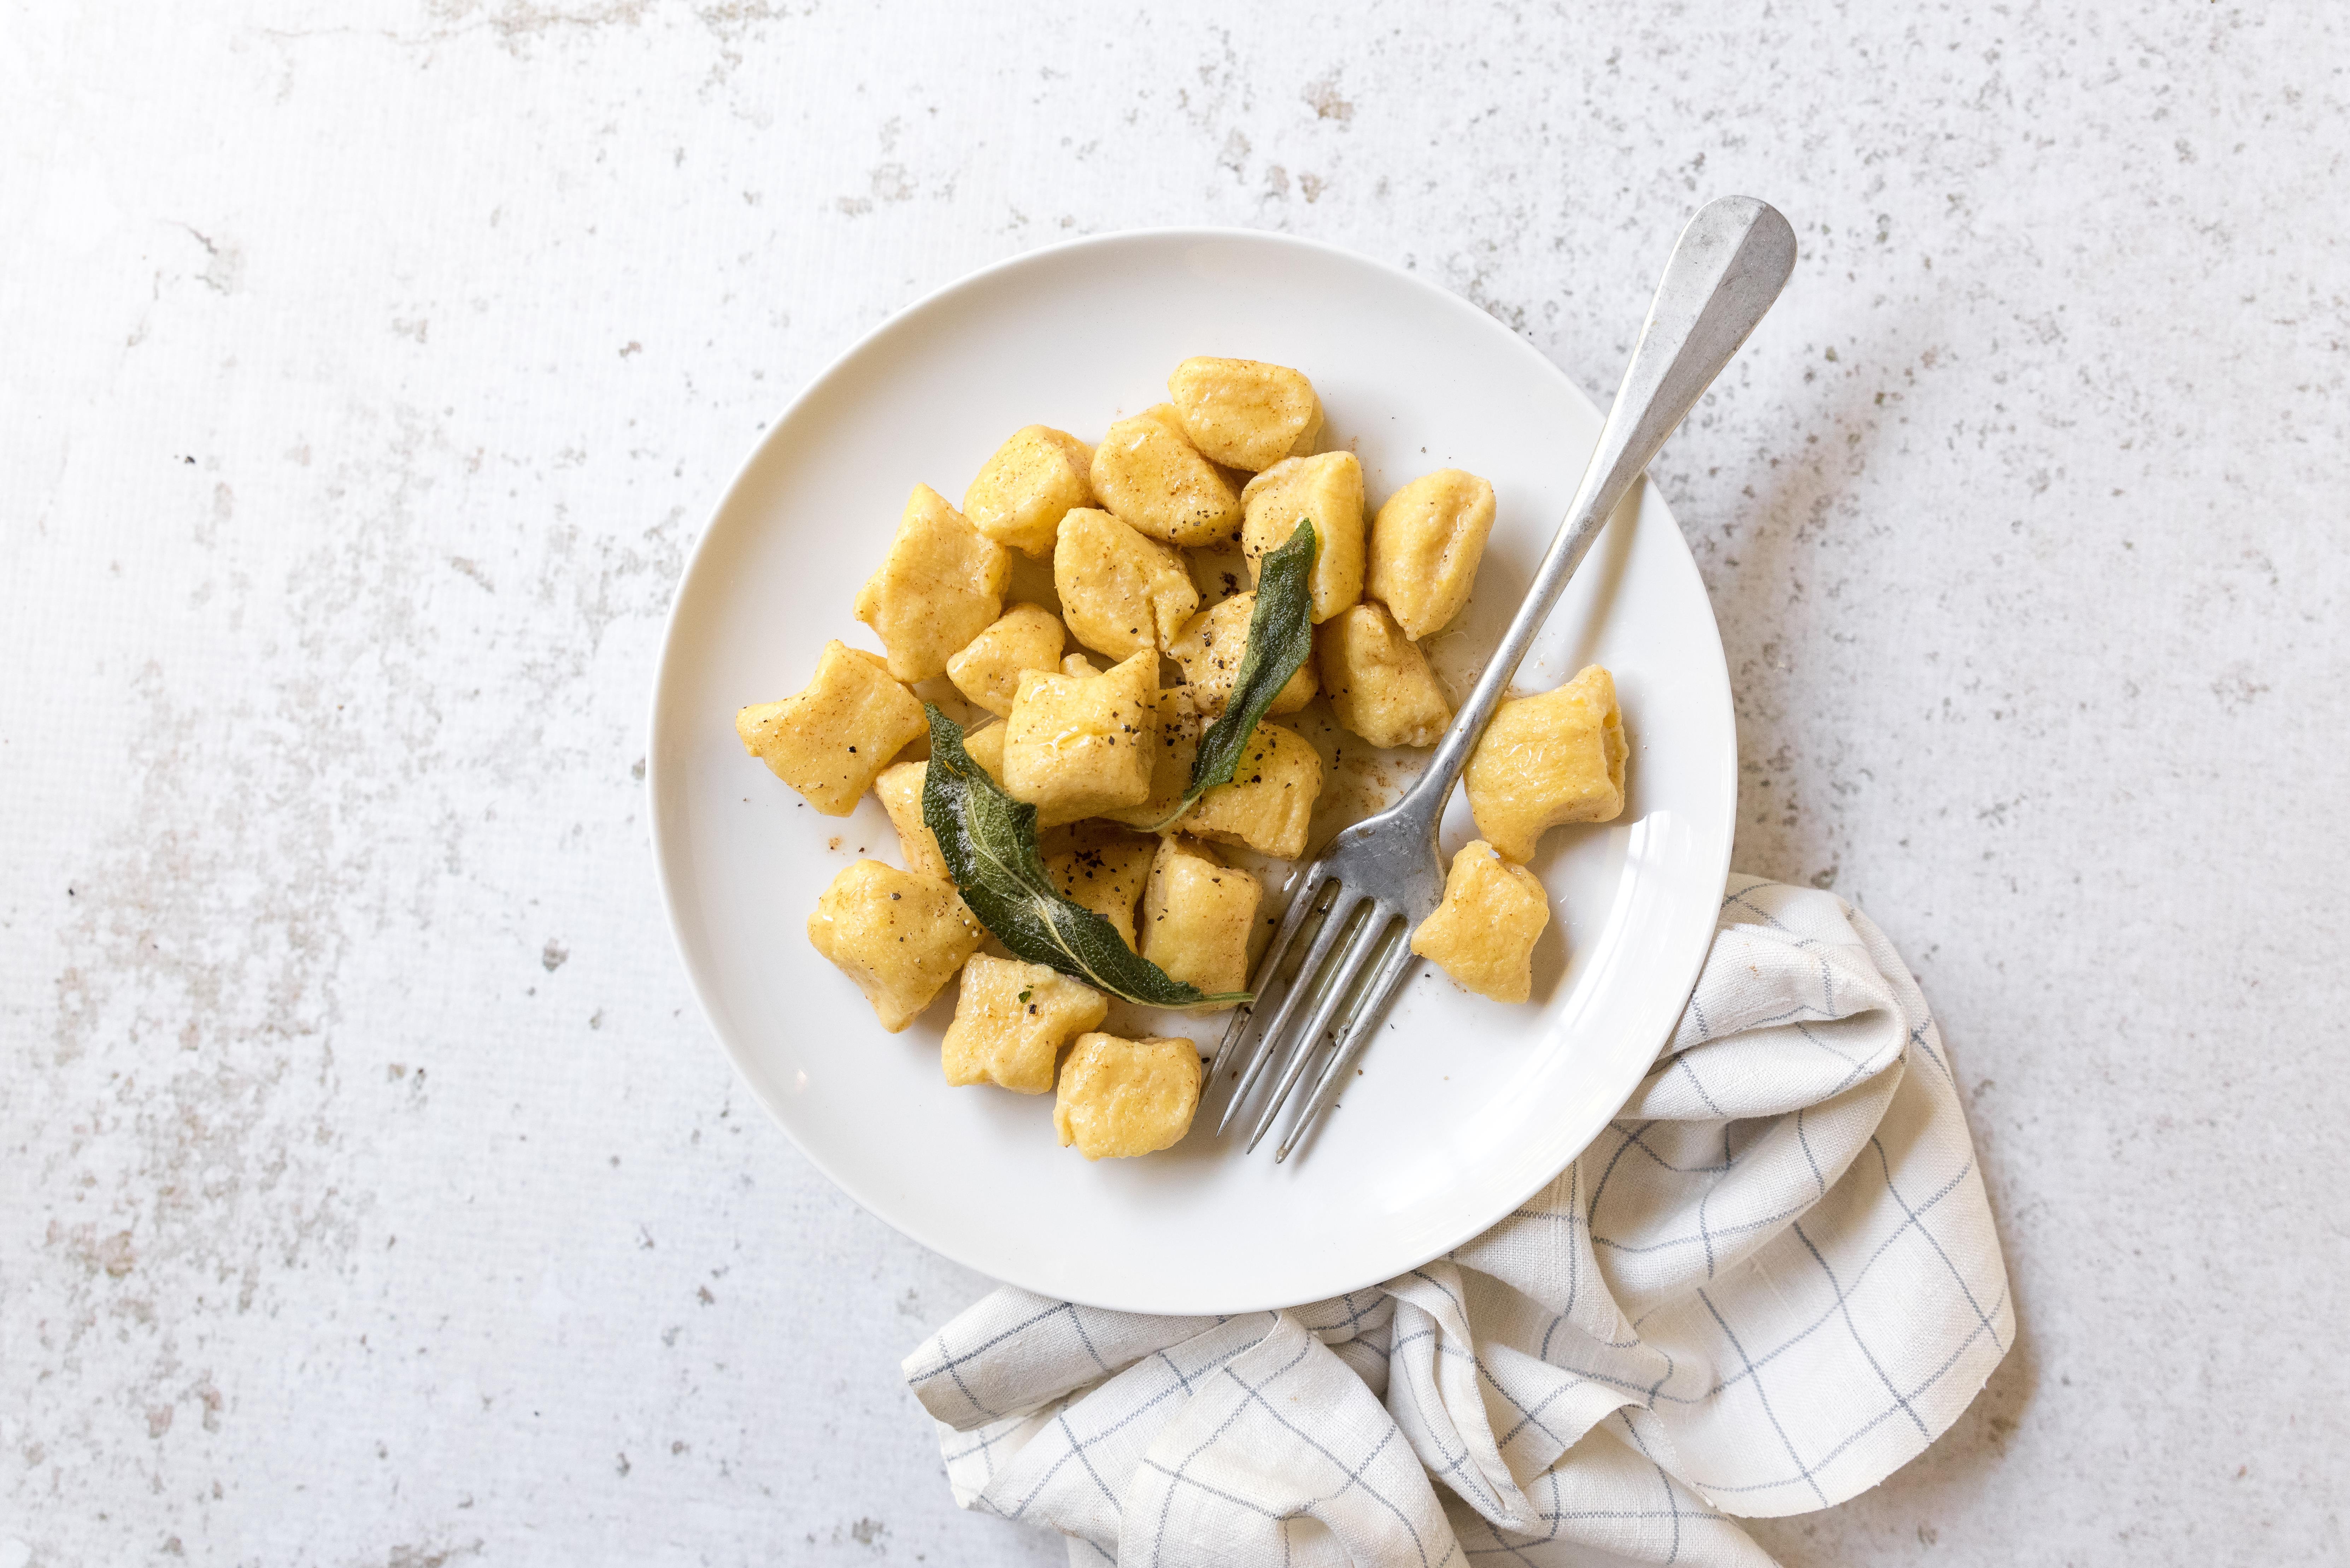
Gnocchi is a great entry point for homemade pasta! This recipe for homemade squash gnocchi don’t require a pasta maker, a food processor, or any fancy unitaskers. If you’ve played with modeling clay as a child, you can make gnocchi. Rolling out the dough into long strands may give you flashbacks to your younger years. Just make sure you only add flour if the dough is sticking. Add too much and you’ll lose the light fluffy texture of truly great gnocchi. The addition of squash puree ups the seasonal wow factor and nutrition. You can use canned pumpkin, roasted butternut, or any combination of winter squash you have on hand.
Homemade Squash Gnocchi
Gnocchi is a great entry point for homemade pasta! If you played with modeling clay as a child, you can make Homemade Squash Gnocchi. The addition of squash puree ups the seasonal wow factor and nutrition.
Whisk together ricotta, squash puree, egg, salt, and nutmeg.
Add flour and stir until mixture forms a soft ball; rest for 10 minutes covered.
Meanwhile, heat a large pot of lightly salted water to a boil. Melt butter in a large skillet over medium-low heat, add sage leaves and swirl pan around to crisp sage and allowing butter to brown evenly. Turn off heat and set aside.
Cut dough into six even portions and roll into a ½-inch log shape, using flour as necessary to keep from sticking. Cut logs into 1-inch pieces and set aside on a floured surface.
Drop gnocchi into boiling water in batches and cook until they float, about 3 minutes. Carefully strain cooked gnocchi.
Put the brown butter and sage pan back over medium-low heat and add cooked gnocchi. Heat through and serve promptly.
Looking to power your immune system? Look no further than Immune Defense by MegaFood 🎉 Loaded with Vitamin C, Zinc & Black Elderberry, and herbs like Echinacea and Andrographis – your immune system will be locked and loaded, ready to go! Go ahead and show your immune system some love ❤️
Immune Defense
Starting to feel a cold coming on? Take two tablets three times per day for five days to get that immune boost you need!
AND it checks ALL of the boxes:
✔️Powered by Elderberry ✔️Made with real food and added nutrients ✔️Non-GMO Project Verified ✔️Glyphosate residue free certified ✔️Gluten free ✔️Dairy & Soy free ✔️Vegan
Did you know their Blood Builder Liquid Iron is clinically shown to:
✔️ support overall immune health* ✔️ increase iron levels and reduce fatigue* ✔️ help maintain healthy red blood cell production* ✔️ support optimal iron absorption*
OCTOBER 2022 BOGO – With the purchase of ANY MegaFood product, you’ll receive a FREE Blood Builder Liquid Iron supplement!*
*While supplies last. Promotion ends 10/31/2022.
*These statements have not been evaluated by the Food and Drug Administration. These products are not intended to diagnose, treat, cure or prevent any disease.
Thanks to Christine Waltermyer & The Natural Kitchen Cooking School!
Christine Waltermyer is a local and renowned Wellness Chef, private chef to celebrities, published cookbook author and founder of the Natural Kitchen Cooking School, which offers an online Plant-Based Cooking Program. She also loves shopping at Basil Bandwagon! Visit naturalkitchenschool.com to subscribe to her email newsletter for new recipes, tips, and FREE access to the Power of Veggies mini-course!
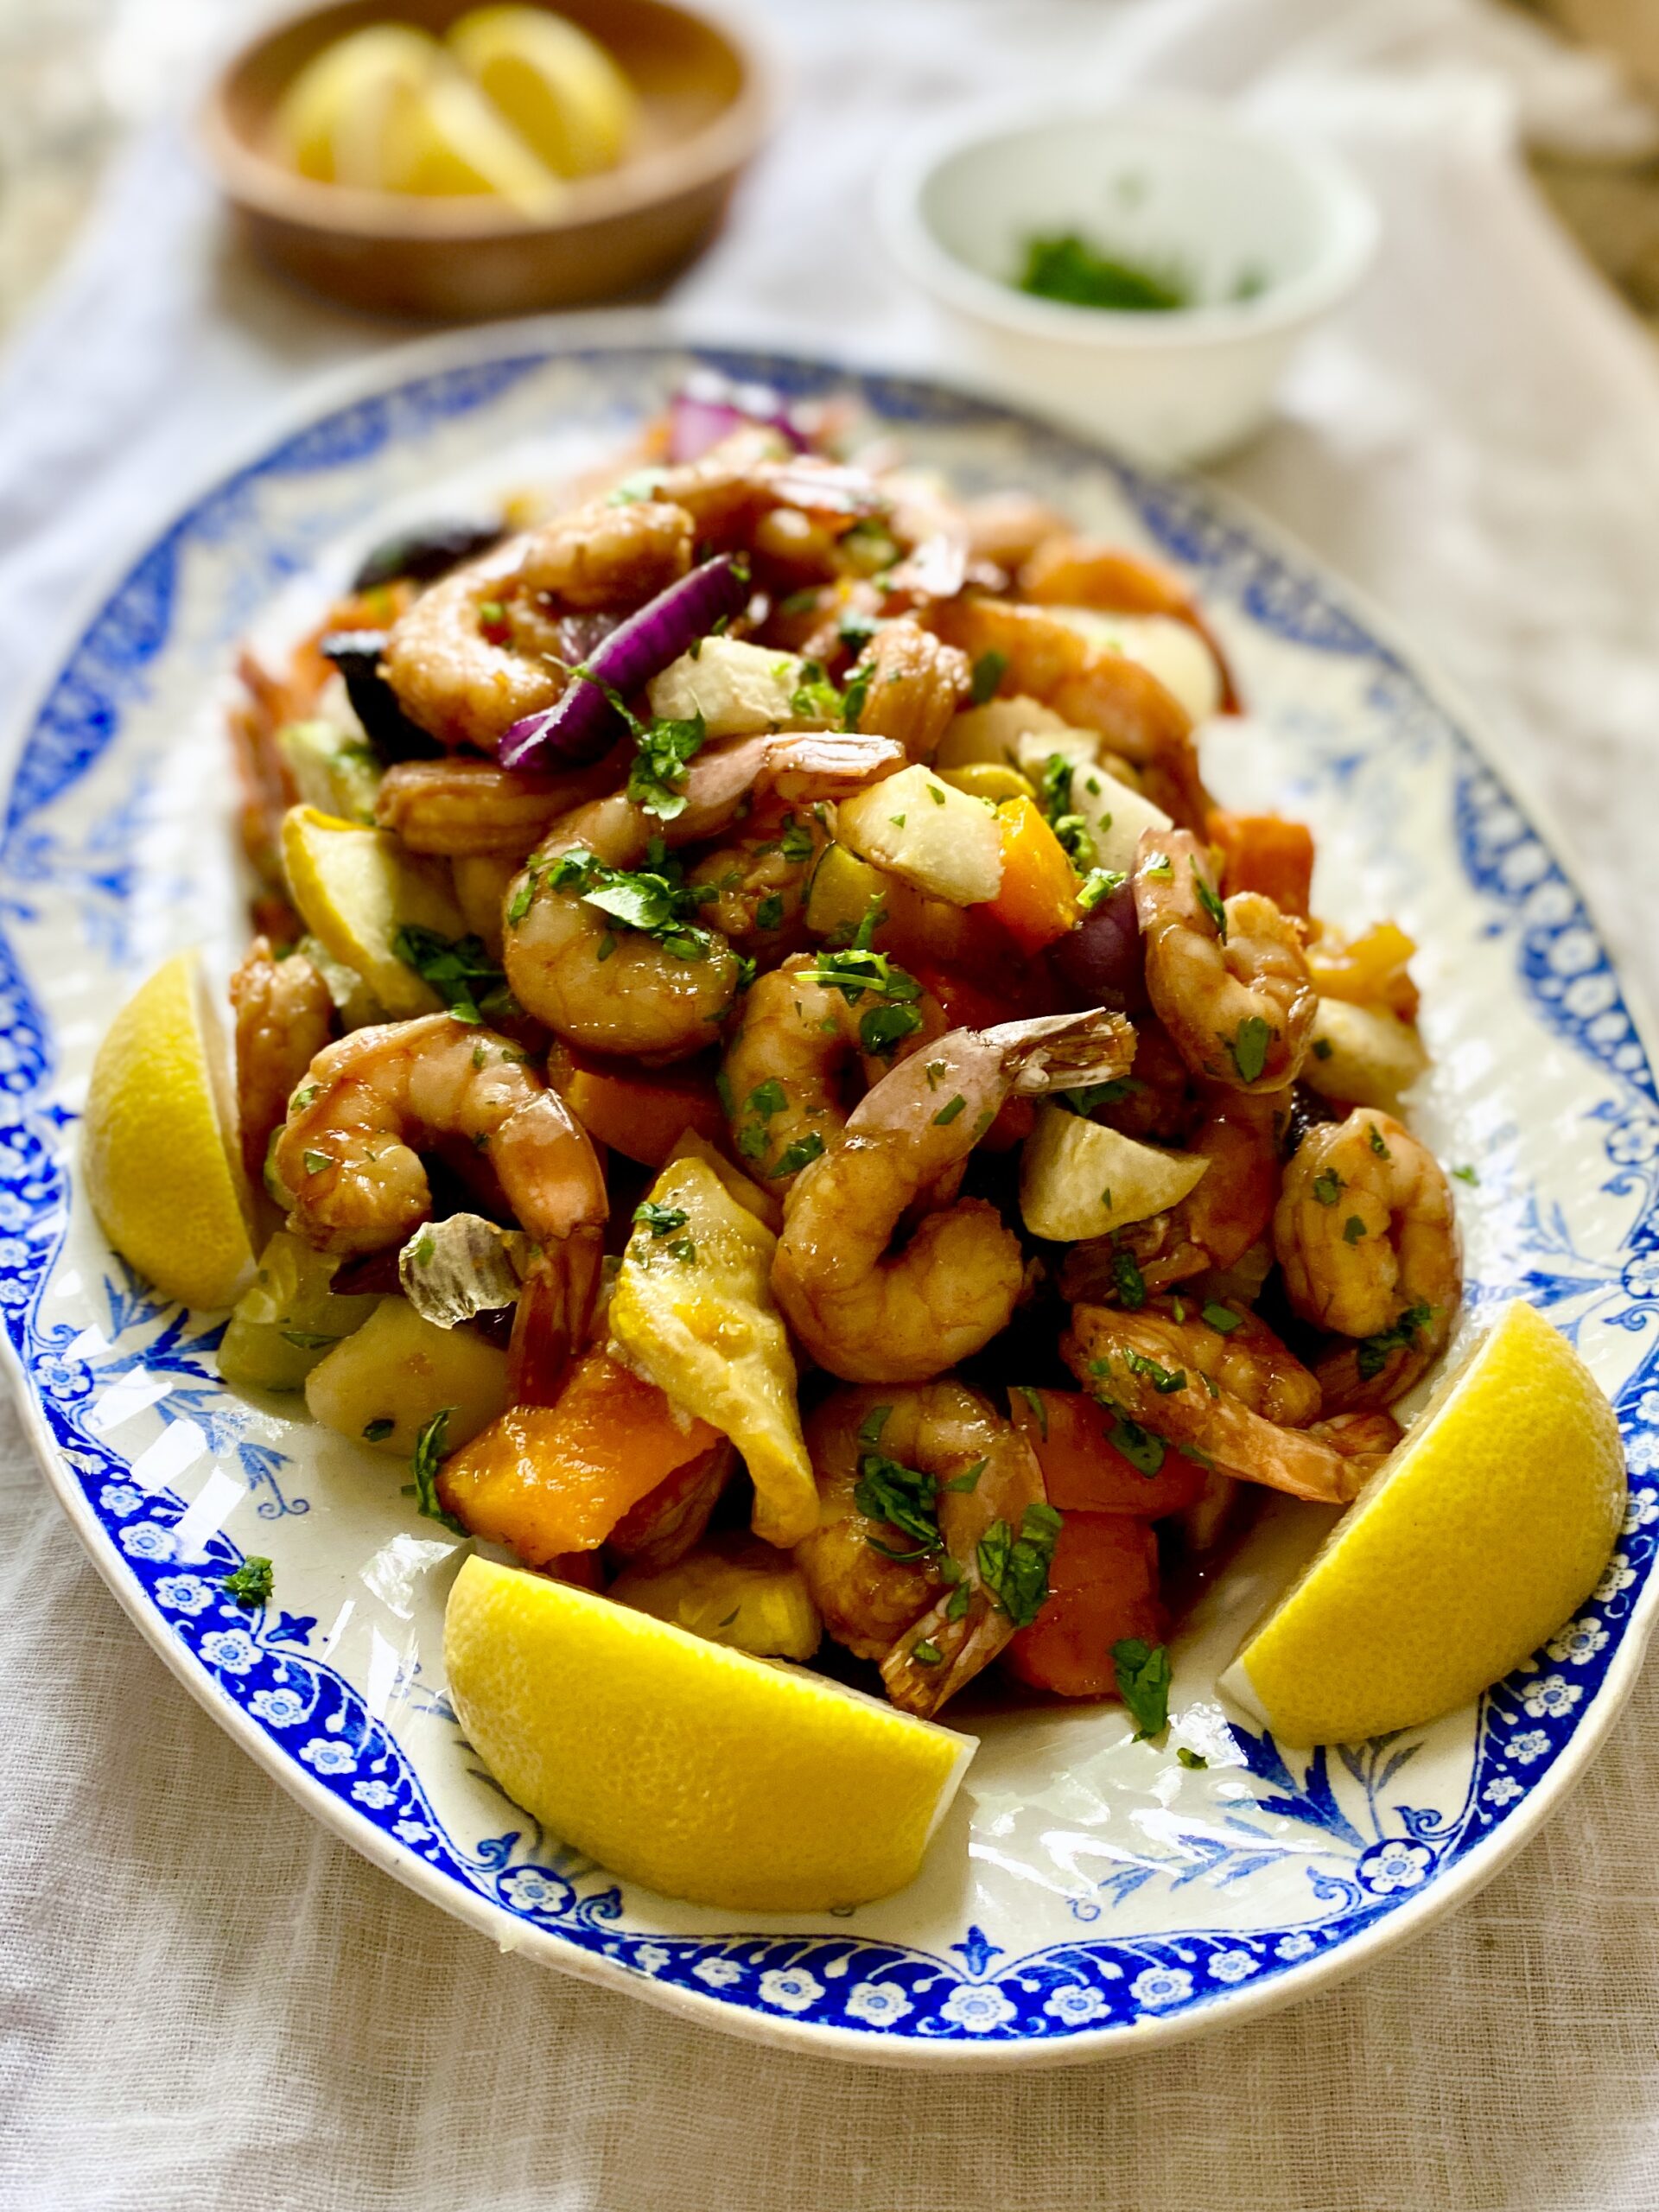
Do you have a busy schedule? Are you looking for an easy, weeknight meal? Well thanks to Christine Waltermyer and The Natural Kitchen Cooking School, you can make your family a delicious honey glazed shrimp sheet pan dinner with this simple recipe!
Make the Marinade: In a medium mixing bowl, whisk together the honey, coconut aminos, ½ teaspoon of the onion powder and sea salt and white pepper to taste. You will use half of this marinade to marinate the shrimp. Save the other half for cooking the shrimp.
Marinate the Shrimp: Place the shrimp in a medium size glass bowl. Add 1/2 of the marinade and toss well to combine. Cover the bowl and place it in the refrigerator for at least 15 minutes. To make the shrimp even more flavorful you can marinate them up to 8 hours, or overnight. Pour the rest of the marinade into a glass jar and refrigerate.
Preheat the oven to 375-degrees F. Line a large, rimmed baking sheet with parchment paper.
Season and roast the vegetables: Add the vegetables to the baking sheet and toss with the coconut oil. Season with the remaining onion powder and sea salt and white pepper to taste. Toss again. Arrange the vegetables in a single layer. Roast for 15 minutes. Remove the sheet pan from the oven. Flip the vegetables over. Return to oven and roast for 15 more minutes.
Add shrimp + bake: Remove the baking sheet from the oven. Use a spatula or tongs to carefully move the vegetables over to one side to make room for the shrimp. Add the shrimp to the baking sheet. Discard the used marinade. Drizzle the shrimp with the remaining unused marinade in the jar. Return the baking sheet to the oven and bake for 5 to 7 minutes, or until the shrimp are pink and firm to the touch.
Serve the roasted vegetables and shrimp with lemon wedges and garnished with the cilantro. This goes well served over some fluffy cooked white rice.
Enjoy!
Thank you to Christine Waltermyer and the Natural Kitchen Cooking School for working with us to help promote healthy, nutritious meals and products that are affordable, full of nutrients, and simple to make at home!
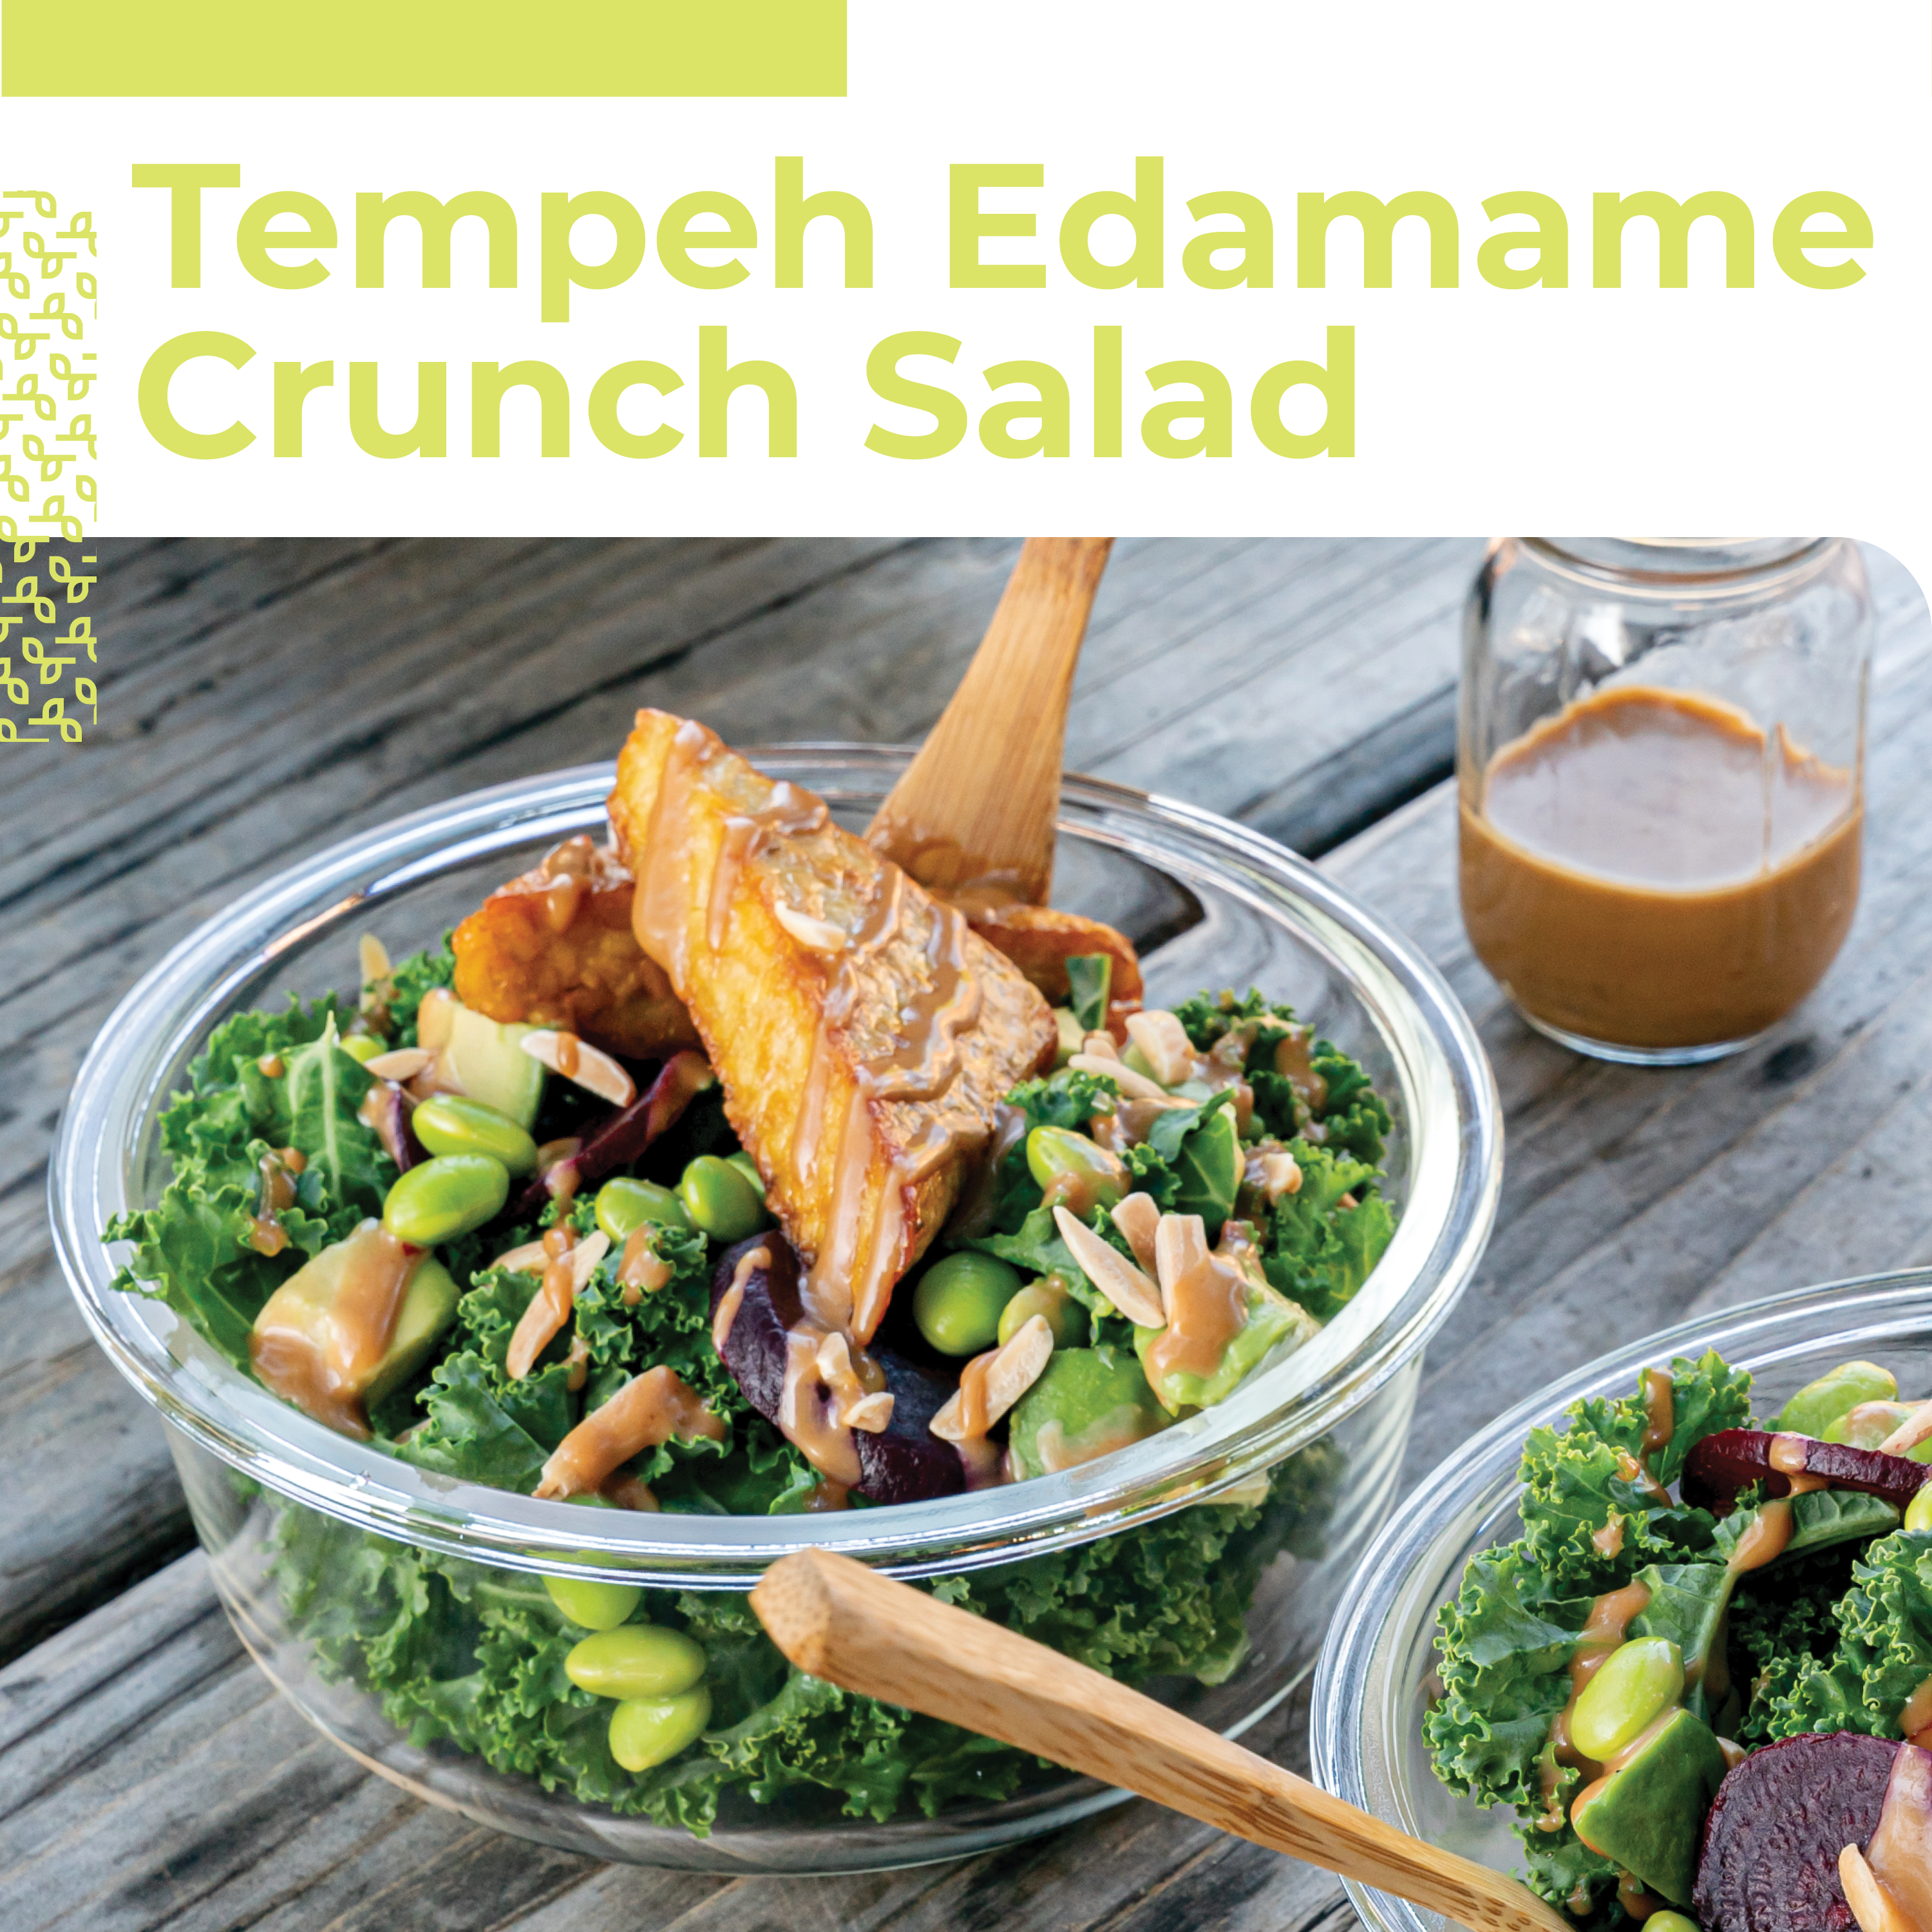
Tempeh is a savory and super versatile addition to your next dish. The nutty flavor and simple, clean ingredients pair perfectly with this crunchy edamame salad.
Tempeh Edamame Crunch Salad
Tempeh is a savory and super versatile addition to your next dish. The nutty flavor and simple, clean ingredients pair perfectly with this crunchy edamame salad.
With all the flavors of the fall, these Pumpkin Snickerdoodle Cookies are the perfect way to celebrate the season! Although we’d gladly open a can just for these cookies, if you’re already cooking with pumpkin puree, these cookies are the perfect way to use the last bit.
Pumpkin Snickerdoodle Cookies
With all the flavors of the fall, these Pumpkin Snickerdoodle Cookies are the perfect way to celebrate the season! Although we’d gladly open a can just for these cookies, if you’re already cooking with pumpkin puree, these cookies are the perfect way to use the last bit.