Blog

  • Chicken with Spiced Rice

    Chicken with Spiced Rice

    Chicken with Spiced Rice


    This Chicken with Spiced Rice is a simple, flavorful one pan dinner! You can practically set it and forget it. Check your pantry and freezer; you might have everything you need to make this for dinner tonight. If not, we’ve got everything you’ll need to be the dinner hero tonight. While it bakes, you can catch up on your favorite show, do a quick load of dishes, or whip up a quick lemon yogurt sauce that pairs perfectly. Serve with a simple green salad, and for a complete meal, bake a nice snacking cake alongside the chicken. You’ve already got the oven on, right? 

    Chicken with Spiced Rice

    This Chicken with Spiced Rice is a simple, flavorful one pan dinner! You can practically set it and forget it. Check your pantry and freezer, you might have everything you need to make this for dinner tonight.
    Servings: 4
    Course: entree, Lunch

    Ingredients
      

    • 1 pound boneless, skinless chicken thighs
    • 2 tablespoons olive oil
    • 1 teaspoon garam masala
    • 1 teaspoon turmeric divided
    • ¼ teaspoon sea salt
    • 2 tablespoons ghee
    • 1 small yellow onion diced
    • 1 cinnamon stick
    • 2 cardamom pods
    • 1 teaspoon cumin seeds
    • 1 tablespoon minced garlic
    • 1 tablespoon minced ginger
    • 1 cup basmati rice
    • 1 cup cold water
    • ½ teaspoon sea salt
    • cup frozen peas
    • Cilantro for garnish

    Method
     

    1. Place chicken, olive oil, garam masala, ¼ teaspoon turmeric, and salt in a bowl and toss to coat. Cover and marinate for four hours to overnight in the fridge.
    2. Preheat oven to 350ºF. Heat ghee in a 1.5-quart saucepan over medium heat. Add onion, cinnamon stick, cardamon pods, and cumin seeds. Sauté until onions are translucent. Stir in garlic and ginger and cook for one minute.
    3. Add rice, water, ¾ teaspoon turmeric, and salt to pan and bring to a simmer. Submerge chicken and cover.
    4. Bake for 35-40 minutes or until water has been absorbed. Remove from oven, add peas and rest covered for 10 minutes before serving. Garnish with cilantro if desired.
    5. Enjoy!

    Recipe Provided by INFRA

  • Celebrate Oktoberfest!

    Celebrate Oktoberfest!

    Celebrate Oktoberfest!

    Delicious and healthy iconic German specialties

    Anchored in tradition but updated for health, these recipes for some of the greatest Oktoberfest foods will have you ready to celebrate!

    Plant-based Schnitzel with Noodles

    Schnitzel usually means tenderized meat coated in egg and bread crumbs and deep-fried. This version of schnitzel would have even Julie Andrews singing its praises, thanks to the tender tofu that skips the fryer.
    Servings: 4

    Ingredients
      

    • 12 to 15 ounces block firm or extra-firm tofu
    • ½ cup gluten-free flour blend
    • ¾ cup water or beer
    • 1 ½ cups bread crumbs
    • 1 teaspoon smoked paprika
    • ½ teaspoon garlic powder
    • ¾ teaspoon salt divided
    • 1 ½ tablespoon sunflower oil or canola oil divided
    • 8 ounces dried egg noodles or gluten-free pasta
    • ½ cup chopped parsley to garnish

    Method
     

    1. Slice tofu twice horizontally to create 3 pieces about 1/2 in thick, then cut each piece in half vertically to make 6 pieces. Different brands are different thicknesses, so slice it however is best to make pieces slightly smaller than a deck of cards.
    2. Line baking tray with clean kitchen towels and place tofu pieces on top in a single layer. Top with more towels, followed by another baking sheet. Weight the baking sheet (with books or cans of beans) and let moisture drain for 15 minutes.
    3. Preheat oven to 350 F.
    4. In shallow bowl, combine flour and water or beer. In second shallow bowl, combine bread crumbs, paprika, garlic powder, and 1/4 tsp salt.
    5. Sprinkle drained tofu with remaining 1/2 tsp salt, then dip each piece in flour mixture followed by spiced bread crumbs. Place on paper towel-lined plate and pat extra bread crumb mixture gently on top in any bare areas.
    6. In large skillet, heat 1 Tbsp oil over medium-high heat. When hot, add half the tofu and cook 2 minutes on each side, or until golden, pressing down with flat spatula on top to ensure crumbs brown evenly. Return tofu to paper towel-lined plate to drain excess oil.
    7. Remove any loose bread crumbs from skillet, then add remaining 1/2 Tbsp oil and cook remaining tofu.
    8. Meanwhile, cook pasta as per package instructions. Heat sauce, if using.
    9. Serve drained pasta topped with schnitzel and sauce of choice. Sprinkle with chopped parsley.
    10. Enjoy!

    Gluten-Free Pretzels

    Large pretzels are a staple of many Oktoberfest celebrations. The large pieces of golden, twisted pretzel dough come topped with coarse salt for a savory crunch with every bite.
    Servings: 10

    Ingredients
      

    • 2 cups sweetened or unsweetened nondairy milk divided
    • 1 tablespoon dry active yeast
    • ½ teaspoon cane sugar
    • ½ cup tapioca starch
    • ½ cup + 2 tablespoons cornstarch
    • 3 cups all-purpose gluten-free flour
    • 2 tablespoons psyllium husk powder
    • 1 ½ teaspoon salt
    • cup vegan butter or coconut oil melted
    • 5 cups water
    • ¼ cup baking soda
    • Coarse salt

    Method
     

    1. In small pot, heat 1/2 cup nondairy milk (or microwave) until warm to the touch but not scalding. In heat-proof bowl, add yeast and sugar, then pour milk overtop. Set aside for 15 minutes.
    2. In stand mixer or large bowl, whisk tapioca starch, cornstarch, flour, psyllium, and salt. Add melted butter or oil, remaining 1 1/2 cups nondairy milk, and yeast mixture. Use dough hook or hand mixer on low speed to beat until just combined.
    3. Shape dough into a ball. Transfer to lightly oiled bowl, cover with dish towel and set in a warm, draft-free place for 90 minutes.
    4. Preheat oven to 400 F.
    5. In medium pot, bring 5 cups water to a simmer with baking soda. Line 2 baking sheets with parchment paper. On cutting board or clean countertop, divide dough into 10 pieces and roll into 15 in strands. Push edges away from you into a “U” shape and twist the ends over each other twice (there are plenty of videos online for this if you need help). Then bring the ends down to the bottom of the “U.”
    6. Remove pot of water from heat. Using large, flat spatula, carefully pick up and slide a pretzel into water for 30 seconds. If water doesn’t cover the pretzel, rotate pot to submerge. Remove pretzel to parchment-lined baking sheet and repeat with remaining pretzels. You can do this all at once, but the pretzels are delicate.
    7. Sprinkle pretzels with coarse salt and bake for 15 to 20 minutes, until golden brown.
    8. Enjoy!

    Dunkel Beer-Marinated Rotisserie-Style Chicken

    This dark beer-marinated chicken uses the convection setting on your oven to create a crispy skinned bird. (If you don’t have a convection setting on your oven, you can simply bake the chicken for longer at the same temperatures as below, until a meat thermometer inserted in the thickest part of the thigh reads 165 F.)
    Servings: 5

    Ingredients
      

    • 1 lemon
    • 5 pounds whole chicken
    • 2 fresh thyme sprigs
    • 1 cup dark beer
    • 1 tablespoon olive oil
    • 1 teaspoon German mustard or any grainy or stone-ground mustard
    • 4 garlic cloves minced
    • 1 ½ teaspoon salt
    • 1 teaspoon pepper
    • 2 teaspoons dried basil

    Method
     

    1. Zest and juice lemon. Stuff chicken cavity with leftover lemon pith and fresh thyme sprigs. In medium bowl, combine lemon zest and juice with remaining ingredients and pour over chicken in large bowl, pot, or leak-proof, sealable bag. Gently separate chicken skin from breast and legs without tearing, and scoop some of the marinade juices inside. Refrigerate for at least 1 hour, up to 12 hours.
    2. Heat oven to 400 F on convection roast setting.
    3. Place chicken in roasting pan and pour remaining marinade overtop. It should be elevated above juices to allow chicken to crisp. A metal rack that fits inside the roasting pan can be used. Roast for 30 minutes. Lower heat to 375 F and roast for 50 minutes longer, basting chicken every 20 minutes, until internal temperature reads 165 F and juices run clear. Loosely tuck a large piece of parchment paper over chicken during the last 30 to 60 minutes if overly brown.
    4. Remove chicken from oven and let it rest for 10 minutes. Carve chicken and serve with sieved juices, or thicken juices with beer and cornstarch to make gravy.
    5. Enjoy!

    Recipes Provided by Alive Magazine

  • How to maintain muscle and bone health

    How to maintain muscle and bone health

    How to maintain muscle and bone health

    Let’s be proactive

    It’s a natural part of the aging process: degradation and loss of our cartilage, bone density, and muscle strength. So, what can be done throughout those intervening years? How can we manage joint pain and bone and muscle loss before they become unbearable? Read on.

    A lifetime of wear and tear

    Dr. Pascal-André Vendittoli is an orthopedic surgeon with a sub-specialty in hip and knee replacement. He says that past the age of 40, we lose about 1 percent of our bone density annually. He adds that for many people, the degradation can be more severe.

    “We know that in the general population there are about 15 percent of people who will really suffer from wear and tear on their knees and hips throughout their life. They will need to receive treatments to try to improve their condition. This can be a medical treatment, or a surgical treatment to replace the joint with a prosthetic,” says Vendittoli.

    Vendittoli emphasizes that surgery is a last resort, to be considered only once the chronic discomfort and lack of function interferes with daily tasks such as walking, standing, or being able to perform your job.

    Managing joint pain and bone and muscle loss

    Manage stress

    Naturopathic doctor Amanda Capasso says that one of the most important steps in managing bone loss is managing stress. This will reduce your body’s natural hormonal reaction to anxiety and worry, which can be damaging.

    “Having long, chronic elevated cortisol is not great for bone health. It creates a lot of inflammation, and it just changes … your bones, how much calcium they release back into your bloodstream, and how much they take out.”

    Capasso says that stress reduction can be as simple as reorganizing your priorities and giving yourself a little bit more time for a walk, or yoga, or meditating.

    She says that your stress reduction should not be an additional burden to your already busy life. “Some people are going to hate meditating, and some people are going to hate yoga … So it’s just individualizing care and finding what works for them. For a lot of people … it’s just taking a bath or going to get your nails done.”

    Consider your diet

    Diet also plays a big role in bone and muscle health. Capasso has seen a lot of success with patients who have switched to the Mediterranean diet—reducing red meat and adding more vegetables, oils, and fish.

    Exercise

    Both professionals agree that there is no substitute for regular exercise. Vendittoli says, “When it comes to hips and knees, you cannot stop moving. Quite the opposite … It could become a vicious circle. When you have pain from wear and tear in your joints and you stop moving, it becomes worse and worse.”

    If you are experiencing joint or muscle pain, Vendittoli suggests switching to a less impactful activity such as walking instead of running, or swimming instead of tennis.

    Article Provided by Alive Magazine

  • 5 health benefits of nostalgia

    5 health benefits of nostalgia

    5 health benefits of nostalgia

    Good for your mental health and emotional health

    A blast from the past could be a blast for your physical and psychological wellbeing. Nostalgia—reveling in the past and reminiscing about the good ol’ days—is about more than just daydreaming. Researchers say it’s also the foundation for your health and happiness.

    Cue sourdough bread-making during the pandemic, or digging into classic comfort food when you’ve had a rough workweek. The solace these things provide isn’t just your imagination. Psychologists and researchers have found that thinking fondly of the past, and embracing nostalgia, can bring these powerful health benefits to your life.

    1. Reduced stress and anxiety

    Studies analyzed nostalgic people who regularly think about positive past experiences, such as cheerful childhood memories. They found that nostalgia helps us to better cope with stressful situations.

    And it’s not just about using memories as a way to lighten life’s current burdens. Researchers also found that nostalgic individuals are more likely to take positive action during times of stress.

    2. Protection against loneliness

    Health researchers warn that loneliness is a health epidemic. A lack of healthy social connection is linked with numerous health problems, like increased heart disease and stroke risk.

    Several studies have found that nostalgic memories help combat the effects of loneliness. When you reminisce about times you’ve been with a friend or family member and felt their love and acceptance, it can make you feel more loved and socially connected in the present.

    3. Greater sense of life meaning and purpose

    A series of studies asked participants to think about their past goals and positive experiences, and reminisce about their old dreams for their future.

    Those who were most nostalgic had a greater sense of their life purpose and were better able to find meaning in their life’s circumstances.

    4. Improved self-confidence

    When life gets challenging, it’s easy to get stuck in cognitive distortions or mindset traps, like assuming the worst possible outcome will happen. These mindsets are a form of mental self-sabotage that stand in the way of you and your happiness.

    Nostalgia helps. People who reflect on times they’ve overcome a challenge, used a skill, proved themselves wrong, or done the impossible are better equipped to break through these negative mindset ruts.

    5. Healthier, happier aging

    Graduating from high school. Getting your first job. Falling in love and having children. Retiring. Much of your life’s journey is fragmented into these short chapters. And progressing through these chapters of change can be stressful, especially as you get older.

    Nostalgia helps you connect the dots, experience the fullness of your experiences, and move through life with improved psychological well-being and less stress. It’s also been shown to improve your idea of self-continuity—maintaining a sense of self as your world changes—and helping you to get comfortable with your own mortality.

    Article Provided by Alive Magazine

  • Korean Ground Beef Bowl

    Korean Ground Beef Bowl

    Korean Ground Beef Bowl

    Thanks to Christine Waltermyer & The Natural Kitchen Cooking School!

    Christine Waltermyer is a local and renowned Wellness Chef, private chef to celebrities, published cookbook author and founder of the Natural Kitchen Cooking School, which offers an online Plant-Based Cooking Program. She also loves shopping at Basil Bandwagon! Visit naturalkitchenschool.com to subscribe to her email newsletter for new recipes, tips, and FREE access to the Power of Veggies mini-course!


    Looking for a quick and easy weeknight dinner? How about Korean Ground Beef Bowls! Customize it any way you like – add crushed red pepper flakes to make it spicy or chopped unsalted peanuts for a little extra crunch 😋

    Korean Ground Beef Bowl

    Course dinner, entree, Lunch
    Keyword bowl, dinner, entree, lunch
    Servings 4

    Ingredients

    • 2 cups uncooked Lundberg white sushi rice
    • 3 cups water
    • ¼ cup brown sugar packed
    • ¼ cup coconut aminos
    • 1 pound ground beef
    • 1 teaspoon minced fresh ginger
    • 2 cloves garlic minced
    • 2 green onions thinly sliced
    • ¼ cup chopped fresh cilantro
    • 4 large butter lettuce cups to serve

    Instructions

    • Use a fine mesh strainer to rinse the rice for 1 to 2 minutes, until the water runs clear. Place the rinsed rice in a medium saucepan. Add the 3 cups fresh water. Let the rice soak for 30 minutes. This helps to soften it and make the rice more digestible.
    • After 30 minutes, bring the soaked rice and water to a boil. Reduce the heat to low and cover the saucepan. Cook for 20 minutes. Remove from the heat and let the rice sit, covered, for another 10 minutes.
    • Meanwhile, prepare the sauce. In a small bowl, whisk together the brown sugar and coconut aminos.
    • Heat a large skillet over medium high heat. Add the ground beef, ginger and garlic. Break up the beef as it cooks and stir the ginger and garlic. Cook for 3 to 5 minutes.
    • Add the brown sugar-coconut aminos mixture to the beef. Stir well to combine. Cook for 1 minute. Add the scallions. Cook for 1 more minute.
    • Place a washed lettuce leaf on a plate or in a shallow serving bowl. Carefully add a scoop of the cooked rice. Serve the beef over the rice. Garnish with the cilantro.
    • Enjoy!

    Thank you to Christine Waltermyer and the Natural Kitchen Cooking School for working with us to help promote healthy, nutritious meals and products that are affordable, full of nutrients, and simple to make at home!

  • Seasonal changes are coming… LifeSeasons is here to help!

    Seasonal changes are coming… LifeSeasons is here to help!

    Do you ever feel like when the seasons change, you change slightly, too? First of all, that’s totally normal! But you can help yourself feel more like yourself again. Check out a few of our favorite LifeSeasons products to help you get back to feeling like yourself again.

    Anxie-T

    A better you starts with a better mood – staying cool, calm, and collected should be a part of your routine. A massage, facial, and Anxie-T is a great way to start your self care stress relief – and all it takes is 30 minutes!

    Breathe-X

    With cooler outdoor temperatures, means warmer indoor temperatures. This can cause some stress on your sinuses and respiratory tract. Breathe-X helps manage that healthy tissue and promotes normal immune function. Keep those germs out and good vibes in!

    Inflamma-X

    Maybe you’re feeling a little sore and achey? Inflamma-X helps soothe discomfort and inflammation from everyday aches and pains. Made with Meriva® Turmeric, your body can absorb the all of the healthy benefits of turmeric without the harsher effects some people feel from black pepper.

    Digestivi-T

    The holidays are coming and you know what that means – the holiday bloat is upon us! Digestivi-T focuses on balancing your gut microbiome and helps ease digestion. So you can enjoy your pie and not worry about unbuttoning your pants to make room for your food-baby afterwards.

    All LifeSeasons supplements are 25% OFF all month long!

    Resources:

    https://lifeseasons.com/product/inflamma-x-intestinal-anti-inflammation-supplement/

    https://lifeseasons.com/product/anxie-t/

    https://lifeseasons.com/product/breathe-x/

    https://lifeseasons.com/product/digestivi-t-digestive-enzymes-probiotic-supplement/

    https://www.instagram.com/lifeseasons/

  • Mayan Lima Beans

    Mayan Lima Beans

    Mayan Lima Beans


    Lima beans are one of the most polarizing beans and more polarizing foods out there. We don’t get all the lima bean hate. Don’t turn up your nose at lima beans; they’re one of the mildest flavored beans. Sometimes called butter beans, these protein rich, creamy beans are mild and delicious. With just a bit of lime juice and toasted pumpkin seeds, lightly charred lima beans make a satisfying dish full of texture and flavor. 

    Mayan Lima Beans

    Don’t turn up your nose at lima beans! Sometimes called butter beans, these protein rich, creamy beans are mild and delicious. With just a bit of lime juice and toasted pumpkin seeds, lightly charred lima beans make a satisfying dish. 
    Course dinner, entree, Lunch, Side Dish
    Keyword dinner, entree, gluten free, lunch, side, vegan
    Servings 2

    Ingredients

    • 20 ounces lima beans frozen
    • 1 tablespoon sesame oil
    • 1 tablespoon avocado oil
    • ½ cup pumpkin seeds
    • ¼ – ½ teaspoon sea salt
    • 2 green onions sliced
    • ½ cup chopped parsley
    • 1 lime quartered

    Instructions

    • Toast pumpkin seeds in a 350∞F oven for 10 minutes or until lightly browned. 
    • Place freshly toasted seeds in a food processor and process until finely ground. 
    • Heat sesame and avocado oil in a medium sauté pan until hot, add lima beans and allow to sit and develop a sear, tossing occasionally until desired sear is achieved.
    • Add green onions, ground pumpkin seeds, and salt.
    • Enjoy!

    Recipe Provided by INFRA

  • Brownie Baked Oatmeal

    Brownie Baked Oatmeal

    Brownie Baked Oatmeal


    This Brownie Baked Oatmeal is the next best thing to eating cake for breakfast. With oats, chia seeds, and peanut butter, you’ll feel satisfied through the morning. Sweet maple syrup and chocolate make this a decadent treat that may be just what you need to get out of bed when all you want to do is hit the snooze button. As the weather cools, there’s nothing like a warm meal to motivate you. One batch of this oatmeal is perfect as a weekend breakfast for the whole family, or you can reheat individual portions throughout the week for a quick meal before work or school. 

    Brownie Baked Oatmeal

    This Brownie Baked Oatmeal is the next best thing to eating cake for breakfast. With oats, chia seeds, and peanut butter, you’ll feel satisfied through the morning. Sweet maple syrup and chocolate make this a decadent treat.
    Course Dessert
    Keyword baked oatmeal, brownie, dessert, vegan
    Servings 6

    Ingredients

    • 2 cups quick oats
    • ¼ cup cocoa powder
    • 1 teaspoon baking powder
    • 1 tablespoon chia seeds
    • Pinch of salt
    • 2 cups coconut milk from a carton
    • ¾ cup maple syrup
    • ½ cup peanut butter
    • 1 teaspoon vanilla
    • cup chocolate chips or chopped chocolate

    Instructions

    • Preheat oven to 350∞ F. In a medium bowl combine oats, cocoa powder, baking powder, chia seeds, and salt. 
    • In a separate bowl whisk together coconut milk, maple syrup, peanut butter, and vanilla.
    • Pour wet mixture into the dry mixture and stir until fully incorporated. Pour mixture into an oven-safe baking dish and sprinkle with chocolate chips. 
    • Bake for 35-40 minutes.
    • Enjoy!

    Recipe Provided by INFRA

  • Beer Brats

    Beer Brats

    Beer Brats


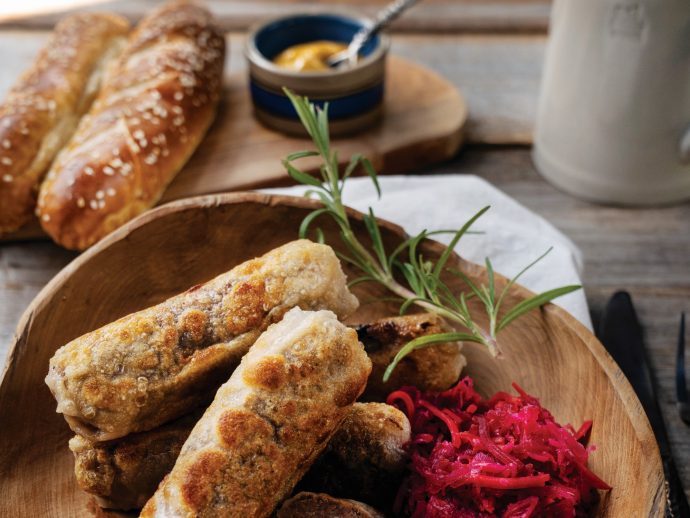
    Did you know that Oktoberfest starts in September!? This year in Munich, Oktoberfest is celebrated September 17 – October 3. We’re just happy to have a reason to enjoy some delicious sausages this month. Beer brats celebrates the best of beer and sausages. No grill? You can always cook the brats in a deep pan on the stove and then crisp them up in a dry skillet. Experiment with different mustards and different beers to find the perfect combination. 

    Beer Brats

    Did you know that Oktoberfest starts in September!? We’re just happy to have a reason to enjoy some delicious sausages this month. This beer brat recipe celebrates the best of beer and sausages.
    Course dinner, Lunch
    Keyword bratwursts, dinner, lunch
    Servings 1

    Ingredients

    • 8 uncooked bratwursts
    • 1 medium yellow onion thinly sliced
    • 16 ounces light lager beer
    • ¼ teaspoon sea salt
    • ¼ teaspoon ground black pepper
    • 8 hotdog buns

    Instructions

    • Preheat grill to high. 
    • In a foil pan, place brats, sliced onion, salt, pepper, and beer. Cover tightly with foil lid or aluminum foil and cook for 30 minutes.
    • Transfer brats to grill to give them a good char, approximately three minutes per side.
    • Place brats back in the cooking liquid and serve. To serve, place brats in buns and top with your favorite condiments.
    • Enjoy!

    Recipe Provided by INFRA

  • Red Thai Curry Noodles

    Red Thai Curry Noodles

    Red Thai Curry Noodles


    Vegan, flavorful and budget-friendly, this Thai-inspired noodle recipe is a keeper! Add raw or cooked veggies, whatever’s lingering in your fridge, to bulk it up!

    Red Thai Curry Noodles

    Vegan, flavorful and budget-friendly, this Thai-inspired noodle recipe is a keeper! Add raw or cooked veggies, whatever’s lingering in your fridge, to bulk it up!
    Course dinner, entree, Lunch
    Keyword dinner, entree, lunch, noodles, vegan
    Servings 4

    Ingredients

    • 2 packages Lotus Foods Organic Traditional Pad Thai Rice Noodles
    • 1 14 ounce can unsweetened coconut milk
    • ¼ cup vegetable broth
    • 3 tablespoons smooth peanut butter
    • 3 tablespoons Thai red curry paste
    • 1 tablespoon maple syrup
    • 1 tablespoon fresh lime juice
    • 1 tablespoon ginger minced
    • 2 cloves garlic minced
    • Salt to taste
    • Peanuts chopped, to taste
    • Scallions chopped, to taste

    Instructions

    • Prepare Lotus Foods Organic Traditional Pad Thai Rice Noodles per directions on package. Drain and set aside.
    • While noodles are cooking, whisk together coconut milk, broth, peanut butter, curry paste, maple syrup, lime juice, ginger, and garlic in a medium pan.
    • Cook over medium-high heat, stirring frequently. Bring to a gentle boil before reducing heat. Simmer uncovered for ~10 mins or until sauce starts to thicken. Add salt to taste.
    • Mix in noodles and warm through. 
    • Garnish with chopped peanuts and scallions. Serve immediately.
    • Enjoy!

    Recipe by Cooking for Peanuts for Lotus Foods

    Photo Credit Anett Velsberg

    Recipe Provided by INFRA