Thanks to Christine Waltermyer & The Natural Kitchen Cooking School!
Christine Waltermyer is a local and renowned Wellness Chef, private chef to celebrities, published cookbook author and founder of the Natural Kitchen Cooking School, which offers an online Plant-Based Cooking Program. She also loves shopping at Basil Bandwagon! Visit naturalkitchenschool.com to subscribe to her email newsletter for new recipes, tips, and FREE access to the Power of Veggies mini-course!
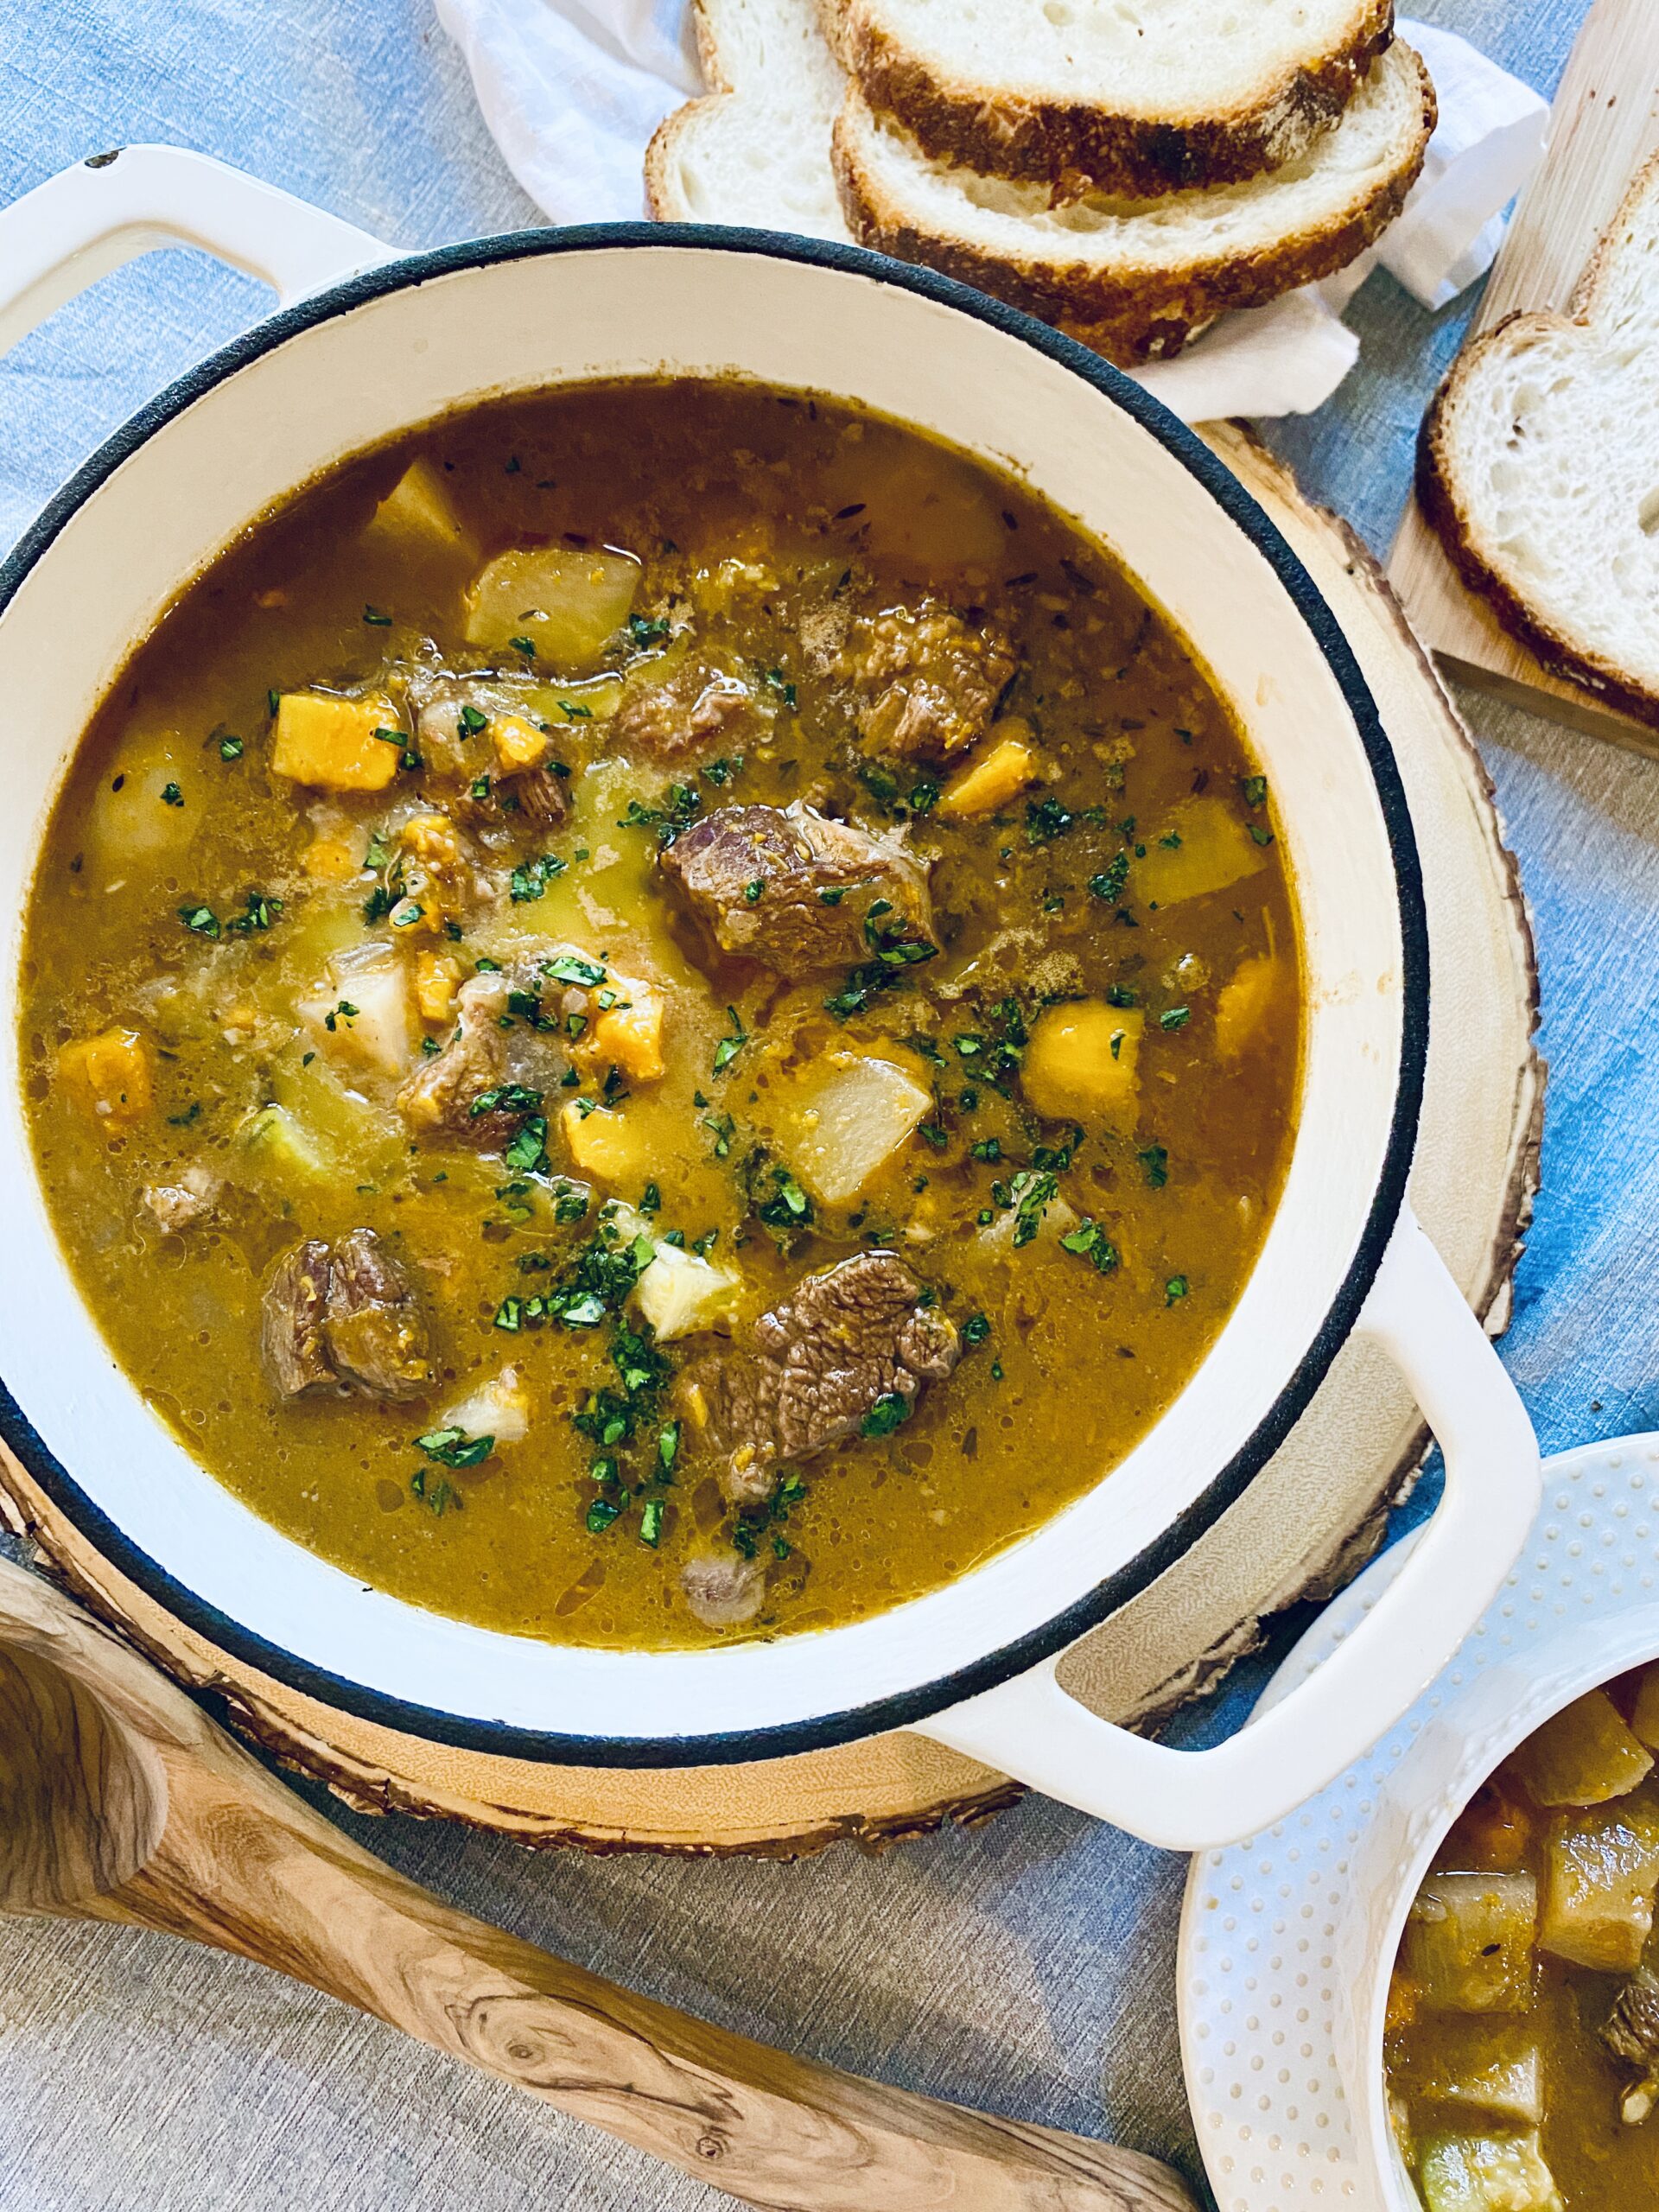
The holidays are full of family, friends, and busy schedules – which means you’re probably constantly on-the-go. But thanks to Christine Waltermyer and The Natural Kitchen Cooking School, we have a hearty, Beef Stew recipe that you can pour and freeze into portions for quick and easy meals!
1poundbeef stew meat or steaktrimmed and cut into inch cubes
1 – 2tablespoonsolive oil or beef tallow
1 ½tablespoonsapple cider vinegar
4 ½cupsbeef broth
1tablespoonapple butter
1teaspoondried thyme
1teaspoonsugar
2bayleaves
1medium onionpeeled and chopped
1 ½cupswinter squashpeeled and cut into bite-size cubes
2medium turnipspeeled and cubed
½of a small zucchinicut into chunks
1 – 2teaspoonssea salt
Method
In a large bowl, stir together the flour and white pepper. Add the beef cubes and toss to evenly coat them with the flour mixture. Heat the olive oil in a heavy-bottomed pot like a Dutch oven. Add half of the beef, being careful not to overcrowd them. Brown the beef on all sides by cooking and turning them for 5 minutes. Repeat with remaining beef, adding a little more oil to the pan if needed.
Transfer the beef to a bowl. To the pot, add the apple cider vinegar and ½ cup of the beef broth. Cook and stir over medium heat for a few minutes, using a wooden spatula to release any flavorful bits from the pot. Add the beef, remaining beef broth, apple butter, dried thyme, sugar and bay leaves. Bring to a boil over medium high heat. Skim off any foam that appears. Reduce the heat to low and cook, covered, for 1 ½ hours.
Add the onion, squash and turnips. Cook, covered, for another 30 minutes. If the strew starts to look too dry, you can add a little more beef broth or water. Add the zucchini and cook for 10 more minutes. Season with sea salt and additional white pepper to taste. Serve hot.
Enjoy!
Thank you to Christine Waltermyer and the Natural Kitchen Cooking School for working with us to help promote healthy, nutritious meals and products that are affordable, full of nutrients, and simple to make at home!
This is what we’d call a showstopper! From warm winter spices to delicate roasted pears, this is a seasonal treat that is sure to impress. While we’d never suggest you skip the pie, perhaps there is room on your holiday table for more than one dessert? 🤔
Pear Almond Toffee Cake
This is what we’d call a showstopper! From warm winter spices to delicate roasted pears, this is a seasonal treat that is sure to impress. While we’d never suggest you skip the pie, perhaps there is room on your holiday table for more than one dessert? 🤔
¾cupbutter room temperature, plus 1 tablespoon for greasing the pan
1cupsugar
1cupwhole milk Greek yogurtroom temperature
1teaspoonbourbon vanilla extract
2eggsroom temperature
2cupsBob's Red Mill almond flour
¾cupBob's Red Mill unbleached white all-purpose flour
1teaspoonBob's Red Mill baking powder
½teaspoonBob's Red Mill baking soda
½teaspoonground cardamom
½teaspoonground cinnamon
½teaspoonground ginger
¼teaspoonsalt
2medium D'Anjou pears
2tablespoonscoarse turbinado sugar
Rum Toffee Sauce
¾cuppacked dark brown sugar
¼cupwater
4tablespoonsunsalted buttercubed
¼cupheavy creamroom temperature
1teaspoonrum
½teaspoonvanilla extract
¼teaspoonsalt
Method
Preheat the oven to 350°F. Butter a 9-inch springform pan and line the base with parchment paper. Set aside.
In a stand mixer fitted with the paddle attachment, cream butter and sugar until light and airy, about three minutes. In a separate medium-sized bowl, whisk dry ingredients together. Set aside.
Stop the mixer and, using a spatula, scrape down the sides of the mixing bowl. Turn the mixer to medium low and add yogurt and vanilla extract; then add eggs one at a time, beating well after each addition.
Turn the mixture to low and then slowly add the dry ingredients, taking care to not overmix.
Using an offset spatula, evenly spread the batter into the prepared cake pan.
Clean and peel the pears. Slice the pears ¼-inch thick and arrange on top of the cake in a concentric circle, overlapping them a bit. Sprinkle with turbinado sugar.
Bake for 55-65 minutes, or until a skewer comes out clean and the top of the cake springs back to the touch. Remove from the oven and let cool in the pan for about 10 minutes. Remove the sides of the springform pan and let cool completely.
While the cake is baking, make the rum toffee sauce. Place the brown sugar and water in a medium saucepan set over medium-high heat, whisking until the sugar crystals dissolve. Once the mixture has reached a rolling boil, add butter and cream. Return to a boil while whisking constantly for at least four minutes.
Remove from heat and stir in the rum, vanilla, and salt. Set aside to cool to room temperature.
Serve the cake while still slightly warm and drizzle the toffee sauce on it immediately before serving.
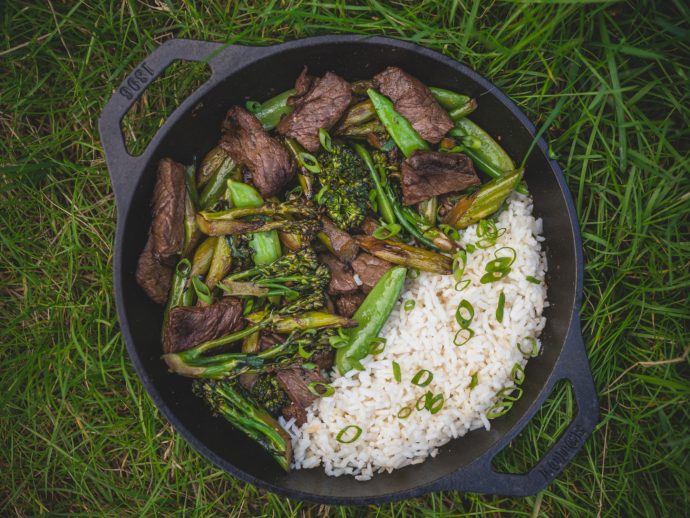
Cast-iron pans are nonstick, easy to clean, and add healthy minerals to food. Here are a few delicious dishes to try.
Coconut Curry Turmeric Trout
This quick curry is great with a variety of proteins. Seasoning the fish as soon as you’ve cut the fillets ensures the salt permeates the flesh, making for a more delicious result.
2fresh troutabout 12 inches long, skinned, filleted, and cut into 1 inch pieces
Salt and pepperto taste
1teaspooncoconut oil
1carrotsliced
1medium onionsliced
1fennel bulbsliced, fronds reserved
½teaspoononion powder
½teaspoongarlic powder
½teaspoonground ginger
⅛ – ¼teaspooncrushed red pepper flakes
⅛teaspoonground turmeric
13 ½ouncescan coconut milk
Method
Sprinkle trout with salt and pepper.
In 12 inch cast iron skillet, heat coconut oil and sauté sliced carrots, onion, and fennel, with salt and pepper to taste, for 5 minutes. Add onion powder, garlic powder, ground ginger, red pepper flakes, and turmeric. Once spices are fragrant, add coconut milk. Cook for 3 minutes, until sauce thickens, then add trout, gently cooking it through, about 2 minutes.
Serve with rice and garnish with fennel fronds.
Enjoy!
Salmon, Polenta, and Charred Vine Tomatoes
This twist on a classic gremolata uses fish-friendly dill and parsley and cuts through the creamy richness of the polenta.
For polenta, in medium saucepan, bring water to a boil, then add stock cube and butter. Whisk in cornmeal and cook for 15 to 20 minutes, covered, stirring every few minutes, depending on how hot the fire is. If polenta starts to stick or burn, reduce heat or add water. Whisk in Parmesan. Season, to taste, and set aside pot.
Meanwhile, for gremolata, in medium bowl, combine lemon juice and zest with garlic, chopped dill, parsley, and pinch of salt.
Over medium-high, heat 12 inch cast iron skillet. Be patient; the pan is hot enough when you place a hand above it and feel a fair bit of heat, about 3 to 4 minutes. Add tomatoes, still on the vine, and cook until lightly charred but not bursting. Remove tomatoes from pan.
For salmon, add oil to pan. When hot, add salmon, skin side down. Cook until the line of opacity reaches halfway up the side of salmon, about 2 minutes. Flip and cook for 30 seconds to 1 minute longer. If the two lines of opacity meet, the fish will be overcooked, so remove them sooner rather than later.
To serve, plate polenta and fish and top with gremolata, and place tomatoes on the vine alongside. Sprinkle with salt.
Enjoy!
Prawn Pasta
Simple and quick, this prawn pasta combines seafood with a touch of heat. If you can’t find a fresh Fresno chili pepper, use a red jalapeño or a tiny bit of fresh cayenne pepper instead.
1poundsustainable shrimpin their shells, heads removed
Juice of ½ lemon
Saltto taste
Pepper
Method
In large pot, boil pasta until tender. Drain and set aside.
Meanwhile, chop garlic, chili pepper, and parsley.
In 12 inch cast iron skillet, heat chili oil. Add shrimp and fry for 1 minute on each side. Remove to cutting board.
Add pasta to skillet (don’t wipe it out first) and add garlic and chopped chili. Cook for 30 seconds, then add pasta and toss to coat. Return shrimp to skillet, stir in parsley, and squeeze lemon juice overtop. Sprinkle with salt and pepper.
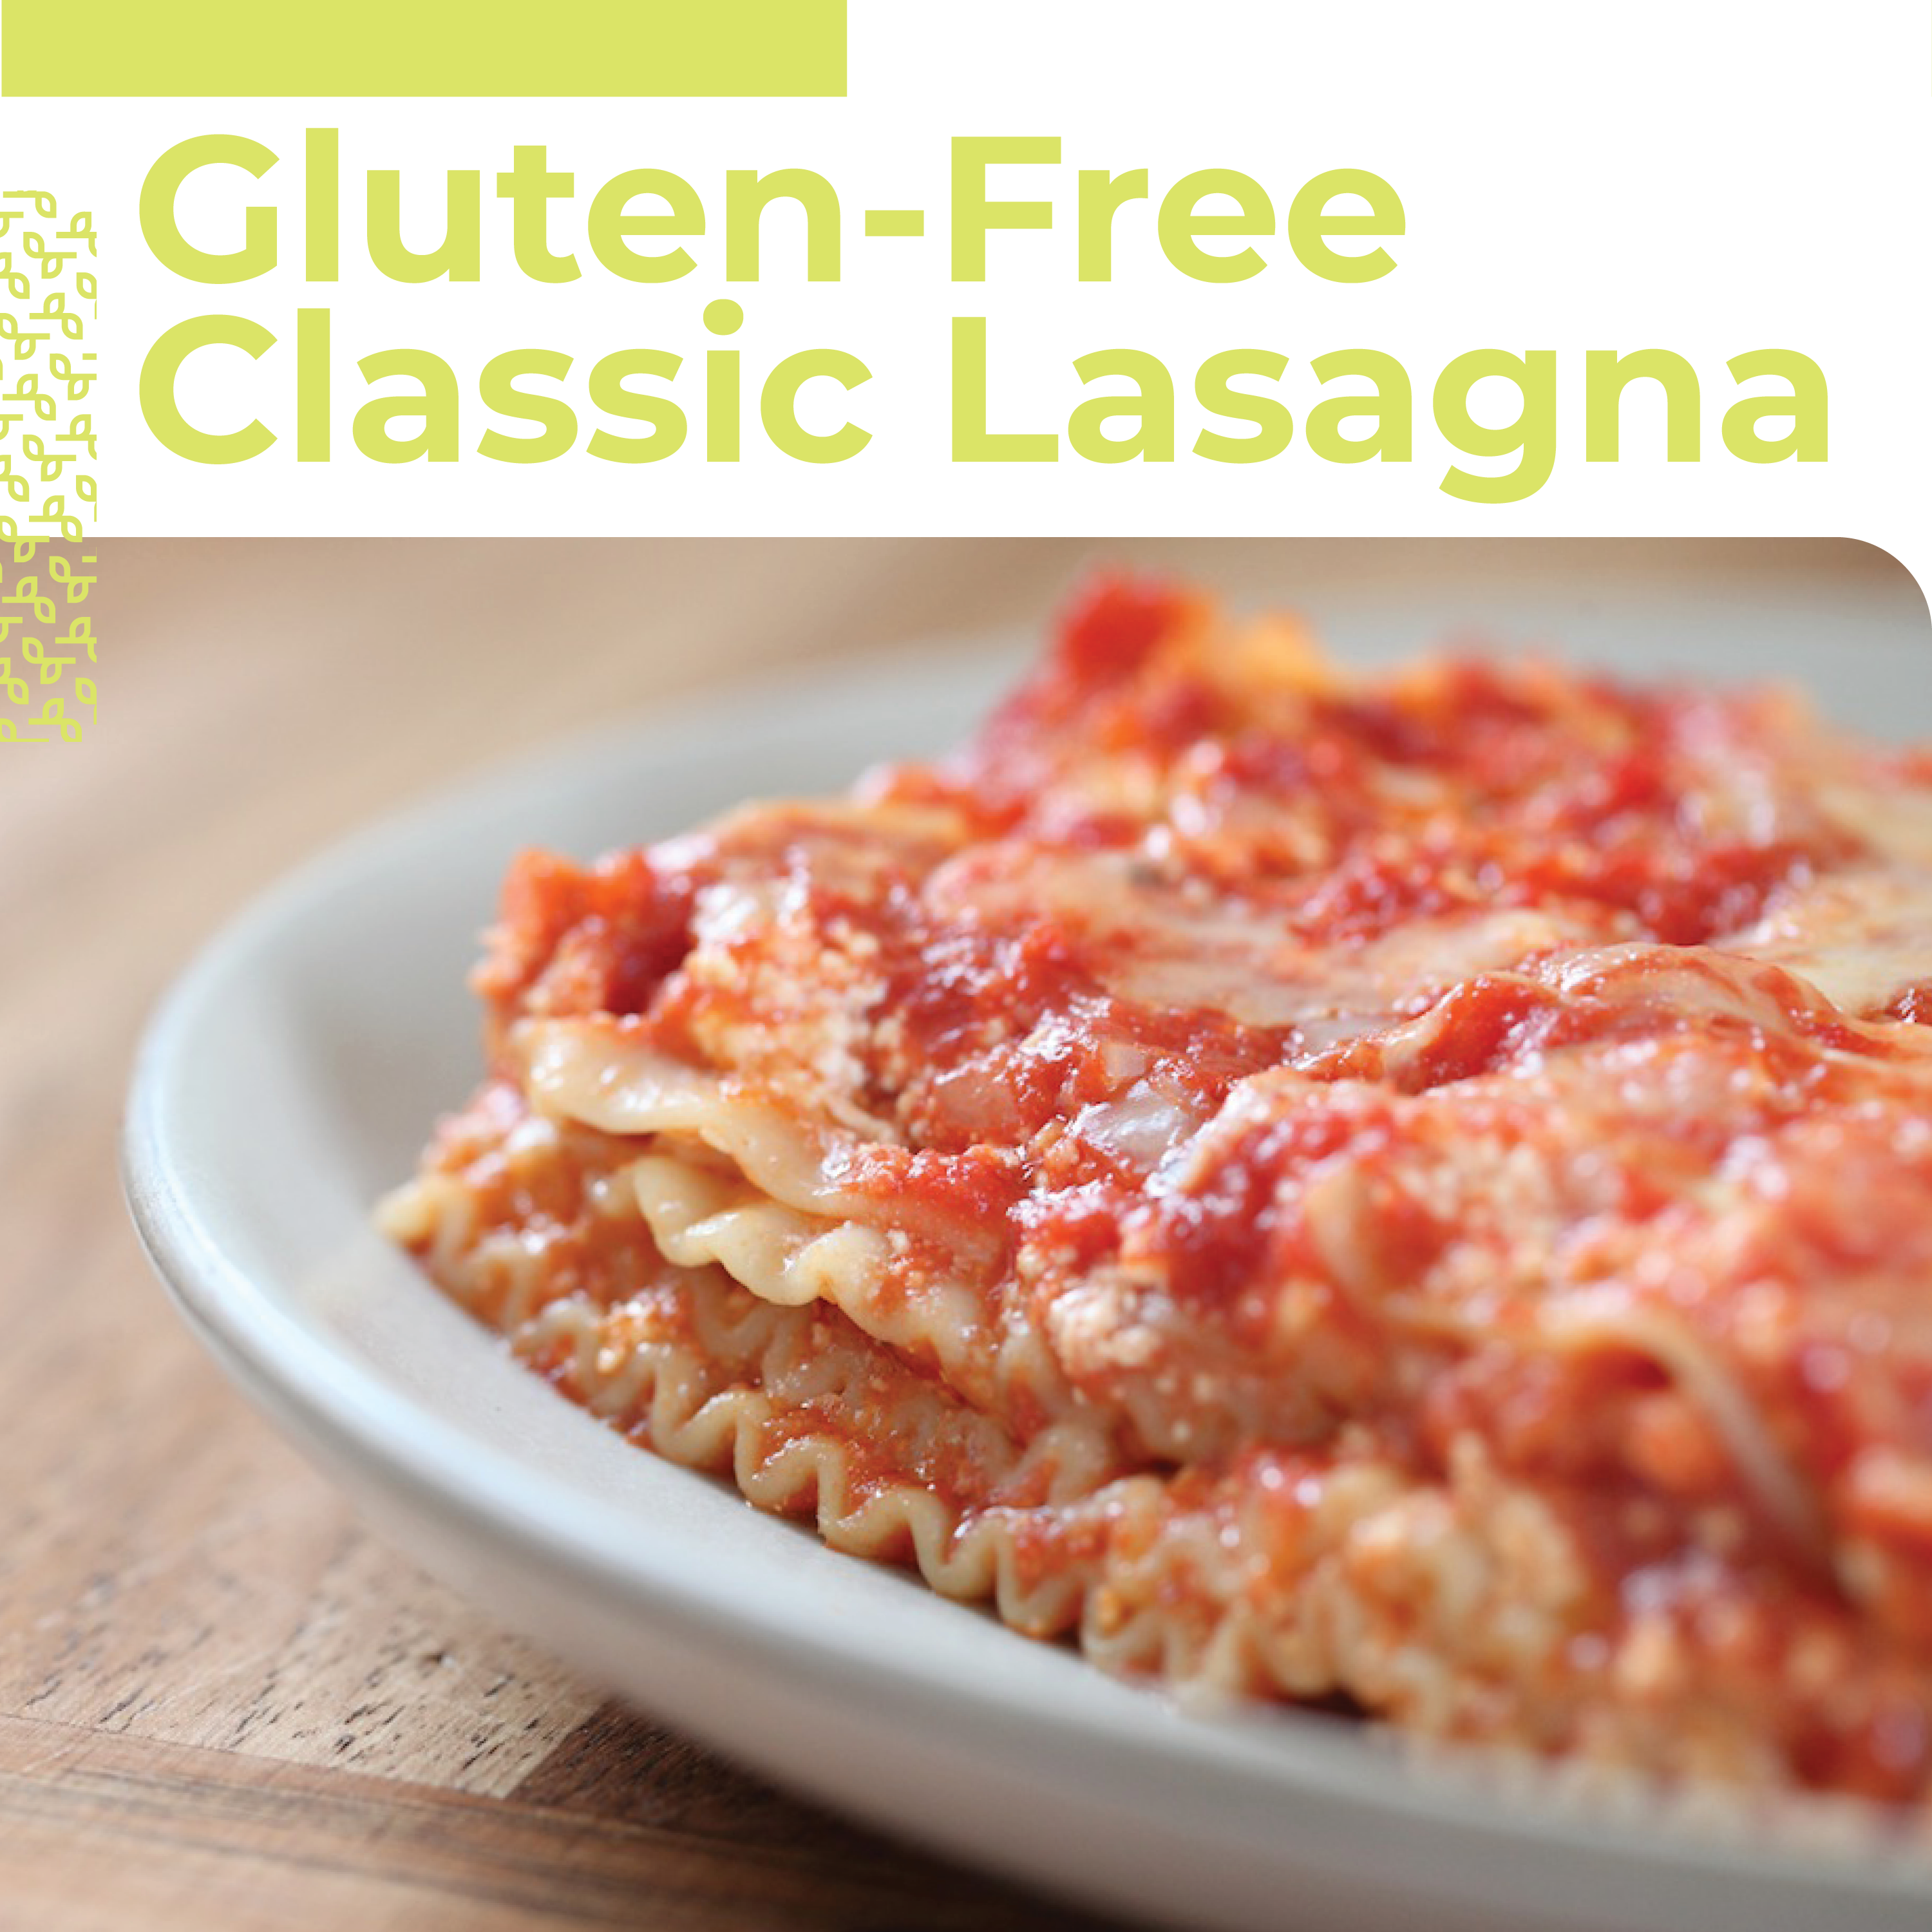
This classic lasagna is a hearty vegetarian meal for chilly days. Don’t be intimidated by the 90-minute recipe. Most of that time is hands off—the cheese is getting nice and bubbly in the oven. The hardest part is waiting for the #GlutenFree deliciousness.
Gluten-Free Classic Lasagna
This classic lasagna is a hearty vegetarian meal for chilly days. Don’t be intimidated by the 90-minute recipe. Most of that time is hands off—the cheese is getting nice and bubbly in the oven. The hardest part is waiting for the #GlutenFree deliciousness.
These cheddar & chive smashed potatoes are simply elegant! Equal emphasis on the simple and the elegant. Cheddar and fresh chives combine for the perfect side dish. Plus, it’s vegan!
Cheddar & Chive Smashed Potatoes
These cheddar & chive smashed potatoes are simply elegant! Equal emphasis on the simple and the elegant. Cheddar and fresh chives combine for the perfect side dish. Plus, it’s vegan!
Looking for a warm bowl of cozy? Look no further than this potato & corn soup. It’s luscious and creamy, without any cream! This savory soup is a no brainer for cold nights.
Potato & Corn Soup
Looking for a warm bowl of cozy? Look no further than this potato & corn soup. It’s luscious and creamy, without any cream! This savory soup is a no brainer for cold nights.
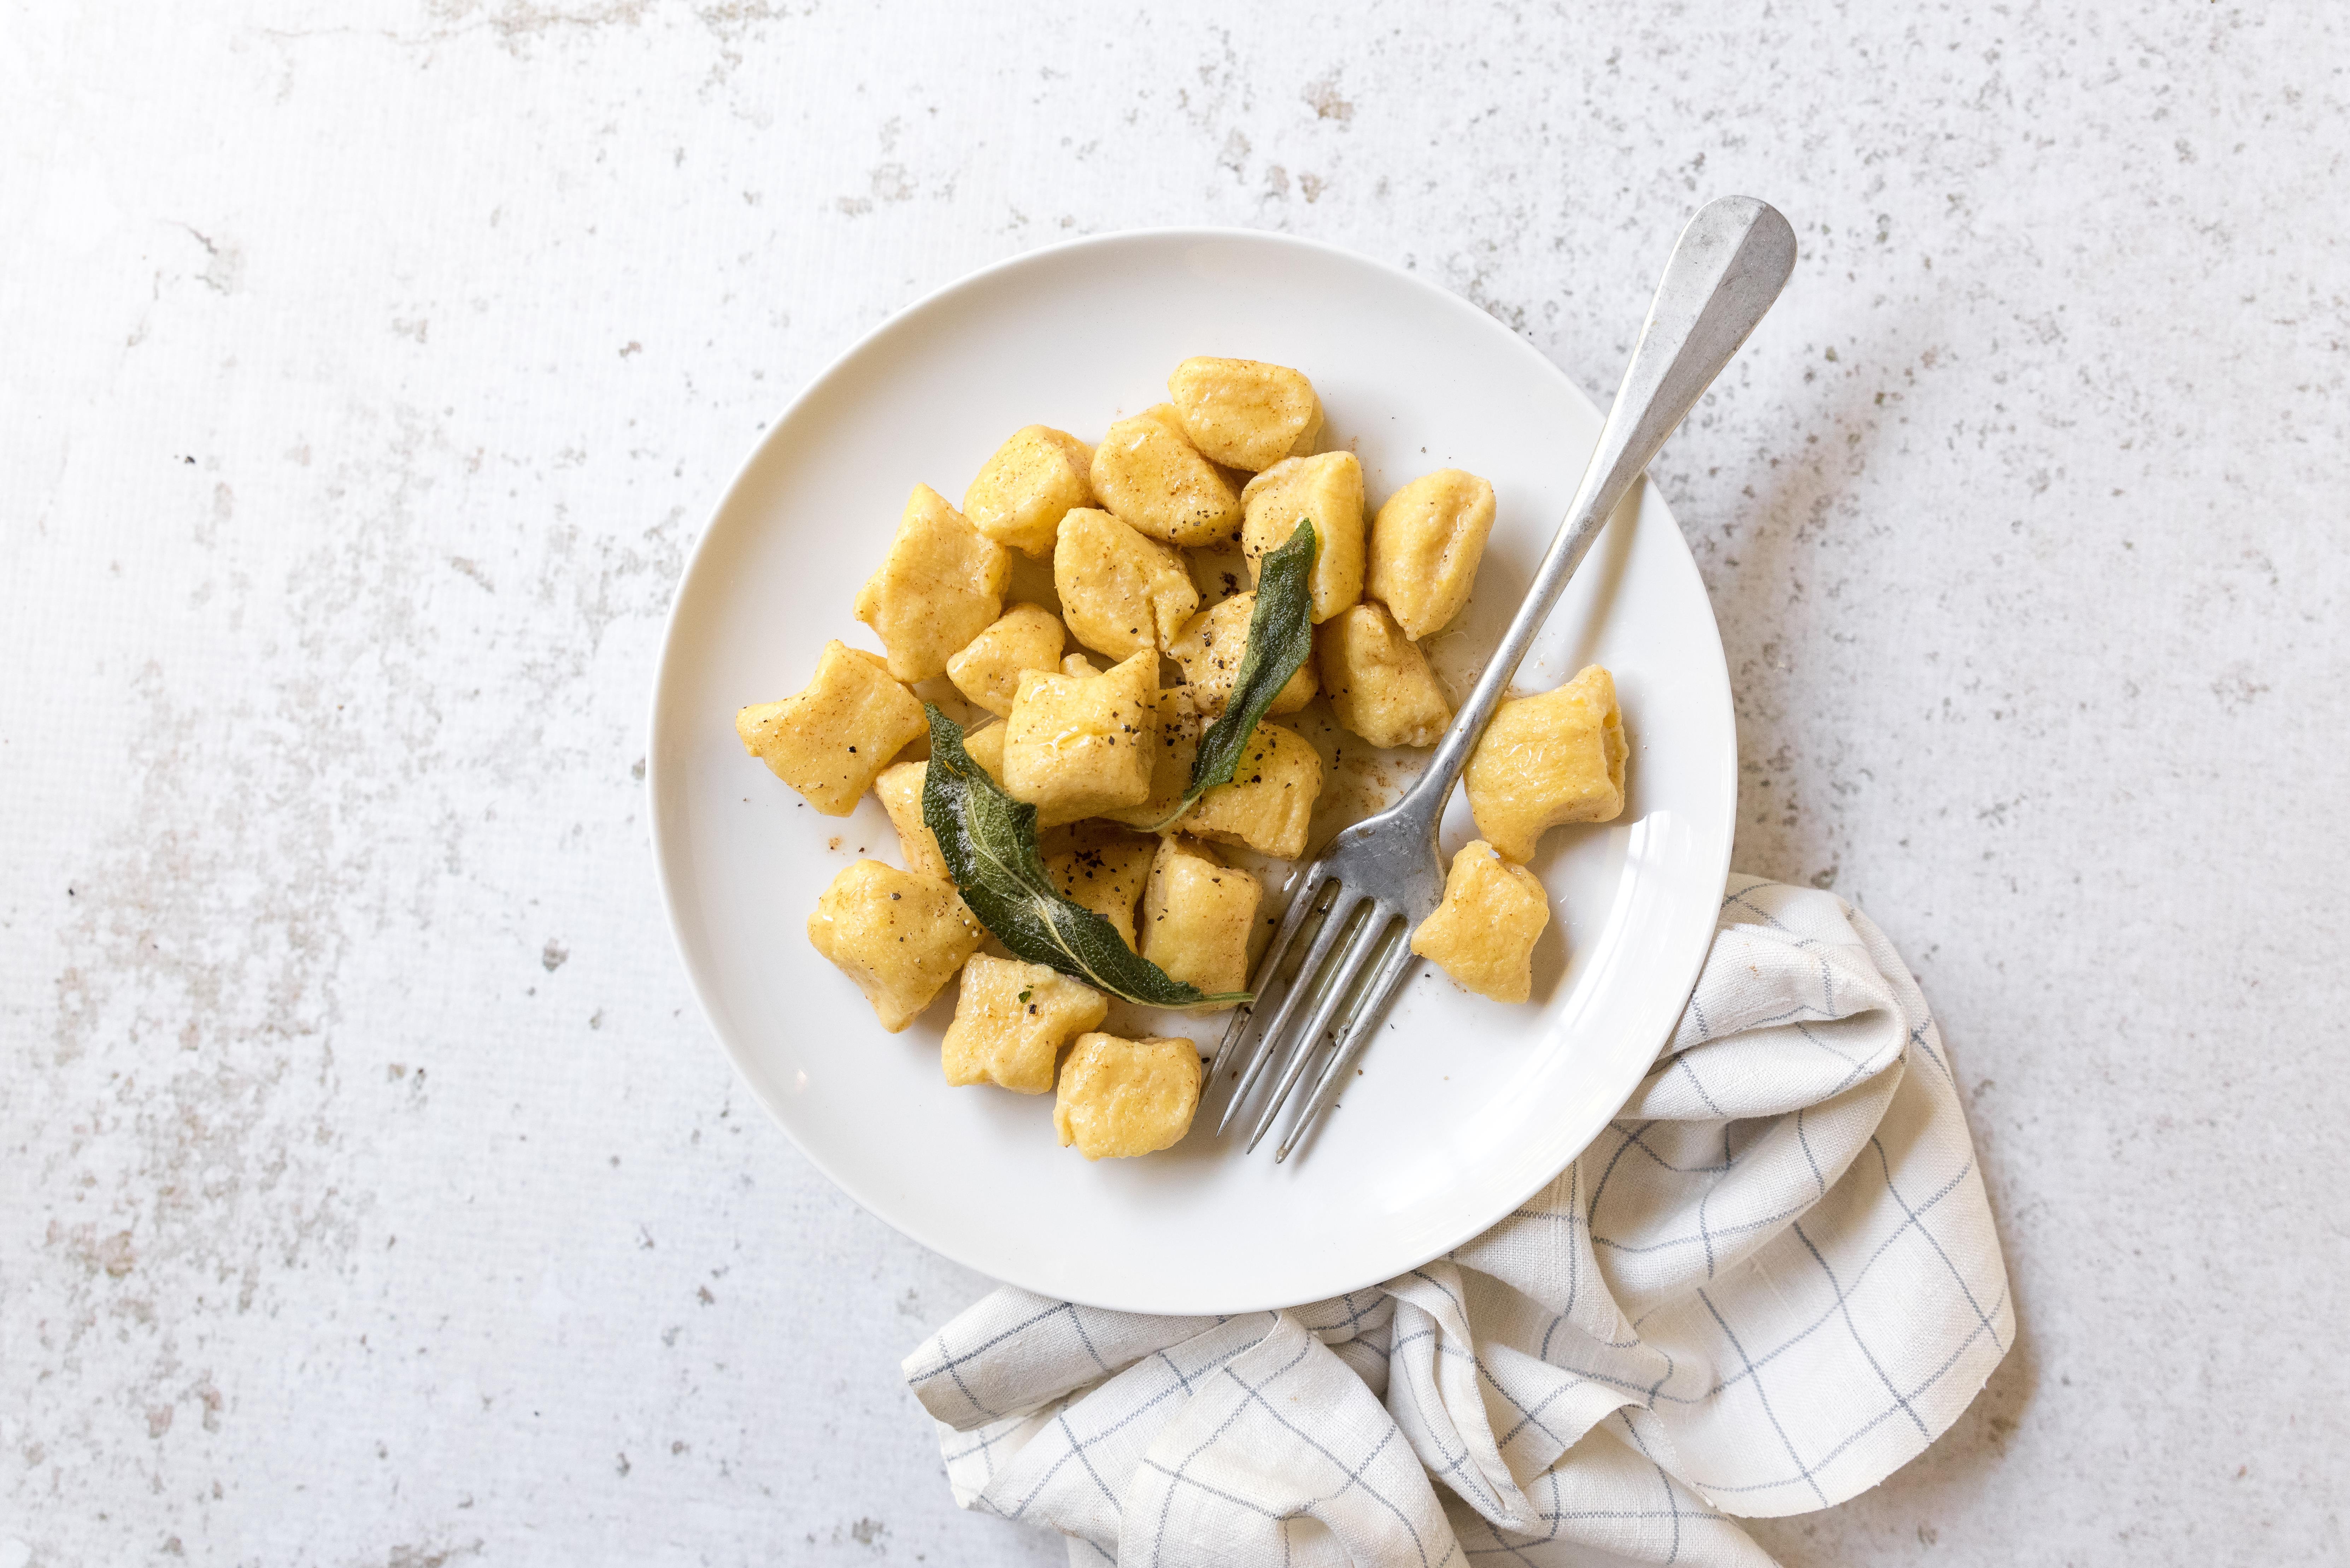
Gnocchi is a great entry point for homemade pasta! This recipe for homemade squash gnocchi don’t require a pasta maker, a food processor, or any fancy unitaskers. If you’ve played with modeling clay as a child, you can make gnocchi. Rolling out the dough into long strands may give you flashbacks to your younger years. Just make sure you only add flour if the dough is sticking. Add too much and you’ll lose the light fluffy texture of truly great gnocchi. The addition of squash puree ups the seasonal wow factor and nutrition. You can use canned pumpkin, roasted butternut, or any combination of winter squash you have on hand.
Homemade Squash Gnocchi
Gnocchi is a great entry point for homemade pasta! If you played with modeling clay as a child, you can make Homemade Squash Gnocchi. The addition of squash puree ups the seasonal wow factor and nutrition.
Whisk together ricotta, squash puree, egg, salt, and nutmeg.
Add flour and stir until mixture forms a soft ball; rest for 10 minutes covered.
Meanwhile, heat a large pot of lightly salted water to a boil. Melt butter in a large skillet over medium-low heat, add sage leaves and swirl pan around to crisp sage and allowing butter to brown evenly. Turn off heat and set aside.
Cut dough into six even portions and roll into a ½-inch log shape, using flour as necessary to keep from sticking. Cut logs into 1-inch pieces and set aside on a floured surface.
Drop gnocchi into boiling water in batches and cook until they float, about 3 minutes. Carefully strain cooked gnocchi.
Put the brown butter and sage pan back over medium-low heat and add cooked gnocchi. Heat through and serve promptly.
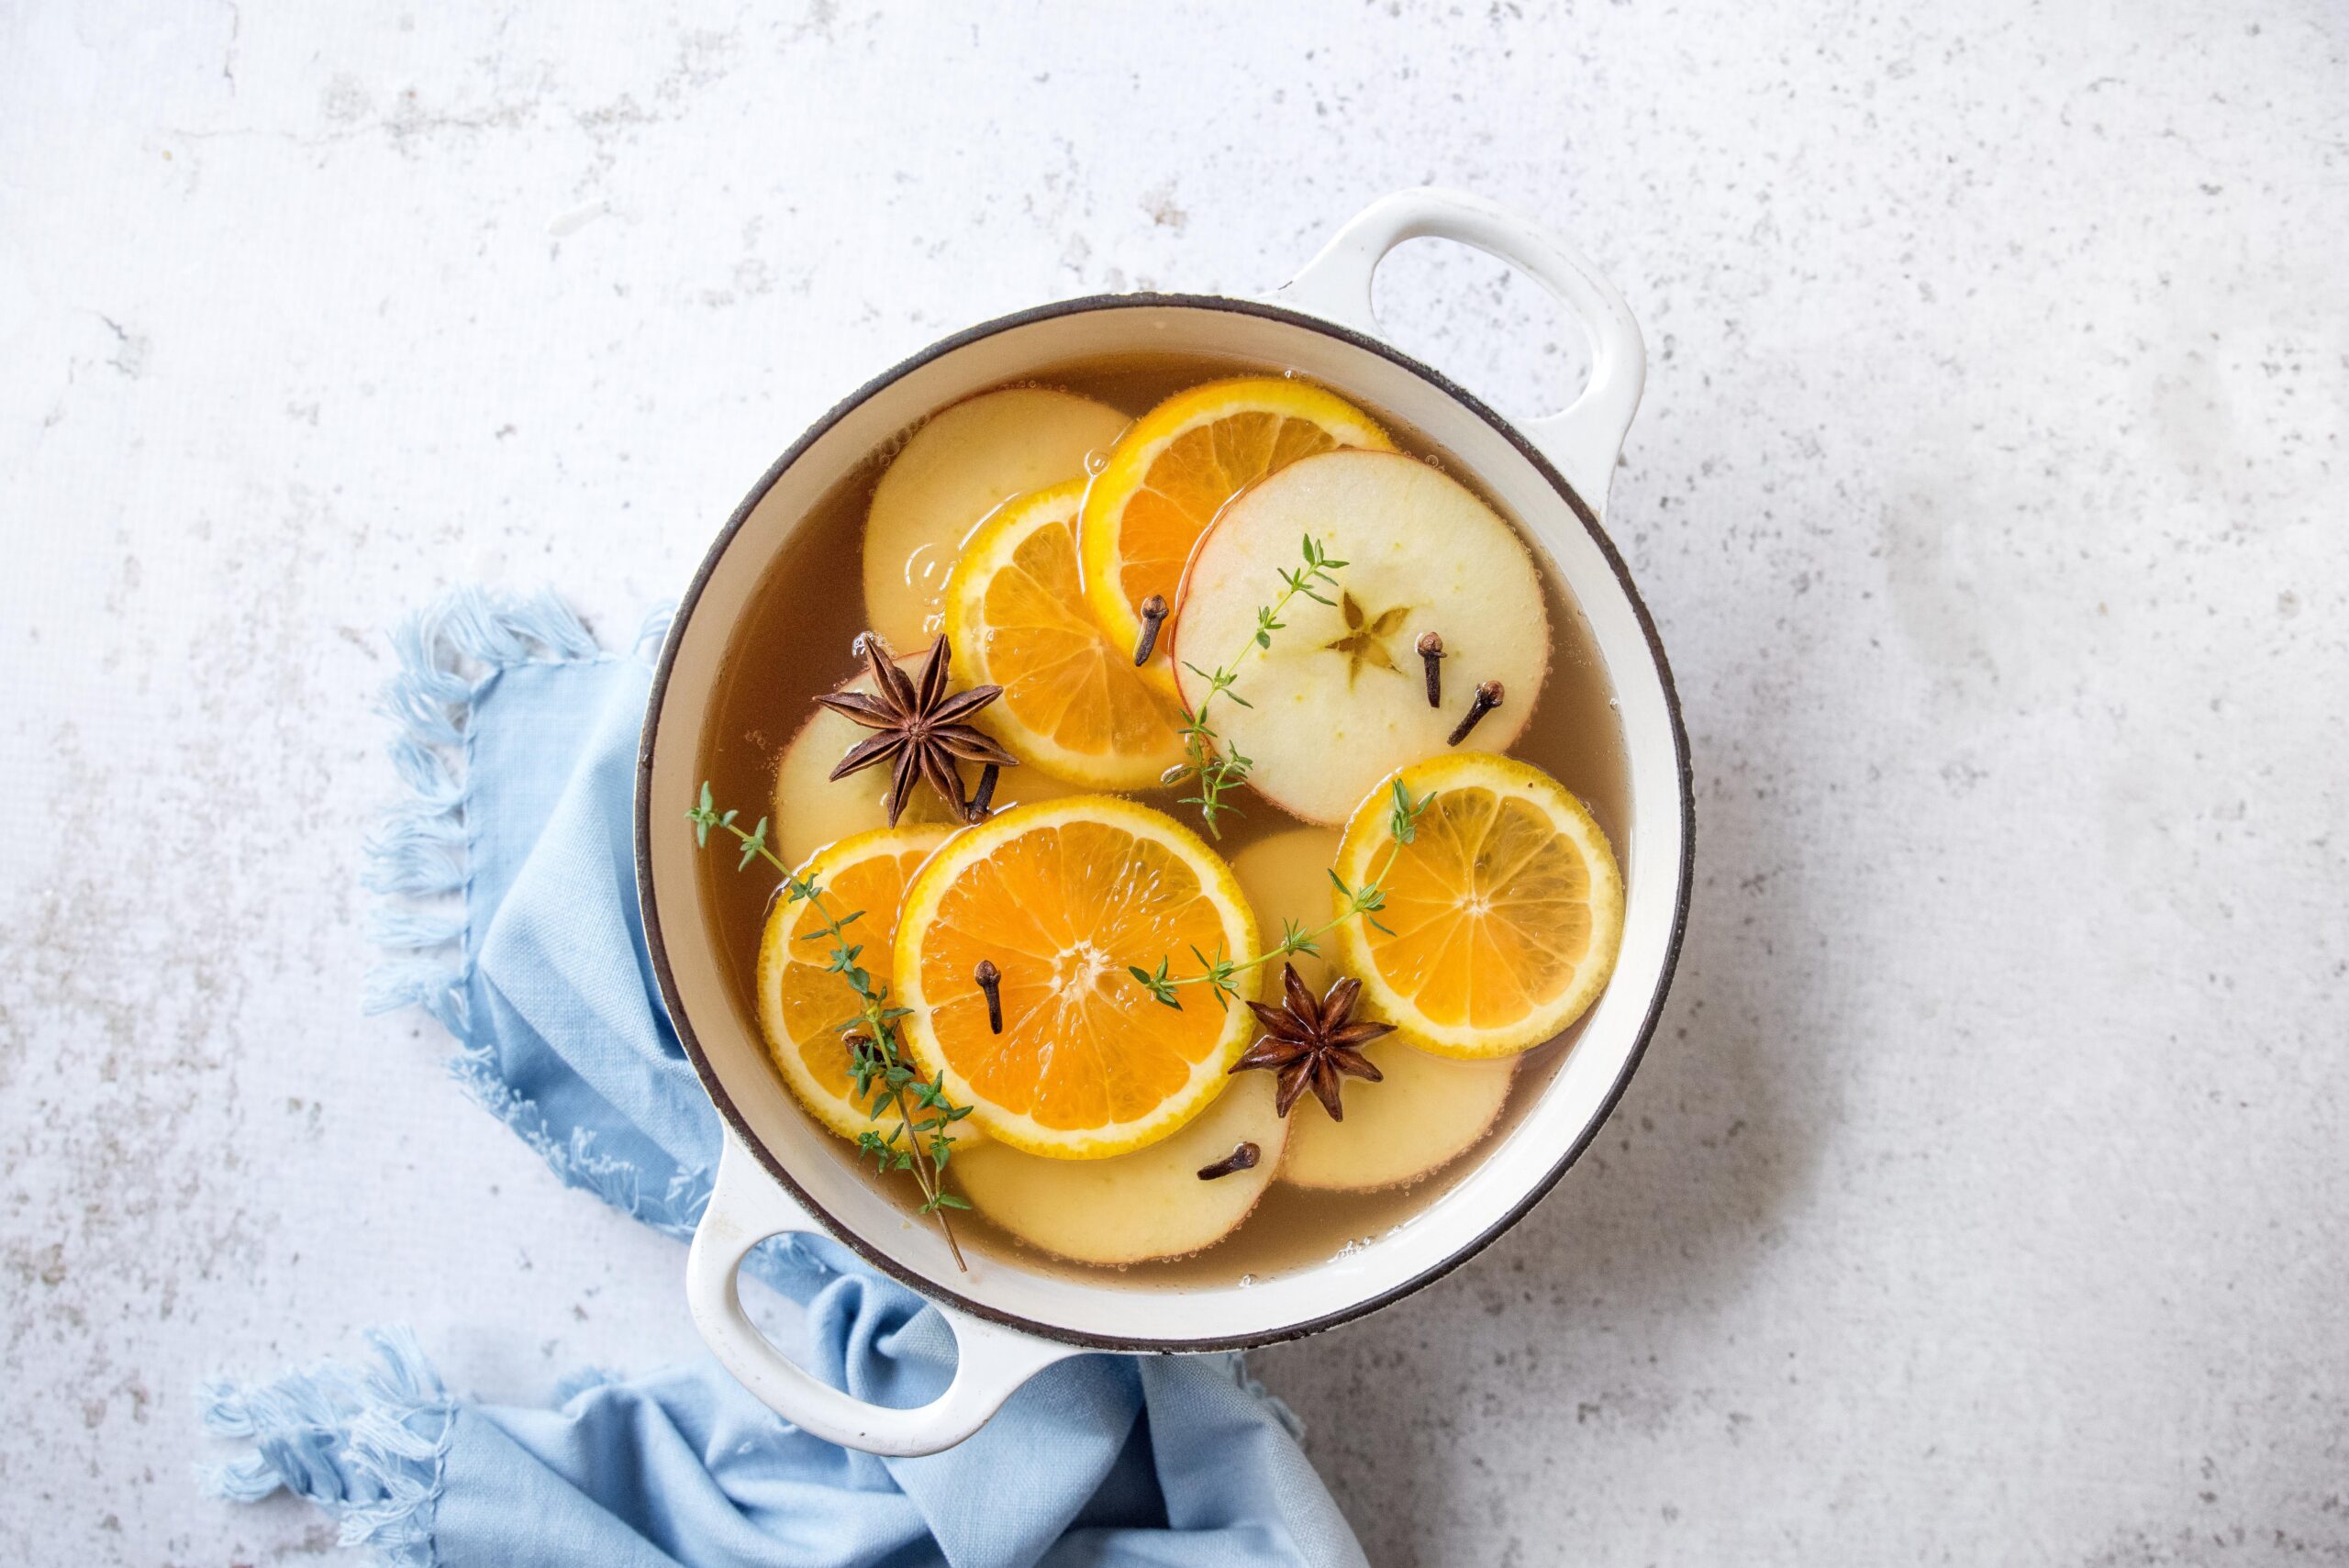
Looking for a fun beverage for your next fall gathering? Infuse cider with your favorite fall baking spices and add bubbles—either sparkling juice or the adults-only prosecco. This Sparkling Spiced Cider is easy enough to pull off for unexpected guests. Don’t forget the sliced fruit for the punch bowl. It takes it to the next level! Serving this punch warm is a nod to mulled wine and the chillier temps. The addition of sparkling wine or juice keeps it festive.
Sparkling Spiced Cider
Looking for a fun beverage for your next fall gathering? Infuse cider with your favorite fall baking spices and add bubbles—either sparkling juice or the adults-only prosecco. This sparkling spiced cider is easy enough to pull off for unexpected guests.
In a 6-quart stockpot, bring apple cider, pear juice, half of the orange slices, cinnamon sticks, cloves, and star anise to just under a simmer and cook for 15 minutes.
Remove from heat and carefully strain into a large serving vessel, top with prosecco or sparkling pear juice. Serve warm, garnish with remaining orange slices, apple slices, and fresh thyme sprigs.
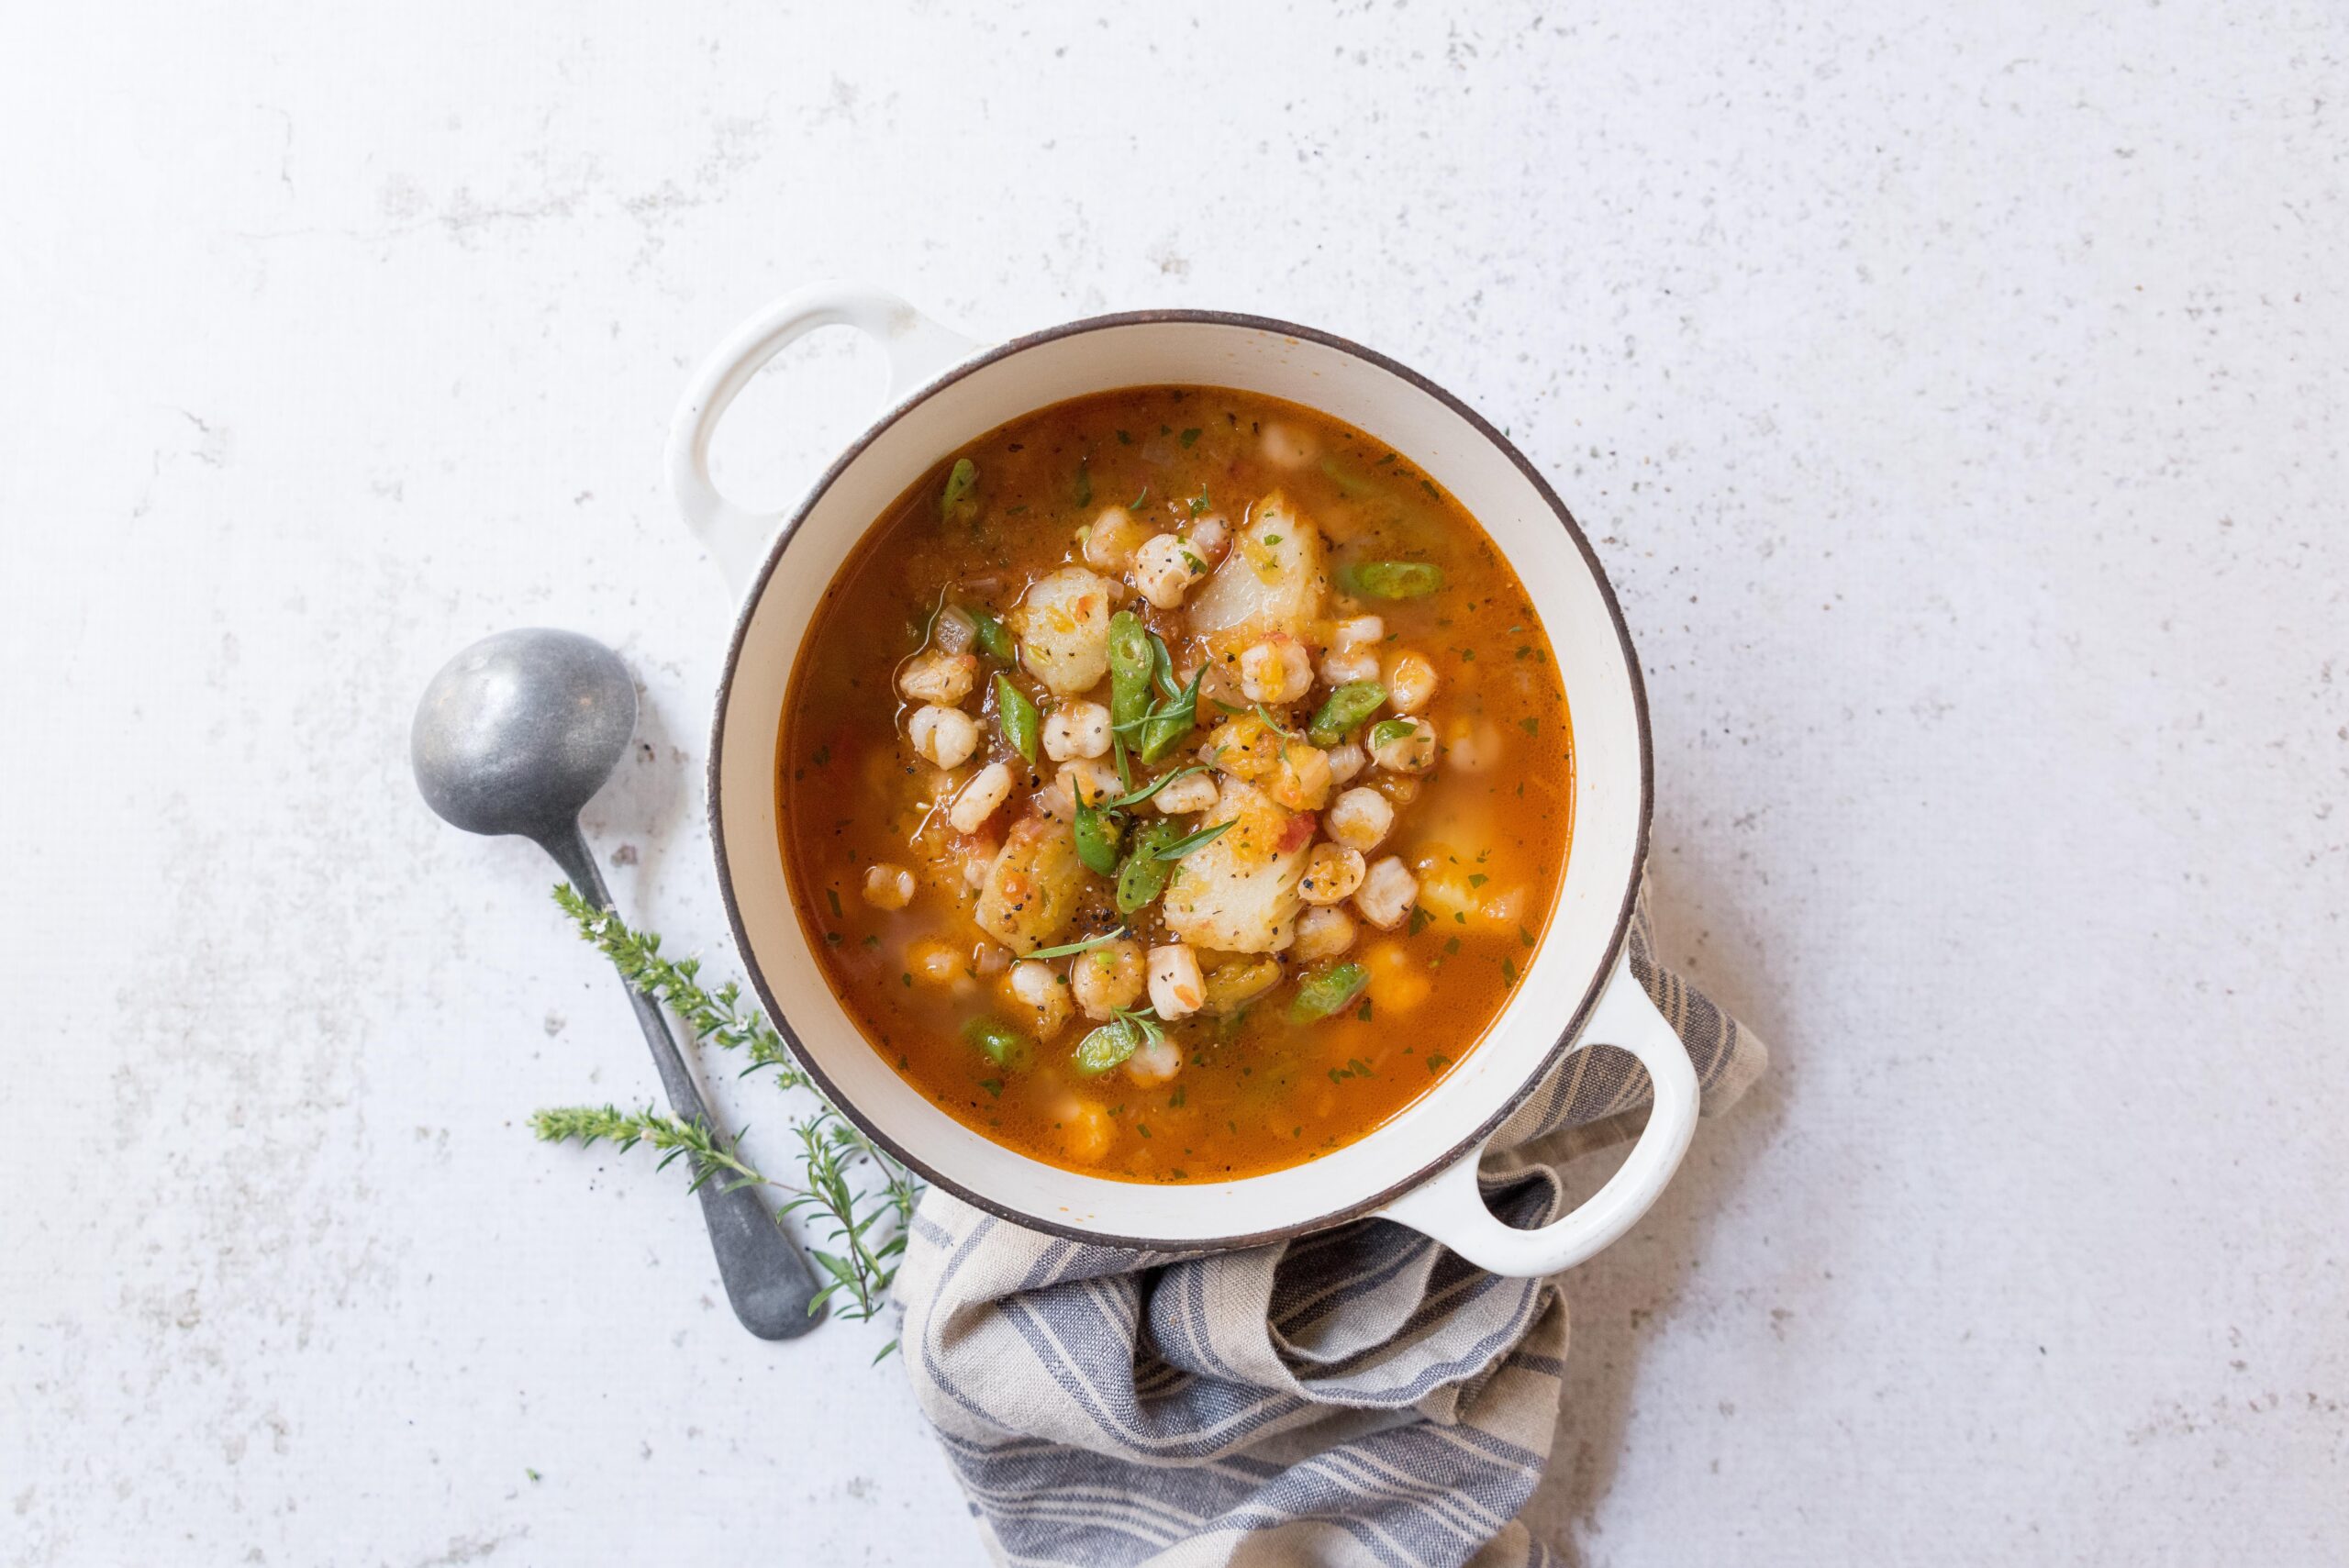
This three sisters stew is named after the indigenous agricultural practice of planting beans, corn, and squash together. Not only do these ingredients taste great together, but they also actually help one another grow! Corn stalks form a trellis that the beans can climb. Squash leaves help shade the soil and reduce evaporation, so the plants need less water. The beans deposit nitrogen back into the soil that the corn needs. It’s a wonderful system where each piece plays an important part to benefit the whole. This Three Sisters Stew is a warm bowl of simple veggie stew that is sure to keep you satisfied.
Three Sisters Stew
This Three Sisters stew is named after the indigenous agricultural practice of planting beans, corn, and squash together. Not only do these ingredients taste great together, they actually help one another grow!
Thanks to Christine Waltermyer & The Natural Kitchen Cooking School!
Christine Waltermyer is a local and renowned Wellness Chef, private chef to celebrities, published cookbook author and founder of the Natural Kitchen Cooking School, which offers an online Plant-Based Cooking Program. She also loves shopping at Basil Bandwagon! Visit naturalkitchenschool.com to subscribe to her email newsletter for new recipes, tips, and FREE access to the Power of Veggies mini-course!
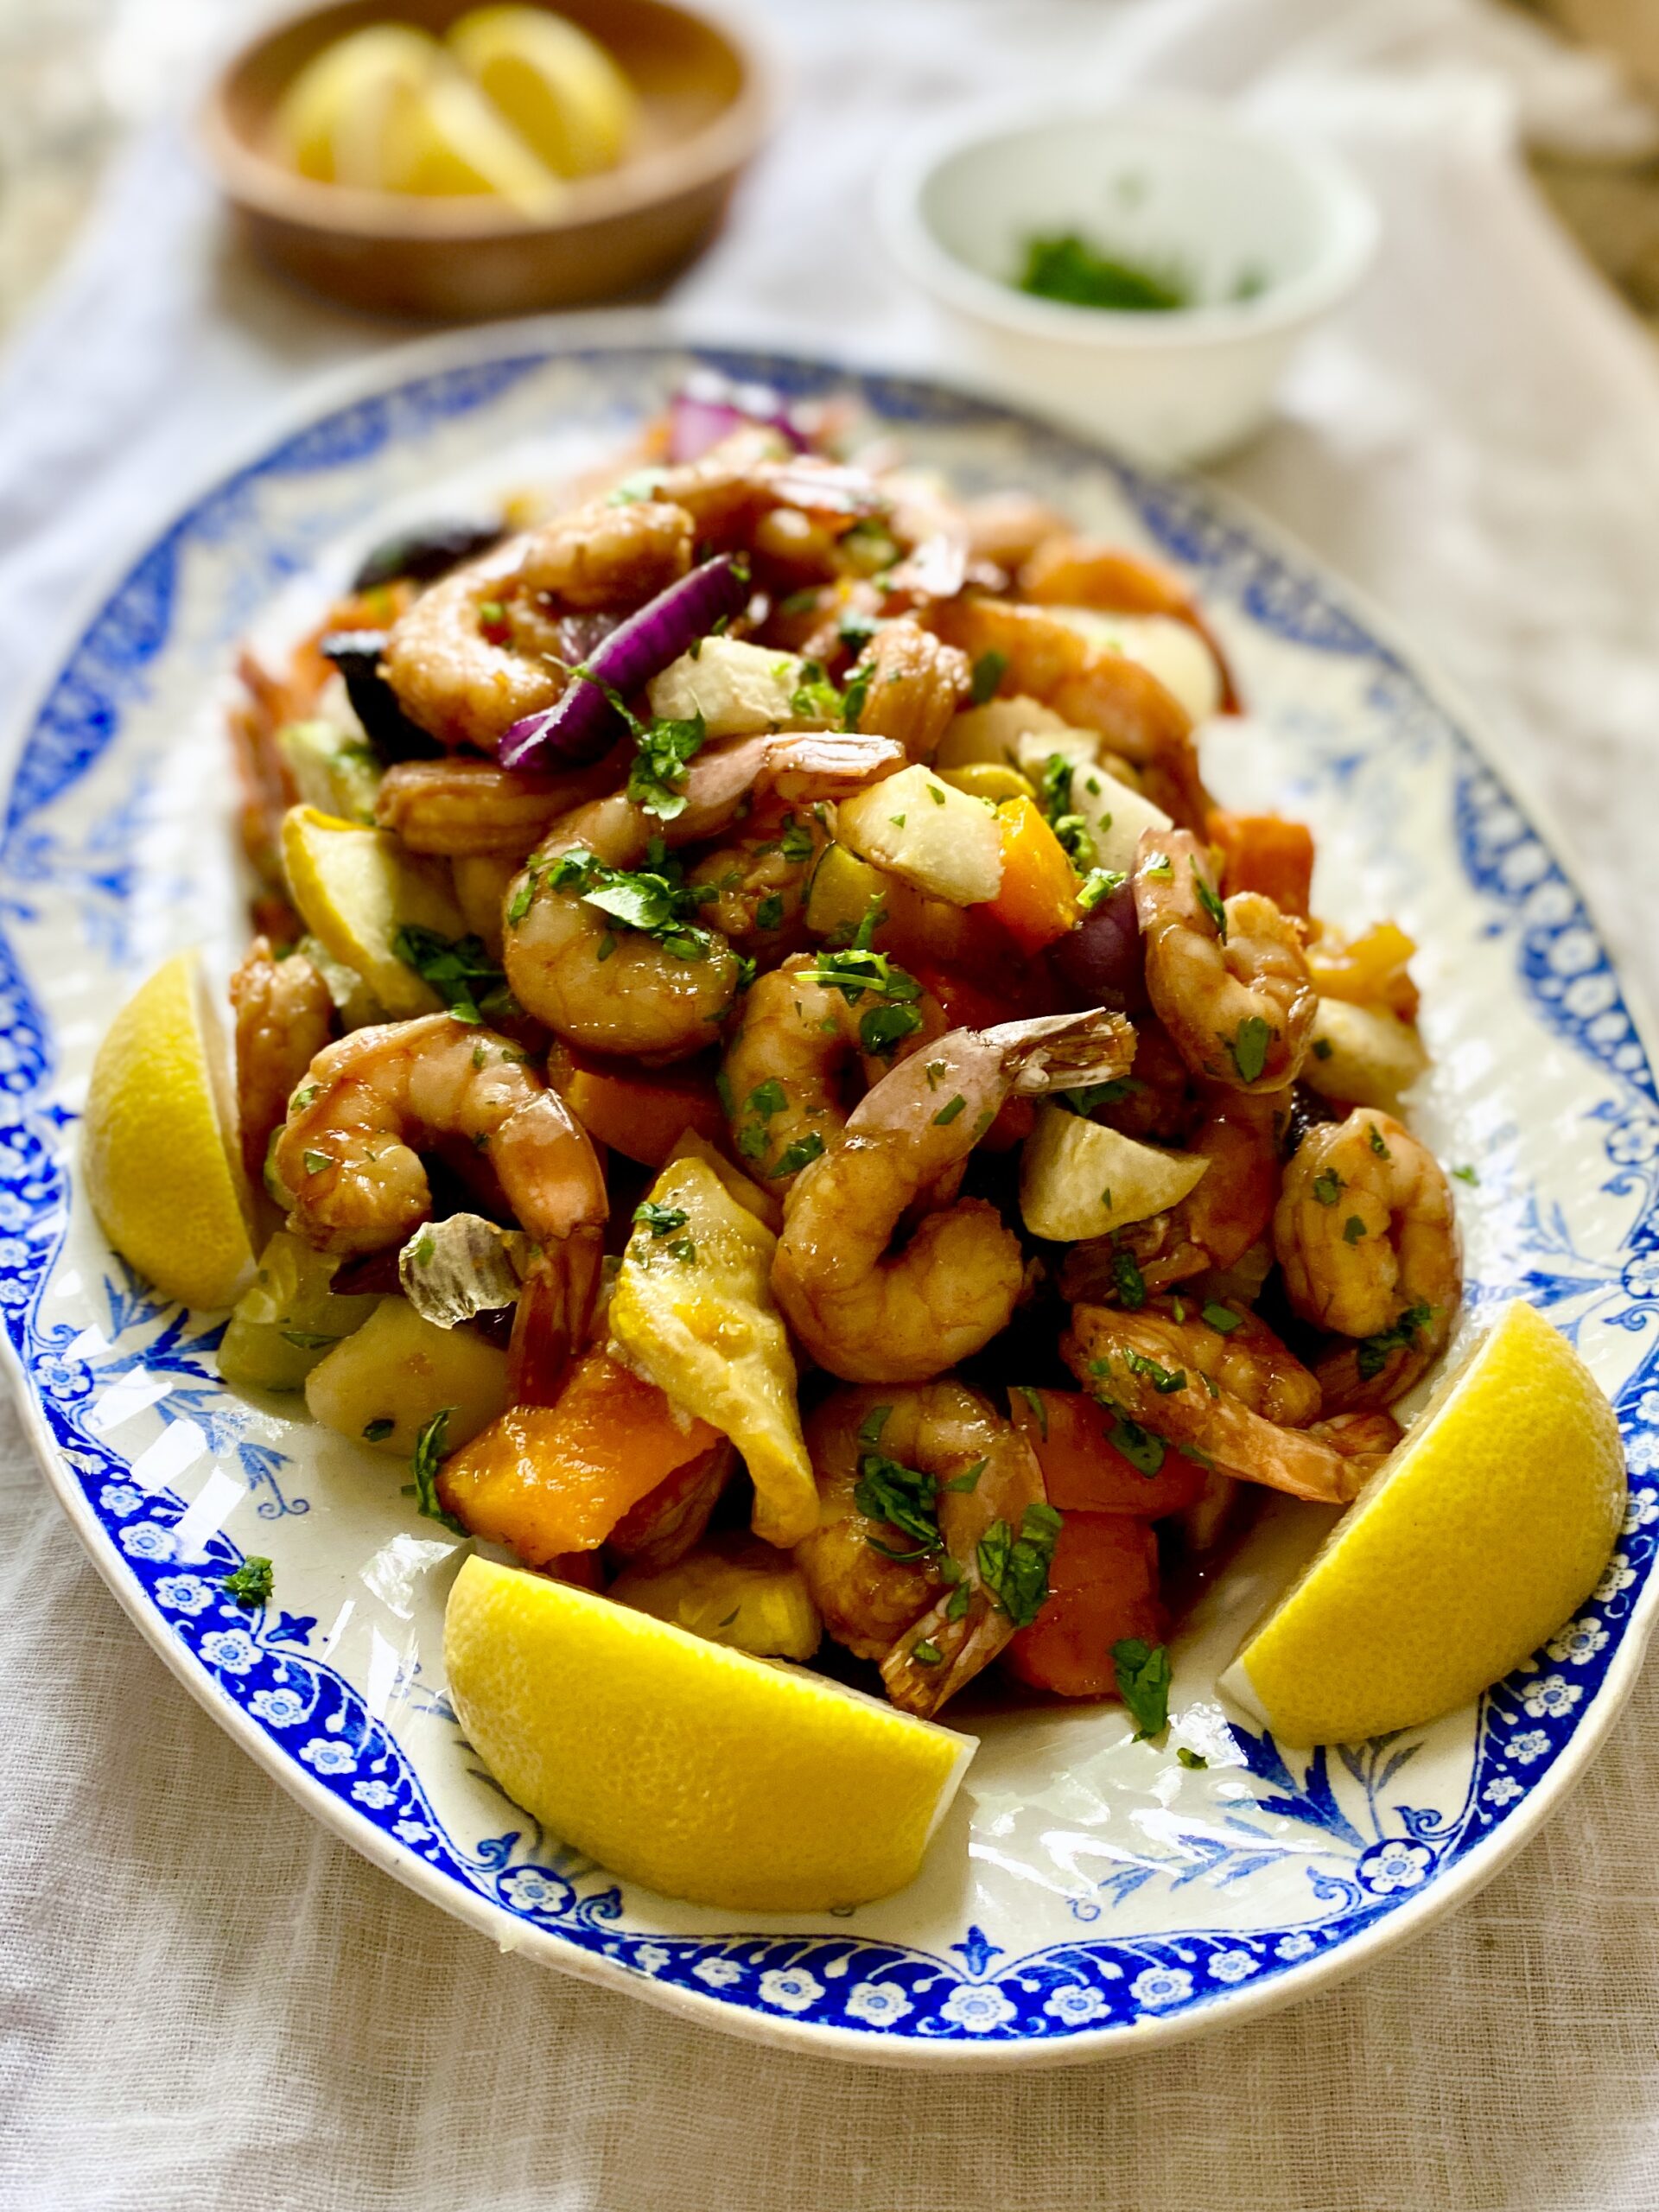
Do you have a busy schedule? Are you looking for an easy, weeknight meal? Well thanks to Christine Waltermyer and The Natural Kitchen Cooking School, you can make your family a delicious honey glazed shrimp sheet pan dinner with this simple recipe!
Make the Marinade: In a medium mixing bowl, whisk together the honey, coconut aminos, ½ teaspoon of the onion powder and sea salt and white pepper to taste. You will use half of this marinade to marinate the shrimp. Save the other half for cooking the shrimp.
Marinate the Shrimp: Place the shrimp in a medium size glass bowl. Add 1/2 of the marinade and toss well to combine. Cover the bowl and place it in the refrigerator for at least 15 minutes. To make the shrimp even more flavorful you can marinate them up to 8 hours, or overnight. Pour the rest of the marinade into a glass jar and refrigerate.
Preheat the oven to 375-degrees F. Line a large, rimmed baking sheet with parchment paper.
Season and roast the vegetables: Add the vegetables to the baking sheet and toss with the coconut oil. Season with the remaining onion powder and sea salt and white pepper to taste. Toss again. Arrange the vegetables in a single layer. Roast for 15 minutes. Remove the sheet pan from the oven. Flip the vegetables over. Return to oven and roast for 15 more minutes.
Add shrimp + bake: Remove the baking sheet from the oven. Use a spatula or tongs to carefully move the vegetables over to one side to make room for the shrimp. Add the shrimp to the baking sheet. Discard the used marinade. Drizzle the shrimp with the remaining unused marinade in the jar. Return the baking sheet to the oven and bake for 5 to 7 minutes, or until the shrimp are pink and firm to the touch.
Serve the roasted vegetables and shrimp with lemon wedges and garnished with the cilantro. This goes well served over some fluffy cooked white rice.
Enjoy!
Thank you to Christine Waltermyer and the Natural Kitchen Cooking School for working with us to help promote healthy, nutritious meals and products that are affordable, full of nutrients, and simple to make at home!