Tag: christine waltermyer

  • Vegan Charcuterie Board

    Vegan Charcuterie Board

    Vegan Charcuterie Board

    Thanks to Christine Waltermyer & The Natural Kitchen Cooking School

    Christine Waltermyer is a local and renowned Wellness Chef, private chef to celebrities, published cookbook author and founder of the Natural Kitchen Cooking School, which offers an online Plant-Based Cooking Program. She also loves shopping at Basil Bandwagon! Visit naturalkitchenschool.com to subscribe to her email newsletter for new recipes, tips, and FREE access to the Power of Veggies mini-course!


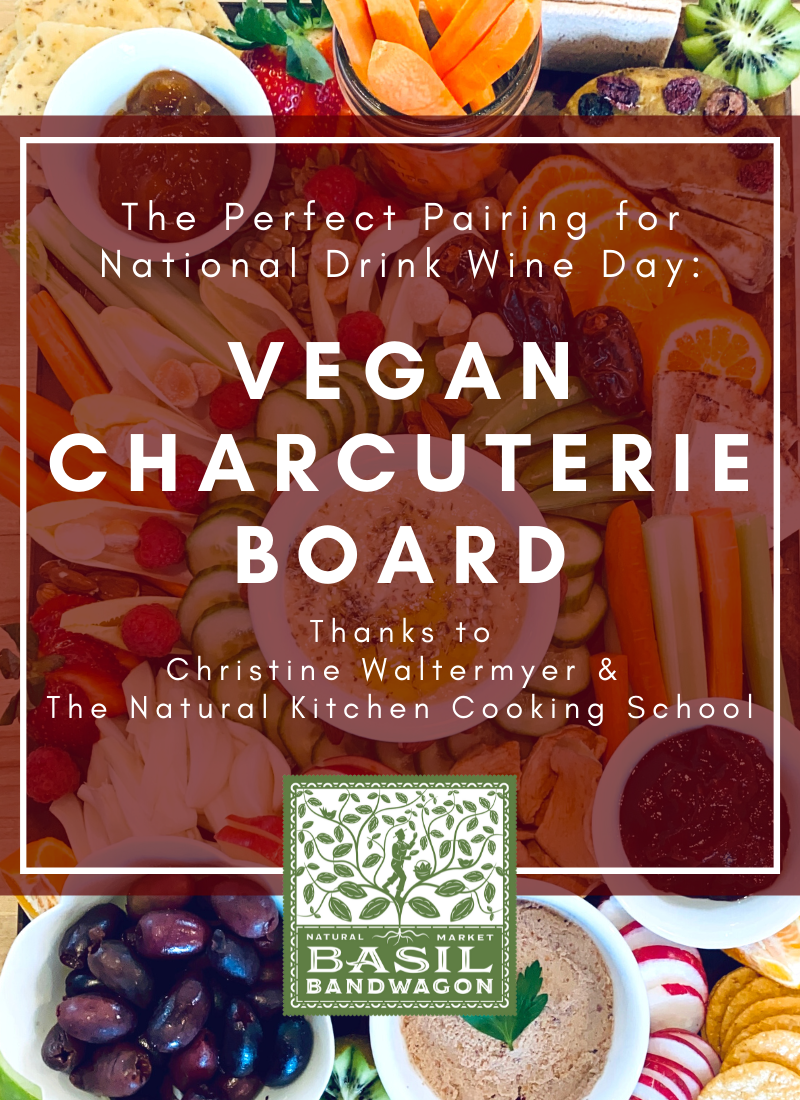
    Friday, February 18th is National Drink Wine Day and what better way to celebrate than pairing your favorite wine with a Vegan Charcuterie Board! Thanks to Christine Waltermyer and The Natural Kitchen Cooking School, you can learn how to put together the perfect selection of fresh fruits, vegetables, vegan cheeses, crackers, and savory & sweet accompaniments. Looking for an extra special item to wow your guests? Check out our vegan meat selection – including vegan fig salami! All ingredients – including almost the entire portfolio of local Unionville Vineyard wines – are available at your favorite local Basil Bandwagon Natural Market location.

    Vegan Charcuterie Board

    Ingredients

    Hummus

    Raw Vegetables

    • Red radishes
    • Snap peas
    • Celery
    • Carrots
    • Endive
    • Fennel bulb

    Fresh Fruit

    • Strawberries
    • Orange Segments
    • Apple slices

    Dried Fruit

    • Dates
    • Apple chips

    Nuts & Seeds

    • Macadamia nuts
    • Almonds
    • Toasted pumpkin seeds

    Nut Cheeses & Spreads or Other Spreadable Cheese of Your Choice

    Jams

    • All-fruit raspberry jam
    • All-fruit apricot jam

    Black Olives

    Crackers

    Gluten-Free Pita Bread

    Parsley Sprigs

    Instructions

    • Prep ahead: Use a cutting board that you will not be using as your presentation board. Cut up all of the fruit and vegetables. Place the hummus, olives and jams in serving bowls. Pre-slice any block cheeses.
    • Assemble the board: Wipe down a large wooden cutting board. Place the bowls onto the board. Next, add the sliced fruits and vegetables, building around the bowls. Arrange the crackers as well.
    • Fill in the gaps: Add little piles of nuts, seeds and dried fruits in any open areas. Place garnishes of fresh parsley sprigs as the final touch. Serve right away or cover the board with plastic wrap and refrigerate.
    • Enjoy!

    Thank you to Christine Waltermyer and the Natural Kitchen Cooking School for working with us to help promote healthy, nutritious meals and products that are affordable, full of nutrients, and simple to make at home!

  • Valentine’s Day Snacks in 5 Minutes or Less

    Valentine’s Day Snacks in 5 Minutes or Less

    Valentine’s Day Snacks in 5 Minutes or Less

    thanks to Christine Waltermyer

    Christine Waltermyer is a local and renowned Wellness Chef, private chef to celebrities, published cookbook author and founder of the Natural Kitchen Cooking School, which offers an online Plant-Based Cooking Program. She also loves shopping at Basil Bandwagon! Visit naturalkitchenschool.com to subscribe to her email newsletter for new recipes, tips, and FREE access to the Power of Veggies mini-course!


    Are you looking for sweets and treats for your Valentine this year? Thanks to Christine Waltermyer and the Natural Kitchen Cooking School, here are three simple better-for-you snack recipes that you can make in 5 minutes or less! All ingredients can be found at your favorite local Basil Bandwagon Natural Market location.

    Strawberry Avocado Sorbet

    Course Dessert, Snack
    Keyword dessert, plant based, valentine’s day, vegan

    Ingredients

    • 1 10 oz. bag frozen strawberries
    • ½ ripe avocado
    • 1-2 tablespoons pure maple syrup OR stevia to taste
    • Juice of 1 mandarin orange or 1 lime
    • Pinch of sea salt
    • 1 teaspoon pure vanilla extract optional

    Instructions

    • Place all of the ingredients in a food processor and blend until creamy. Serve as is or topped with your favorite toppings such as chocolate chips and fresh sliced strawberries.
    • Store leftovers in the freezer. Before serving, let the strawberry sorbet at room temperature for at least 30 minutes to help it soften. It becomes very hard when frozen!
    • Enjoy!

    Hummus Sandwiches

    Course dinner, Lunch, Snack
    Keyword dinner, lunch, plant based, sandwich, snack, vegan
    Servings 2 sandwiches

    Ingredients

    • 4 slices your favorite bread
    • 6 tablespoons hummus
    • 1 cup lettuce
    • ½ cup shredded carrots
    • ½ cup sliced avocado
    • Olive oil to brush the bread slices optional

    Instructions

    • Lightly toast or grill the bread slices. If using a grill pan you can brush with olive oil.
    • Cut the grilled bread into heart shapes using a sandwich cutter: Line up the sandwich cutter in the center of a slice of bread. Press down firmly, until it cuts through completely, leaving you with a heart-shaped piece of bread.
    • Spread one slice of the prepared bread with 3 tablespoons of the hummus. Layer on top half of the lettuce, carrots and avocado. Repeat with the remaining ingredients.
    • Enjoy!

    Beet Hummus

    Course Appetizer, Snack
    Keyword appetizer, plant based, snack, valentine’s day, vegan
    Servings 4

    Ingredients

    • 3 medium size cooked beets chopped
    • ¼ cup tahini
    • 2 tablespoons lemon juice
    • ½ teaspoon sea salt
    • 1 teaspoon chopped scallions (only the white bottom part)
    • 2 tablespoons water
    • Olive oil for drizzling

    Optional garnishes for serving

    • Chopped parsley
    • Chopped pistachios
    • Fresh lemon zest
    • Za'atar
    • Flaked sea salt

    Instructions

    • Place the cooked beets in a food processor.
    • Add the tahini, lemon juice, sea salt and scallions. Blend until smooth, adding just enough of the water to reach desired consistency.
    • Serve drizzled with olive oil and sprinkled with any garnishes you like, such as chopped parsley, chopped pistachios, fresh lemon zest, za’atar, and/or flaked sea salt.
    • Enjoy!

    Thank you to Christine Waltermyer and the Natural Kitchen Cooking School for working with us to help promote healthy, nutritious meals and products that are affordable, full of nutrients, and simple to make at home!

  • Holiday Mocktails

    Holiday Mocktails

    Holiday Mocktails

    with Christine Waltermyer

    Christine Waltermyer is a local and renowned Wellness Chef, private chef to celebrities, published cookbook author and founder of the Natural Kitchen Cooking School, which offers an online Plant-Based Cooking Program. She also loves shopping at Basil Bandwagon! Visit naturalkitchenschool.com to subscribe to her email newsletter for new recipes, tips, and FREE access to the Power of Veggies mini-course!


    Holidays can be hectic, which is why we love these easy MOCKTAIL recipes thanks to Christine Waltermyer and the Natural Kitchen Cooking School. Featuring ingredients found at your local Basil Bandwagon Natural Market, these recipes can be enjoyed all year round!

    Cranberry Pomegranate Cosmo

    Course Drinks
    Keyword cosmo, drinks, holiday, mocktail

    Ingredients

    • cup pomegranate juice
    • Juice of ½ orange
    • Pink food coloring (I used 1 teaspoon of Supernatural food colors pink shade)
    • 16 ounces Mingle Mocktails Cranberry Cosmo

    Garnishes

    • cup fresh pomegranate seeds
    • ½ cup fresh cranberries
    • A few fresh rosemary sprigs
    • 2-4 strips orange peel curled around a chopstick

    Instructions

    • In a glass jar, combine the pomegranate juice, orange juice and food coloring. Shake well to combine. Add to the Mingle Mocktails Cranberry Cosmo and stir well. Pour into two martini glasses. To each glass add a few pomegranate seeds, some cranberries, a rosemary sprig and fresh orange peel.
    • Enjoy!

    Blueberry Basil Bellini

    Course Drinks
    Keyword bellini, drinks, holiday, mocktail

    Ingredients

    • 16 ounces + ½ cup Mingle Mocktails Blackberry Hibiscus Bellini
    • Juice of one lime
    • 1-2 tablespoons pure maple syrup
    • Purple or blue food coloring (I used 1 teaspoon of Supernatural food colors purple shade)

    Garnishes

    • ½ cup fresh blueberries
    • A few fresh basil sprigs
    • Fresh lime wedges
    • Colorful straws

    Instructions

    • In a glass measuring cup, combine 16 ounces of the Mingle Mocktails Blackberry Hibiscus Bellini with the lime juice and maple syrup. Stir to combine.
    • Add some ice to two glasses. Pour in enough of the mocktail to fill two third’s full.
    • In a glass jar combine another ½ cup of the Mingle Mocktails Blackberry Hibiscus Bellini with the food coloring. Stir well or place a lid on the jar and shake well. Divide this mixture evenly between the two glasses. Stir to combine.
    • Garnish the glasses with the fresh blueberries, basil sprigs, lime wedges and colorful straws.
    • Enjoy!

    Thank you to Christine Waltermyer and the Natural Kitchen Cooking School for working with us to help promote healthy, nutritious meals and products that are affordable, full of nutrients, and simple to make at home!

  • Holiday Stuffed Mushroom Appetizer

    Holiday Stuffed Mushroom Appetizer

    Stuffed Mushroom Appetizer

    with Christine Waltermyer

    Christine Waltermyer is a local and renowned Wellness Chef, private chef to celebrities, published cookbook author and founder of the Natural Kitchen Cooking School, which offers an online Plant-Based Cooking Program. She also loves shopping at Basil Bandwagon! Visit naturalkitchenschool.com to subscribe to her email newsletter for new recipes, tips, and FREE access to the Power of Veggies mini-course!


    ‘Tis the season for delicious food and family gatherings! These flavorful stuffed mushrooms will add a nice touch to your holiday entertaining buffet. Featuring ingredients found at your local Basil Bandwagon Natural Market.

    Stuffed Mushroom Appetizer

    Course Appetizer, Snack
    Keyword appetizer, holiday, snack
    Servings 12

    Ingredients

    • 16 ounces button mushrooms cleaned and stems removed
    • ¼ cup avocado oil
    • 1 tablespoon olive oil
    • ¼ cup diced shallot
    • ½ cup finely diced carrot (about 1 medium carrot)
    • Sea salt
    • cup mushroom jerky (or sun-dried tomatoes) finely chopped
    • 2 tablespoons minced parsley
    • ¾ cup walnuts finely chopped
    • ½ cup cooked black rice
    • 1 tablespoon Annie's Worcestershire Sauce
    • Freshly ground black pepper
    • cup scallions thinly sliced

    Instructions

    • Preheat the oven to 375 degrees F. Line a baking sheet with parchment paper.
    • Finely chop the mushroom stems. Place the cleaned and de-stemmed mushroom caps on the prepared baking sheet. Lightly brush with the avocado oil. Bake, stem side facing up, for 8 to 10 minutes.
    • Make the filling mixture: In a large skillet over medium high heat, add the olive oil and the shallot. Cook and stir for a few minutes. Add the carrot and a pinch of the sea salt. Cook and stir for a few more minutes. Add the mushroom jerky. Cook a few more minutes, then add the parsley. If the vegetables stick to the skillet you can a splash of white wine or vegetable broth. Add the mushroom stems and another pinch of sea salt. Cook and stir for another minute or two. Add the walnuts and cook for another minute. Add the cooked black rice, Worcestershire sauce, black pepper and scallions. Cook and stir a few minutes more.
    • Remove the mushrooms from the oven. Drain out any liquid from the centers of the mushrooms. Fill each mushroom cap with a rounded tablespoon of the filling mixture. Press the filling firmly, squeezing it over the mushroom cap.
    • Bake the stuffed mushrooms for 10 more minutes at 375 degrees F. Serve warm or cooled to room temperature. Serve garnished with fresh parsley. Optional: Drizzle with a little balsamic glaze just before serving.
    • Enjoy!

    Thank you to Christine Waltermyer and the Natural Kitchen Cooking School for working with us to help promote healthy, nutritious meals and products that are affordable, full of nutrients, and simple to make at home!

  • Vegan Potato Soup

    Vegan Potato Soup

    Vegan Potato Soup

    with Christine Waltermyer

    Christine Waltermyer is a local and renowned Wellness Chef, private chef to celebrities, published cookbook author and founder of the Natural Kitchen Cooking School, which offers an online Plant-Based Cooking Program. She also loves shopping at Basil Bandwagon! Visit naturalkitchenschool.com to subscribe to her email newsletter for new recipes, tips, and FREE access to the Power of Veggies mini-course!


    Soups’ on! How do you keep yourself warm during the colder months? There are plenty of different ways – like warm sweaters, cozy blankets, and sitting by the fireplace. But our favorite way is enjoying a delicious hot soup with family and friends. Thanks to Christine Waltermyer and the Natural Kitchen Cooking School, we may have found our next favorite soup recipe – and it’s vegan! Featuring all products that can be found at Basil Bandwagon Natural Market 😊

    Vegan Potato Soup

    Course Lunch, Main Course, Soup
    Keyword dinner, lunch, main course, soup
    Servings 4

    Ingredients

    • 3 medium white flesh sweet potatoes such as Hannah or Japanese sweet potatoes peeled (or an equivalent amount of white potatoes)
    • 1 tablespoon olive oil
    • 1 cup onion diced (about 1 medium onion)
    • Sea salt
    • 2 stalks celery diced
    • 2 carrots peeled and diced
    • 4 cups vegetable broth
    • 1 6 oz package Lightlife Tempeh Smoky Bacon
    • Avocado oil
    • 1 cup thinly sliced leeks
    • ½ cup coconut cream

    Instructions

    • Peel the sweet potatoes. Cut into small dice pieces and place them in a pot of cold, salted water.
    • Heat a large skillet or large soup pot over medium high heat. Add the olive oil, onion and a pinch of the sea salt. Cook and stir for a few minutes. Add the carrots, celery and another pinch of sea salt. Cook and stir for five minutes. If the vegetables begin to stick to the pan add a small splash of vegetable broth or water.
    • Meanwhile, in a medium size saucepan, warm the vegetable broth over medium heat. If you used a skillet, transfer the cooked vegetables to a large soup pot. Drain the potatoes and add them to the pot. Add the warmed vegetable broth. Bring to a boil over medium high heat, then reduce the heat to simmer on medium low, lightly covered, for 20 minutes.
    • Cut the tempeh bacon strips in half. Heat a large skillet over medium heat. Add about a tablespoon of the avocado oil, then add the tempeh bacon in a single layer. Fry for a few minutes on one side, then turn to fry on the other side for a few more minutes, until lightly browned on both sides. Remove and transfer to a plate to cool. Chop the cooked tempeh into smaller pieces.
    • To the soup pot, add the coconut cream, 1 teaspoon of sea salt and a few grinds of freshly ground black pepper. Puree one third of the soup by using an immersion blender. Or, place a few cups of the soup into a blender and blend until smooth. Return the pureed soup to the pot and stir to combine.
    • In the large skillet, heat another 2 teaspoons of the avocado oil. Add the leeks, a pinch of sea salt and a few grinds of black pepper. Cook and stir for 5 to 10 minutes, or until the leeks are very tender and lightly browned. Serve the soup hot, topping each bowl with a tablespoon of the tempeh bacon bits and a couple of teaspoons of sautéed leeks.
    • Enjoy!

    Thank you to Christine Waltermyer and the Natural Kitchen Cooking School for working with us to help promote healthy, nutritious meals and products that are affordable, full of nutrients, and simple to make at home!

  • Holiday Frosted Sugar Cookies

    Holiday Frosted Sugar Cookies

    Holiday Frosted Sugar Cookies

    with Christine Waltermyer

    Christine Waltermyer is a local and renowned Wellness Chef, private chef to celebrities, published cookbook author and founder of the Natural Kitchen Cooking School, which offers an online Plant-Based Cooking Program. She also loves shopping at Basil Bandwagon! Visit naturalkitchenschool.com to subscribe to her email newsletter for new recipes, tips, and FREE access to the Power of Veggies mini-course!


    Impress your friends at this year’s cookie exchange with Christine Waltermyer’s Holiday Frosted Sugar Cookies! This sweet recipe can be decorated any way you’d like – maybe plant-based food dyes? How about festive Supernatural sprinkles? The sky’s the limit!

    Share your special creations by tagging us on social media:

    Instagram – @basilbandwagon & @naturalkitchenschool

    Facebook – @BasilBandwagonOfficial & @NaturalKitchenCookingSchool

    Find these ingredients at your local Basil Bandwagon Natural Market today!

    Holiday Frosted Sugar Cookies

    Course Dessert
    Keyword cookies, dessert, holiday
    Servings 24 cookies

    Ingredients

    • ¼ cup ghee or butter of your choice
    • 6 tablespoons maple syrup
    • 1 room temperature egg
    • 1 teaspoon pure vanilla extract
    • 1 ¾ cup fine almond flour
    • ¼ cup arrowroot flour
    • ¼ cup cassava flour
    • ¼ teaspoon sea salt
    • ½ teaspoon cream of tartar

    Toppings

    • Simple Mills frosting
    • sprinkles of your choice (I used Supernatural Sprinkles)
    • colored sugar
    • coconut sugar
    • cinnamon

    Instructions

    • In a large bowl (or stand mixer or food processor), combine the ghee, maple syrup, egg and vanilla. Whisk well to blend.
    • Add the almond flour, arrowroot flour, cassava flour, sea salt and cream of tartar. Whisk again or use a fork to combine into a smooth dough.
    • Wrap the dough with plastic wrap and form into a flat disc. Refrigerate for two hours.
    • Preheat the oven to 350 degrees F. Line a baking sheet with parchment paper. Place the chilled dough on a piece of parchment paper. Place another piece of parchment paper on top. Roll out the dough to desired thickness, about ¼-inch thick. Or you can make it slightly thinner if you prefer. Use cookie cutters or a glass jar to cut out shapes of your choice.
    • Transfer the cut out cookies onto the prepared baking sheet. If you want to make some cinnamon sugar variety, top them with a mixture of half coconut sugar mixed with half cinnamon. Leave the rest of the cookies plain for frosting later when cool. Bake for 10 minutes, or until lightly golden on the bottoms.
    • Cool the cookies. Prepare your toppings. If you want to add food coloring to white frosting, place ½ cup of the frosting in a small bowl and add a teaspoon of the desired dry food coloring powder. If using liquid food coloring drops you will need less. Mix until completely uniform in color. Carefully frost the cookies and add sprinkles of your choice. Store cookies in a single layer in a glass storage container, lightly covered.
    • Enjoy!

    Thank you to Christine Waltermyer and the Natural Kitchen Cooking School for working with us to help promote healthy, nutritious meals and products that are affordable, full of nutrients, and simple to make at home!

  • Paleo Pumpkin Pudding

    Paleo Pumpkin Pudding

    Paleo Pumpkin Pudding

    with Christine Waltermyer

    Christine Waltermyer is a local and renowned Wellness Chef, private chef to celebrities, published cookbook author and founder of the Natural Kitchen Cooking School, which offers an online Plant-Based Cooking Program. She also loves shopping at Basil Bandwagon! Visit naturalkitchenschool.com to subscribe to her email newsletter for new recipes, tips, and FREE access to the Power of Veggies mini-course!


    Tuesday, 10/26/21 is National Pumpkin Day! 🎃 What’s your favorite way to incorporate pumpkins this fall? Whether it’s as a decoration, gutted out for the seeds, or used in a recipe, the possibilities are endless. Christine Waltermyer and the Natural Kitchen Cooking School have picked the perfect recipe… that’s gluten-free AND egg-free! Shop all of the needed ingredients for this Paleo Pumpkin Pudding in all of our locations today!

    Paleo Pumpkin Pudding

    Course Appetizer, Breakfast, Dessert, Snack
    Keyword appetizer, breakfast, custard, dessert, egg free, fall, gluten free, paleo, pudding, pumpkin, snack

    Ingredients

    • 1 small pumpkin to make ¾ cup pumpkin puree from scratch, or use canned
    • ½ teaspoon agar powder
    • 2 tablespoons warm water
    • ¾ cup cooked pumpkin purée
    • 1 ½ cups full-fat coconut milk
    • ¼ cup maple syrup
    • 1 tablespoon creamy almond butter
    • 1 teaspoon pumpkin pie spice
    • teaspoon sea salt
    • ½ teaspoon vanilla bean powder

    Coconut Whipped Cream

    • 1 (13.5 oz.) can heavy coconut cream refrigerated overnight
    • 2 tablespoons powdered monkfruit sweetener
    • ¼ teaspoon vanilla bean powder
    • nutmeg for garnish

    Instructions

    • Prep and cook the pumpkin if using: Cut the pumpkin in half. Use a large spoon to remove the seeds. Cut into big chunks. Place the chunks into a medium size saucepan. Add enough water to cover the bottom of the pan by one inch. Cover and bring to a boil over medium high heat. Reduce to simmer on medium low, covered, for 25 minutes, or until easily pierced with a fork. Transfer to a blender and blend until smooth.
    • In a small bowl, mix together the agar powder and warm water.
    • In a blender or food processor, combine ¾ cup of the pumpkin purée, coconut milk, maple syrup, almond butter, pumpkin pie spice, sea salt and vanilla bean powder. Blend for a minute or two. Transfer to a medium saucepan.
    • Over medium-high heat, bring the pumpkin mixture to a gentle boil, stirring occasionally. Stir in the agar-water mixture. Whisk well. Reduce the heat to low, cover, and cook for 20 minutes, whisking occasionally.
    • Meanwhile, make the coconut whipped cream: Place the heavy coconut cream, powdered monkfruit sweetener and vanilla bean powder in a blender. Blend until smooth. Drain any excess liquid that separates from the cream. Set aside. I don’t recommend chilling as it will get too hard.
    • Remove the pumpkin custard mixture from the heat. Transfer to 3 or 4 small pudding dishes. Cool to room temperature, then chill for 1 hour before serving. Serve the pumpkin custard with a dollop of coconut whipped cream and a pinch of nutmeg.
    • Enjoy!

    Notes

    Leftover pumpkin custard will keep in the refrigerator for up to 4 days.

    Thank you to Christine Waltermyer and the Natural Kitchen Cooking School for working with us to help promote healthy, nutritious meals and products that are affordable, full of nutrients, and simple to make at home!

  • 6 Easy Breakfast & Lunch Ideas thanks to Christine Waltermyer!

    6 Easy Breakfast & Lunch Ideas thanks to Christine Waltermyer!

    6 Easy Breakfast & Lunch Ideas

    thanks to Christine Waltermyer

    Christine Waltermyer is a local and renowned Wellness Chef, private chef to celebrities, published cookbook author and founder of the Natural Kitchen Cooking School, which offers an online Plant-Based Cooking Program. She also loves shopping at Basil Bandwagon! Visit naturalkitchenschool.com to subscribe to her email newsletter for new recipes, tips, and FREE access to the Power of Veggies mini-course!


    We’re more than halfway through the first half of this school year! 🤓 What better time to switch up your breakfast and lunch routines. Christine Waltermyer and the Natural Kitchen Cooking School have whipped up 6 easy recipes for us – 3 before-school breakfasts to keep them full until lunch 🧇 & 3 school lunch ideas that your kids will look forward to eating! 🥗

    Easy Before-School Breakfast Ideas

    Carob Smoothie

    Course Breakfast
    Keyword breakfast, easy, smoothie
    Servings 1

    Ingredients

    • ¼ cup shredded coconut
    • 1 cup water
    • 1 ripe avocado pitted and peeled
    • ¼ cup cooked pumpkin puree
    • dash sea salt
    • 1 heaping tablespoon carob or cacao powder
    • teaspoon vanilla powder
    • stevia or honey to taste

    Instructions

    • Place the shredded coconut and water into a blender. Blend on high for a few minutes, scraping down the sides as needed. Strain through a nut milk bag if desired.
    • In the blender, place the milk and all remaining ingredients. Puree until smooth.
    • Optional: Add a scoop of your favorite protein powder or some walnuts to add protein to this smoothie.
    • Enjoy!

    Carrot Spice Waffles with Maple Almond Butter

    Course Breakfast
    Keyword breakfast, easy, waffles
    Servings 2

    Ingredients

    • ¾ cup almond flour
    • 2 tablespoons coconut flour
    • ½ teaspoon sea salt
    • 1 teaspoon baking powder
    • ½ teaspoon vanilla powder
    • ½ teaspoon pumpkin pie spice or ground cinnamon
    • 2 tablespoons Lakanto monk fruit sweetener with erythritol
    • ½ cup unsweetened almond milk
    • ¼ cup avocado oil or melted coconut oil optional
    • 2 eggs
    • ½ cup shredded carrot

    Maple Almond Butter Topping:

    • ¼ cup almond butter
    • ¼ cup maple syrup

    Instructions

    • In a large bowl, combine the almond flour, coconut flour, sea salt, baking powder, vanilla powder, pumpkin pie spice, and monk fruit sweetener. Whisk to blend together.
    • Add the almond milk and optional avocado oil if using. In a small bowl, beat the eggs, then add them to the almond flour mixture. Stir well. Add the shredded carrot and fold in gently.
    • Preheat the waffle iron. Just before adding the batter, lightly brush with a silicone brush or spray the waffle iron with a little avocado oil or coconut oil. Using a spoon or measuring cup, quickly add half of the batter (about 1 cup). Spread it evenly over the waffle iron, then close it.
    • If you have the kind of waffle iron you can flip, cook for about 2 to 3 minutes on one side, then flip it. Cook for an additional 2 ½ minutes on the other side. If you have a regular waffle iron that does not flip, just cook for 4 to 5 minutes.
    • Carefully open the waffle iron. Let the cooked waffle cool slightly before removing. Repeat with remaining batter.
    • To make the maple almond butter topping: In a small bowl, mix together the almond butter and maple syrup. Serve the waffles warm, spread with the maple almond butter.
    • Enjoy!

    Egg Muffin Cups

    Course Breakfast
    Keyword breakfast, eggs, muffins
    Servings 12 cups

    Ingredients

    • cup diced red onion
    • water or cooking oil of your choice
    • sea salt
    • cup carrot finely diced
    • 10 large eggs
    • 1 teaspoon prepared dijon mustard
    • ½ teaspoon salt
    • a few pinches freshly ground black pepper
    • coconut oil or avocado oil for the muffin tin
    • 1 cup cooked broccoli florets

    Instructions

    • Heat a medium size cast iron skillet or other skillet of your choice over medium heat. Add the red onion, a small splash of water and a pinch of the sea salt. Cook for a few minutes, until they start to soften. Add the carrots, and another pinch of sea salt and splash of water. Cook for another few minutes, or until all vegetables are tender.
    • Crack all of the eggs into a large bowl. Beat the eggs. Add the Dijon mustard, sea salt and black pepper. Stir again.
    • Preheat the oven to 350 degrees F.
    • Prepare your muffin tin by generously greasing each muffin cup with some coconut oil or avocado oil. Add a spoonful of the cooked red onion-carrot mixture to each cup, evenly distributing the veggies among the 12 muffin cups.
    • Pour some of the egg mixture into each muffin cup, dividing equally. Bake for 25 minutes or until the tops are set and no longer wet. Cool for 15 minutes. Use a knife around the edges to release the egg muffin cups from the muffin tin.
    • Enjoy!

    Notes

    Store in the refrigerator for up to 5 days.

    School Lunch Ideas

    Salmon Patties with Dill Sauce

    Course Lunch, Main Course
    Keyword Kids, lunch, patties, salmon

    Ingredients

    • 15 ounces canned wild-caught salmon (or cooked fresh salmon)
    • 2 eggs
    • cup almond flour
    • 2 scallions thinly sliced
    • ¼ cup minced parsley
    • ½ teaspoon sea salt (+ more for sprinkling on the finished patties)
    • a few grinds of freshly cracked black pepper
    • 2 tablespoons avocado oil or coconut oil for frying

    For the Dill Sauce:

    • ½ cup avocado mayonnaise
    • 1 teaspoon dijon mustard
    • 1 tablespoon fresh dill finely chopped
    • 2 teaspoons lemon juice

    Instructions

    • Drain the canned salmon and place in a large bowl.
    • Add the eggs, almond flour, scallions, parsley, sea salt and pepper. Mix well, cover and refrigerate for 15 minutes.
    • Form the salmon mixture into 7 or so patties.
    • Heat a large skillet over medium heat. Add the avocado or coconut oil, and quickly add the salmon patties. Depending on the size of your skillet, you can add all of them or just 4 patties at a time.
    • Cook for about 4 or 5 minutes on one side. Using a spatula, carefully turn each patty. Fry for another few minutes on the other side.
    • To make the dill sauce: In a small bowl, combine all of the dill sauce ingredients. Stir well. Serve the salmon patties warm, drizzled with the dill sauce.
    • Enjoy!

    Salmon Salad with Lettuce Cups

    Course Lunch, Main Course
    Keyword Kids, lunch, salad, salmon

    Ingredients

    • 8 ounces frozen wild salmon thawed
    • sea salt & pepper
    • 1 tablespoon avocado oil or coconut oil
    • 2 tablespoons celery minced
    • 1 tablespoon onion minced
    • 2 teaspoons lemon juice
    • 2 teaspoons fresh dill finely chopped
    • cup avocado mayonnaise
    • To Serve: butter lettuce, radicchio

    Instructions

    • Pat the salmon dry using a paper towel. Sprinkle with sea salt and pepper.
    • Heat a skillet over medium heat. Add the avocado oil, then quickly add the salmon, flesh side-down. Cook uncovered for 4 to 5 minutes. Use a spatula to turn the salmon. Cook for three more minutes on the other side.
    • Once the salmon has cooled to the touch, remove any bones. You can also remove the skin and gray-colored fat if desired. Using a fork, flake the salmon apart. Place the prepared salmon in a large bowl.
    • Add the celery, onion, lemon juice, sea salt and pepper to taste, fresh dill and mayonnaise. Stir to combine and adjust seasoning to taste.
    • Fill radicchio or butter lettuce leaves with a generous spoonful of the salmon salad per leaf.
    • Enjoy!

    Broccoli & Carrots with Homemade Guacamole

    Course Lunch, Snack
    Keyword guacamole, Kids, lunch, snack, vegetables
    Servings 2

    Ingredients

    • 1 cup carrot sticks or flat planks
    • 1 cup broccoli – a combination of broccoli florets & peeled stems sliced
    • sea salt
    • 1 avocado pitted
    • 2 teaspoons fresh cilantro chopped
    • ½ teaspoon sea salt or to taste
    • black pepper to taste
    • 1 tablespoon chopped onion
    • 1 teaspoon fresh lime juice or more to taste

    Instructions

    • In a medium saucepan, bring a few inches of lightly salted water to a boil over medium high heat. Keep a strainer or colander nearby, with a plate underneath. Drop the broccoli florets and peeled stems into the water. Cook for a few minutes.
    • Remove the broccoli with a slotted spoon. Place them in the strainer to cool.
    • Bring the water back to a boil, then drop in the carrot planks. Cook for a few minutes. Remove the carrot planks with a slotted spoon. Place them in the strainer to cool.
    • Make the guacamole: In a large bowl, mash the avocados. Add the sea salt and black pepper to taste. Add the lime juice, cilantro, chopped onion and lime juice. Stir well.
    • Serve the cooled vegetables and guacamole, or pack them into a portioned lunch container as a snack on the go.
    • Enjoy!

    Thank you to Christine Waltermyer and the Natural Kitchen Cooking School for working with us to help promote healthy, nutritious meals and products that are affordable, full of nutrients, and simple to make at home!

  • You’ll APPLE-solutely LOVE This!

    You’ll APPLE-solutely LOVE This!

    Celebrate National Apple Day on 10/21/21

    with Christine Waltermyer

    Christine Waltermyer is a local and renowned Wellness Chef, private chef to celebrities, published cookbook author and founder of the Natural Kitchen Cooking School, which offers an online Plant-Based Cooking Program. She also loves shopping at Basil Bandwagon! Visit naturalkitchenschool.com to subscribe to her email newsletter for new recipes, tips, and FREE access to the Power of Veggies mini-course!


    Christine Waltermyer and the Natural Kitchen Cooking School are awesome to the CORE! 🍎Whether you pick-your-own or you pick some up the next time you’re shopping with us, we have the perfect recipe for you – and it’s GRAIN-FREE! Just in time for National Apple Day on Thursday, October 21, 2021. Trust us, you’ll live apple-ly ever after once you’ve made some at home! (Okay, we’ll stop with the apple puns now 😄)

    Grain-Free Apple Dumplings

    Course Breakfast, Dessert, Side Dish
    Keyword apple, breakfast, dessert, dumplings, grain-free, side
    Servings 3

    Ingredients

    • 3 apples peeled and cored
    • 1 tablespoon butter of your choice
    • ½ cup butter of your choice
    • 2 teaspoons monkfruit sweetener with erythritol + extra for sprinkling the apples before baking
    • 1 teaspoon cinnamon
    • 1 ½ cups almond flour divided
    • 1 tablespoon coconut flour
    • 2 tablespoons arrowroot powder
    • ½ teaspoon sea salt
    • ½ teaspoon baking powder
    • ¼ cup almond milk

    Sauce

    • 1-2 cups water
    • 1 teaspoon arrowroot powder + 1 tablespoon cold water
    • ½ cup monkfruit erythritol sweetner
    • 2 tablespoons butter of your choice
    • 1 teaspoon molasses
    • ½ teaspoon cinnamon
    • Few pinches sea salt

    Instructions

    • Lightly oil a medium size baking dish.
    • Slice a thin piece off the bottom of each apple so that they sit evenly. In a small bowl, combine together 1 tablespoon of the butter, 1 teaspoon of the monkfruit sweetener and cinnamon. Fill each apple with a spoonful of this mixture.
    • Make the dough: In a food processor, combine ¾ cup of the almond flour, coconut flour, arrowroot powder, sea salt, baking powder and 1 teaspoon of the monkfruit sweetener. Process to blend. Add ½ cup of cold, cubed butter. Add the almond milk. Add the remaining ¾ cup almond flour. Blend again. Turn the dough onto a piece of parchment paper dusted with arrowroot powder. Shape the dough into a flat disk. Cut into 3 equal size pieces and reform the pieces into a round flat disk. Wrap each disk of dough with parchment paper or plastic wrap. Chill in the refrigerator for 30 minutes.
    • Make the sauce: In a small saucepan, place the water. Use less water for a sweeter, more concentrated sauce. Or use 2 cups if you like more sauce with your dumplings. In a small bowl, stir together the arrowroot and the tablespoon of cold water. To the saucepan, add the monk fruit sweetener, butter, molasses, diluted arrowroot, cinnamon and sea salt. Simmer over medium low heat for 30 minutes. If you like your sauce sweeter, feel free to add more sweetener.
    • Preheat the oven to 350 degrees F. Remove chilled dough from the refrigerator. Place one disk of dough between two sheets of parchment paper. Roll into a 6-inch circle. Place one of the prepared apples in the center of the dough. Use the parchment paper to wrap the dough up around the sides of the apple, covering it with the circle of dough. Repeat with remaining dough and apples. Place the apples in the prepared baking dish. Bake for 30 minutes.
    • Spoon the sauce over the apples to fill the baking dish. Sprinkle with a little extra monkfruit sweetener. Bake for another 20 minutes. Serve warm, drizzled with the sauce.
    • Enjoy!

    Thank you to Christine Waltermyer and the Natural Kitchen Cooking School for working with us to help promote healthy, nutritious meals and products that are affordable, full of nutrients, and simple to make at home!

  • Happy National Chocolate Chip Day with Christine Waltermyer

    Happy National Chocolate Chip Day with Christine Waltermyer

    Happy National Chocolate Chip Day

    with Christine Waltermyer

    Christine Waltermyer is a local and renowned Wellness Chef, private chef to celebrities, published cookbook author and founder of the Natural Kitchen Cooking School, which offers an online Plant-Based Cooking Program. She also loves shopping at Basil Bandwagon! Visit naturalkitchenschool.com to subscribe to her email newsletter for new recipes, tips, and FREE access to the Power of Veggies mini-course!


    Frozen Chocolate-Covered Bananas

    Course Appetizer, Dessert, Snack
    Keyword appetizer, Bananas, Chocolate, Chocolate chips, dessert, Kid snacks, Kids, snack
    Servings 8

    Equipment

    • 8 popsicle sticks (wooden or plastic)

    Ingredients

    • 4 Ripe bananas peeled
    • 1 cup (8 oz.) chocolate chips or carob chips
    • 2 tablespoons coconut oil

    Toppings of your choice, such as

    • Shredded coconut
    • Flaked sea salt
    • Naturally-colored sprinkles
    • Freeze-dried raspberries
    • Dried apple chips ground up
    • Roasted nuts (pecans or pistachios)

    Instructions

    • Cut the bananas in half lengthwise. Place each banana half (wider end) on a popsicle stick. Place the banana halves on a parchment-lined plate or container. Freeze for a minimum of 2 hours.
    • Arrange your toppings in little bowls. Melt the chocolate chips in a double boiler or a stainless steel bowl placed on top of a saucepan filled with simmering hot water on medium heat. Add the coconut oil. Whisk occasionally until melted.
    • Use a silicone brush to brush the melted chocolate onto the frozen bananas. While the chocolate is still soft, sprinkle with any toppings of your choice. Work quickly as the chocolate freezes quickly. Place on parchment or wax paper to set. Refreeze the bananas, storing in an air-tight container.
    • Enjoy!

    Notes

    Note: Instead of putting the bananas on sticks, you can just slice them before coating with melted chocolate and toppings.

    Vegan Cookie Dough Truffles

    Course Dessert, Snack
    Keyword dessert, kid friendly, Kid snacks, vegan
    Servings 8

    Ingredients

    • 1 cup gluten-free oat flour
    • 2 tablespoons maple syrup
    • 1 tablespoon coconut oil softened
    • 1 tablespoon almond butter
    • 1 teaspoon pure vanilla extract
    • 1 pinch sea salt
    • 8 oz. chocolate chips or carob chips divided
    • 2 tablespoons chocolate chips or carob chips divided
    • flaked sea salt optional

    Instructions

    • In a bowl, mix together the oat flour, maple syrup, coconut oil, almond butter, vanilla extract and sea salt. Stir well, then add 2 tablespoons of the carob chips. Roll into 8 bite-size little balls. Feel free to double the recipe if you want a larger batch. Refrigerate the cookie dough balls for about 12 minutes.
    • Using a double boiler or a stainless steel bowl placed over a saucepan of boiling water, melt the chocolate chips or carob chips. One at a time, drop the chilled cookie dough balls into the melted chocolate, turning it to completely cover it. Carefully place on a piece of parchment paper. Repeat with the remaining cookie dough balls. Feel free to sprinkle with flaked sea salt before they cool and harden. You can also use a spoon to drizzle a little extra melted chocolate on top. Chill the cookie dough balls again before serving.
    • Enjoy!

    Thank you to Christine Waltermyer and the Natural Kitchen Cooking School for working with us to help promote healthy, nutritious meals and products that are affordable, full of nutrients, and simple to make at home!