Tag: dinner

  • Chicken with Spiced Rice

    Chicken with Spiced Rice

    Chicken with Spiced Rice


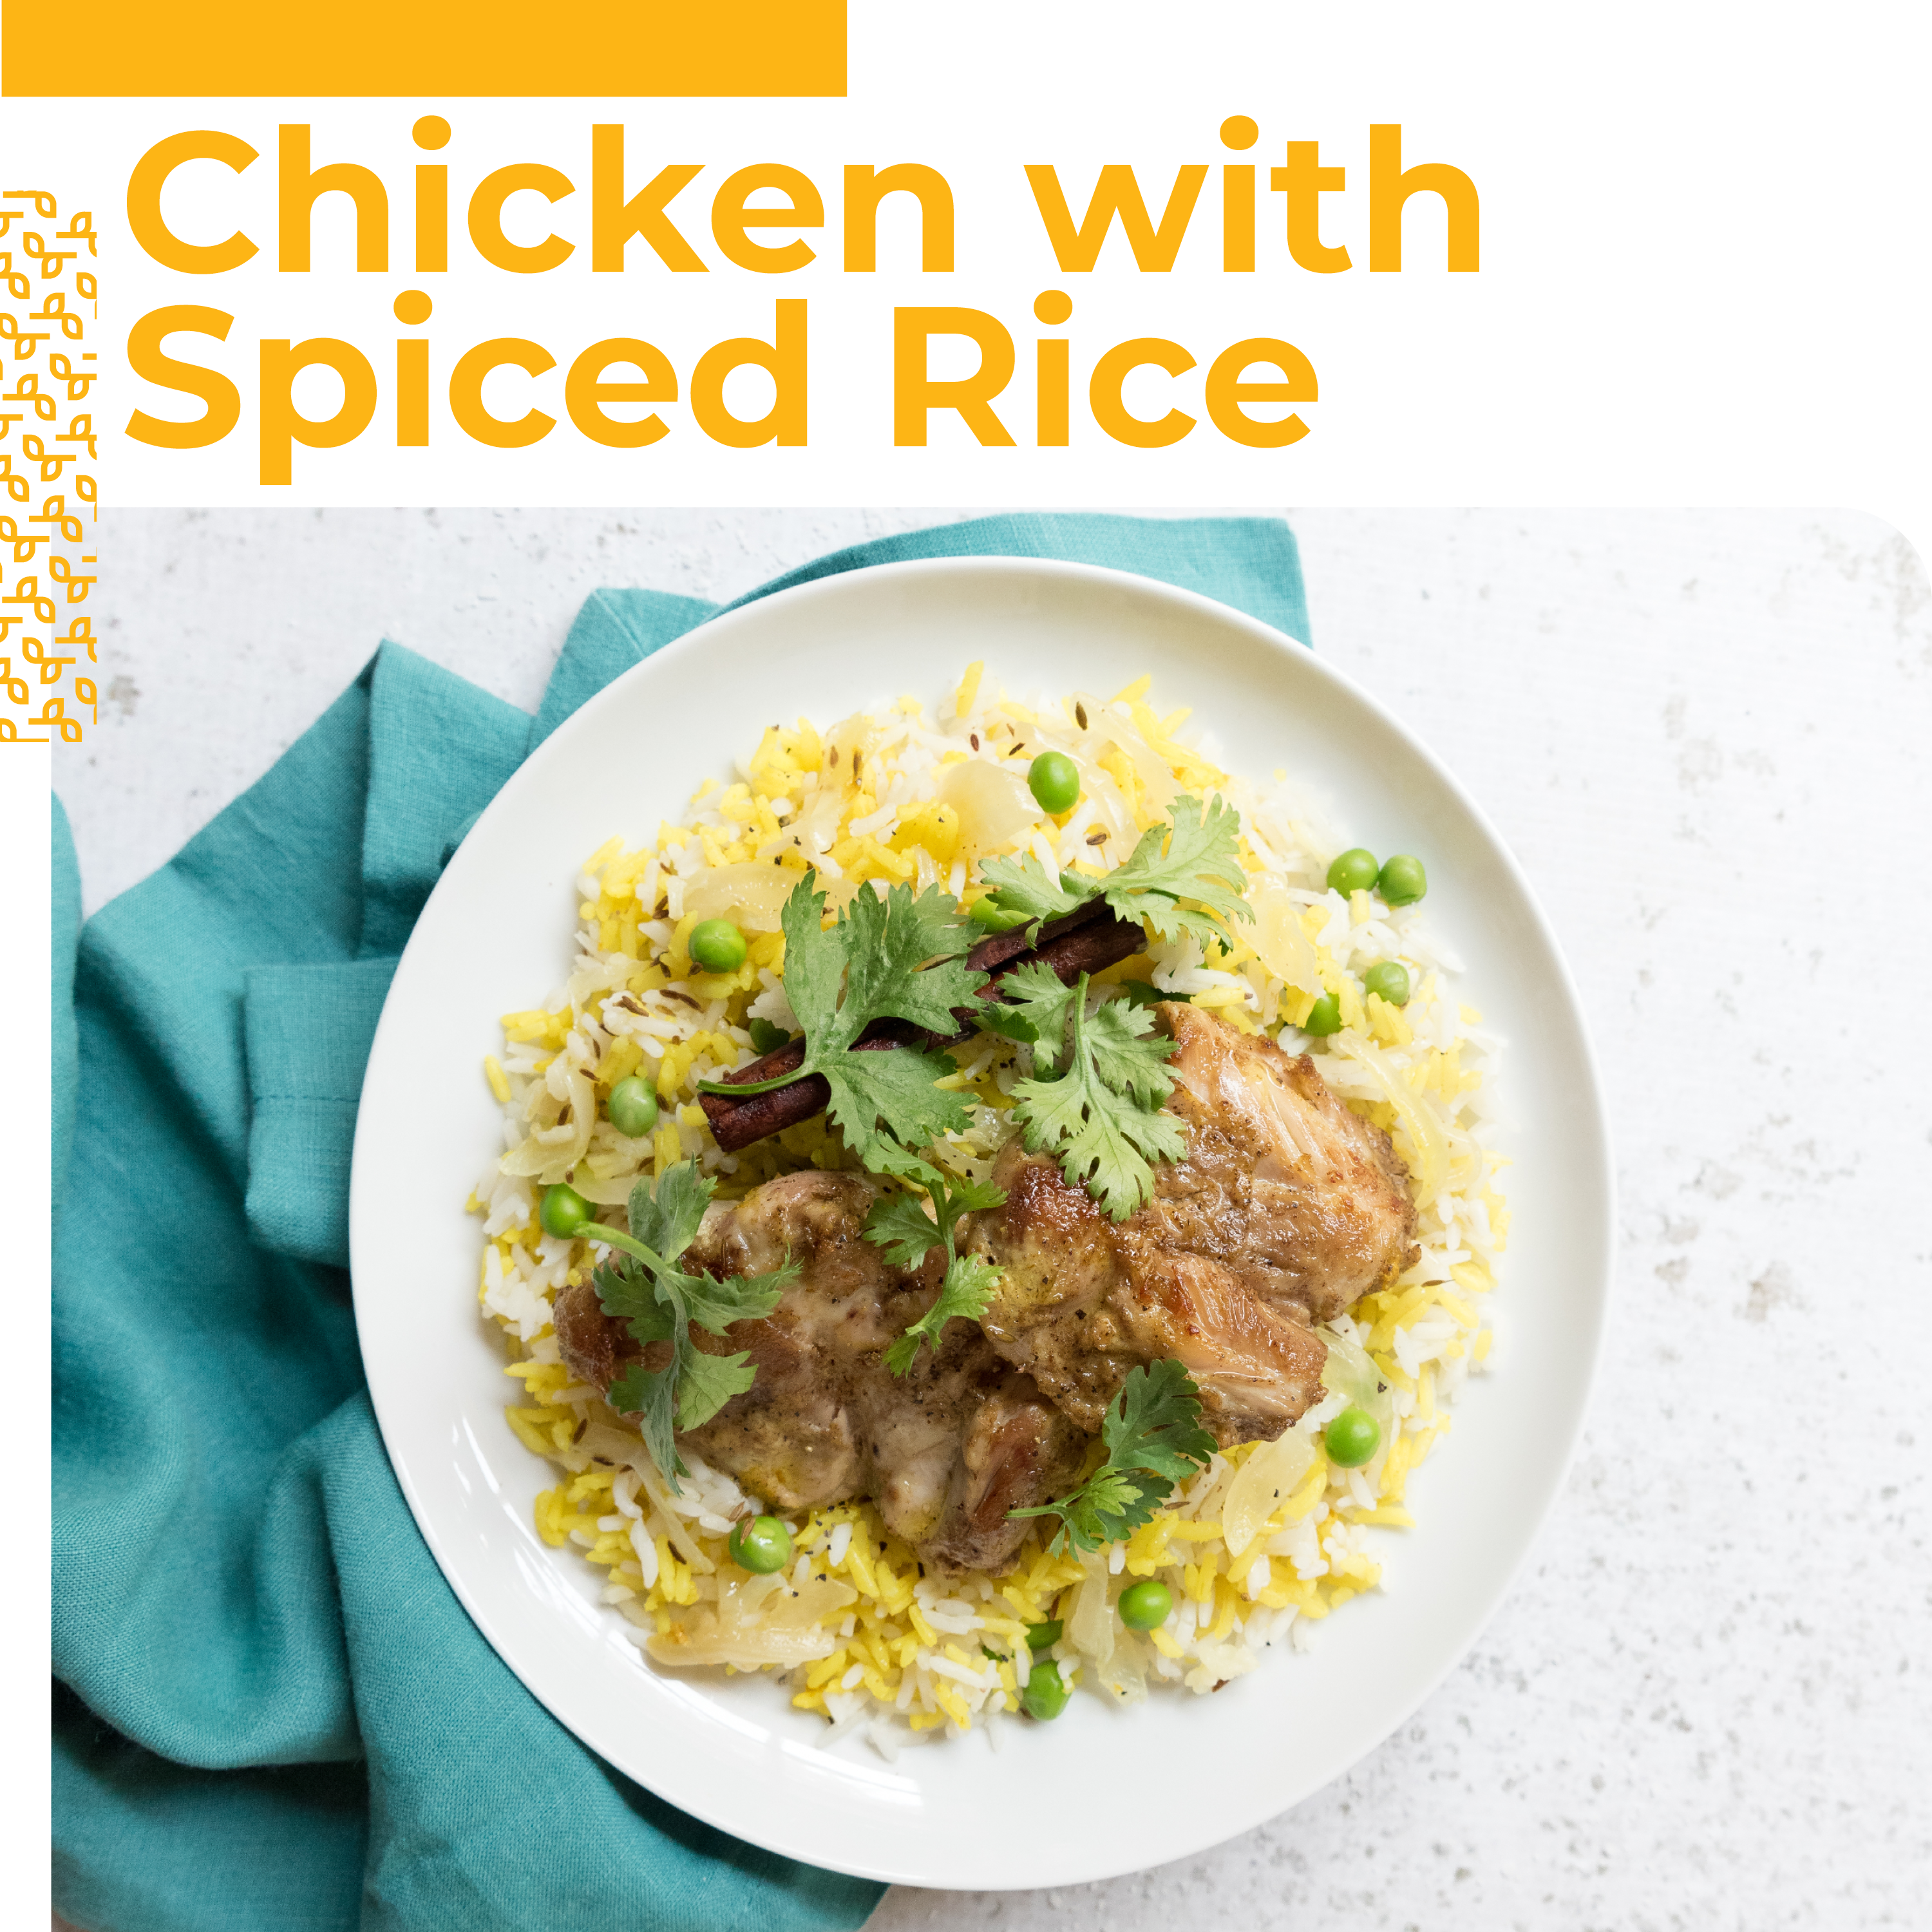
    This Chicken with Spiced Rice is a simple, flavorful one pan dinner! You can practically set it and forget it. Check your pantry and freezer; you might have everything you need to make this for dinner tonight. If not, we’ve got everything you’ll need to be the dinner hero tonight. While it bakes, you can catch up on your favorite show, do a quick load of dishes, or whip up a quick lemon yogurt sauce that pairs perfectly. Serve with a simple green salad, and for a complete meal, bake a nice snacking cake alongside the chicken. You’ve already got the oven on, right? 

    Chicken with Spiced Rice

    This Chicken with Spiced Rice is a simple, flavorful one pan dinner! You can practically set it and forget it. Check your pantry and freezer, you might have everything you need to make this for dinner tonight.
    Servings: 4
    Course: entree, Lunch

    Ingredients
      

    • 1 pound boneless, skinless chicken thighs
    • 2 tablespoons olive oil
    • 1 teaspoon garam masala
    • 1 teaspoon turmeric divided
    • ¼ teaspoon sea salt
    • 2 tablespoons ghee
    • 1 small yellow onion diced
    • 1 cinnamon stick
    • 2 cardamom pods
    • 1 teaspoon cumin seeds
    • 1 tablespoon minced garlic
    • 1 tablespoon minced ginger
    • 1 cup basmati rice
    • 1 cup cold water
    • ½ teaspoon sea salt
    • cup frozen peas
    • Cilantro for garnish

    Method
     

    1. Place chicken, olive oil, garam masala, ¼ teaspoon turmeric, and salt in a bowl and toss to coat. Cover and marinate for four hours to overnight in the fridge.
    2. Preheat oven to 350ºF. Heat ghee in a 1.5-quart saucepan over medium heat. Add onion, cinnamon stick, cardamon pods, and cumin seeds. Sauté until onions are translucent. Stir in garlic and ginger and cook for one minute.
    3. Add rice, water, ¾ teaspoon turmeric, and salt to pan and bring to a simmer. Submerge chicken and cover.
    4. Bake for 35-40 minutes or until water has been absorbed. Remove from oven, add peas and rest covered for 10 minutes before serving. Garnish with cilantro if desired.
    5. Enjoy!

    Recipe Provided by INFRA

  • Korean Ground Beef Bowl

    Korean Ground Beef Bowl

    Korean Ground Beef Bowl

    Thanks to Christine Waltermyer & The Natural Kitchen Cooking School!

    Christine Waltermyer is a local and renowned Wellness Chef, private chef to celebrities, published cookbook author and founder of the Natural Kitchen Cooking School, which offers an online Plant-Based Cooking Program. She also loves shopping at Basil Bandwagon! Visit naturalkitchenschool.com to subscribe to her email newsletter for new recipes, tips, and FREE access to the Power of Veggies mini-course!


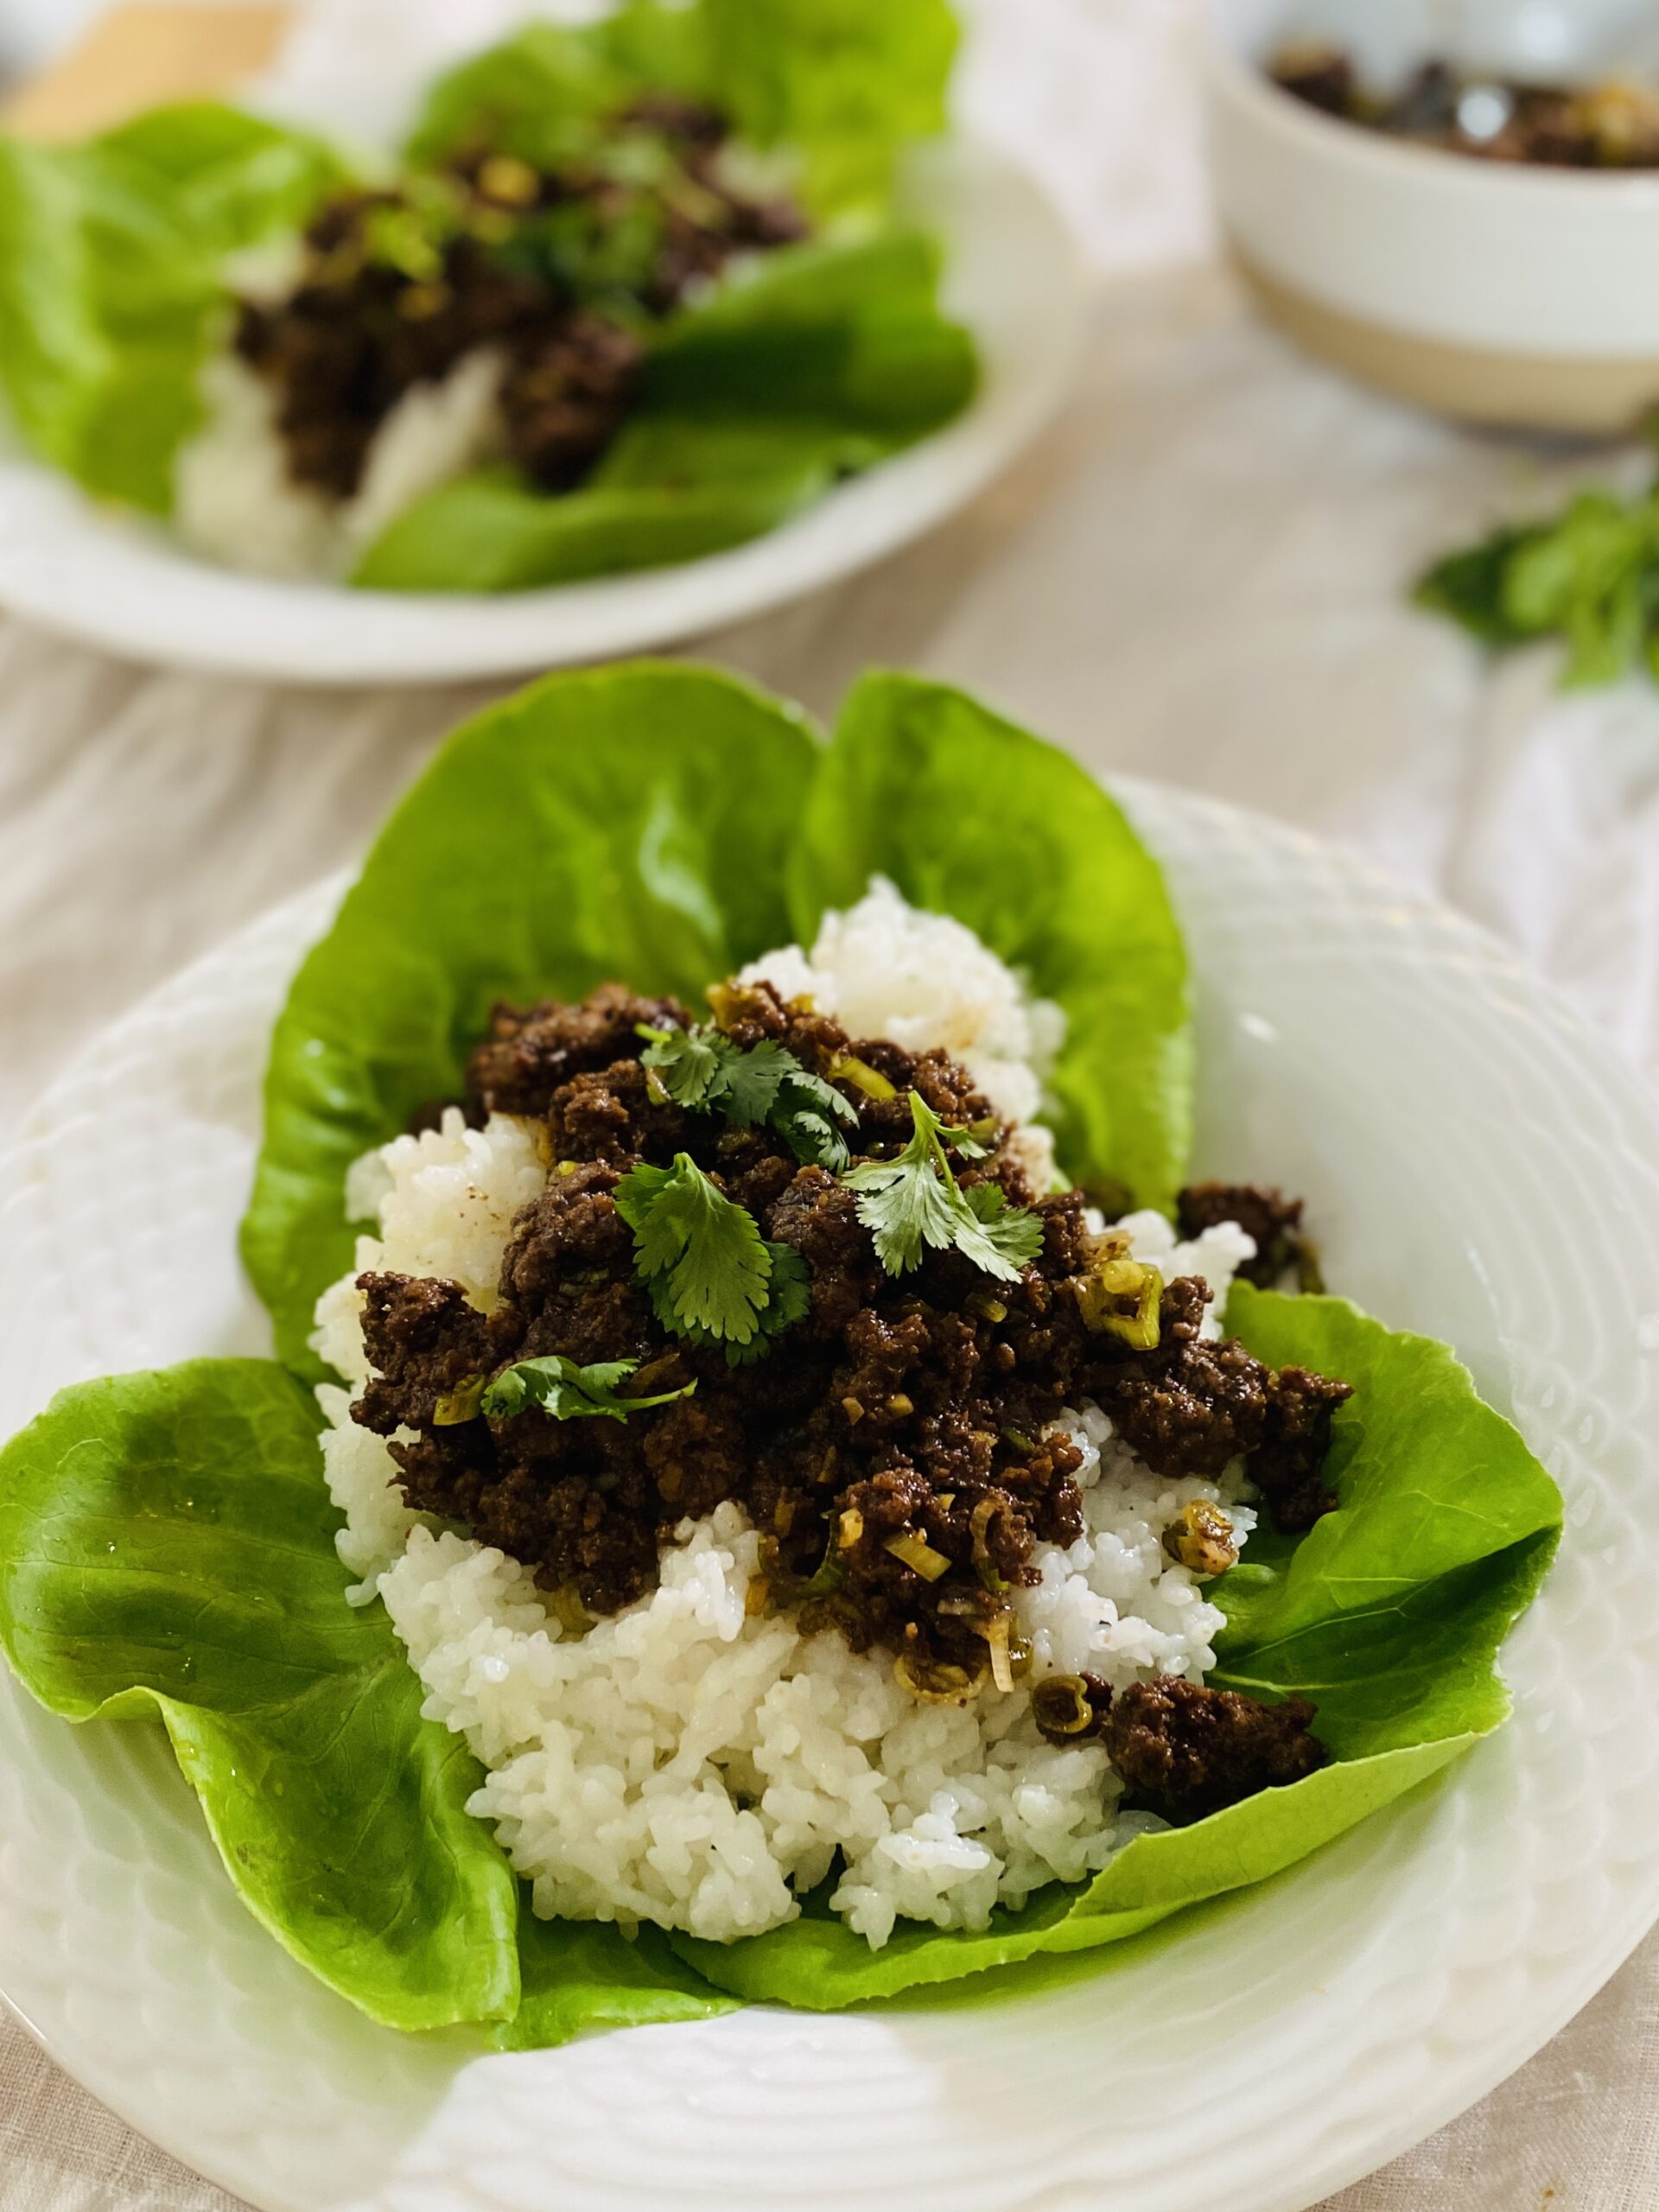
    Looking for a quick and easy weeknight dinner? How about Korean Ground Beef Bowls! Customize it any way you like – add crushed red pepper flakes to make it spicy or chopped unsalted peanuts for a little extra crunch 😋

    Korean Ground Beef Bowl

    Course dinner, entree, Lunch
    Keyword bowl, dinner, entree, lunch
    Servings 4

    Ingredients

    • 2 cups uncooked Lundberg white sushi rice
    • 3 cups water
    • ¼ cup brown sugar packed
    • ¼ cup coconut aminos
    • 1 pound ground beef
    • 1 teaspoon minced fresh ginger
    • 2 cloves garlic minced
    • 2 green onions thinly sliced
    • ¼ cup chopped fresh cilantro
    • 4 large butter lettuce cups to serve

    Instructions

    • Use a fine mesh strainer to rinse the rice for 1 to 2 minutes, until the water runs clear. Place the rinsed rice in a medium saucepan. Add the 3 cups fresh water. Let the rice soak for 30 minutes. This helps to soften it and make the rice more digestible.
    • After 30 minutes, bring the soaked rice and water to a boil. Reduce the heat to low and cover the saucepan. Cook for 20 minutes. Remove from the heat and let the rice sit, covered, for another 10 minutes.
    • Meanwhile, prepare the sauce. In a small bowl, whisk together the brown sugar and coconut aminos.
    • Heat a large skillet over medium high heat. Add the ground beef, ginger and garlic. Break up the beef as it cooks and stir the ginger and garlic. Cook for 3 to 5 minutes.
    • Add the brown sugar-coconut aminos mixture to the beef. Stir well to combine. Cook for 1 minute. Add the scallions. Cook for 1 more minute.
    • Place a washed lettuce leaf on a plate or in a shallow serving bowl. Carefully add a scoop of the cooked rice. Serve the beef over the rice. Garnish with the cilantro.
    • Enjoy!

    Thank you to Christine Waltermyer and the Natural Kitchen Cooking School for working with us to help promote healthy, nutritious meals and products that are affordable, full of nutrients, and simple to make at home!

  • Red Thai Curry Noodles

    Red Thai Curry Noodles

    Red Thai Curry Noodles


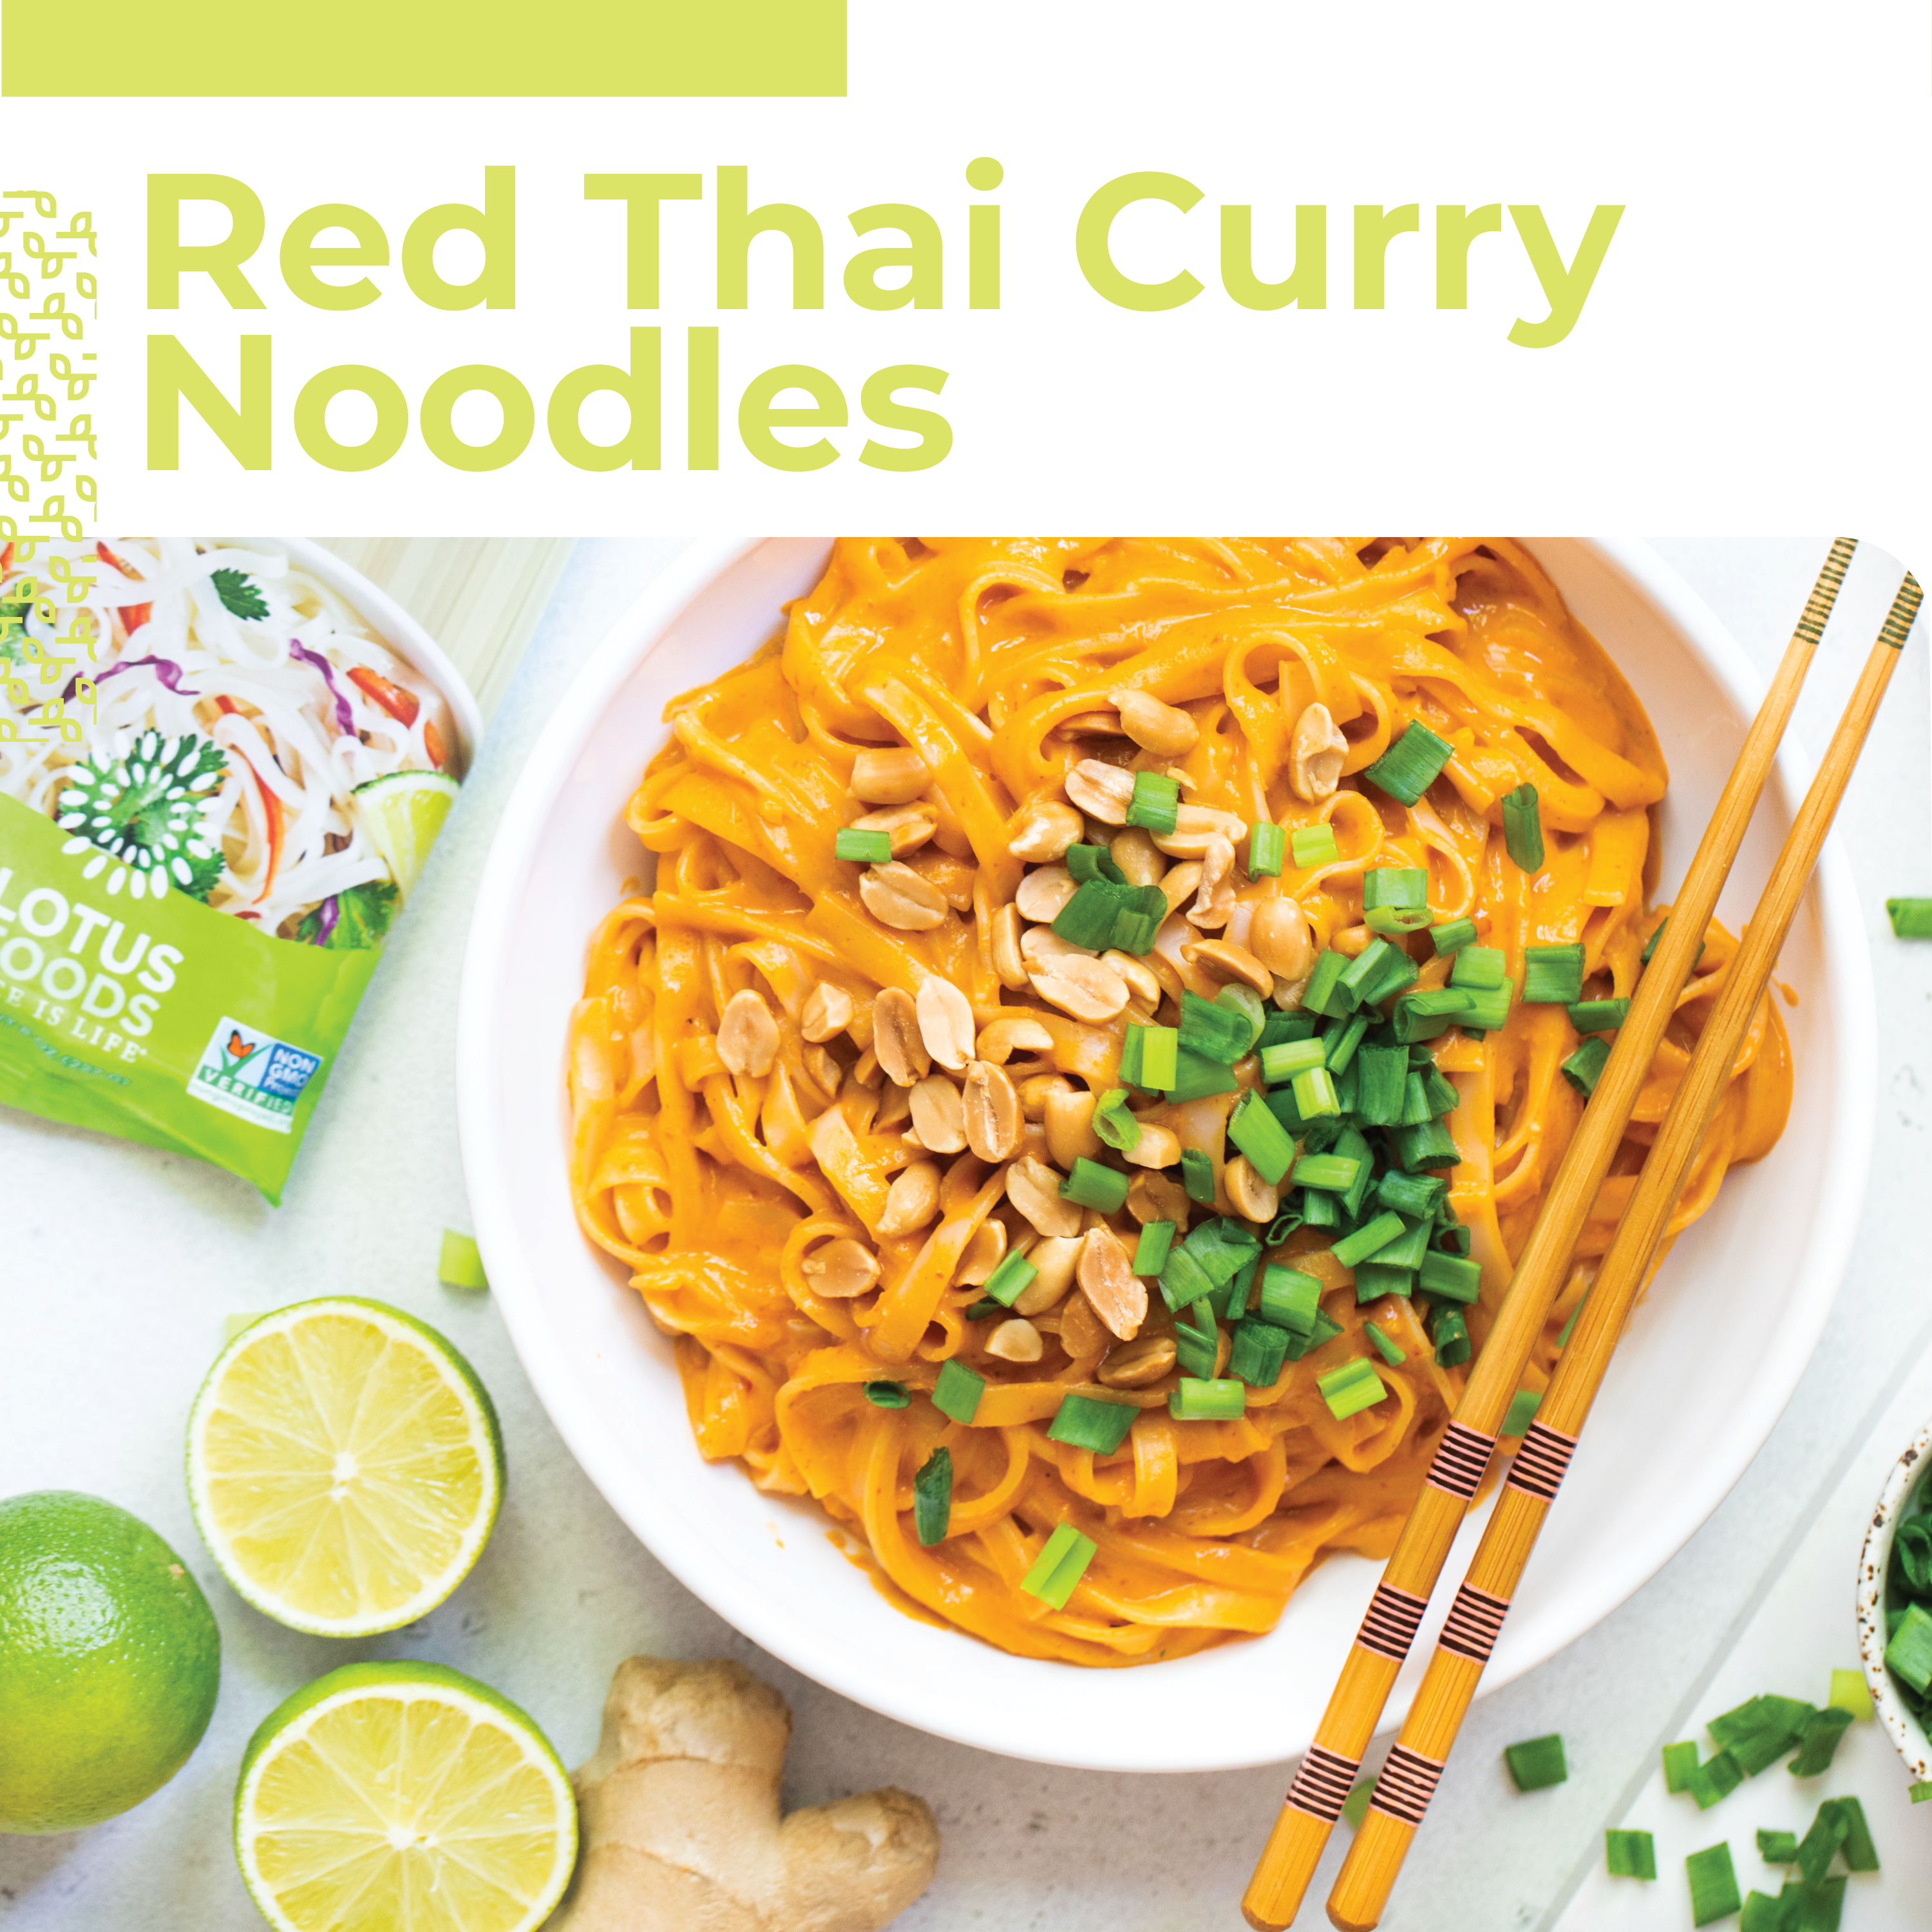
    Vegan, flavorful and budget-friendly, this Thai-inspired noodle recipe is a keeper! Add raw or cooked veggies, whatever’s lingering in your fridge, to bulk it up!

    Red Thai Curry Noodles

    Vegan, flavorful and budget-friendly, this Thai-inspired noodle recipe is a keeper! Add raw or cooked veggies, whatever’s lingering in your fridge, to bulk it up!
    Course dinner, entree, Lunch
    Keyword dinner, entree, lunch, noodles, vegan
    Servings 4

    Ingredients

    • 2 packages Lotus Foods Organic Traditional Pad Thai Rice Noodles
    • 1 14 ounce can unsweetened coconut milk
    • ¼ cup vegetable broth
    • 3 tablespoons smooth peanut butter
    • 3 tablespoons Thai red curry paste
    • 1 tablespoon maple syrup
    • 1 tablespoon fresh lime juice
    • 1 tablespoon ginger minced
    • 2 cloves garlic minced
    • Salt to taste
    • Peanuts chopped, to taste
    • Scallions chopped, to taste

    Instructions

    • Prepare Lotus Foods Organic Traditional Pad Thai Rice Noodles per directions on package. Drain and set aside.
    • While noodles are cooking, whisk together coconut milk, broth, peanut butter, curry paste, maple syrup, lime juice, ginger, and garlic in a medium pan.
    • Cook over medium-high heat, stirring frequently. Bring to a gentle boil before reducing heat. Simmer uncovered for ~10 mins or until sauce starts to thicken. Add salt to taste.
    • Mix in noodles and warm through. 
    • Garnish with chopped peanuts and scallions. Serve immediately.
    • Enjoy!

    Recipe by Cooking for Peanuts for Lotus Foods

    Photo Credit Anett Velsberg

    Recipe Provided by INFRA

  • Beer Brats

    Beer Brats

    Beer Brats


    Did you know that Oktoberfest starts in September!? This year in Munich, Oktoberfest is celebrated September 17 – October 3. We’re just happy to have a reason to enjoy some delicious sausages this month. Beer brats celebrates the best of beer and sausages. No grill? You can always cook the brats in a deep pan on the stove and then crisp them up in a dry skillet. Experiment with different mustards and different beers to find the perfect combination. 

    Beer Brats

    Did you know that Oktoberfest starts in September!? We’re just happy to have a reason to enjoy some delicious sausages this month. This beer brat recipe celebrates the best of beer and sausages.
    Course dinner, Lunch
    Keyword bratwursts, dinner, lunch
    Servings 1

    Ingredients

    • 8 uncooked bratwursts
    • 1 medium yellow onion thinly sliced
    • 16 ounces light lager beer
    • ¼ teaspoon sea salt
    • ¼ teaspoon ground black pepper
    • 8 hotdog buns

    Instructions

    • Preheat grill to high. 
    • In a foil pan, place brats, sliced onion, salt, pepper, and beer. Cover tightly with foil lid or aluminum foil and cook for 30 minutes.
    • Transfer brats to grill to give them a good char, approximately three minutes per side.
    • Place brats back in the cooking liquid and serve. To serve, place brats in buns and top with your favorite condiments.
    • Enjoy!

    Recipe Provided by INFRA

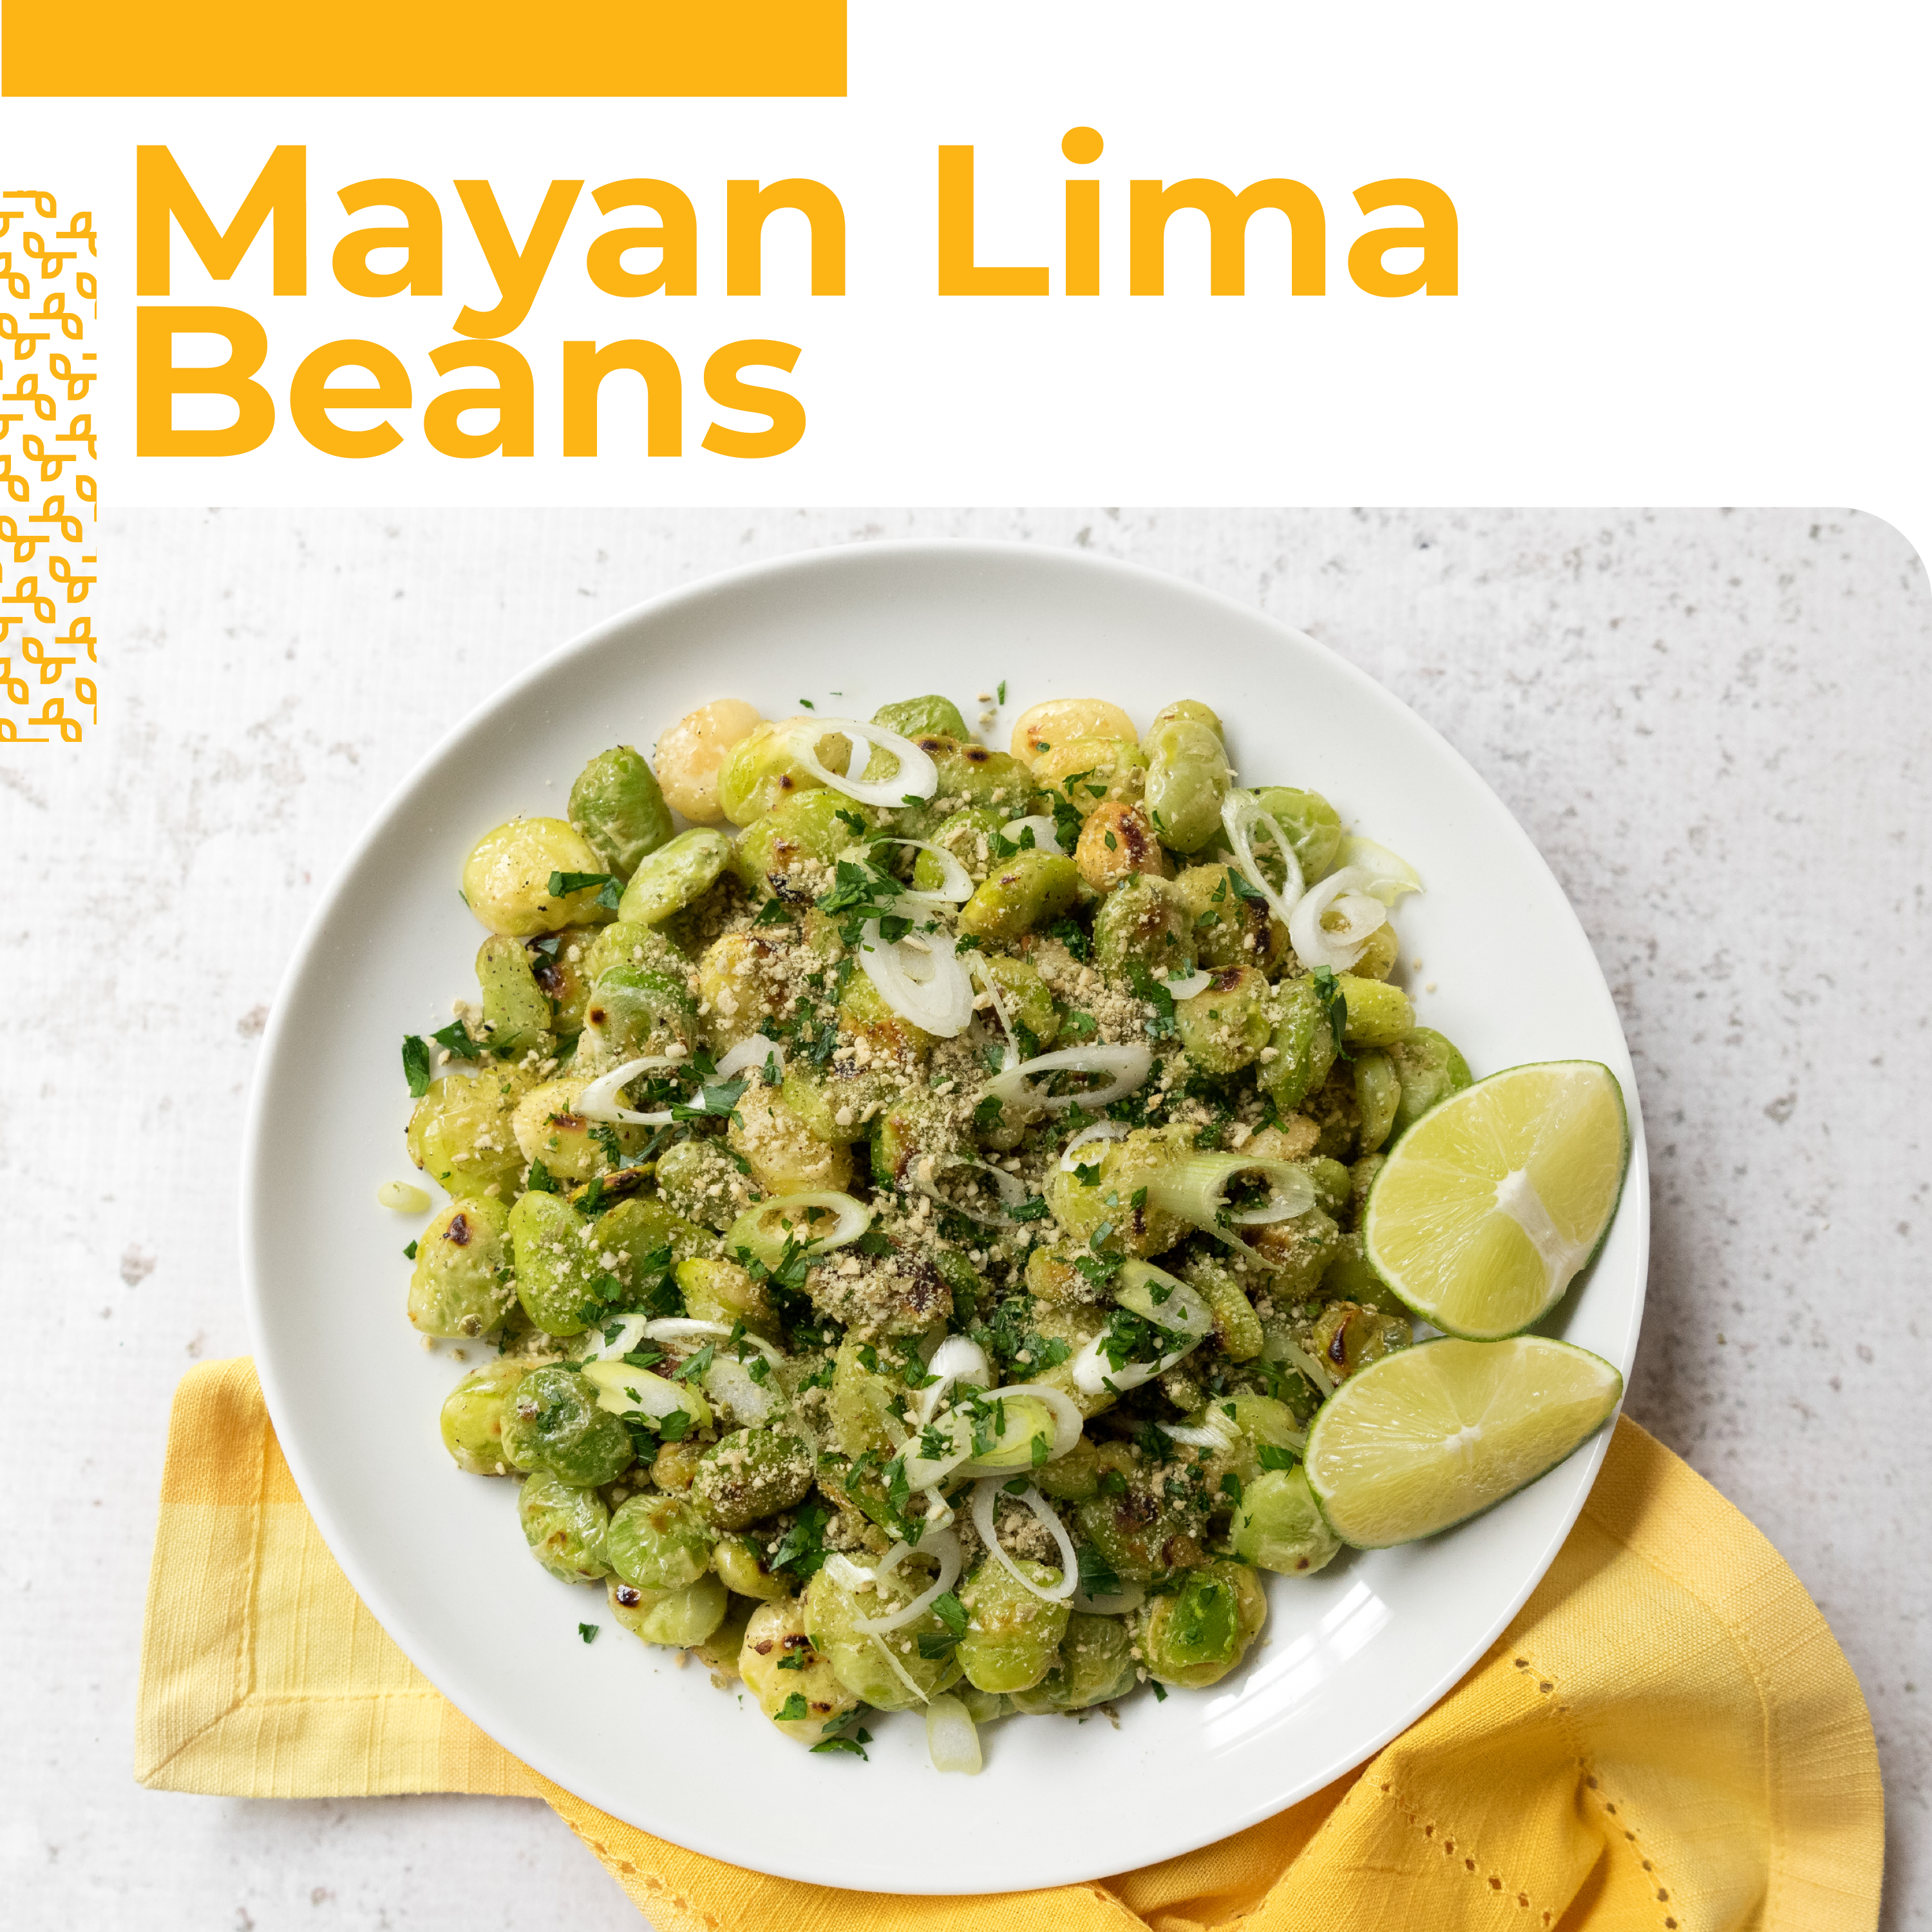
  • Mayan Lima Beans

    Mayan Lima Beans

    Mayan Lima Beans


    Lima beans are one of the most polarizing beans and more polarizing foods out there. We don’t get all the lima bean hate. Don’t turn up your nose at lima beans; they’re one of the mildest flavored beans. Sometimes called butter beans, these protein rich, creamy beans are mild and delicious. With just a bit of lime juice and toasted pumpkin seeds, lightly charred lima beans make a satisfying dish full of texture and flavor. 

    Mayan Lima Beans

    Don’t turn up your nose at lima beans! Sometimes called butter beans, these protein rich, creamy beans are mild and delicious. With just a bit of lime juice and toasted pumpkin seeds, lightly charred lima beans make a satisfying dish. 
    Course dinner, entree, Lunch, Side Dish
    Keyword dinner, entree, gluten free, lunch, side, vegan
    Servings 2

    Ingredients

    • 20 ounces lima beans frozen
    • 1 tablespoon sesame oil
    • 1 tablespoon avocado oil
    • ½ cup pumpkin seeds
    • ¼ – ½ teaspoon sea salt
    • 2 green onions sliced
    • ½ cup chopped parsley
    • 1 lime quartered

    Instructions

    • Toast pumpkin seeds in a 350∞F oven for 10 minutes or until lightly browned. 
    • Place freshly toasted seeds in a food processor and process until finely ground. 
    • Heat sesame and avocado oil in a medium sauté pan until hot, add lima beans and allow to sit and develop a sear, tossing occasionally until desired sear is achieved.
    • Add green onions, ground pumpkin seeds, and salt.
    • Enjoy!

    Recipe Provided by INFRA

  • Melon Salad with Citrus Dressing

    Melon Salad with Citrus Dressing

    Melon Salad with Citrus Dressing

    Thanks to Christine Waltermyer & The Natural Kitchen Cooking School!

    Christine Waltermyer is a local and renowned Wellness Chef, private chef to celebrities, published cookbook author and founder of the Natural Kitchen Cooking School, which offers an online Plant-Based Cooking Program. She also loves shopping at Basil Bandwagon! Visit naturalkitchenschool.com to subscribe to her email newsletter for new recipes, tips, and FREE access to the Power of Veggies mini-course!


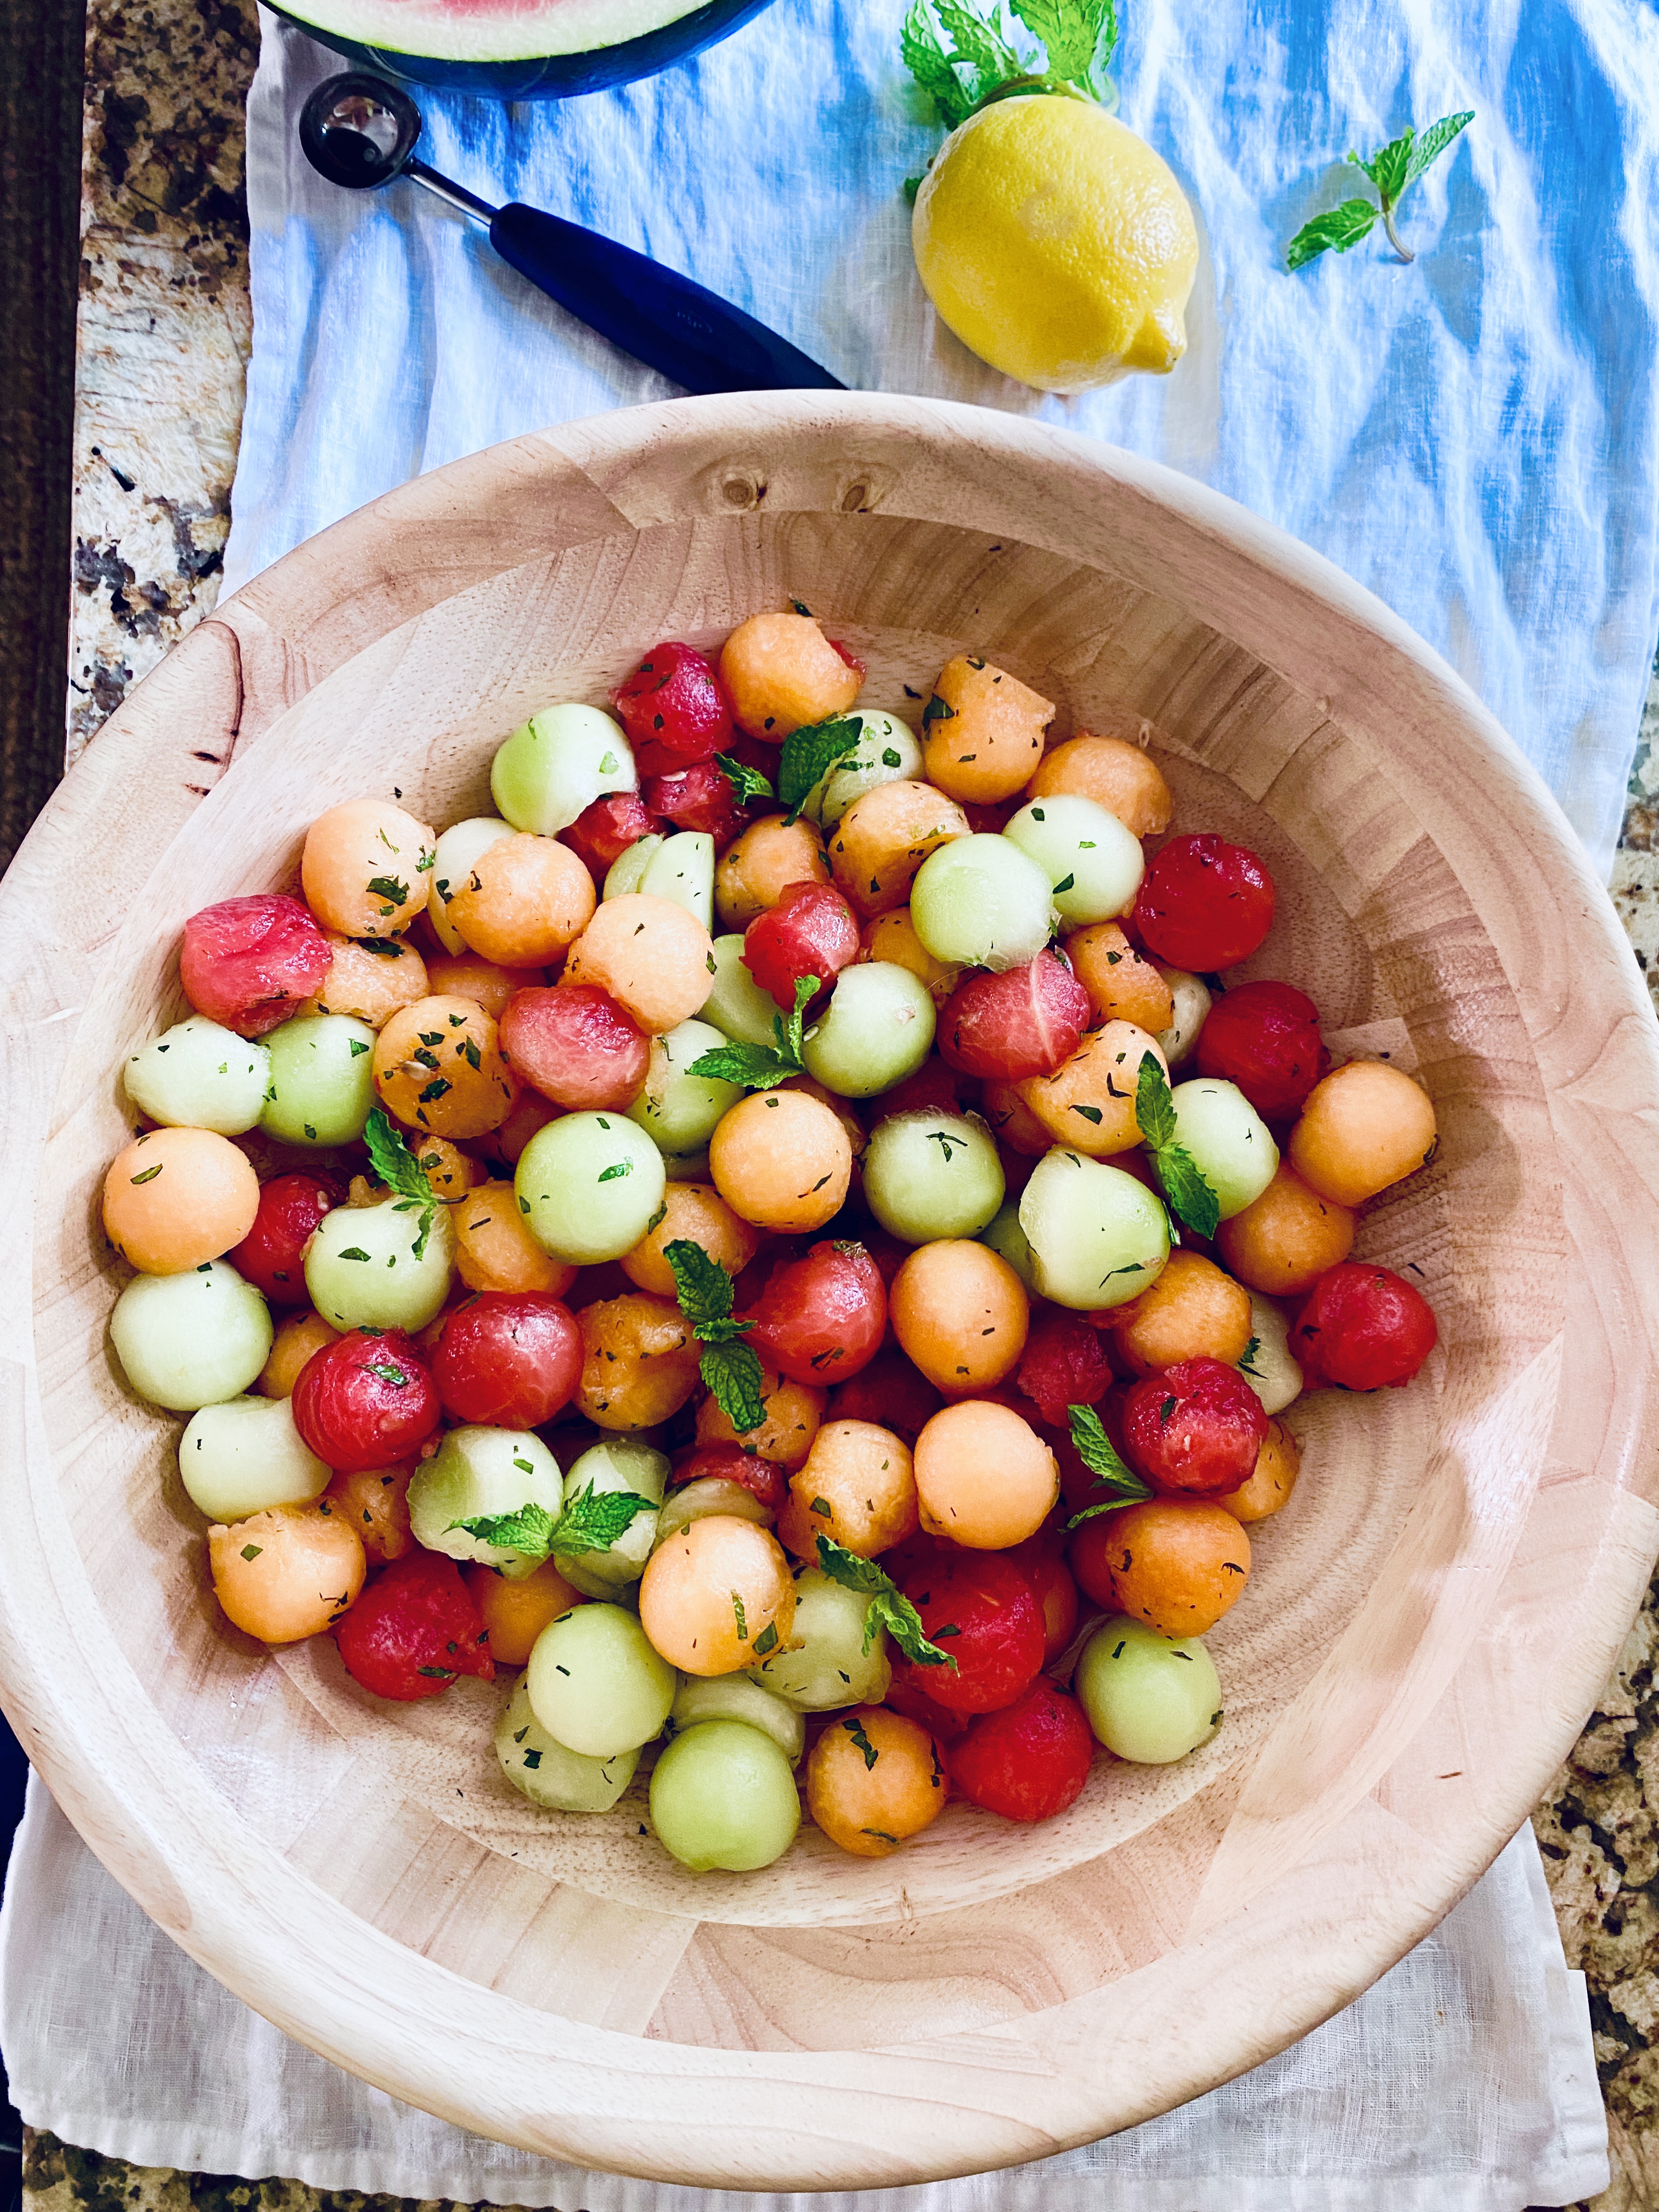
    Summer is time for fresh, colorful salads – and melons! Thanks to Christine Waltermyer and The Natural Kitchen Cooking School, you can learn how to cut a melon (whether it’s a honeydew, cantaloupe or watermelon!) and use it to make a bright, refreshing salad with citrus dressing. Scroll down for the recipe!

    Melon Salad with Citrus Dressing

    Colorful balls of various melons take on a delicious flavor when combined with fresh lime juice.
    Course dinner, entree, Lunch, Salad
    Keyword citrus, dinner, entree, lunch, melon, salad
    Servings 4

    Ingredients

    • 1 honeydew melon
    • 1 cantaloupe
    • 1 small watermelon

    Citrus Dressing

    • Juice of 1 lemon
    • Juice of 1 lime
    • Pinch sea salt
    • ¼ cup raw honey or maple syrup
    • 1-2 tablespoons chopped mint

    Instructions

    • Use a melon ball scoop to create little balls from each of the melons. Place them in a large bowl.
    • Make the citrus dressing: In a small bowl, combine the lemon juice, lime juice, sea salt, honey and mint. Whisk together. Pour over the melon balls and gently toss until evenly coated. You can serve right away or chill before serving. If you refrigerate it, stir the salad again just before serving.
    • Enjoy!

    Thank you to Christine Waltermyer and the Natural Kitchen Cooking School for working with us to help promote healthy, nutritious meals and products that are affordable, full of nutrients, and simple to make at home!

  • Wild Rice Salad

    Wild Rice Salad

    Wild Rice Salad

    Thanks to Christine Waltermyer & The Natural Kitchen Cooking School!

    Christine Waltermyer is a local and renowned Wellness Chef, private chef to celebrities, published cookbook author and founder of the Natural Kitchen Cooking School, which offers an online Plant-Based Cooking Program. She also loves shopping at Basil Bandwagon! Visit naturalkitchenschool.com to subscribe to her email newsletter for new recipes, tips, and a FREE low-oxalate recipe guide!


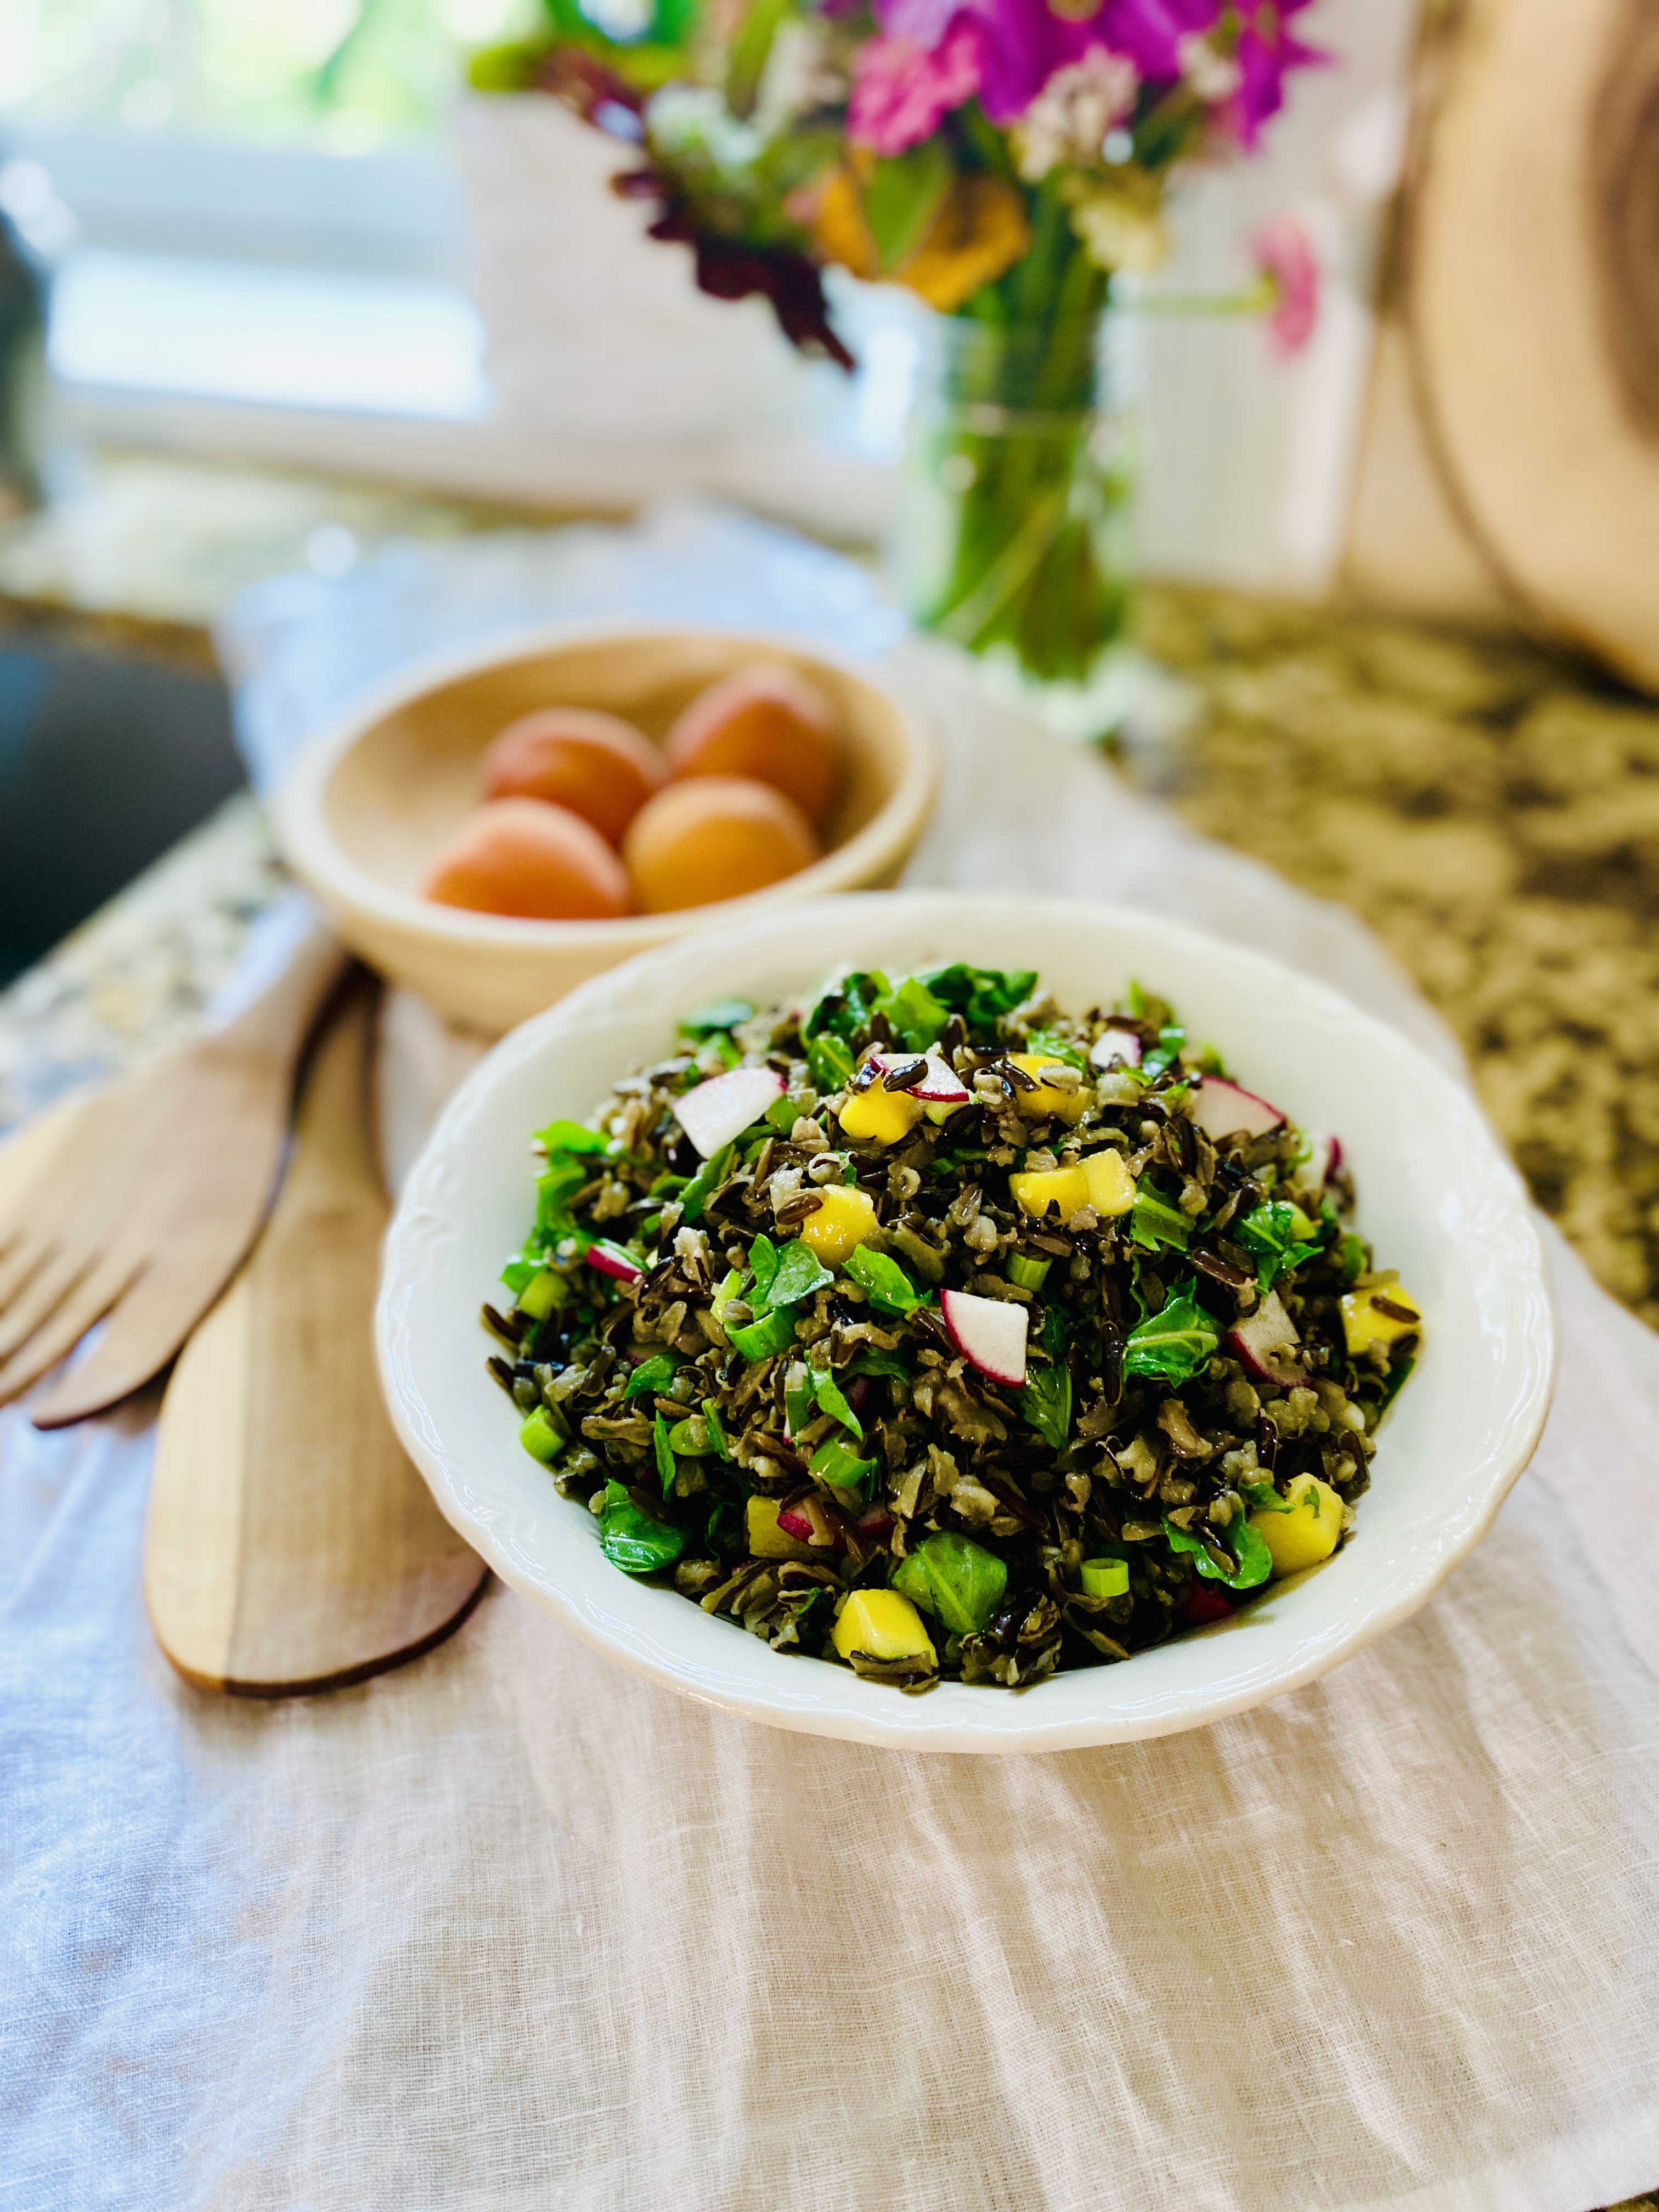
    We’re WILD about Christine Waltermyer and The Natural Kitchen Cooking School’s Wild Rice Salad. We have to agree that “the tangy dressing, sweet mango and pungent scallions help to make this a flavorful side dish!” Keep scrolling for this simply delicious recipe.

    Wild Rice Salad

    I love the combination of nutty wild rice with fresh chopped arugula. The tangy dressing, sweet mango and pungent scallions help to make this a flavorful side dish!
    Course dinner, entree, Lunch, Salad, Side Dish
    Keyword dinner, entree, lunch, salad, side, wild rice
    Servings 4

    Ingredients

    • 1 cup wild rice rinsed
    • 3 cups water or broth
    • ½ cup sliced scallions
    • ½ cup fresh, chopped mango
    • ½ cup sliced red radishes
    • 5 ounces arugula (about 5 packed cups)

    Dressing

    • ¼ cup olive oil
    • Juice of 1 lemon
    • 2 tablespoons fresh orange juice
    • 2 teaspoons dijon mustard
    • 1-2 tablespoons honey or maple syrup
    • Sea salt and white pepper to taste

    Instructions

    • In a medium saucepan, place the wild rice. Add the water or broth and bring to boil. Reduce the heat to low, cover and simmer for 50 minutes or until the rice is tender. Drain if needed and let the rice cool.
    • Make the dressing: In a small bowl, whisk together the olive oil, lemon and orange juices, mustard, honey, sea salt and pepper.
    • Place the cooled wild rice in a large bowl. Add the arugula, chopped scallions, mango, radishes and arugula. Add the dressing, stir well, and adjust seasoning to taste. Store in the refrigerator, covered, for up to three days. It tastes best when given at least an hour to marinate before serving.
    • Enjoy!

    Thank you to Christine Waltermyer and the Natural Kitchen Cooking School for working with us to help promote healthy, nutritious meals and products that are affordable, full of nutrients, and simple to make at home!

  • Traditional Chorizo Pupusas

    Traditional Chorizo Pupusas

    Traditional Chorizo Pupusas


    Pupusas are a thick griddled corn cake from El Salvador and Honduras. They are filled with savory ingredients and typically served with a pickled vegetable slaw called curtido. You can get creative with the fillings! Beans, squash, peppers, and even shrimp find their way into pupusas. While you can get pupusas from a restaurant or even the freezer section, this is a really approachable recipe to try at home! If you can roll a ball of dough and cook pancakes, you’ll have no trouble with pupusas! 

    Traditional Chorizo Pupusas

    Course Appetizer, dinner, Lunch, Side Dish
    Keyword appetizer, chorizo, dinner, gluten free, lunch, pupusas, side
    Servings 4

    Ingredients

    • 2 cups masa harina
    • 1 ½ cups water
    • 1 teaspoon sea salt
    • ¾ cup cooked chorizo sausage crumbled
    • 1 ¼ cup shredded mozzarella cheese

    Instructions

    • Prepare the pupusa dough by mixing the masa with the salt. Add water and stir until fully incorporated. The dough should be firm yet pliable, add more masa or water depending on how the dough turns out after stirring in the water described above.
    • Scoop dough into approximately ¼ cup amounts and roll into balls.
    • Heat a skillet over medium-low heat. It is best to assemble and cook the pupusas as you go, one or more at a time depending on the size of the skillet.
    • Using wet hands, flatten a dough ball to a diameter of five inches and place three tablespoons of cheese and two tablespoons of chorizo into the center. Flatten another dough ball and place on top of the filling. Press and shape the pupusa into a round form with a quarter inch of thickness.
    • Place in an oil coated skillet and cook 3-5 minutes per side. Repeat with remaining dough and filling.
    • Enjoy!

    Notes

    SUBSTITUTIONS: Replace chorizo with any other seasoned meat, plant-based alternatives, or refried beans. Cheese can be swapped out for a non-dairy cheese that has good melting properties.

    Recipe Provided by INFRA

  • Watermelon Jicama Salad

    Watermelon Jicama Salad

    Watermelon Jicama Salad


    Sweet, spicy, crisp, and refreshing. Forget your usual potluck sides and make this watermelon jicama salad instead! It’s both hydrating and delicious! We love the juicy melon mixed with a slightly spicy dressing. You can control the heat by using less serrano pepper or amp it up by using the seeds and ribs. It may get spicier over time as the peppers marinate in the dressing, so be careful if you’re prepping this ahead of time. Don’t have any jicama? Daikon radish, a green apple, or even a firm pear will work here. 

    Watermelon Jicama Salad

    Course Appetizer, dinner, Lunch, Salad
    Keyword appetizer, dinner, gluten free, grain-free, lunch, salad, vegan
    Servings 2

    Ingredients

    • 3 pounds watermelon
    • 1 ½ pounds jicama
    • 2 scallions

    Dressing

    • 1 tablespoon avocado oil
    • 2 tablespoons fresh lime juice
    • ¼ teaspoon crushed red chilies
    • ½ teaspoon ground cumin
    • ¼ teaspoon sea salt
    • 1 medium serrano pepper seeded and minced

    Instructions

    • Prepare salad ingredients. Peel and chop watermelon. Peel jicama and cut into matchsticks. Thinly slice scallions.
    • Whisk together dressing ingredients, adjust heat to taste.
    • Toss dressing with jicama and watermelon in a large bowl. Top with scallions and serve.
    • Enjoy!

    Recipe Provided by INFRA
  • Breaded Fish Tacos

    Breaded Fish Tacos

    Breaded Fish Tacos


     If you’re fishing for compliments, these gluten-free crispy fish tacos will certainly help you reel them in! Great for a crowd, everyone can build their own tasty tacos.

    Breaded Fish Tacos

    Course dinner
    Keyword dinner, entree, fish, tacos
    Servings 5

    Ingredients

    • 1 pound wild cod cut into strips
    • 1 egg beaten
    • 1 box Simple Mills Cracked Black Pepper or Fine Ground Sea Salt Almond Flour Crackers
    • 1 teaspoon dried parsley
    • ½ teaspoon salt
    • Olive oil optional
    • 10 paleo, gluten-free tortillas
    • Organic or vegan ranch dressing
    • ½ cup shredded cabbage
    • ½ red onion thinly sliced
    • 2 avocados sliced
    • Fresh cilantro

    Instructions

    • Preheat oven to 400°F and line a baking sheet with parchment paper. Set aside.
    • Add Simple Mills crackers to a food processor and pulse until a coarse meal is formed. Transfer to a large bowl along with the parsley and salt. Mix and set aside.
    • Drop fish strips into the beaten egg then into the cracker mixture, ensuring the fish is well coated. Place on the prepared baking sheet. Drizzle with a touch of olive oil for an extra crispy exterior.
    • Bake for 15 minutes or until the fish is flaky.
    • Assemble your tacos by spreading 1 teaspoon of your favorite Organic or Vegan Ranch Dressing onto warmed tortillas. Top with shredded cabbage, red onion, avocado, fresh baked cod, fresh cilantro, and a drizzle of your favorite dressing.
    • Enjoy!

    Recipe Provided by INFRA